walls

The Process of Putting Wallpaper On the Ceiling

Designing your ceiling will add further beauty to your home. You can either paint it or put on wallpaper. The main focus of this article is to teach you how to paper the ceiling. It won’t be that easy so better prepare yourself! Remember, papering the wall is easier than the ceiling. It is because you can reach the wall easier unlike the ceiling where you need to stand on something so you can reach it. Thus, you will likely need some equipment for this task.

Putting wallpaper on the ceiling

Before we give the procedures, you should make sure of the following first:
• Prepare the different equipment to be used (e.g. wall paper, paste)
• The room should be empty or with things that you’re not afraid to get stained.
• Have a scaffold that can lift your weight. Make sure that the plank is in the right measurement so you can reach the ceiling with ease.

Now, for the next procedure, let’s follow this simple step-by step guide in papering a ceiling:
1. Take out the different furniture inside the room then put on old cloths on the floor. After that, focus on the ceiling and decide on what kind of direction you will be using for the pattern of the wallpaper.
2. Now, set up the scaffold. The scaffold should be high enough for you to reach the ceiling. It will be better if the scaffold is placed in a manner that it can reach both ends of the room.
3. Next, measure the ceiling with the use of the tape measure. Make sure that there will be extra inches so if ever adjustments will be made, you can effortlessly do it. Measure the wallpaper to be used and cut it according to the first measurements done with the tape measure.
4. Fill the paper tray with water then dip the cut end in the tray. Roll the paper and let it lay around for a while.
5. Premixed wall paper will then be put into the paper tray. With the use of the paint roller, glue it thinly to the ceiling area where the first edge of the paper will be placed. Place then the corner of the paper on the edge as well as the right side. Make sure that you are aligning the paper while putting it on the ceiling.

Floral ceiling wallpaper

6. Roll the paper until you reach the end of the room. You can use your hands to press the paper unto the ceiling for better results. You can also use a smoother in order to have more security. To trim the end of the paper, you may use a dry wall knife. This knife will help you cut the excess with ease.
7. Continue the process until all parts of the ceiling are covered. Make sure that the patterns are matched accordingly for a better appearance.

You can’t do this alone so it will be better if you let someone help you! Also, you can ask for some other instructions and tips from professionals. Good luck!

Read More
office

Step-by-Step Guide to Use Plants in our Office

Office decors can be easily done if you use your creativity. With a creative mind and a design in mind, you can play with different colors and styles and then place it inside your office space. But sometimes, people forget the magic of the nature, the beauty of the plants.

For man-made decors, you may want to implement ideas that can set your mind in a happy mood through memories of past good times. You can use pictures of your family, friends or your beloved one.

One of the best options regarding pictures is the funny ones; those will easily relax your mind as well as put a smile on your face.

It does not matter what you use. It will always be better if you can make something simple into a great design. Do not be pressured in your workplace but rather relaxed. This is why you should decorate your office in order to create a relaxing rather than pressuring environment for you.

Read More
Kitchen

15 Unique Kitchen Decor Ideas You Can Use Today

You do not need to go bankrupt after decorating your kitchen. There simple and inexpensive yet stunning ideas of giving your kitchen that amazing appearance. There are actually various ways of beautifying your kitchen without spending a single cent. All you need to do is to concentrate on the key areas that usually draw the most attention; these include the floors, storage and walls. You can start by changing these 3 areas and your kitchen will magically be transformed. You can thereafter proceed to other areas of the kitchen. Choosing your kitchen theme can be a challenge but this article is supposed to address that with the following simple steps.

  1. Change the Lighting

[one_half_first]Move from the ordinary lighting by introducing new stylish and pendant lights as your kitchen’s focal point. For some long lasting glass pendant lights, you will only need to pay $200 or less. This will definitely not break your bank especially if your current lights are dim. Changing that overhead in your kitchen may sound mysterious but it’s actually very easy. It doesn’t have to be 200 bucks; there are vintage lights worth $20 out there. Don’t forget your under-cabinet lights as well.[/one_half_first][one_half_last][/one_half_last]The swing-arm on top of the open shelving not only offer more personality, but also provides an ambient light compared to the track or standard lighting. An average electrician can actually do the job with cords hidden. It is also practical to use the plug-in versions with the dangling cords covered by the cord covers.

  1. Add new Hardware

Enhance the entire kitchen space by upgrading the classic hardware. But even as you go shopping, be sure to keep an eye on the price tag – it accumulates quite fast especially if your kitchen is big. It would be wise to have the number of knobs and pulls at the back of your mind so as to determine whether the hardware you are eyeing on is within your budget. With many pieces available with as low as $10, it is not necessary to blow your budget.

  1. Upgrade your accessories.

Since there are limited chances of doing this kind of decorations, it is wise to use the opportunity that you get to the maximum. Put some of the items that you frequently use are inside a woven tray and display pantry accessories that have pretty packaging on top of your counter.

  1. Repaint Cabinets

Look around your kitchen; are there signs of outdated finish? It is very important to have a personal touch with your kitchen. Think of adding a white color on your kitchen cabinets, preferably white. Try duck egg, warm putty or sage green – all versatile selection will go with different finishes and materials.

A palette of white and black with a bit of metal and wooden accents looks modern and sleek for the kitchen. Paint both your kitchen base and bottom cabinets with island black and let the upper cabinets be white.

  1. Work in rustic elements

Use the farmhouse accents to add character and warmth to your kitchen. Swap the pantry door with hang copper pots or a sliding door. You may also bring in a wooden stool if you like.

  1. Use simple shelves as the storage

Don’t have top cabinets? You can easily use rustic wooden shelves with metal brackets that are cheap and easy to install. They will also provide a clear display space for all your day to day activities and dish storage.

  1. Get Roman Shades for that finished appearance.

The Roman shades provide an elegant appearance to your kitchen and home in general. If you prefer a more cohesive look, have some matching shades prepared for all the glass doors for same room.

  1. Paint the floor

Do you have a wooden floor and it’s not in the most desirable shape? If your floor is not in a very good look and there is no time or money to do a complete refinishing, you can simply paint them. White color can be chic but it will make you a cleaner person. If you need to be more creative, you can try to create a design of your choice on your newly painted floor.

  1. Get rid of the upper cabinet doors

Glass door fronts are ideal for the upper cabinet doors but they can be unaffordable especially if there are many upper kitchen cabinet doors. Alternatively, you can as well get rid of the upper cabinet doors. This is an easy thing to do because you simply need to paint the holes after unscrewing them. This will clearly create a sense of more room in your little kitchen.

  1. Try new dishes

Open counters and shelving are perfect ways of practicing the display art. Be assured you will never go wrong with classic clear glasses and white dishes. But feel free of course to hope around the market till you get what you love.

  1. Introduce a chalkboard Paint into your Fridge

No money to trade in that outdated fridge? No worries, there’s another way out; use chalkboard paint to cover it and for a creative appearance and for fun. This chalkboard paint is multipurpose, as you cook, it will keep the children busy and you can also use it for doodles, inspiring quotes, and grocery list or menu ideas.

  1. Add a rug

Replace the old, ugly laminate floors of your kitchen by covering them with a rug. You can thereafter upgrade to floor tiles which are also easy to install. When it comes to decoration and kitchen in particular, we tend to concentrate on organizing pans and cleaning cupboards and forget that floors occupy the largest part. A beautiful rug is definitely one of the things that will give your kitchen some life. The only issue is that a rug is likely to get dirty. So, your choice should be around easy to clean fabrics and cheap enough so that they can easily be thrown away once they get dirty.

One of the most ideal kitchen rugs is the oriental rugs – they are just perfect for the kitchen area. The truth is, these throw away rugs are affordable and easy to clean. This makes them perfect for kitchens that require a little texture.

  1. Replace the Faucet

This is clearly a straightforward and simple kitchen upgrading technique especially if you are in a rental house. Anyone can clearly be able to do it. Although faucets can be really expensive, you can get a faucet at $80 – very little investment for a stuff that you will use on daily basis.

A 4-Hole Ashfield design faucet will cost you $ 159.95 at amazon. Although the design is a little bit traditional, it is suitable for the modern porcelain sinks as well as the general farmhouse style of your kitchen. So, the first step when it comes to faucet replacement is choosing the replacement. Take a look at your sink and identify the number of holes it has. There are faucets out there in the market that have in-built sprayer and soap dispenser.

  1. Replace your dish rack

Replace your cheap wooden dish racks with some heavy duty ones from a reputable company. Wooden dish racks will cost you even more money because of the constant replacement. It makes even more sense for individuals without dishwasher to own a reliable dish rack. The dish rack also looks good as it sits on the counter.

The Bamboo Dish Rack is one of the best in terms of design and durability. The dish is made from natural bamboo coated with waterproof and rust-proof aluminum. Among the notable features include a drainage system made of drip tray and swivel spout under the cup holders so as to direct water towards the sink. There are also cup holders that are located along the inner frame, and there is also a place for holding the knives and utensils.

  1. Cover the ugly countertops

Changing the countertops is not an easy task – it’s close to extreme makeover. In order to improve whatever you have, try some new tips. Of course you may not be able to do permanent transformation if you are a renter. So, simply cover your kitchen countertop with a huge cutting board. It’s not only functional but also eye-catchy.

There are some people who also opt to paint their countertops to completely change their look. This is an affordable technique and particularly easy to implement. The entire painting process can cost you $60.

Use another technique to cover them up. This means you have to be creative and think outside the box. For instance, there are people who use vinyl tiles with a grout layer to cover the countertop.

Finally, if you cannot stand the look of your countertops, then you may as well replace them completely. Of course there are affordable techniques of replacing countertops out there. This is true if there are only a few linear spaces to be covered and you are in a position to do some of the job for yourself.

Brilliant idea for a small kitchen

There are lots of unique kitchen idea you can use; you just need to blend your own concept with other ideas you can see in home magazines and books. If you are not working, you can still work on improving your kitchen. You just need to think of more ideas to help you conceptualize and have a great outcome. One of the most famous concepts these days are the green and organic concept. Its main purpose is to recycle anything in the kitchen that can still be used. Like in the case of bottles, most of them are disposed off after use; they can still be used as a kitchen ornament. In the case of cans, you can still use it to plant herbs or spices.

There are lots of things in the kitchen which you can still use for other things. Thinking green is not a talent; it is having the heart for nature. It can also be a great tool to help you save a lot. Utilizing your imagination will help you make a lot of meaningful things you can still use within the house. You can also make use of this particular scene to bond with the whole family. Let your children help you in creating meaningful designs out of garbage.

Read More
Tips

Tips on Buying Upholstered Chair

Buying an upholstered chair is not an easy task because you need to really look into what you are buying. You need to make sure that what you are buying is of high quality by checking the design and the construct of the chair. If you look into even the smallest details of the construct, you will be assured of a product worth the price you pay for it. Here are some things that you may consider when choosing an upholstered chair.

French styled upholstered chair

You should check the chair construction. You should see to it that the frame of the chair is made of hardwood. This would make sure that the chair is durable. You should also check on the joints of the frame where it should be doweled well even two to three times and it should also be held in place with the use of glue and screws to make the frame secured. You should also check on the webbing that are in between the frames and the spring coils. Make sure these are tightly woven and check if there are gaps or sags. Then check for the spring coil used. Check for its type and design as each design would determine the type of the quality of springs used. There are single, double and the zigzag types of coils. The sinous type is the coil with a lower quality. More coils that are together and the closer that they are would mean a higher quality of the design. They offer a greater support for the chair.

In purchasing a chair, you need to pay attention to the details of how the piece is tailored. Check for the quality of the buttoms, the tufts, the quilting, they should fit well and not loose. Try to check for the cushion as well. It should fit the corners of the seat well. It should not have any lumps on it and a muslin fabric should be used to cover the padding of the cushion and make sure that this muslin fabric should not be flimsy and it should also not be torn. Then you also need to check on the fabric patterns. Take into consideration the size of the pattern that should be proportional to the size of the chair.

Upholstered chair

The next thing that you need to consider is the comfort that the chair can give you. Try it out if it offers you the comfort that you are looking for in a furniture. If it is a chair that you are looking for, then you should look one that offers you the comfort that you are looking for when sitting on the chair and resting. These are the things that you need to consider for you to have the chair’s value of your money.

Read More
Floors

Mosaics are ideal floors for shower sliding doors

The doors themselves can be of an array of unique designs and themes: either mosaic design, colored, or by a technique called sandblasting. Mosaic designs have the glass themselves carved and crafted with intricate designs and some are designed from inside the glass. These are ideal for sliding doors that generally only have two large glass sheets. Common themes for mosaic design include a frosted design or any design that would make the other side of the glass out of visible. Colored designs make use of tinting the glass itself. It has the same principle as painting a wall section of a room; but of course, is treated with a different technique than the usual. After all, it is glass; and a glass is very different from a concrete wall.

Shower flooring

Sandblasted glass makes use of very fine uniform particles that are accelerated onto the glass; often to create intricate graphic designs. Its difference from mosaic designs is that it involves a blaster gun to decorate rather than conventional tools when sculpting glass. This is also a very good way to design your shower glass doors; and you can even request for unconventional designs to suit your designing preferences. Regardless of application methods, a way of designing your shower doors is great because it adds to the total atmosphere that bathrooms can provide. After all, the bathroom is the sanctuary of cleanliness; and an article in a bathroom, such as shower doors, also requires a good design as any article of any room in the house.

Read More
wallpaper
walls

Creating a wallpaper border design in a computer

Create the design of your wallpaper on your computer to the edge that separates the ceiling from the wall or simply to place it in the middle of the wall. It is very simple!

I could give you a design class with the different programs I use but; in reality that would go against the principles of our DIY philosophy. What I can do, however, is explaining the different scenarios that you could find and how to overcome them to help you.

The idea is that by your own means you could discover how far you can and want to get. So what do you think if we start with that edge wallpaper?

Read More
Bathroom

Bathroom Designs: Shower Door Selections

While you may lament the idea of yet “another, boring, back-breaking, renovation job” it’s important to take a moment to step back and remember all the positives of renovating. First of all, it increases the value of the property you own. Should you ever want or need to sell your home, you can take pride in knowing you made the latest and greatest upgrades to your home that appreciate with value.  Not only that, but renovating is a preventative measure that not only can and will prevent dangerous and costly unforeseen wear and tear circumstances that in the worst-case scenario could destroy your home, leaving you completely homeless and stranded without somewhere to sleep.

[one_half_first]Your home is your palace. You should cherish every moment in your home in peace and happiness. If you renovate something and it ends up looking just like the picture you conjured out of your wildest dreams or exactly like a “spot the differences” photo challenge between a picture of your bathroom and that classy home décor magazine, you’ll derive peace of mind, happiness, and pleasure from you place you live. A welcome break from all the stress of the outside world.[/one_half_first][one_half_last][/one_half_last]

There are quite a few hotspots in houses that are traditionally considered the most “bang for your buck” jobs to tackle. In no particular order, those would be:

  1. The bathroom
  2. The kitchen
  3. The living and dining rooms
  4. And finally, bedrooms.

The bathroom is a fantastic place to renovate, especially since it is a high traffic area seen by multiple people every day and the equipment is highly durable. When it comes to bathrooms, you won’t need to be renovating for quite some time.

Picture this for a moment. Step into the bathroom. Fumble blindly across the wall for that light switch you know is somewhere there.  At last, after finally finding the light switch and your eyes adjust to the immediate shock the overhead artificial lighting provides, what do you immediately see? You may notice the toilet or the sink first, but most people will say the first thing that they notice is the shower stall.

Indeed, the shower stall can make or break the bathroom completely. Bathroom renovations should most definitely start at the beginning with the shower stall itself as its ‘main attraction’ and the rest of the furnishings should step to the background to allow the centre-piece to shine.

Really, are you sure? Shower Stalls?

So, what is there to a shower stall? Is there much to it worth considering? Without a doubt, the answer is yes, yes, and yes. From curtains to curved doors, a shower stall immediately demonstrates style, design, and can be a wonderful demonstration of just how in with the times the designer is. Some designs are old, antiquated and simply plain ugly. Adding or removing the nicest light fixture, sink, and toilet to this bathroom is not going to make the bathroom look any better. Can’t you just picture it now? Unfortunately, this attempt to renovate would just be a complete and utter disaster.

Just what types of shower doors are there?

Let’s begin with a basic run down of the diverse types of shower doors.

There’s the common swinging door:

  • These are most popular in stand-alone corner showers.
  • These are the most popular shower door fixtures in spaces that are short on space as the door closes upon itself.
  • The door swings open and can either pivot either in or out depending on the space available.
  • If you are short on space, this is an option to go with when choosing your new shower door.

Next on the list is the bypass (also known to most as sliding doors):

  • These are most popular in self-contained shower units that take up most of the entire length of a wall.
  • These shower doors require a much larger shower unit, but certainly are much higher up on the shower-with-style scale than the swinging door.

Let’s not forget though, the swinging door is for those who are in dire need of saving of square foot they can. Not everyone can afford the space a wall to wall shower dictates.

If you have space, and like the idea of sliding in and out to get in the shower, then this might be the decision you’ll be making when you’re ready to renovate. Newer, and less popular are the extravagant round door style.

  • Round doors open inwards and are usually corner stalls, with the door being attached all the way to the top and the bottom.
  • Because they’re curved, the bathing area becomes larger.
  • While it’s true, the round door style generally requires the most space, it also offers the most bathing space. This is a strong point to consider if you’re looking to change your shower stall. The round door style is elegant, stylish, and a unique look to bring to the bathroom.

What about the type of door frames? What’s the difference? Is there a difference at all?

Do I need to consider several types of door frames for my shower? The is definitely the next question in the decision making process. The answer is yes, there are some differences that are important to note.

The two major styles:

The two major styles frequently seen in most residential units are frameless doors and framed doors. Framed doors are indeed very much similar to your everyday bedroom door –they use a frame system above and below the panel to secure the door in place. Framed models require a little more space, but they can often cost much less, making them extremely budget friendly, and can take significantly more abuse. Material wise, frames are almost always made out of aluminum

As mentioned above, the other popular door type is frameless. The frameless systems are more modern. They are easier to clean and care for, as well as work great in small bathrooms. This makes them a very popular choice. It’s important, however, to note that they require thicker glass, expensive hardware, flawless fabrication

What about those of you who are DIY-kind of guy or gal?

Of course, if that’s the case, the frame definitely makes a huge decision if you are intending on making this a personal, weekend warrior type project for you to conquer with the help of your trusty power tools.

Framed or frameless makes a big decision if you are intending on this being a personal project. Remember, frameless requires much more expensive materials, and an extremely precise installation – it just simply might not be worth the extra cost and effort.  Those of you interested in a DIY install should most definitely take framed doors into strong consideration when making their choice.

For those of you who prefer to leave your design and renovation projects to the pros, you’re in quite a bit of luck provided you can fork over the fees associated with this design freedom.  As mentioned, for an often-negotiable fee, you open up a world of different installation options for your bathroom shower door. Most local and chain based vendors have an absolutely massive catalog to pick from, and on top of that, they will offer to install it as well!

Not to mention, if there are pieces and parts of the design that you can find elsewhere but not at that specific store, most contractors from big hardware stores will incorporate the price of sourcing that material into their fee! If you can budget towards getting your bathroom renovated, this is definitely an option that takes a lot of the dirty work off of your hands into the hands of someone who is used to getting them dirty and getting paid for it.

A final option that anyone can indulge themselves in is finding all the parts, pieces and materials needed and sourcing an independent contractor. Independent contractors can be very helpful as they have no affiliation with any big hardware store and won’t be biased in the decision-making process. They also may be able to help with the sourcing process, even find you very good deals and matching your budget with look-alike products every step of the way. Usually, independent contractors are found online or through word of mouth, so they aren’t very difficult to find.

Conclusion:

Let’s face it. You need to love the place you live. Something as small as changing that dreary old shower curtain to a sleek and modern frameless glass panel would not only make you feel great about the decisions you made to redo that old outdated bathroom of yours – but it will also improve the value of your home should you decide it’s time for you to sell it. Who knows? Maybe you will have been hit by the renovation bug and now officially cannot wait to start on the very next project on the list!

Shower doors are an essential part of a bathroom, if you know what I’m talking about. However, it would seem that even the shower doors of a bathroom are unable to escape the artistic minds of interior designers. And in this article, we shall take a look at the different ways that interior designers do to make door shower selections to people’s homes and help you decide on a design that can match your preference or can match the current design and feel of your bathrooms. Before the intricate design on the doors themselves, shower doors are generally categorized in the way they are separated from the main room. And they are classified as either a sliding shower door or a pivot point shower door.
Glass shower door
Sliding shower doors are essential doors that are aligned flatly at each other and as the name suggests, it is opened by sliding the door to each other. These are perfect for small bathrooms because it doesn’t need to take up an arbitrary space for it to be opened Pivot point shower doors works like hinged doors in the sense that it needs to be swung to be opened. They are, however, different from hinged doors in its mechanism, because the doors are usually created from one whole glass sheet; drilling holes on it is not a good choice. Instead, pivot points on top and bottom of the sheet are installed replicating the door swinging mechanism of hinged doors.

Why Go For Glass Shower Doors?

Shower doors are a welcome addition to your bathroom. They increase the shower performance and give a pleasant ambiance when you shower. Also they last for a longer time than the shower curtains. With so many benefits going for them, shower doors are definitely your choice to deck up the bathroom. Shower curtains are available in many varieties and you can get one that will be right for your bathroom.
Shower door for bathrooms
The door frame:
There are two main categories available for you to choose from namely framed shower doors and frameless ones. This is based on the quantity of metal [aluminium] present in the frame that borders the glass panels. Framed ones are better aesthetically, as they are more stylish and attractive to look at. If you want a simple design then you can go for the frameless ones where you have minimal amount of the frame used.

Thickness and types of glass panel:

As the glass panel is the main component in the shower door, proper quality should be chosen. The thickness of glass adds to the strength and performance. It also makes the door look stylish and beautiful. 1/2”, 3/8” and 1/4” are optimal thickness measurements. The various varieties available include rain, embossed, etched and antique ones. Choosing from these depends on the type of décor your bathroom has. These add glamour to your shower cubicle.
Glass shower door
Proper finish:
The décor and the color of the door should match correctly for a better appearance. You can choose from more than 40 shades of colors and finishes, present with the manufacturers of shower doors. You get paint finishes that come in a variety of colors to suit your style. There are anodized finishes which you get in three types. There are gold, silver and also nickel finishes available in the anodised form. If you go for the brass finish, you have polished chrome and antiqued brass finish to choose from. The brass finish also comes in nickel and gold type of finishes. Whatever types you choose, be it simple and trendy ones or the classic and antiqued types, shower doors enhance your décor and give your bathroom a glamorous and alluring effect.

References:

Read More
Decoration

How to Create a Japanese Inspired Dining Room

We all know that the Japanese inspired dining rooms are composed of some low tables whereas the diners sit on the floor with a pillow on it. This is also one of the characteristics that Japanese are being popularly known. Now let us discuss some of the interior design which creates a Japanese inspired dining room tips for all of us who wants to have a Japanese inspired dining room in our own home.

Japanese styled table

The first one is by simply putting some artwork in our dining room. We could simply hang some Kimono which is traditionally worn by the Japanese or we can even put some Japanese swords in our wall. If none of these two attracts us, we could simply choose to put some large landscapes which are a reminiscent of toile for the Japanese or even some painted fans if that interest us. Another interior design which creates a Japanese inspired dining room is that we should have some wall treatment. For some Japanese, their choice of wall colors should just come from the color palette of white, cream, black, and red. Aside from those colors, gold is also being popularly known and used by the Japanese in most of their designs.

The third one that we should always consider is our window treatments. We could simply use a shoji screens made out of rice paper to serve as our window shade which could be just under a very simple gold or black fabric covered with some cornice boards. The fourth one involves our chosen furniture; as mentioned above, Japanese don’t usually use chairs. They just sit on the floor with some tatami mats. But then, if we wanted to follow this Japanese tradition and yet don’t find it very comfortable for us, we could then make use of some pillows where we could sit to have a much softer and comfortable seat.

Japanese decorating style

Aside from all of those tips that have been mentioned above, we should also take some consideration with some of our tableware which should be also a Japanese inspired one; as well as our chosen fabric patterns and a lot even more. An interior design which creates a Japanese inspired dining room is a very stylish and trendy one. This is the one which is popularly being used by a lot of families who wants to experience a Japanese ambiance while eating in their own dining room. Now, we could enjoy eating like we are really eating in a real Japanese inspired restaurant at the comfort of our own home.
We just have to learn some Japanese cooking for us to be able to have the greatest experience that we ever wanted to have without having to spend much.

Read More
Feng Shui

Feng Shui Tips to Encourage Adventure and Self Discovery

1. For rooms in your home, there are several common recommendations. You can use plants to liven up some rooms that have natural sunlight coming in through them. Plants are symbols for the wood element, and wood is the symbol of life. So make sure you keep the plants healthy and alive. Remember to water them and clean them. They are not only there as a symbol, they can also help filter the air in the room.

FengShui kitchen

2. Fire is the symbol of passion and strength in Feng Shui. It is usually put into a room through the use of candles. But because having unattended candles can be dangerous, substitutes such as a table lamp with a crimson shade are recommended. It is also believed that the fire symbol works best for irregularly shaped rooms.

3. Having statues made of clay can be used for representation of the earth element in your rooms. Or you can also use clay pots filled with soil and rocks. The earth element represents stability because it is on it that we build our homes and office buildings. It is what nourishes us and helps us strengthen our lives.

Feng shui styled living

4. The element metal can be symbolized by bronze, silver, or gold. It represents abundance and guardianship. Because of its properties, the metal element lends itself to creativity easily. It can be in the form of practically anything.

5. For the water element, an aquarium is almost always the best way to go. But sometimes, water fountains may serve the purpose well too. You need to keep the water flowing and clean because this element works best when it is moving.

Read More
wallpaper borders
walls

5 Secrets: How To Use Flower Wallpaper Borders To Create A Beautiful Room

Wallpaper borders with floral motifs is one of the most popular used in all houses, especially in girls’ rooms.

It is also very common to see it in the main rooms or in the areas of social concurrence; provided that it is the woman of the house who has taken over the decoration or when the house is dominated by women.

At this point it is difficult to do something new, but not for Decorating Visita Casas; today we bring you various techniques and designs to maximize your creativity.

So be prepared to be amazed!

Read More
Painting

Protecting Your Room Before Painting

Painting your room is a fun activity giving your room a new look with a new theme that you would want to have. This is also one way of updating your room which has been painted ages ago. However, painting can be very messy because it easily drips and run and get the things in your room painted. You might mess up the things that you do not want to have a paint on. Thus, it is very important to take precautionary steps to protect your room and your things from mess when painting. Here are some ways that you can do to protect your room and things from getting messed up with paint.

Painting walls

• First, remove any furniture found in your room. If you do not have any space in the house where you can move it, just move it at the center of the room and make sure that you cover these furniture completely using a plastic sheet so that it will be protected from accidental painting.

• Be sure that you remove the lamps, the wall decorations, the throw rugs or other things that you would not want to paint on. Remove the switch covers and outlet covers and place them in a plastic bag along with the screws so they will not be misplaced.

• Then with the use of a painter’s masking tape, tape the baseboard to mask it off if you will be painting another color other than the one you used for the wall. Position the tape in between the floor and the baseboard so that no part of the floor is exposed. You can also use additional masking tape around the window frames that you have, this would help preventing accidental paints on the window frame. Position the tapes closely to the edges of the window frame as possible.

Painting with sponge techique

• Also make sure that the floor is well covered with drop cloths on the floor to protect it from drips or runs of paint. If you do not have drop cloths, make use of newspapers. But because newspapers are thin and can be easily torn, you need to use it with extra care. Always remember never to use plastic sheeting becuse they are slippery and may cause you accident. Plastic sheeting does not stay in place as well, thus it is not advisable to use it to cover the floor when painting the walls or the ceiling.

These are just some of the ways that you can make use of when painting your room. These are the basic things that you need to remember so that you can protect your room decors, furniture, outlet and switch covers from being accidentally painted on. Painting the room is never that hard nor messy. If you follow the precautions before painting a room, you will surely have a nice finish on the room without the mess. Be ready with the things that you need to use to protect other parts of the room that you do not intend to paint. Before starting the painting process, make sure you have everything needed to paint the whole room.

Read More
Kitchen

15 Creative Ways to Decorate your Kitchen Affordably

Everybody aspires to make their kitchen more than just a cooking space. The kitchen is the heart of every home. The kitchen should be well decorated since this sometimes becomes the meeting place for the family. A good kitchen should be well equipped, with big cabinets, properly lit and spacious. Decorating the kitchen may be quite expensive, for example, buying new tiles for your kitchen will cost you up to 1000$. Here are simple but effective ways to decorate your kitchen:

1. Upgrade accessories

[one_half_first]A good kitchen is worth nice looking and latest kitchen accessories. It is important to make the maximum out of the accessories in your kitchen. The pantry items you choose should be able to match the color of the cabinets in the kitchen.

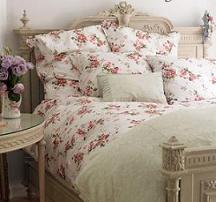
You can add a few accessories such as a wall clock on one of the walls or a trashcan in one of the corners. A floral pattern is the best to adopt.

Wooden items such as chopping boards can also add a cozy look to the kitchen tables. The most important of all is to ensure that they are neatly arranged.[/one_half_first][one_half_last][/one_half_last]

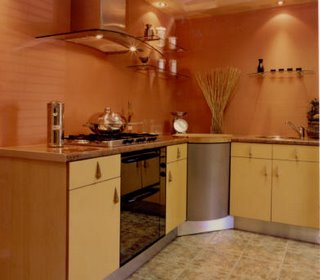
2. Brighten up your kitchen

A kitchen that does not get enough lighting or has dark colors will look small and congested. You can, therefore, paint your kitchen walls with bright colors, decor it with a country style, and if you like dark cabinets, you could add some led lights on them to make them look brighter. Concerning the lighting of the kitchen room, make sure that nothing blocks the lights from your windows. You can also replace your dark curtains with brighter ones. Here are some tips for optimizing lighting in the kitchen rooms:

  • To brighten up your counter space, stick some led strip lights on them and on the under cabinets. Led lights are very cheap and consume very little energy.
  • Use energy saving bulbs to replace the incandescent light bulbs.
  • Use pendant lights to replace an old lighting system.
  • A mirror on the cabinet or on the walls will be a nice idea to make the kitchen entertaining and also for reflection of light.
  • Outdated lighting systems should also be removed.

3. Cooking tool wall storage

This is an idea got from the busy restaurant kitchens. They use some nice industrial hardware and well-painted racks mounted on the wall to store their utensils. Here are some ways of adopting this idea.

  • Use magnets mounted on the wall to store metallic cutlery such as knives.
  • Mount a pegboard just above your counter. The pegboard should be well painted and polished. It will be important also to hang items by merit of color or use.
  • Install hang racks to hang utensils that are fitted with hooks or have a hanging hole.
  • Hang baskets are also available. This can be used to store small items, thus may include fruits, ingredients or even cutlery.

4. Use hideaway furniture

The most important component of your kitchen is space. To maximize the available space, you can choose simple furniture that can be moved away from the kitchen when they are not needed. Some examples of such furniture include;

  • Bar stools that can be tuck under the cabinets.
  • Kitchen cabinets or tables that can be rolled back.
  • Wall mounted, dropdown kitchen tables or chopping boards.

5. Pot Racks

Small kitchens usually face a problem in storing large pots. The best option in such a case is to use pot racks, they can either hang from the ceiling or mounted on the wall. Pegboards mounted on the wall will be ideal for a small kitchen. The pots should be arranged neatly maybe according to their sizes or frequency of use.

6. Increase your counter space

A large counter space will make the cooking process easier and faster. A spacious kitchen looks modern and appealing, one should, therefore, device ways to increase their kitchen space as much as possible. There are so many suggestions on how to increase space in the kitchen. Here are a few suggestions:

  • Use of cooktops that are made up of low-profile ceramic. The modern cooktops are well designed to give you extra space where you can place a few items when not in use.
  • Cooktop cover. Your cooktop can be converted into a counter space by covering it with a wooden or plastic panel when not in use. You can chop your ingredients on top of this cover before you start cooking.
  • Add a butcher block. It is advisable that you buy one with wheels or fit a set so that you can easily push it away when not in use. Adding some simple stools to the butcher block will form a nice breakfast bar.

7. Additional Shelving

Shelves are important in storage in the kitchen.To achieve a more elegant look in your kitchen, add a row of narrow shelves to blank walls. Here you can store your cookbooks and recipe guides.You can also put movable shelves at the corners, here you can store extra nonperishable groceries.
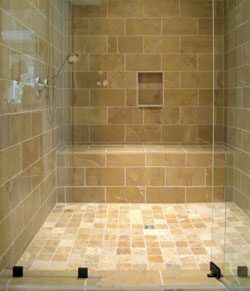
8. Add a backsplash

When you are unable to tile the area around the sink, a backsplash will solve the problem. A standard backsplash is about 10 to 40 square fit. A well-decorated backsplash will cost you up to $5 per square feet which is very cheap. The backsplash will protect the walls from effects of water such as paint peeling off. A backsplash will not only make the sink area beautiful but can also be cleaned and disinfected easily.

9. Carpets and Mats

A few pieces of mats or rags in your kitchen will improve its look. First, look for a carpet to spread on the floor space. The carpet must not necessarily cover the whole kitchen space, you can put it under the dining table in the kitchen if you have one. The color of the carpet should also match the general color of the paint in the room. Secondly, you can add small mats on random places in the kitchen room, for example, places where you like standing like next to the fridge, next to the cooktop. A brilliant idea is putting some mats beside the sink, this is important since it does not only make the sink space look more beautiful but also absorb any water that is splashing from the sink.

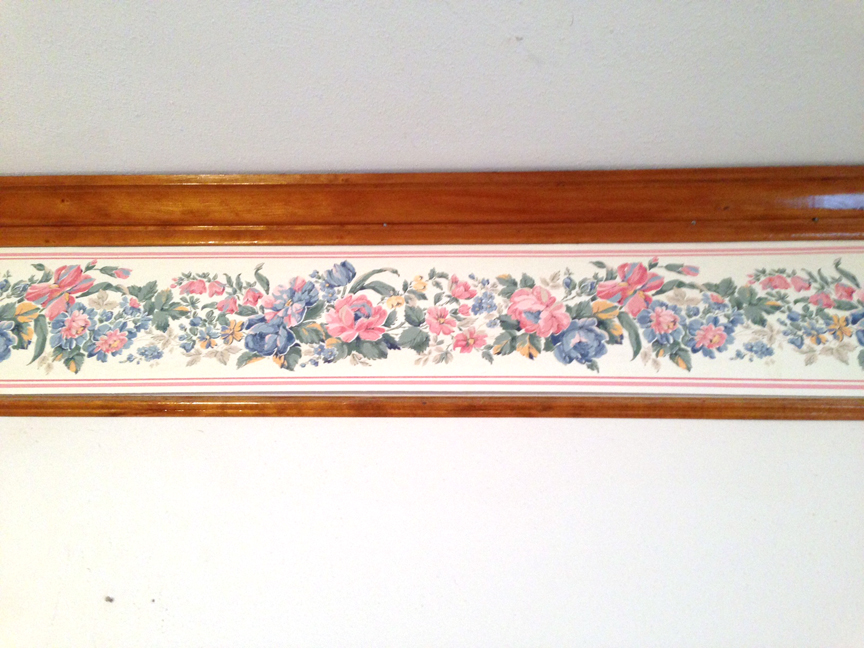
10. Add wall covering

Wall coverings are a cheap and easy decorative technique. Wall coverings come with adhesive backs and are therefore easy to install, you just cut and stick. It gives more volume to your cabinets and countertops. Wallcoverings come within a range of decorations such as beautiful landscapes, quotes and amazing color combinations.

11. Change Knobs and handles

This is one of the easiest and quickest updates. Choose stylish and well-polished knobs and handles for your drawers. Polished Nickel handles are the best for kitchen cabinets and drawers. It is advisable to avoid funny knob and handle designs, for example, some people choose handles that are customized in the shape of some objects. You should avoid such since they old very fast.

12. Painting

Paint the kitchen furniture to give them a new and polished look. If you won’t be able to paint all your walls and furniture, you can concentrate on the part just above your cabinet or sink. Some interior designers will propose painting the upper parts of your kitchen with brighter colors than the lower components, this will enhance a well-lit look in the kitchen room. When choosing paints, you should choose kitchen adapted paints that are water resistant.

If you don’t want to engage in heavy paintwork, you can concentrate on a small area and paint it with a very conspicuous color, for example, if the color of the kitchen walls is white, you can paint one of the corners with a yellow or pink color.

13. Remove cabinet doors

If you have a small or medium size kitchen, you could open it up by removing the cabinet doors especially for shelves on the high parts of the kitchen. However, if you are not confident enough to remove the cabinet doors you can replace them with glass doors that will enable you to see your utensils without opening the cupboards.

14. Changing Faucets

Faucets are what make a kitchen look stylish. Choose faucets that are well designed, for example, the tall curved faucets look elegant and stylish. You should also choose Faucets that are of good color, for example, red or black.

15. Adding a dining table and chairs

If you have a spacious kitchen, you can consider adding a nice dining table in the kitchen space. If you already have a dining table and chairs, you may consider changing the set to a modern and stylish one, you can choose a set that comes with chairs that have the same color as the kitchen walls. A good dining table will add a more elegant look in your kitchen.

Conclusion

If you don’t have enough budget to redo your kitchen decorations from the floor to the ceiling, these fifteen ideas will help you achieve what you desire at your budget.

In redecorating your kitchen, you do not need to break your piggy bank just to go through the process. There are numerous ways to liven up your kitchen without spending anything. You need to learn the 3 main areas which will be covered by a kitchen decorating; they are the floors, walls and storage. You can use these 3 as a guide in fixing your kitchen. Choosing the themes for your kitchen may be very tough. But the outcome of your newly renovated kitchen will depend on your new concept. You can start with these steps:

Brilliant idea for a small kitchen

1. Floors – the best idea is to use a blend of ages with the modern touch. Vinyl floor tiles can do wonders with your floor. You can easily choose from different colors which can easily blend with other kitchen ornaments.
2. Storage – having a cool storage will help you reorganize the things you need around the kitchen. Some of the best storage can be seen during the old times. Go for an antique hunt! Most of the things you need can be seen there.

Wall accents for the kitchen
3. Walls – wall paper can be the best solution but it can cause you a lot than paint. Paint can cover larger area; this means you can save a lot on paint. There are different pint colors to choose from if you want to blend it with the colors of your wall and floors. Creativity counts! You can make wall frames containing your own recipes; you can have it printed and hang it on your kitchen wall.

How to decorate a small kitchen

Every kitchen represents a place for the family, friends, food and fun so you have to make sure that it has a grand design with a huge impact. Today, decorating a kitchen can be easy with the number of designs and techniques available. You shouldn’t be bothered with a big or small kitchen. It is actually not an issue of size but how it is been executed.

Some wonderful ways to decorate a small kitchen are:
Selecting the right color for the kitchen space is vital because it is one of the rooms which will be used by most of the people. You need to select one that will make your kitchen look more spacious and appealing. Bright colors makes a room look more spacious so you can opt for any light colors.

Make sure that the kitchen appliances are chosen with smaller features. If the kitchen appliances are big and gigantic, it will take a lot of space and you won’t be able to add any extra accessories. One of the easiest ways to completely change the look of the kitchen is by putting your appliances to new positions.

It is not necessary to build a number of cupboards in a small kitchen. It will not go along with a small kitchen. It is better to replace them with shelves which are quite handy and you can place almost all of the kitchen appliances. However if you want cupboards, one good idea is to build kitchen cupboards in different heights.

You can also place the table in the corner cubicle instead of a free standing kitchen table. This will open at least half of your dining space. You can also build a table that contains shelving drawers and units below the table where in you can store large items and all the other items that are often used less.

How to Make the Most out of a Small Kitchen?

Having a small kitchen does not mean you do not have a good kitchen. Even though you can’t fill it up with furniture or appliances as compared to what you can place in large one, that doesn’t mean it wont be as functional. You can make the most of your small kitchen if you remodel you small kitchen focusing on visual balance, space utilization and functionality.

Here are some things to consider on how to make the most of a small kitchen:
1. Find ways on how to maximize your storage space

In maximizing your kitchen space, you have to partition your storage spaces and make them achieve multiple functions. For example, a wooden rack can be placed on your window provided that they will not block sunlight. This will allow you to have additional space to display plates or other utensils. Aside from its added functionality it can also serve as a decoration.

Brilliant idea for a small kitchen2. Use Eye Pleasing Colors
Colors can greatly contribute to the overall ambience of your kitchen. It is advisable to use light colors because unlike dark colors, light shades create a visual illusion of having a bigger space. Researches also conclude that light colors can improve a person’s mood.

3. Customize your cabinets
You can also remodel your kitchen cabinets according to how you use them. By maximizing your storage spaces you can free up space for something else. Unused cabinet space should be utilized, if not they should be eliminated.

4. Customize your kitchen furniture
Having a small space may present difficulties in making stuff fit in your kitchen. It may limit you in your choice of appliances and furniture, but you can get through this ordeal by determining what you really need. Eliminate bulky furniture and replace them with a smaller and a more compact one. You may also want to consider portable ones, they offer the same functionality and you can just fold them over when finished.

Small kitchen5. Utilize Lighting effects
Light can greatly influence the ambience of your kitchen. With proper lighting and positioning your kitchen can appear bigger than it really is. The positioning and the intensity of light also contribute to this feat. Using accent lights tends to provide an impression of a larger space. When used properly, lighting effects will surely enhance your kitchen’s harmony and comfort, no matter how small it is. You don’t need to have a large kitchen to achieve full kitchen functionality or visual edge. Make the most out of your kitchen by planning and strategizing on how to boost the room’s efficiency. As long as you place the right things at the right place, you are guaranteed to maximize whatever space you have. It is not how big your kitchen is, it’s how you make use of it.

References:

  • Michaud, E., & Hirsch, A. (2009). The Healing Kitchen: From Tea Tin to Fruit Basket, Breadbox to Veggie Bin, How to Unlock the Power of Foods That Heal. Dallas: BenBella Books, Inc.
  • Rhodes, V. (2001). Pumpkin decorating. New York: Sterling Pub.
  • Ward, L. (1999). Use what you have decorating: Transform your home in one hour with ten simple design principles using the space you have, the things you like, the budget you choose. New York: Berkley Pub. Group.
Read More
Remodeling

Redecorate Your Room: Fast and Affordable

Updating the design of your room does not need you to work physically hard to exhaustion or having to spend too much. There is really no need for very elaborate changes and furnishings. Remember that home trends change quickly and if you intend to change the design of your room to match these trends, it would be both taxing and very expensive on your part. To update a room quickly and inexpensively, a few solutions may be taken which can bring a new life to your once dull room. The following are a few suggestions on how to update your room without having to empty your wallet.

Victorian styled girl room

• First things first, get rid of your junk and clutter. What most of us do not realize is that the big bulk of the items in our room are things that we do not need. These may be piles of paper or items that have been left in our cabinets but have been unused for years. Throw the paper piles and arrange a garage sale for the items that you no longer need. By doing so, you are able to clean up your room and at the same time, gather funds for new items that you may need to redecorate.

• Acquire remarkable ideas from resources. While thinking about what you want your new room to look like, it would help to acquire ideas from references such as photographs in magazines and in the internet, etc. These references can give you a countless ideas on how to redecorate a room.

• Think about a new arrangement for your furniture. Moving the furniture around until you reach the arrangement that you are satisfied in might be physically exhausting. A technique may be to draw your room and create a scale of the furniture. Rearrange them in the drawing until you have reached your envisioned arrangement for the furniture.

Small elegant bedroom

• Decide on a new coat for your wall paint or have wallpaper installed on your room walls. Think about the color combinations that you want. Choosing the right colors would definitely change the mood of your room. Do you want to make your small room appear bigger? Do you want your large room to be cozier? Colors can greatly influence the appearance of a room.

• Change your lighting or add candle arrangements. Candles for instance do not only add an amazing appeal of a warm room environment but they also add scent to your new room. You may also add lamps to dark areas of your room.

• Consider adding flowers and plants. Flowers and plants do not only answer decoration needs but health needs as well. Not only do they add warm colors but also freshens the air of your new room. Further, adding plants in the room create a welcoming feeling.

Updating your room is pretty simple by first planning what you envision your room to be. Remember that for a room to look absolutely amazing, elaborate and expensive changes are not necessarily needed. Simple changes are enough as long as you love what you have done. With these simple changes, you will be able to do it.

Read More
How tos

How to Hang Objects in Brick Wall

In personalizing your own home, there are so many things that you can do. You can add furniture, shelves, flower vases, etc., but the most common to do is hang some personal choices of objects on your walls. This is a very easy task. You’ll just select a design you personally want and then find a nail or anything which you can use in order to dangle it. But wait! Don’t be excited to hang up your favorite portrait or design just yet.

Pictures hanged on a brick wall

Determine first the kind of walls you have. Is it brick? If yes, please be reminded that hanging objects on brick walls might be easy but with carelessness might lead to having your walls some cracks or crumbles on your precious wall! You wouldn’t like that, would you? So before anything else, follow the tips and instructions that we will give you. First and foremost, determine what kind of picture hanger that you would use. For brick walls, the best choice would be is the concrete and brick one. It can hang not only light objects but heavy ones as well. Of course, this is when it is installed properly. This kind of hangers is easy to use. In using it, just find a position for your object on the wall then insert a nail (small and brass-plate one) and hammer it to the wall gently.

Next, choose what kind of screw that you can make use of. For this one, we suggest that you use concrete screws. These screws are very hard and really can handle support. It is not only applicable to brick walls but you can use it in other types of walls too. For this one, you will have to use an electric drill hammer. Don’t just drill but make sure that the hole will be smaller than the diameter of the screw and evenly insert and tighten securely the screw and you’re done.

Pictures in the kitchen

Lastly, anchors are also the ones that you should use. We highly recommend lead anchors. It is a very strong and durable anchor and they are specially designed for heavy objects. You’ll use an electric drill again for this one but you should set it into a lower speed. Drill a hole that is fit enough for the lead anchor then lightly tap the lead anchor on the wall. Screw and tighten it until it expands and securely hold the anchors on the walls.

That’s all about it. All the stuffs mentioned can be bought in your local store or hardware. Also, if you’re just a kid, let an adult help you in hammering or drilling your anchors or screws. The final advice we can give is that be careful in applying these stuffs in your brick walls. If you really can’t do it, you can ask your nearby carpenters to help or guide you instead! Good luck!

Read More
Tips

Simple Painting Tips for a Room

It is not a hard task to paint a room and make it look professionally clean. We just have to have the right plan, the patience, and our desire to save some money by simply executing it by ourselves. We should also have the knowledge on how to paint a room well.

Painting walls

The very first step that we should do is to make sure that we already have enough paint that we needed in doing the said job. The greatest way for us to do this properly is to always get the general measurement of our room which includes the count of our windows and doors. If we don’t have any idea in doing this thing, we could simply seek some help of the painting experts in our town. They are the ones who are going to teach us on how to paint a room well. If our room already has a darker color or if we’re just going to apply a darker color, we might need some few extra coats of paints just to have an even color as a result. The good thing about this is that almost every hardware store are using some machines to program a very specific formula of colors. This will surely help us; most especially if we needed to run out and have more paint to be able to finish our job.

For us to execute our job well, we need to be sure that we have all the tools that we needed for it such as the following:
• A masking tape; the wide one.
• A newspaper which will serve as the resting place of our tools to protect our floors from having some paints on it.
• A paint stirrer; a wood is much advisable to be used.
• A pan which will be the one to hold our paint that we are going to put into our roller.
• Some angled sash brush.
• Small dishes which will help us carry our paint when we are using brush.
• And lastly, some roller and roller based which is specially designed for the right texture of our wall.

Wine tone painting

When we already have all of this, we may then start stirring our paints to mix its color well, after which, we could now then start painting the edges of our room and follow it properly until we finish our whole wall. We just have to put at least 2 coatings of our paint until we reach our desired color and let it dry. If we wanted to have a great finishing, we could always seek some help from the experts who really knows on how to paint a room well. It would be a bit expensive; but then we are assured that we will be having a great result.

Read More
Curtains

9 No-Fuss Tie Up our Curtains Ideas

If we already have a good view from our window, we could also wish that we have our curtains and draperies frame the scene, rather than covering it up with a soft veiling or even hiding it completely. We might also wish to have a proper knowledge on making tie backs for curtains.

[one_half_first]Making tie backs for curtains has its simplest kind which is the straight bands of the fabric, which may be folded and stitched or even, have a trimming along both sides of its edges. It could also be short enough to hold the fabric tightly in a bunched fold, or even long enough to permit the curtain fabric to drape softly.[/one_half_first][one_half_last][/one_half_last]

A lot of curtains have tie backs of a straight band of the curtain which is being folded over the gathered edges of a full raffle, which is practically being used for bedrooms or even at the informal living room. The most formal draperies could have its folded bands left plain, or even with a trimming that is being introduced along with the folded stitched edges. This may also be stiffened with an interlining of a canvas or buckram, or it may be lined with a contrasting fabric with or without any inner stiffening.

Procedures in making tie backs for curtains

Window decorative curtainsNow let us discuss one of the procedures in making tie backs for curtains which have its simplest type. In which we just have to cut a fabric strip of the very same material as our draperies or our curtains. We should make this strips measured at least 14 to 20 inches long for a usual tie back, and 30 to 40 inches long for a strip that can be draped loosely up to the top corner of our window frame for either of its side.

We could also cut this strip for at least 8 inches wide, just to allow for a half-inch seam at each of its side, folding it lengthwise and by using a cotton tape that could run through its fold. We should now stitch along the edge ½ inch in, and then pull out the cotton tape, which will turn the tube right side out.

Now, we can fold the tube smoothly to be able to follow the seam along the edges, and press it flat. After which, we should now tuck in every unfinished end and pleat it neatly around a bone or any metal ring, and sew it with a small overcasting stitches. Then, place a cup hook in our window frame at our desired height just to hold these two rings. And lastly, we should hook one of the rings and bring the tie back around from the back of our drapery or our curtain and then hook the other one on the other place in end.
Black out curtains
We should never forget to try out the tie backs before placing the hooks in our window frame. After we had placed it, we can now adjust the folds to drape attractively over it. If we had used a softer material we had to loop our folds over its tie back more.

Curtains can pronounce your home décor

When dealing with the most important parts of your home décor, windows are definitely one of them. Curtains are the simplest and most popular type of window dressing and have involved greatly with the changing times. Curtains are used to only be available in a typical rich fabric which added volume and traditional weight to your interior décor. Placing window dressings that you really like can add extra interior decoration. Aside from adding a design, curtains can also protect you from sunlight.

Today, wide varieties of materials are available where you can choose a various styles of curtain. Though, you must also consider the decoration of your home before you choose the window dressing. It is very important that your curtains match the design of your house. If you want a modern décor and contemporary then eyelet curtains may suit your home. And if you want a 1950’s interior design curtains, it is possible. 1950’s style are coming back and there are many products now available to “capture the past” in your home decorating. To help you started, here’s a partial list reproduced products inspired from the 1950’s interior design curtains.

• Fabric by the yard including bark cloth for curtains, pillows and furniture upholstery.
• Interior design curtains matches the kitchen table and chair sets complete with chrome legs, Formica table tops and vinyl covered seats in many colors. It also matches with small retro style kitchen appliances including, toasters and soda shop drink mixers.
1950’s design is also applicable in stoves and refrigerators styles reproduced with today’s technology, but with the original appearance in many original colors
• Your antique and local second hand appliances are very good style because it will add the feeling that you are in 1950’s.

Useful Hints and Tips for Choosing Curtains

Curtains add a finishing touch to any room. They can transform your room as you wish with curtains to give it a classy, chic or trendy look. Before choosing curtains take note of the size, shape and the style of windows or anyplace that you want to hang curtains. The curtains should match the general décor of a room. You can add height to a room by hanging full length curtains or you can give a room an airy look with short and bright curtains.

Today there are literally countless varieties of curtains available in all hues and patterns to suit the décor of your home, from ready-made to custom-made curtains. You can also find an assortment of curtain rods ranging from stylish and trendy to elegant and classic. Perfect curtains with matching rods that blend with your room décor can enhance the whole ambience of the room.

Following are some useful tips for choosing the perfect curtains

• Take care to blend your curtain fabric with that of your upholstery. This will give a uniform look to the room.
• If you are aiming for a sophisticated and periodic look, go for fabrics with classic patterns for your curtains.
• Choosing the right curtain is not enough, you also have to give attention to tablecloths, towels or bed linens in the room. Colours and textures of all these fabrics should blend well to enhance the ambience of a room.
• You can create space within a room to establish a social zone by placing carpets or attractive rugs.
• If you want to let in air and light into your room then go for gauzy or sheer curtains.
• To have more control of the light that enters your room you can use venetian blinds instead of curtains.
• If the room is already cluttered with lots of pictures, furniture and other accessories, the best choice is to select muted or neutral colours for curtains and also for your upholstery.
• Keep in mind that curtains are not just for windows. You can improvise and use them to separate a long hallway or other areas.
• If you have leftover fabrics from curtains, use them to redecorate your furniture to match your curtains.

So you want to sew curtains for the first time

Next would be the preparation of materials for sewing fabric. In general, you would need measurement materials such as yardsticks and tape measures, sewing devices or tools such as sewing machines and scissors, and other supporting materials like threads, pins etc.

Roman curtains
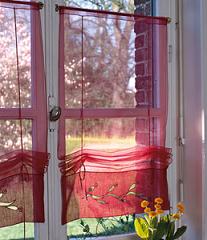
If you don’t have a ready made fabric for curtains, then you might have to cut one for yourself. Adjust the size of the fabric to the size of the window. The fabric doesn’t have to be of completely exact size. In fact, excess fabric is even more recommendable as it provides room for the main design of your curtain. Pre-wash the fabric before sewing or cutting it. You might be surprised to see the difference in size between a store-bought fabric and a pre-washed fabric, and might make errors in cutting and sewing the fabric altogether.

Another procedure in sewing curtains is to mark the fabric. This is to know where the cut line would be and where to fold and sew the fabric into place. Sewing the fabric is mostly done to shorten the fabric to a specified size. When there is a need to create certain decorations like ruffles and certain draping designs on your curtains, pins are used. In sewing the fabric, always make sure to measure the folded areas before sewing, and test them if they fit the design by applying pins first before actually sewing them into place.

This is just be a starting reference to get you started in sewing curtains. There are whole variety of designs and decorative innovations in sewing curtains, and there are quite a number of experts who are willing to help you in your curtain design. You just have to know where and how to look, and who and how to ask.

Read More
How tos

How to Install Subpanel Center in Basement?

Your main electrical panel can only accommodate a certain number of connections. There will come a time when it will become too occupied to have any more link attached to it. This is a problem when you decide to ‘extend’ your electricity to the least used areas in the house like the basement. During this situation, it is not advisable to add another circuitry. Instead, you can install a sub panel. Most homeowners will employ a professional electrician, but if you are up for the challenge you can do it by yourself. Here are some things to remember to know how to install a subpanel center in the basement.

Plan on it
As with any installation, it is imperative that you plan everything. From the target location to the tools you will need, you have to strategize everything to the bone. Check your state’s electrical standards first so you will have a guide to follow. Measure the basement and draw a plan, keeping in mind the future improvements you will implement after you install the subpanel.

Installing a subpanel

Ready your materials
Clean your basement first. Installing a subpanel in the basement can be arduous when there is a lot of clutter in the room. Make sure that you have all of the tools and materials you need. Place them where you can easily reach them. Set up a good lighting to avoid accidents, in doing electrical works one mistake can be fatal. Be sure that the lighting will not get in the way of the installation process.
If there is an existing yet non-working subpanel in the basement, it would be better to remove it first.

Mark the walls
Use a pencil to outline exactly where you desire to install the sub panel. This will help you do a precise work and keep you from going astray from the plan. Be sure to get the exact measurement of the sub panel so that everything will fit perfectly.

Mount the Sub Panel
Prepare the subpanel first for mounting. It is advisable that any covers, doors and partitions be removed first because they can get in the way in the installation. .
After doing this, you can attach a plywood backboard first. Make sure that it is sturdy enough to stay attached to the wall while bearing the weight of the sub panel. Be sure that it is securely fastened to the wall. Attach the subpanel to the board.

Subpanel center

Install the sub panel
Double-check the sub panel if it is securely mounted. Follow the instructions given by the manufacturer. Attach the wires as described in the users’ manual.

When you are done, test it if it works. If it does not, contact a professional to troubleshoot it to prevent the risk of burning the subpanel.

Read More