Paint

How to paint stripes on a wall

Are you looking for a new and effective idea on how you can redecorate your home and make it look like a new house? Are you artistic? There’s this new trend in painting your walls and ceilings that will make really you happy with the outcome. Striping is not new to painters and to those inclined in arts. It’s a method being used to replicate wallpaper designs. Striping is often being use to reinvent designs and to add cool and vibrant effects in walls and ceilings. Modern houses are the ones using this technique, it’s very time consuming and requires details but it brings a good and lasting result.

Painting is one of the best decorating items you can put upon any room or the entire house. It inflects an intonation with the change of color and the whole new look. Painted stripes are the new trend that is used in a variety of interior settings. People living in older homes often tend to mixed it up with the paint stripes. The best part of this trend is that you can do it easily without spending a lot of money. It is one of the neatest paintings to come along.

There are some quick suggestions to paint stripes on a wall. Some of these are:

  • Knowing the right size of the stripes: It is important to know the size of the stripes otherwise it will hamper with the shape of the room. Go accordingly with the outlook of the room. One simple method is to measure it with the standard masking tape widths. It will give the accurate size which is best suited to the room.
  • The number and quantity of the colors: You might picture a whole lot of colors but do make sure that they compliment each other. You can select 2, 3 colors or more but the paint stripes looks the best with 2 colors.
  • Technique to lay out the stripes: You have to stripe down the entire room the same way you did when you wanted to hang wallpapers. Starting with a corner and working your way around the room from that particular point will give you a superior result. This way the starting point will be the finishing point of your painting.
  • Getting hold of a good masking tape: It is necessary to use a masking tape so that the end result will be easy and smooth. With masking tape, you can possibly get neat lines and a minimum amount of leaks will appear from the tape.

Play on Stripes!

If you want to give the impression that your wall is like a tattered silk, you can do it so by the use of whisking. What is whisking? It is basically a method of faux painting with the use of two colors-the base coat and the top coat. It is easy to do whisking as long as you follow the easy steps.

The first thing to do is to choose the colors that you are going to use. Always take in mind that the shade of the top coat will be more visible than the base coat so better choose the right shades of color. Remember to check if the top coat will complement the base coat to achieve that tattered silk effect. Upon choosing the colors to use, you must first try painting them in a piece of wood or any surface you can test on. You can check on how thick or thin your coating will be for each paint color. It is just a way of testing the coatings so you would know how to get the look that you want to achieve.

Once you are already done with the testing, you can now check on and prepare the surface that you are going to paint on. If it is your walls, you must be sure that it is clear and clean. You can also put some tape on the surfaces that you would not put paint on just to serve as your guide. Then, once you are ready to start painting, apply the base coat first. Be sure to apply the same amount on the entire surface to achieve that uniform shade. Allow it to dry first before applying the top coat. You must start on one side first then continue to paint the entire surface. Remember to get a brush and use it for cutting near baseboards.

You can now get your whisk broom to apply paint stripes. The area can depend on you but the usual plays around two feet. With the use of the roller, you can roll over the strip from top to bottom. Check on the texture of your whisk because it will take too much of your time going back to the entire surface just to paint over it again. Also, be careful so as not to overlap the stripes on the other parts to achieve that perfect tattered silk you wanted. To avoid leaving a mess with your walls, wipe off the broom before you go over the next swipe. Avoid using paper towels because they will only ruin your whisk paint. As with regards to the design of the stripes, you can play around vertical, horizontal or curve patterns as long as you know that the shade of colors complement with one another.

In conclusion

Redecorating your home is a very exciting and relaxing thing to do, you will be able to unwind and free your mind from stress by simply painting your walls and rearranging simple items around the house. You don’t need assistance, you don’t need professional back up, and you just need to work on your creativity to be able to come up with a nice and unique design.

Read More
Paint

Advantages of latex acrylic paint vs. oil-based paint

Painting is one of those things some people enjoy and some people find a chore to do. Painting is a hobby for some. A lot of people love to paint or is learning. So, if you are a beginner, there is a lot of things about painting you don’t know. One of the most puzzling problems are choosing the right paint. Sometimes if you don’t choose the right paint, it can really ruin all your hard work. There are many different types of paint in the market like oil based paint and latex acrylic paint. Many become confused over which one to choose. “Should I use oil based or acrylic?” is a common question. So this article will help you choose the right paint.

1. Do you work fast or slow?

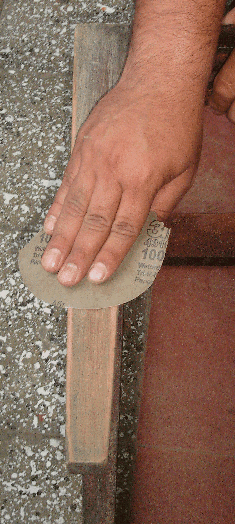
Acrylic paint Pros: You can paint on anything.

This is one of the crucial things that make acrylics an important choice for beginners. Being able to set up everything quickly and start painting on anything is brilliant. Paper, card, canvas board, whatever you have at hand you can paint with this.

Acrylic Cons: They dry quickly

[one_half_first]

Now acrylic paint dry very quickly. Say you’re about to start painting and you squeeze some paint out and then suddenly there’s ring on your phone. When you comeback you’ll see that the paint has already dried out. You take some more and before you begin there’s a knock at your door, you go to check and by the time you return the paint has already dried. So that’s a problem with this type of paint that they dry really quick.

The solution?

  • Try to squeeze out more paint
  • Try adding a retarder to keep the acrylics wet for longer (no more than 15%)
  • Use a stay wet palette to keep the paints moist.

[/one_half_first][one_half_last][/one_half_last]

Oil Pros: Longer working time

Since oil paints stay wet for a lot longer than acrylics it gives you the flexibility to start a painting and then come back to it later and continue from where you left off. The paint on the palette will still be wet and pliable, the colors on your canvas can still be blended together. So you get a huge advantage.

Oil Cons: Preparation is key

Since oil is corrosive in nature (in oil paints) you have to work on a prepared canvas or board. If you are going to prepare the surface of the canvas yourself the preparation time can take a lot longer. You could always buy a pre-prepared canvas and get started right away.

2. Blend or gard lines?

Acrylic Pros: A Crisp edge

The crisp edges that you can achieve with acrylics can be a huge benefit for you if you paint with a more graphic composition. You can mask out areas and work over them quickly and easily cover a hard shape with thicker paint. Mixing clean, bright colors very easily.

Acrylics Cons: Achieve a smooth blend

Blending with acrylics can be really frustrating since the speed of the drying time is quite high. If you are working on a large-scale it can be practically impossible to work the canvas as a whole to bring it all to the same finish together.

This is for a size of say 6ft x 4ft. If you are working smaller that this you can create some lovely blends.

You can however achieve smooth blends with acrylics if you just work quicker. Add a medium to the paint to help keep the working time open for longer. Use soft gel gloss, retarder (slows down drying time) or glazing liquid gloss.

Oil Pros: smooth blending

Oil paints are number one when blending colors together. Because of the slow drying nature of oil paints they can be really fantastic for creating subtle blends.

Working wet-into-wet is a sure-fire way to get a smooth transition in your painting. This is particularly true for portrait painting when the slight shading of the face is needing constant revisiting. Adding slower drying oils to your paints create surfaces that can stay wet for weeks.

Oil Cons: Trying to create a crisp edge without it affecting the underlying colors with oils means you have to wait until the next day, or touch dry otherwise your brushstroke will pull and mix with the paint underneath it. It is very easy to mix ‘muddy colors’ when starting with oils due to everything staying wet and the colors mixing together on the canvas.

Solution: Experience teaches you to work cleanly.

3. Shifting colors

Acrylic Pros: They are superfast

Acrylics won’t fade in time, the colors will look the same now as they will in 200 years. The binder in oil paint, oil goes yellow over time which causes the slight glow on old master paintings with acrylics they are colorfast. On the other hand, the binder – acrylic polymer doesn’t yellow over time.

Acrylic Cons: They change color when they dry

The binder used in acrylics is usually white but dries clear. Acrylics is clear, but still has a slight color shift. This means it seems lighter on the canvas when you first put in on, and then dries darker as the white binder turns clear.

This becomes really clear when painting portraits. When you think you’ve cracked the precise color, you turn around and the color has already changed. With practice, you can learn to judge to shift but it can be disconcerting when you’re first beginning.

If you add more acrylic polymers to the paint, in the form of mediums the color shift will be even greater.

If you use student quality paints that have extra fillers added, which are often white, the color shift will be more pronounced.

Oil Pros: color doesn’t shift immediately

Initially, oils stay the same color when painted on a canvas. However, once the color dries it can appear to change if the oil from the paint ‘sinks in’ to the canvas.

This can lead some areas being glossy (still have the oil in) and others staying matt (oil has soaked into the under layer) to produce a deader color. To overcome this, try to “oil out’ the area of the painting you are working on. A paint surface can appear dull and is usually caused by too little oil in the paint film due to the absorption into the ground layer (or overuse of thinners such as turpentine).

Oil Cons: Yellowing

Oil paints will have a slight yellow tinge to them due to the color of the oil (like olive oil) as oil dries over time through the process of oxidation additional yellowing takes place. This varies in degree depending on the binder used in the paint.

4. Do you like working with thick paint or thin layers?

Acrylic Pros: Very flexible

If you like the idea of using a palette knife and creating thick, impasto paintings, and acrylics could be the choice for you. You can paint thickly, build it up and the paint will dry. If you try to achieve the same with oils the outer surface will dry to the touch but the inner paint will still be wet.

You can also work very thinly with transparent glazes or very thickly with a mountain of paint but the actual surface quality of the acrylic remains flexible, this means your painting won’t crack over time. You can use thin coats of acrylic paint to give a watercolor look to a picture.

Oil Pros: Longer drying times

If you have plenty of time set aside for your painting, oils can be fantastic. You can work with thick paint, wait a couple of days for that paint to dry then add thin glazes to create luminosity in your work.

Oil Cons

If you are working with thick paint, you need to take into account the drying time of oils. Each particular pigment needs a different amount of oil mixed with it resulting in a different drying time,.

The solution: Add a siccative to the paint. A siccative is a medium that helps to speed up the drying process in oil paints.

5. Are you working in a small space?

Acrylic Pros

Acrylics can be a great alternative to oils if you’re working in a confined space are working with kids or in an unventilated area. You just need access to water. Acrylics have no smell and are non-toxic.

Oil cons: turpentine smell

If your start painting with oils in a confined space the fumes from the thinners can really overwhelm you, turpentine and white spirit can be really strong. White spirit can also be irritating to the skin and turpentine rags can spontaneously combust. So, by now you should be able to decide which is better suited for you.

Some tips to use acrylic paint

  • Latex acrylic paint have water soluble base thus may be easily applied and can be dried up within 1-2 hours. This kind of paint also produces less odor than the solvent paints. Oil-based paint on the other hand requires longer drying period around 24 hours. Moreover, oil-based paint produces strong odor.
  • Latex acrylic is also less expensive than the oil-based paint.
  • Latex acrylic paint is resistant to fading, chalking, blistering and peeling while oil-based paint may become brittle thus may lead to peeling and chalking. Blistering in oil-based paint may also appear over time.
  • Latex paint is preferred to be used in exterior painting as this kind of paint is less prone to fading. Oil-based paint is susceptible to mildew thus may not be preferred for exterior painting.
  • Latex acrylic paint is non-flammable while oil-based paint is highly flammable.
  • Latex acrylic paint may be easily disposed while oil-based paint cannot be easily disposed due to its hazardous material components. Turpentine is also required in cleaning up oil-based paint.

As they say, painting indeed is a remarkable way to bring life to a once dull space. While the right color is one of the major considerations for choosing, color is not entirely the basis for selecting paint. In choosing oil-based paint vs. latex acrylic paint, it would be wise to choose paint depending on the texture of your existing wall surface, how easily you like it to be cleaned up later on and the appearance that you like your walls to have. Ultimately, you need to wisely select how well the paint will last and wear in your walls.

Selecting the Right Paint: Oil-based or Latex Acrylic Paint

Selecting the type of paint for your painting project may be a tough decision. The question to ask before choosing oil-based paint vs. latex acrylic paint really depends on your existing wall surface, how you prefer to clean it later on and the visual appearance that you like your walls to have.

Before selecting between oil-based paint vs. latex acrylic paint, one must understand first the advantages of each kind of paint versus one another.

Advantages of oil-based paint vs. latex acrylic paint

  • Oil-based paints are better stain sealers compared to latex paint where stains can easily penetrate.
  • Oil based paints are better for holding unto steel, metal and dirty surfaces while latex should rather be applied to clean surfaces since the paint does not stick unto dirty and chalking surface.
  • Oil based paint usually are more resistant to low temperature thus are less susceptible to shrinkage compared to latex that is more sensitive to temperature thus is vulnerable to shrinkage.
  • Oil based paint may be used in high foot traffic areas due to its durability and the capability to be cleaned. Latex on the other hand must rather be used in non-high traffic areas such as the bedroom.

The Difference between Latex and Acrylic Latex

In works of art, amateur painters care less on what kind of paint they will use while the professional ones are keen on choosing their equipments and materials for painting. Paint is a mixture of liquid. It is used in art application and designs. Two popular types of paint are acrylic and latex. Though both looks and works the same, there are certain differences that shouldn’t be overlooked. Originally, latex paints are made by rubber. They are produced from a certain Brazilian rubber tree named Hevea Brasiliensis. Now, they are produced with only water or chemical-based paints and are mixed with different pigments as well as additives that act as the binders. Acrylic latex, on the other hand, contains acrylic or vinyl binders instead of water. There is a big debate on whether which kind of paint should be used. Both have their own advantages and disadvantages.

Painting with sponge techiqueHere are the following differences that you can use in deciding on which one is better:1. The main difference of the two is that latex paint is water-based while acrylic is chemical-based. Latex paint is non-toxic while acrylic is composed of different chemicals which give a less odor for the first one mentioned.
2. Elasticity is one property of acrylic paint that latex doesn’t have due to natural- based components. The elasticity of acrylic allows the paint to contract and expand more so it is better to use it on exterior surfaces. Also, it resists chalking, flaking and peeling for a long period of time.
3. Latex paints are non-flammable compared to chemical-based paints. The solvents used in acrylic paint are considered toxic waste and are usually high-flammable which is kind of dangerous nowadays.
4. Acrylic paint is great on applying to interior surfaces. However, latex paint is better in having gloss and is easier to apply. The bad thing is, the more gloss, the more the imperfections can be seen and it can be quite difficult to have a touch up after applied.
5. Latex paints have a faster drying time compared to acrylic paints.
6. For cost, acrylic paint is more expensive compared to latex paints. But let’s also bear in mind that the more expensive the product is the better quality it can give.
7. In the area of clean-up, latex wins over acrylic. Latex can be easily washed by simple soap and water while acrylic needs a lot of things like thinner, etc.

Painting roomsWith the differences mentioned, it is obvious to see that in terms of cost and nature-friendliness, latex paint is the one we should depend on but in terms of painting expertise, acrylic is the better one. Acrylic is always considered as the highest quality latex paint and it is composed of properties like durability, flexibility, opacity as well as color-retention. Nevertheless, it’s still the user’s choice on which one he or she thinks is better.

Read More
Paint, Swimming pool

How to apply swimming pool paint

Applying color to our Swimming pool produces a rejuvenated and revitalized ambiance that is very infectious to the users as well. Regular repainting of pools is necessary to maintain its pleasant and attractive look. Before starting to do the painting job, there are several things to consider. Is is similar to paint wood furniture.

Painting a swimming poolFirst of all you have to start by preparing all the basic materials needed for painting such as the following:
Muriatic Acid.
• Rubber gloves.
• Epoxy Paints.
• Paintbrushes.
• Safety goggles.
• Paint Rollers with Extension pole.
• Paint Roller Pans.
• Sandblasters.
• Utility knives.
Respirator Mask.

1. Identify the type of paint that is presently applied in your pool. Remember last swimming pool maintenance. Chlorinated rubber paint and epoxy paint are the most common types because of their long life span of up to two to three years and five years respectively. However you have to make sure by taking a fragment of the paint to your dealer to have it examined. It is always recommended to use the same kind of paint that is already used by your pool.

2. Find out the number of coats of paint that are on the walls of your pool and clean your swimming pool. This is done by peeling off and counting the layers in a part that is shedding or coming off using a pocketknife. It is advisable that you apply more layers of new paint in relation to the old ones. Having thicker old paint causes problems with adhesion. If you have multiple layers of old paint, consider having the exterior sandblasted to uncover concrete. All previously used paint and sand should be removed before the application of new paint. If you decide to paint over the old paint used, first scrub thoroughly trisodium phosphate to cleanse the walls before repainting.

3. Rinse with water and then subsequently with a coat of muriatic acid. Let it soak according to the direction of the manufacturer. Do not forget to provide protection to your eyes, lungs and skin when using this harmful chemical.

4. To counterbalance any acid still present on the surface, rinse with more water and utilize another application of trisodium phosphate.

A painted swimming pool
5. Rinse again then remove all water to allow your pool to entirely dry up.

6. Before painting, check the pool for cracks and repair any that can be found.

7. On the surface, apply the kind of paint that you need to use. Chlorinated rubber paints generally are self – priming. A coat primer is needed when using epoxy paints, especially sandblasted concretes.

8. Use a roller to spread out paint on large open areas evenly and quickly. Use a brush for corners and constricted spots surrounding drains and inlet and outlet valves.

9. Directions for drying and curing are indicated by the manufacturer. This should be carefully carried taking in important consideration on temperature especially when using epoxy paint. Discoloration and bad adhesion may result from low temperatures.

How to Install a Pool Liner?

The function of a pool liner that is above the ground level is to keep the water in the pool and to avoid leaking. It does not serve a support purpose that is why it is important to install the pool liner properly. Great care must be taken to maintain the chemical levels in order to get its maximum life expectancy. But what might happen if the time when the pool liner has to be replaced before it leaks and ruin your property? Reading this article will let you know how to install a pool liner properly.

Swimming pool with pool linerPrepare the pool for installation. The process involves the draining of water out of the pool and removing the old liner. The drainage may depend on the pool’s situation. It may require you to rent a submersible pump and discharge the water to the nearest storm drain. For the said procedure, be sure to check all the local codes. To remove the old liner, disassemble the top cap of the pool wall which secures in place the liner. Inspect the pool wall if there are rusts or damages for it could also damage the new liner. If necessary, make repairs to ensure that the installation will be successful. Take note of the pool’s depth and diameter when buying a pool liner. Thicker pool liners will provide longer service compared to others but it will cost much.

Once you have prepared the pool for installation, the first thing for you to do is to place around the bottom of the pool an earth mound to ensure that the metal pool frame will not be touched by the pool liner. An earth mound is a smooth layer of sand at the base of the pool. Smooth the area as mush as possible by removing any pebbles or rocks. The next step is to lay out the pool liner touching the pool walls, the ground and the earth mound. Do not pull it too tightly to avoid creating air between the earth mound and the liner. You are most likely to have extra length and width of liner. Leave this draped over the sides of the pool’s edges.

Installing a pool linerLeave any small wrinkles in the liner that will allow for extra space whenever the liner shrinks. After that, fill the pool with water. Check the liner ensuring that it isn’t moved or being stretched during the filling. Last thing to do is to clamp the liner to the pool’s edges. It is done after the pool has been completely filled with water to secure the liner to the sides of the pool. With all these information at hand, no wonder you already know how to install a pool liner.

Read More
Paint

How to Clean Pain Brushes

When cleaning your paint brush, the most important thing that you need to have is the virtue of patience, especially when you are the meticulous type who is very particular with details. As a painter or even as an individual who loves painting, one’s brushes become an investment. Cleaning them thoroughly and appropriately at the end of each painting session ensures that the paint brushes last longer.


There is a common procedure on how to clean paint brushes. The first step is to wipe off any excess paint using any cloth. If no cloth is available, a soft tissue would do. Then gently squeeze the bristles from the ferrule edge outwards using one’s fingers, or with the use of a cloth. This process will help remove excess paint from the paint brush. It is important to keep in mind to be careful to avoid pulling on the bristles because this will damage the paint brush.

Next, rinse the brush in turpentine or oil if you’ve been using oils or lukewarm water if you’ve been using a water-based medium. Never use hot water as it can expand the ferrule, causing the hair of the paint brush to fall out. Wipe the paint brush again using a cloth to remove the last of the excess paint, if there is any. To further clean the paint brush, wash it using mild soap, rinse and repeat this process until there’s no trace of any color coming out and there is no more paint left. One must remember to not use a lot of pressure in order to force the remaining paint out of a paint brush. One should be patient and rinse the paint brush several times until no trace of paint is left on it. Take note that if the brush used is made from natural bristles, soften it by dipping it in clean oil once it has been cleaned properly.

Once the cleaning is through, shape the brush head into its correct shape. Then leave brush to dry at room temperature. There are various steps on how to clean paint brushes but the key idea is to make sure that there is no paint left and that the brush is shaped correctly until it is dry.

There are a number of tips on how to avoid damaging your brushes from too intense cleaning. Taking necessary precautions like using separate brushes for oil painting and water-based medium helps segregate the different kinds of paint used, allowing the user to use appropriate cleaning materials intended for each. Also, using separate brushes for varnish, gesso, and masking fluid would help make cleaning paint brushes a lot easier.

It is always important to take care of the things that we use be it for our personal care or for work and other purposes. The same goes for paint brushes; taking care of them by cleaning them properly will help preserve them longer for better and long-lasting use.

Read More
Paint

How to Perfectly Estimate the Paint of your Room

Have you ever tried painting your own room? The first thing that might cross your mind before painting your room is how much paint you will need. You may not want to end up with too little paint and failed to finish your room. Inaccurate calculation of paint may affect the overall appearance of your room. On the other hand, you may not want to buy too many paint and wasting all your money. Here is a very simple way to know how much paint you need for your room.


1. First, use a tape measure or any measuring device to accurately measure the overall footage around the perimeter of your wall and multiply by its wall height. Don’t forget to measure in feet. You will most likely need a help of a close friend or neighbor. Measuring a large area requires a lot of work.
2. You have to subtract the area of both windows and doors. Use a tape measure to get the exact length and width of the windows and doors. Multiply all these numbers to get the square footage of the window. To actually determine how much of the wall surfaces you need to paint you have to subtract the square area of each window. Then, add the definite square area that you have to paint to each wall. This will determined the entire surfaces of the room.
3. Know the exact wall coverage of the paint. You can easily see this information on the outside covering of the paint. A regular gallon of an interior paint usually has 350 to 400 square foot. This can greatly help you to pin point the exact amount of paint that you need to purchased.
4. Determine if your room needs extra coats of paint. If your wall has big visible stains that are hard to cover or if your previous wall has darker paint, you have to double the amount of paint. This will ensure a great coverage of your wall. One of the best options for you is to buy a tinted primer as your first coat.
5. Have an exact calculation of how many gallon of paint you should buy to cover the entire wall of your room. Just divide the entire square area of the wall by the number of each gallon of paint can cover. This can give you the precise amount of gallon you need to paint your room.

You can also hire a professional painter to do the work for you. Professional painters, most often one coat of primer paint for first coat and two coats of wall paint after. But this may depend on the quality of the paint. Some paints may only require one coat. Always remember to paint a primer if you are painting much lighter color over a dark one.

Read More
Paint

Painting Calculations Made Easy

Painting is a very great way to relieve stress and be creative without being too much specific on the details. Many people love to paint. In houses, painting is one of the basic ways to redecorate and make the home into a more homely atmosphere. The only problem is, especially to painting amateurs, is how much paint we need to use? Well, if you’re into that difficulty. Do not worry because this article will explain to you on how to determine how much paint you will use in painting your household.


If you’re thinking that calculating how much paint you will use is very hard, well think again. Calculating isn’t that hard, neither that easy. The first thing you need to do is to determine the texture of the surface that you will put on paint on. If its smooth, you only need less paint unlike rough surfaces which need more extra coats. Some paint producers put on guidelines on how much paint will be used on different surfaces so better check the can of the paint first before applying.

Now, let’s assume that a can of paint can be used in order to cover at least four hundred square feet on smooth areas while only a hundred fifty or two hundred for rough areas. Let’s go to the calculations. If you’re going to paint on blank walls, measure first the width of the wall by its height then multiply the numbers. Let’s say that your blank wall is at least 20 feet wide and 15 feet high, now we’ll have a 300 square feet of wall to paint on. Smooth surface will only need ½ gallon of paint while textured wall needs about a gallon to cover it.

Well, we have already discussed the blank walls. Now let’s calculate for walls with windows and doors. If you’re mind is thinking that it’s more difficult, well you’re wrong. To calculate how much paint you need, determine the square footage of the window or door by multiplying its width and height. After determining its dimensions, subtract the measurement from the total square footage. Let’s say that the window is about 40 square feet, we need to subtract this from the 300 square footage of the wall and we’ll only have 260 square footage of wall to paint on. You can also do this on non-removable objects like wall-clocks, cabinets and many more.

Remember, don’t waste too much paint. First and foremost, determine what kind of surface you will be painting on. If you’re confused and needs to know more information, you can ask a professional or the paint store employee so that they can give you advices on the paint that you should use. With this, you will be rest assured that you won’t have to waste too much paint on your wall. Have fun painting!

Read More
Bathroom, Bedroom, Decoration, ideas, Paint

Springtime decorating ideas

Springtime is the perfect season for bringing new life to your living space. It doesn’t require a major remodeling blueprint to add a beautiful freshness to your home. You don’t have to hire an interior decorator -you can make noticeable improvements on your own – there are several ways to do it yourself on a budget you can live with. If you’ve ever seen those home improvement shows on TV, then you probably have seen how a little paint can give a room or whole house a vibrant new look.

Almost all home interior consultants will start by addressing new colors and photos for your walls and maybe a splash of new fabric to match. You shouldn’t be afraid to add cheer to your room with bright shades of blues, greens, and golds. There are endless combinations of paint colors that you can choose from. Gone are the days of flat white! Pillows and table mats can be added to a room to match your new color scheme. Not only does this add a touch of style, but it makes the room seem inviting and comfortable. These require the least amount of work and can be changed around often.

Springtime decorating

If you aren’t sure what color scheme you would like to transform your room into or to paint your daugther’s bedroom, don’t worry. You can get great ideas by looking at furniture or decorating magazines before you make any final decisions. Another good way to get ideas is to visit furniture showrooms as they often have whole rooms set up to give the customer a sense of appreciation for a pretty room. It’s a good idea to make notes of what you find appealing and to improve your bathroom. If you have others living in your home, perhaps they can lend a hand with the project by advising you of their preferences when you’re finding it hard to make a decision. Hopefully they will be there to chip in on the labor if you can rev up their enthusiasm! Sprucing up the colors of your home can be a do it yourself project that you can afford and enjoy.

Read More
Bedroom, Girls, Paint

Painting a girl’s bedroom

I remember growing up and watching my mom completely transform the interior of a house just by slapping on some paint in all the right places. Although it’s not the easiest thing in the world, painting a girl’s room can give a million dollar transformation at an inexpensive price. It can be done by anyone who possesses a little patience and few simple tools that can be obtained at any hardware and paint store or department store. Before you begin your project of painting your daughter bedroom, there are a few things you will need to put on your shopping list:

* Glossy light colored paint for trim and doors.
* Wall paint mixed to your desired color.
* Screwdriver for removing all wall switch covers.
* Tape for protecting edges.
* Protective covering for the floor.
* A stick for stirring paint.
* Primer to help ensure paint adheres.

Some girls grow out of the girly pink phase sooner than others. You don’t have to force pastels on her, but you should insist on glossy light colors for the doors and trim. White or Creme is a happy median. Doors and Trim are generally glossy. It’s a good idea to coat these with a bonding primer to make sure your new application adheres to the existing painted surface. This is especially important when making a move from gloomy to bright coloring. Of course, is not the same that paint a wood furniture.

How to paint a girl's bedroom

Make sure your walls are clean and dry. Now that you have your supplies, you should start with taping off the areas around the trim and doors where they come in contact with the floor and ceiling. This will help keep the paint where it’s supposed to be. There’s no need to tape around to protect the walls, because you will be painting over the walls after a couple of days anyway. You may now begin priming the doors and trim. If the end result is going to be a drastic change, you may wish to give two coats of primer to make sure that the paint will cover and stick well. Be sure to allow your primer to dry for about five hours before giving an extra coat, or before starting to paint it.
A girl's bedroom painted

Once you’ve primed and painted the trim and doors, you may remove the protective tape. You should wait a few days for the doors and trim to dry before beginning the painting of the walls. This amount of drying is needed so that you may apply tape around the edging of the trim for protection when you’re painting the walls. If you put tape on the trim too soon, it may cause the new paint to peel away when the tape is lifted. So, be on the safe side, be patient, and allow for a good drying time.

Read More
Furniture, How tos, Paint

How to paint wood furniture

Furniture that’s been crafted out of solid wood can last for many centuries. Building a sturdy wood piece can be very time consuming, but when it’s all finished, it’s a piece that can be handed down through many generations. If you’re lucky enough to inherit or purchase a fine wood piece, you may wish to change its appearance to match the existing colors of your decor. You might even want to start a new decorating project that revolves around your new found treasure. Don’t worry, you don’t need an expert to do this. All you need are a few simple tools that are not hard to find at any hardware. To be well equipped for painting wood furniture, make a list and include the following:

* Brushes to paint with.
* Handy wipes or rags for easy clean up.
* Paint in your color choice (Gloss paint is recommended, but not required).
* Primer to help bond the new paint color.
* Something to protect the floor from paint spatters.
* A sheet or two of medium grade sandpaper.
* Mild soap and water to clean your piece before painting it.
* Screwdriver to remove hardware knobs and handles if your piece has drawers or doors.

Painting wood furniture

The first thing you should do is make sure your piece of furniture is free of dirt and moisture. If there are drawers, pull them out to work on separately. If the existing paint is extra shiny or you see obvious cracks or peeling, give it a once over with your sandpaper before you go through the cleaning process. No sense in having to clean it twice! Your piece may already be in good enough shape to skip the cleaning/dry and sanding project. If there are any knobs, handles, or hinges that you don’t want to accidentally get paint on, you should remove them.
Painting furniture

Next, you will want to coat your furniture with primer. Paint it in the color of your choice, making sure to apply all surface areas that will be getting re painted. You may wish to repeat the primer process to reensure that you’ve gotten a good bonding effect. Each time you apply primer, you should wait until the wood dry properly before doing anything else; it should take not more than 5 hours. Once your primer is dried to your wood furniture, it will have a filmy look to it similar to chalk dust.

Now you are ready to paint your wood furniture piece. It’s a good idea to give the furniture two coats of paint. You should let the paint dry for about five hours before applying the second coat.

Read More