The leaching of the surfactant causes stains, and glossy brown spots that appear on the outside of a latex paint; surfactants are not necessary in the manufacture of paints, they evaporate and they do not belong to the ingredients of the painting. They do not cause any harm so you do not have to worry too much. Leaching often occurs during cool weather conditions or the day before the weather cools.
However, just because there is no harm to health; it does not mean that they are visually pleasing; in fact, surfactant leaching is easily interpreted as a house with "diseased" walls. It is important to know how to treat them efficiently to prevent them from appearing regularly; so here are some tips so you can eliminate them completely, both inside and outside.
But, why do they appear?
[one_half_first]The first thing we must do to solve this problem, is to understand it. Spotting occurs when moisture condenses into the new paint and extracts the surfactant quickly. This can be avoided when taking the proper precautions when painting. Most of the time this leaching condition cannot be avoided especially when you live in a cool and humid place. Sometimes, there is nothing you can do when you know you've tried everything you need to do to avoid it.[/one_half_first][one_half_last][/one_half_last]
So the best way to deal with them is to know that they regularly appear; in any case, it is good to keep a reserve of paint constantly, the walls always need finishing touches as they are always stained.
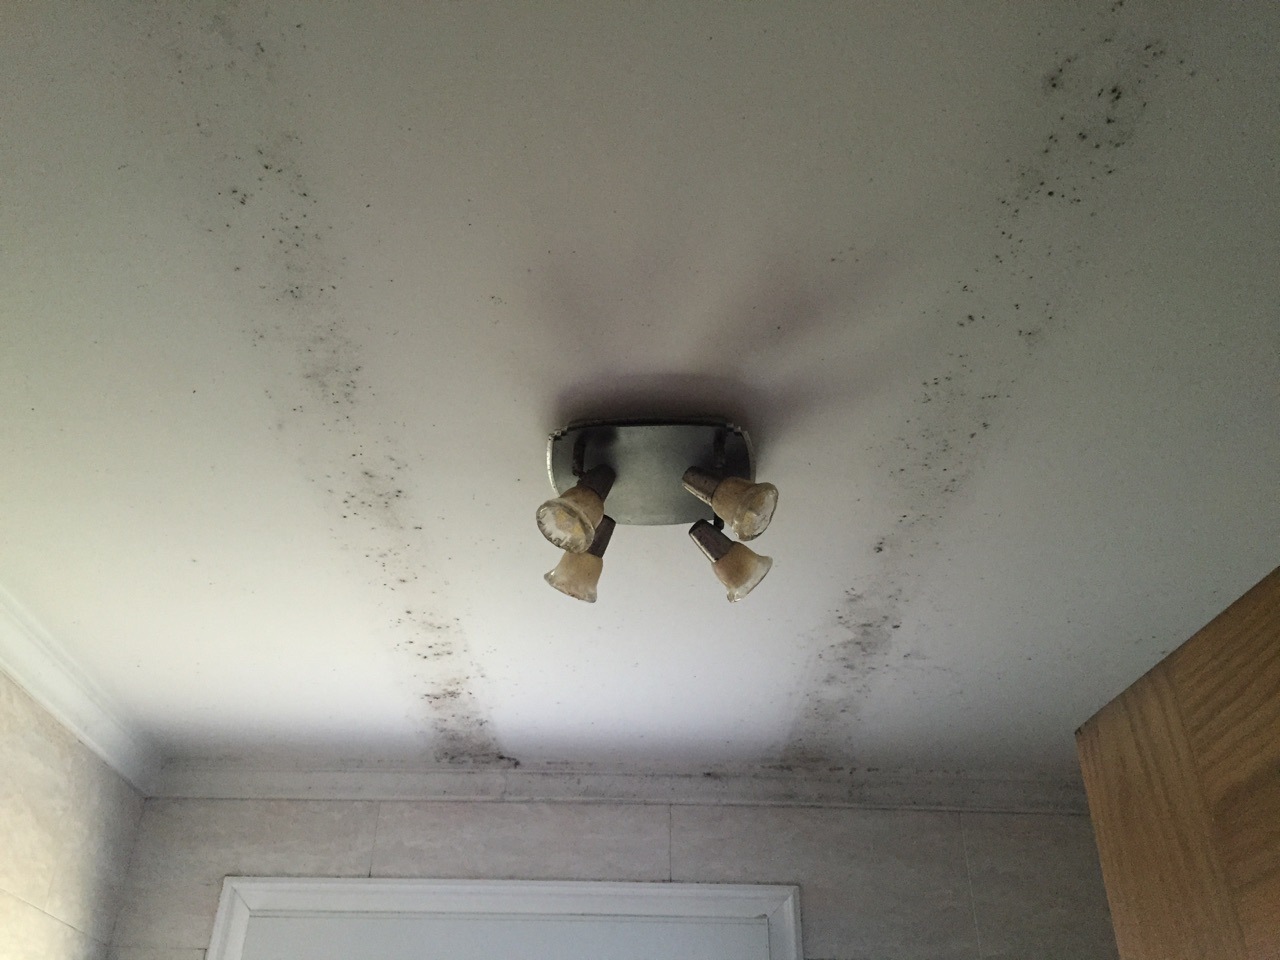
How to treat the problem on interior walls?
The walls inside the house that suffer from surfactant leaching are the ones that present the greatest difficulty; when there is no good air circulation, the problem can be and will be recurrent if a definitive solution is not taken.
To get to that point, the first thing to do is eliminate all trace of surfactant leaching; this is achieved with the following materials:
A cloth
Bleach
Ammoniac
Depending on the color of your wall, you may find that bleach may be more effective than ammoniac; but in any case, you must moisten the cloth or rag with enough liquid.
Another option is to fill a spray bottle with bleach or ammoniac; after having moistened the entire area affected by surfactant leaching and its adjacency, begins to rub with the rag.
This way, you will see how the stains disappear completely. Remember that you are fighting a living organism, so you need to "eliminate" it and also prevent it from reproducing.
The problem of the walls in the interior is that the conditions of the environment lend themselves so that the fungus regenerates; so it is necessary to take some forecasts when repainting.
These are some helpful tips you can do to prevent surfactant leach from appearing:
Do not paint if weather conditions are below 50 degrees or during late afternoon.
If blotching and stings appear you can rinse it with a garden hose.
Most of the time weathering removes the stain itself for a couple of months.
The type of painting will be your greatest ally to prevent surfactant leaching from appearing again; you can even find paint that fights the formation of this horrible fungus.
Also, remember that:
Leaching should not affect the durability of the paint.
A dish detergent and sponge can also be used.
The spotting happens when humidity condenses on the new paint and draws the surfactant quickly. This can be avoided when you take proper precautions when applying paint.
Another great alternative and that could even help you create another decorative concept in your home is to use lime paint. Thanks to this old painting, the problem of surfactant leaching will not be something that you have to worry about.
It is a great alternative to give your house a more vintage look and you do not have to worry about the color; using natural pigments you can get practically any color of your preference.
Removing surfactant leaching from exterior walls
The outside can be a very complicated area, especially when surfactant leaching occurs due to natural causes at a certain time of the year. It could be said that the same climate helps to eliminate it; but if he did it in its entirety, then he would not appear again.
The first solution is to use water under pressure on the surface, this will eliminate traces of surfactant leaching almost immediately; the next thing is to apply the paint. Remember that the paint must be applied in climatic conditions that allow its correct curing; otherwise you will suffer the same problem again and again.
What do I do when I do not want to paint the outside wall?
Even in a brick wall or especially in the small stairs that precede the main door, this kind of "enemy" can be formed. Obviously, not all exterior walls can simply be painted. For this there is a protective chemical that will prevent the new formation of surfactant leaching without altering the color.
This solution is ideal to apply when you have a brick wall or something similar. During the winter especially you will notice how the moisture seems to expand through all the joints and even the bricks.
The first step is to eliminate that accumulation of saltpeter, the most efficient way is using a steel bristle brush; with the scrape the entire affected area until it releases the remains that cause the spots.
Once all the white stain has been removed, it is washed with running water and allowed to dry the wall. Only then must apply the protective anti-humidity primer; does not have color, so the aesthetics of the wall will be protected.
Other reasons why surfactant leaching is formed in the exterior
Many times the reasons are given for the manufacture of the house. Drainage as well as irrigation systems can cause serious moisture problems; the same can not only be seen in the exterior but in the interior.
We as Decorating Visita Casas had to deal with the surfactant leaching of a very unique wall. The inclination of the soil caused that the water both of the drainage of the roof of the house like of the system of irrigation; will stagnate in a corner. Little by little the humidity was climbing inside the wall to damage the image of the same on the outside; while inside the green mushroom was produced.
The process to eliminate it consisted of several stages:
Remove all badly adhered wall debris
Use a wire bristle brush to remove the surfactant leaching
Apply waterproof anti-leaching protection
Repaint. But for this we had to wait for the most suitable climatic conditions.
The customer was surprised because we did not move the drainage nor did we suggest changing the position of the irrigation system; it simply was not necessary. So when you want to do this kind of repairs, inform yourself first, thus avoiding overhead on the price for unnecessary works.
Also keep in mind that this problem will arise most of the time on the walls facing north; that is to say, those walls that almost do not receive sun during the day.
I love writing about interior design. I am in love with achieving harmony at home to improve the well-being of my family. I usually write for the "Visitacasas" blog, both in Spanish and English, and personally answer the questions about home decoration of all our users.
1 comments