Our hardwood floors are more delicate than we think despite their hard name. The deep scratches caused to them by the furniture that we daily slip; can make the whole floor virtually unusable.
It is true that we can continue walking on them without problems; but the true problem is aesthetically, they will become almost a cancer for our eyes.
Repairing them is simpler than you think, as long as you do it right; so here at Decorating Visita Casas, we will tell you the techniques to follow, and great advice to avoid these scratches.
First, We Must Identify the Problem

We already know that we are facing a hardwood floor, but; exactly what kind of scratch are we facing? That should be the first step before beginning any repair, since according to the nature of the problem; we will require a different and more or less complex type of solution to perform.
The first thing is to corroborate if we have a superficial scratch or if on the contrary, it is a deep scratch. The difference between them is that; in the surface scratch, the material has not been detached as such, but there has been a pronounced sinking.
On the other hand, a deep scratch or type 2; is one in which we have lost content of our hardwood, we can clearly see the residues around the scratch. This type of damage looks more like a horrible crack, the sinking on the other hand is appreciated as a softer scratch.
Once identified then the type of scratch we can proceed. So take paper and pencil because here is when we tell you the necessary materials to repair a scratch by sinking.
Materials to Repair Scratch by Sinking
• Water.
• A syringe or another instrument that allows small thin portions of water to be applied.
This is the simplest process of all and often the most convenient. Remember that the ideal is to avoid the most patches on our floor; for reasons of aesthetics, sometimes water can give us the best result. Since we are facing a collapse, the natural aspect of the soil will still be appreciated, but with a small difference. Water is an enemy of our hardwood floor; since the floor overflows, for this reason the installation kit comes with a protective membrane anti humidity.
But to repair the sinking, it is best to force that scenario but controlling it. Locating it to the sunken part and using very little water. For that we will go to the syringe or any other mouthpiece that you have purchased for this purpose. Apply water throughout the line and always taking care not to exceed the sides of the sink.
Once the scratch has been filled with water, allow the wood to absorb the water for the next 24 hours, you will notice how the wood “backs up” where it was sunk.
But what to do when we are facing a real scratch?
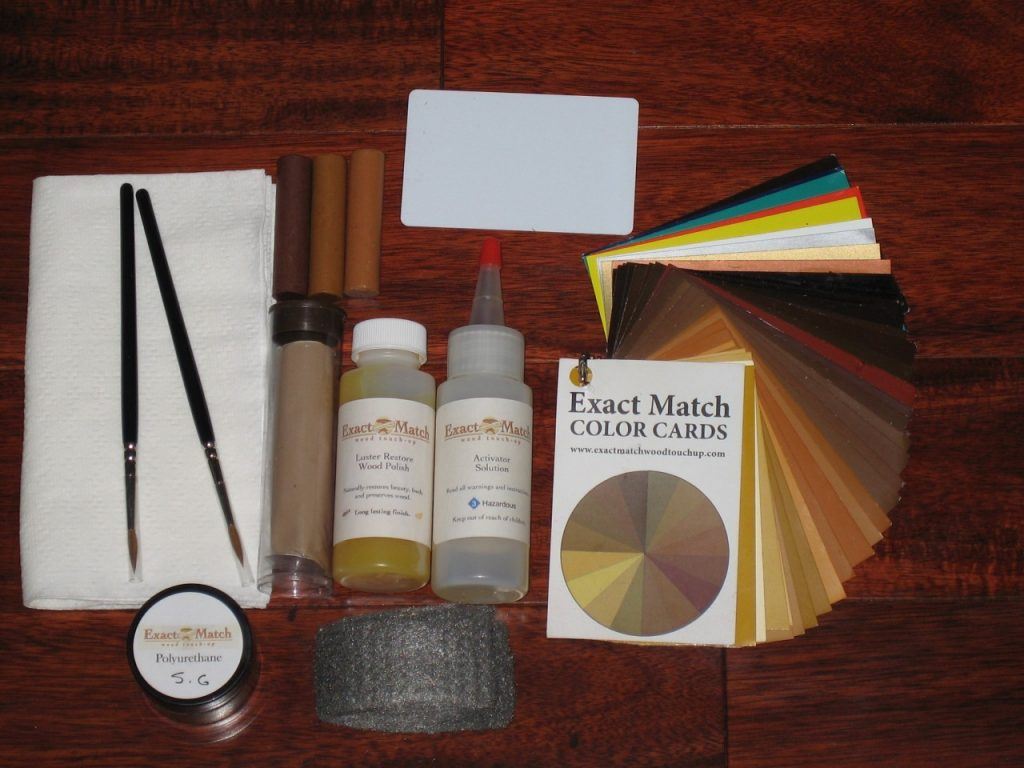
If the integrity of the floor has actually been damaged by a piece of furniture or even by a metal object; then it’s time to go to the repair kit on our hardwood floor.
Repair Kit Materials

• Multi-tone wax
• Plastic spatula
• Hair dryer
• Hardwood flooring marker
• Sandpaper
Using the Repair Kit on Our Hardwood Floor
Very well, if we are in front of a repair kit, it means that the manufacturer is aware of the possibility of scratches but; also means that they can be repaired. The important thing is to do it carefully and in the correct way, otherwise the repair will be clearly seen and will cause us to remove the floor.
All final repair should be imperceptible to the eye, even to ourselves who know exactly where the scratch was. Wax to repair hardwood floor varies by manufacturer, although most of these floors are HDF; there are small differences that go beyond the pitch, so make sure you use the right kit.
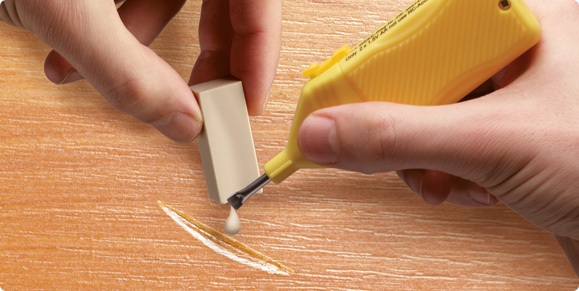
Once you have identified the scratch, you can use the hair dryer or the soldering iron to melt the wax on the scratch directly. Shades can be combined while performing this process; so you will achieve a finish more faithful to the tone of your hardwood floor.
Use the sum of the tones to emulate the direction of the grain and; although you must try to fill the scratch without exceeding much in the amount of wax, you should not worry too much for those surpluses that fall out. Nor should you worry too much about the level of toxicity of this wax.

Many manufacturers use a water-based wax, but it is always important that you check all these details before purchasing the hardwood floor.
Once the wax has dried, you can remove all the excess with the plastic spatula that comes with the repair kit. It is important not to use metal elements for this work as they will only scratch the floor again. Once the excess of wax has been removed, it is time to use the marker.
fter applying the Wax, you will notice that the unevenness between the surface and the scratch is no longer perceived, however; the difference between the tonalities will remain remarkable. For this, you must use the marker for hardwood floor.
With the marker, you can emulate the grain or veins of your hardwood floor more easily. This process does not require as much care as you think, remember that the HDF veins are not perfect;
do not look for perfection, but a natural look.
Once you have finished using the marking pen on the repair, it is time to take advantage of the sandpaper that comes with the repair kit. This sandpaper is not too aggressive to use on the hardwood floor, however; you should be careful with the way you use it.
The direction of the wood grain of your hardwood floor will tell you exactly in what sense you should use the sandpaper to polish the rest of the imperfections and achieve a really natural look.
If unfortunately you had to perform the repair where the veins do not go in a single direction; the best way to use the sandpaper will then be with circular movements.
Remember, anyway that the pressure exerted on the floor should not be too strong. With the plastic spatula you have already removed the largest amount of excess wax, the sandpaper is only for polishing details.
Preventing Deep Scratches in Our Hardwood Floor
The best cure for these types of problems is the prevention of them. The ideal is always to resort to high traffic soils. These are the most resistant before everyday use of them, including sliding chairs and furniture.

However, there are many ways to prevent scratches besides using a floor resistant to them. All installation kit of a hardwood floor comes with a protective plastic to be placed under the wheel of the chair.
Also, make sure that the wheels of the chairs are friendly to this type of floor. At your local hardware store you will find adhesive pads felt that can be placed on the legs of all furniture. Especially on the legs of those who constantly drag almost automatically:
• Chairs
• Tables
• Floor lamps
You should make sure that any element that is capable of damaging the floor in such a case that it is dragged on it; be isolated from direct contact with your hardwood floor using these protective elements.
Remember also, that there are special products to clean the floor, from polish to varnish dedicated solely for this material. Always refer to the recommendations given by the manufacturer of your hardwood floor before buying this type of products.
The last recommendation we can give you is: perform all repairs at the same time. If your hardwood floor has more than one scratch that you have been hiding for some time, it is best to devote a single day to repair them all. That way you will have a finish in the tone of your soil much more uniform since you will see the big picture; not only isolated events.
Applying the entire layer of varnish in unison after a repair session is the best way to ensure that your floor does not end up seeing two colors. It is true that there are techniques to hide scratches on the hardwood floor; but we have not addressed them because you can not hide the sun with a finger.

Before telling you how to hide a problem, it is best to explain how to deal with it and solve it. So you should not worry about scratches on your floor anymore; always try to prevent them from happening, but if they happen, you know how to repair them now.


0 comments