How tos

Making Bamboo Roman Shades as Easy as 1-2-3

There are many things you can do to make your life easier… but making roman shades is not one of them! Making roman shades correctly is difficult. Unlike roller blinds, making them incorrectly can wreck your furniture and put your family in danger! So, to help people who want to make great roman shades but don’t want the hassle of doing it right—I’m going to show them how to do it wrong!

Do you want to make your own bamboo roman shades?

A woman who was tired of buying her roman shades every few months decided to make them herself. She purchased a few simple items she could find at the local hardware store and within a few weeks had a fully functional roman shade in her living room. It was a success, so she decided to do it again.

This step-by-step guide shows how to make beautiful bamboo roman shades for any room in your house. You will also learn why making shades is one of the best DIY projects you can ever do.

If you’re looking for a kind of design that is beautiful to the eyes, simple yet inexpensive, bamboo blinds is one of the best choices. It gives you a very natural look as well as a warm ambiance. Bamboo blinds can be handmade or you can just purchase it in native stores. You can also personally make your very own bamboo blind. Don’t worry if you’re thinking of budget and difficulty. You can work on this design without having to tire yourself out and this will not cost you a lot.

Making your own bamboo roman shades

Bamboo roman shade

In making your own bamboo blinds, you need to settle on different things. First thing to think of is the mounting board. The mounting board is important because it establishes how the shade will be fit against the windowpane. So basically, you really need to know how to install the mounting board properly in place.

Next thing we need to find out is what are the materials needed for the bamboo roman shades and what are their measurements. First thing you need is fabric and cotton lining.

The measurements should be at least 2 inches wider and 6 inches longer than the mounting board. It will be used to wrap your board.

You also need to know the ring tape, the polyester cord, metal dowel, other supplies and tools (e.g., matching thread, scissors, pins, sewing machine, staple gun, staples, and cord toggle, measuring tape). The different tools will be the ones that we will use in order to make our work easier and more efficient.

Roman curtains


Now, for the final step, which is putting up all the things gathered, follow the procedures below:

  1. Cut the lining and fabric according to measurement and stitch the top side of it while the edges are pinned. The bottom seam should also be stitched together but make sure that there’s a gap for turning. Press and stitch again afterwards.
  2. The bottom part should be raised up to 2 inches and you need to press it again. Use a ring tape to pin vertically the back shades side by side. Don’t forget to stitch the casing ends.
  3. Attach the shade to the mountain board via staple gun and let it hang over the board (front).
  4. Lastly, decide where you’ll put the chord. If you had decided, thread the chord via the vertical rings and thread it upwards. To verify if you had made a great blinds close-open the shade. If it isn’t that good, you can still make remedies for it.

Well, that’s the steps in making your very own Roman style bamboo shades. Practice and practice until you get the right shape! Remember, practice does really make something perfect. Good luck!

If you don't want to make them yourself, follow these tips

1. What is Bamboo Roman Shades?

Bamboo Roman Shades are an excellent choice for your home. They are very popular because they are both elegant and functional. The shades come in a wide range of colors and designs. They are made from a unique type of fabric that is light weight and very durable.

2. How Do They Work?

They are a new type of window covering that has become very popular over the past few years. These shades are made from bamboo and other natural materials. They are also eco friendly, and they do not require any maintenance. You can get them online or at your local home improvement store.

3. How Do You Install Them?

To install this kind of shades you will need to use a ladder. It is important that you have someone hold the ladder for you while you are installing the shades.

This will make it much easier to install the shades. Once the ladder is in place you will need to take the ladder down and then place the bamboo shades on the ladder. You will also need to attach the brackets to the ladder so the shades can be attached to the ladder. Once this is done you can then attach the roman shades to the brackets.

4. How Do You Clean Them?

When cleaning bamboo roman shades, use a mild soap and water solution. Use a soft sponge and a mild soap or detergent and gently scrub the shade. Don't use harsh chemicals on the shades.

Read More
shadow box
How tos

How to Create a Shadow Box? | Decorating Visita Casas

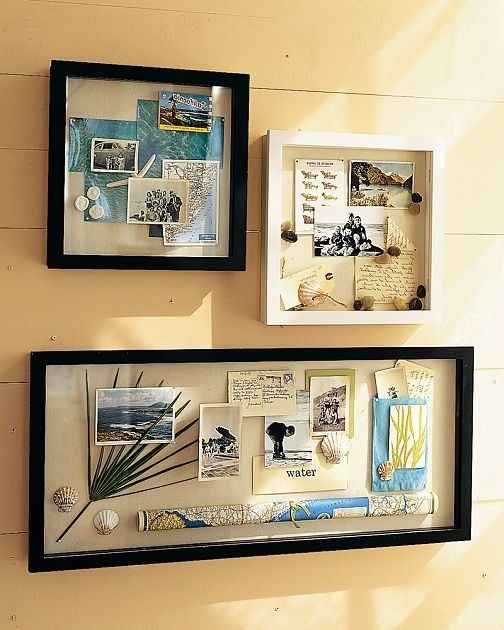
If you want to feature a graduation gift, baby shower gift, Valentine's Day; you can make a shadow box. You can actually place almost anything on a shadow box for you to preserve cherished collections; place your favorite collector's item toy car in a shadow box or some family pictures.

There are many simple and complex ways of making one; although in reality everything depends on you and how much time you want to invest in making it. That's why, here at Decorating Visita Casas; we bring you one of the most elegant options out there. It's the one we use most of the time; but the procedure can be moved to other materials that are more suited to what you would like.

The Magic Behind the Shadows

It is sad to think that objects with greater sentimental value than a person may have; sometimes they end up lost on the road. Many small details are devoured by dust; or they simply fall one day and break into a thousand pieces impossible to put together again. At first; when I first heard about a Shadow Box I asked myself:

"How can you take a person's valuable things, put them in a basket, and then give them back?"

Then they explained exactly the concept and I fell in love with it. I think the first Shadow Box I saw in my life was in my grandmother's house. Or maybe it was used in a Pixar animated film by one of its characters to protect the toys.

The fact is that you create a Shadow Box; Became for a long time one of my favorite hobbies and part-time jobs. Do you want to learn how to make a really special one? Well, take note!

Materials

To be able to build this elegant, simple Shadow Box that really protects the elements inside it and; which can easily be integrated into the decoration in a room, you will need the following:

A frame: Although it is about building a Shadow Box, it is not about doing it from scratch. A frame is really good optimized for this type of project.

Hot Glue: This is the tool you will need to put all of these pieces together.

Stickers: Not quite necessary, but it is always nice to have some.

Scissors: Too obvious?

Cardboard: Bring all those amazon boxes (thick foam also serves)

Choosing the Style for the Shadow Box

shadow box

shadow box

This is definitely the most important part when creating a Shadow Box, even more than the assembly itself; the creative process and the decision making of what will go on it, defines a lot about how it is exhibited.

If it is very heavy, then you will not be able to place it on the wall without risking a break in the bottom; everything could end up lying on the floor.

If the interior has organic components, then it definitely will not last for a lifetime; In fact you would have to change the organic components from time to time to keep the original concept.

If it is there to reinforce a decorative theme like Halloween or Christmas; then the way to integrate it into the final decoration is very important.

shadow box

And lastly, if you only want to preserve important things; it is crucial that the arrangement be beautiful, flashy. Otherwise you will be condemned to live in a corner where you will soon forget it. The ideal is that the looks of the visitors and your own will be diverted to it.

Sorting the Parts

We can classify the components of a shadow box into: internal, embellishers and external. Those that are intended to protect the important elements are external ones. The final decoration is the one that will go inside the box and; the trim elements are small details that complement the interior decoration.

It is important to decide at this point whether, the internal elements of the shadow box; Can be felt again easily or if you will completely seal the decoration.

If you are going to seal everything completely, then I recommend you include in the materials to use: a drill, a vacuum cleaner. I know it sounds strange, but; a fully sealed shadow box will retain much better organic elements or that used to be alive, if you extract the oxygen once armed.

How could you extract the oxygen to be completely empty? Well do not worry about doing a 100% perfect job, but if you want to achieve it perfectly; then you can buy one of those bags to pack vacuum clothes in the store.

Using the scissor, trim the area where the button is. Then use the drill to open a hole to the back or bottom of the shadow box; and using hot glue, paste the button well, and then use the vacuum to extract the oxygen.

Assembling the "Box"

Leaving aside the technique of vacuum packaging; Arming the shadow box using the materials described above is not a very difficult thing to do, but you must do it with patience.

First it starts by disarming the whole frame and you do not push anything!

Then, using the internal measurements of the frame; you must cut the pieces of cardboard, hard foam or you can even use wood like MDF or HDF.

The good thing is that the measurements will be dictated by the frame, always using the part where the back of the same.

Remember that we recommend using a frame of family photos for the economic ones they are; and because they offer the advantage of an elegant glass, in addition to an appearance oriented to the scenery.

The depth of a shadow box is determined by the number of internal elements you place in it; But 2 ½ '' is more than enough, so everything will look much more compact inside it.

Once you've cut the pieces that will add depth to your frame and turn it into a shadow box it's time to put it all together!

Assembling Everything

Use staples, glue, hot glue or even nails; It all depends on the final material with which you are doing your shadow box and if you want to keep things empty.

Start by joining the newly cut pieces so that you can integrate them to the back of the frame as if they were one.

Using ethyl alcohol and absorbent paper; Clean the glass very carefully on both sides.
Now comes the most delicate part of the job; remember that when adding the glue you should avoid spills at all costs so you do not stain the glass. Although, you can always clean it if it's necessary.

Uses hot glue for both glass and cut pieces; you can use any other super-efficient glue that is transparent if you wish.

Once you have assembled these two pieces in the frame; you can begin to create the scenery that you will exhibit inside your shadow box.

There are so many alternatives that we simply will not give you advice about it, listen to your creativity. The important thing now is to place enough hot glue on the edges of the "box" you made; remember to add the back of the frame.

When everything is already assembled, you will notice that the final result is much greater than the sum of its parts!

Final Details

Remember that there are a lot of things that you can use to make your own shadow box. You can even use scraps and turn it into something spectacular. All you need to have is the artistry to put things together to make each design go with the theme to make it look just perfect.

But when everything is armed you feel that something is missing; then you can buy stickers with the reason of your shadow box and paste them on the outside.

You'd be surprised what a witch or spider sticker can do in a Halloween shadow box. So do not be discouraged and send us pictures of your designs.

A perfect Decor

A shadow box is a perfect décor that you can place in your room and it just the best way you can feature your precious collections. This can also become a perfect gift that you can give your friends or your family. A shadow box can be used to create anything.

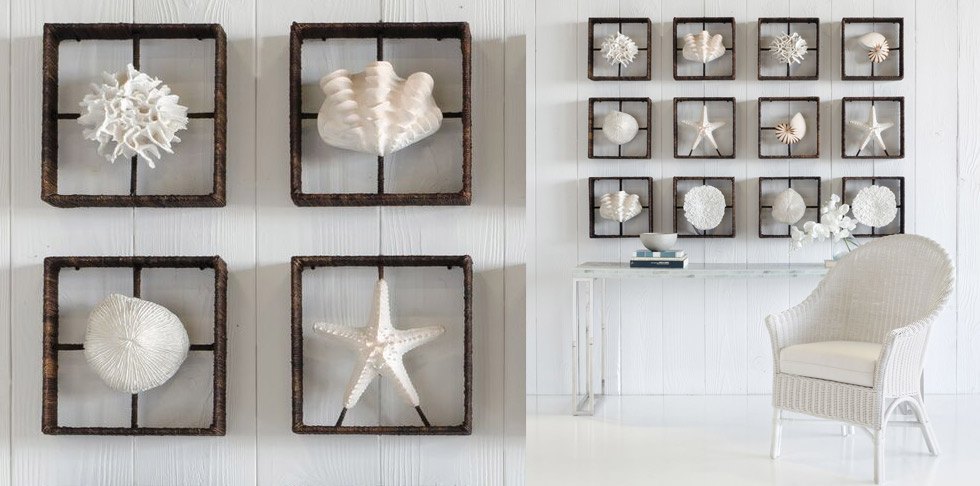
As for the materials, you can just use just anything to personalize it. You can make use of seashells, old coins, photographs, or even you baby’s first clothes can be placed on a shadow box. There are a numerous themes that you can use for your shadow box.

There could be a lot of decorations, memorable souvenirs from a friends wedding, a picture of you and your best friend or other special items that are left lying around the house with no specific place where you can cherish them. Thus a shadow box is a perfect place where you can place the precious memoirs.

In creating a shadow box, the first thing that you can do is plan out a theme for your design. If you want to feature a picture of a summer escapade, a Hawaiian theme may suit your shadow box. 

You can collect seashells, or paint it with bright summer colors or anything that you can associate with summer is best used to decorate your shadow box and you can give it to your friend who is with you on the picture or you can place it as a decoration in your room.

Read More
How tos

How to dry and display wildflowers

Displaying dried wildflowers is a creative way to decorate and you can get it right from your backyard. There are easy (not to mention budget-friendly) ways on how you can dry and displaying wildflowers.

Benefits of having wild flowers to decorate your home

Wildflower home décor will provide you with the chance to use nature in your own home. You will find information on how to grow wildflowers indoors and how to use these as house plants. In this article you'll find some tips and tricks on how to have beautiful wildflowers to decorate at home.

Wild flowers are great additions to any room. They bring a unique touch to any room and the beauty that they create is unparalleled! They are beautiful, and adding them to your home or office creates a natural touch and an interesting and soothing visual experience. Whether they are in vases or growing in the ground, the benefits of having wild flowers in your home are endless. Our blog covers some great benefits of having wild flowers to decorate your home, whether it be in your bedroom or living room.

One of the benefits of having wild flowers to decorate at home is one of the best ways of keeping the room fresh and relaxing. Not only is it very attractive, but it also gives off a welcoming and refreshing feel to the room. Also a bouquet of wildflowers can be placed anywhere in the house. They can be placed in a vase or basket. You can also take them outside and place them in the garden.

With a wide variety of flowers to choose from, you will never get bored with your home décor. When buying flowers for home décor, it is best to go for a large variety. This way you will not be limited by the amount of flowers that you can buy and you can always find something new to decorate your home with. You can choose the type of wildflower you want, or you can pick a combination of flowers to create a unique look.

Preserving Wildflowers for Your Home

Step one would have to be, of course, gathering your flowers and leaves. Bring scissors when you check out your backyard for grass, flowers and fallen tree leaves. Don’t forget to bring a container with water so the flowers won’t wilt. If you live in a nearby river, you can also find interesting plants growing around the bank. As much as possible, when scouring for plants, try to look for the “fresh-looking” flowers. These are the flowers with petals that haven’t been partly eaten by the caterpillars and other leaf-eating insects.
Don’t pick the flowers down to the roots. When cutting the stems, cut at an angle close to the bud. When you get them home, the drying process can begin. Perhaps the most famous method to dry flowers and leaves is to place them inside thick books. To protect the pages, place newspapers between the pages so the pigmentation from the flowers and leaves won’t stain. Another technique is the use of silica gel. These are the ones in packets that you can find in newly purchased bags and shoes but you can get silica gel at flower shops.

There are a number of ways to dry and display wildflowers:

Using an airtight (preferably plastic) container spread a layer of silica gel at the bottom. The size of the container will depend on the number of flowers you’re going to dry. Just use multiple containers if you’re going to dry a lot of flowers. Shape the gel into mounds. The gel will hold the stems. Place some silica gel on the petals as well. You might need to practice on this part especially if you have shaky hands. You don’t want to destroy the petals. Typical waiting will last about 3-5 days. In the same way that you’re careful with the placing of the silica gel, be twice as cautious when removing it. You can dry flowers using floral sprays or satin acrylic spray to ward of the negative effects of moisture on your flowers.

Another method is to air-dry the flowers. Keep a longer portion of the stems when cutting from the plant so you would be able to hang them. Choose a dark area because direct sunlight will wither the flowers. For smaller buds and leaves, you may use food dehydrators.

Once your flowers have dried, you can choose from a wide range of containers to put them on display. Choose from vases, frames, paste them on boxes and present them as gifts. Flowers, even when dried, can be arranged. Your arrangement could be depending on the petal shapes or the color of the flower. Just like all the methods of decorating, you can experiment to your heart’s content. To get best results, just follow these easy steps on how to preserve wildflowers.

Read More
How tos

7 obvious ideas for choosing a lamp for your room

There are many kinds of lamps to choose from. You’ll need to decide on the one that suits your room best. For example, if you have a small room, you can choose a desk lamp that has a very compact design. On the other hand, if you have a bigger room, you may want a lamp that has a more spacious design. The same applies to lampshades and light fittings.

How much lighting do we really need?

You want something that has a lot of light and provides the necessary illumination. This is where task lamps come in handy. They are compact, easy to use, don't have too much light and can be placed anywhere in your room.

The first thing to consider is what kind of lighting you want. You may want ambient lighting for a more relaxing environment. Or you may want bright, powerful lighting to help you study or work.

How to choose the best lamp for you?

The following factors should guide you in selecting the best desk lamp for you:

  • - Brightness: You want a lamp that is bright enough to light your room.
  • - Style: A desk lamp is the focal point of a room so you need a style that fits your decor.
  • - Price: You need to pay attention to how much your new lamp will cost.

Furthermore, you need a lamp that fits your budget.

  • - Shape and size: How big is your desk? Will you need a lamp that is adjustable or portable? Is a desk lamp too heavy?
  • - Color: Choose a lamp color that blends with the color of your walls.
  • - Lighting effects: Select a desk lamp with good lighting effects. You can buy one with various light effects or adjust them using a dimmer switch.
  • - Light intensity: You need to select a desk lamp that has sufficient lighting. Some lamps are very bright. If you use a desk lamp frequently, you may want to consider buying one that will last long.

Additional elements to choose a suitable lamp

The following points should be considered when choosing a desk lamp:

  • Choose a desk lamp that matches the style of your room. A desk lamp can be the center of your room's decor.
  • Select a desk lamp that suits your needs. Do you need one with a dimmer switch? Are you comfortable with the brightness of the lamp? How will it affect your eyes? Do you need a lamp with a color temperature adjustment?
  • Consider the type of work that you do. Does the lamp need to be portable? Are you working on your laptop? What size desk will you have?

Desk lamps shapes and sizes

Desk lamps have so many shapes and sizes; there are a variety of desk lamps to choose from actually. Some desk lamps have this traditional look, some have oriental touches in it while others offer contemporary flavor. Desk lights that have exposed lamps tend to produce distracting glares which also causes more harm than actually helping you while you do your work on the desk. A better choice is that of frosted globes produce softer light which more preferred and pleasant so you could productively do your work without any distractions.

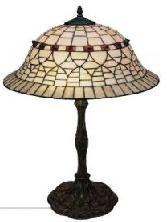
Table lampChoosing one of them among the tons of choices available is a personal thing that would give very great touches to any personal room or office workspace may it be public or private. Lamps have different varieties which range from residential to office lamps.

Stone lamps

Other examples of lamps include alabaster stone lamps, art deco lamps, bankers desk lamps, contemporary lamps, craftsman lamps, crystal lamps, functional lamps, iron & rustic lamps, pacific rim lamps, swing arm lamps, themed and juvenile lamps, and traditional lamps.

These desk lamps are more than just for lighting up spaces or just for work purposes. Some have cool designs that could go well with some furniture. They also have different themes, light colors and stand designs that could add artsy touch to your personal room, or work space.

Conclusions

The best lighting for a space can make or break the mood of an entire room. Whether you are decorating a small apartment, or designing a large living space for a family, choosing the right light is crucial.

  1. I have never seen a light that I thought was perfect for every situation. But I have bought plenty of lamps that didn't work out well. What to look for in a light:
  2. The light has to be easy to operate. A lot of lights are very difficult to operate.
  3. Make sure that the light is high quality and sturdy.
  4. Lamps are not only beautiful but they provide an important part of the environment. So when it comes to choosing a lamp, be sure to do the following:
  5. Pick the right height for the space you have to work.
  6. Choose a lamp shade that works with the lamp.
  7. Look at the color of the lamp.
Read More
Surfactant
How tos

How to Remove Surfactant Leach | Decoraring Visita Casas

The leaching of the surfactant causes stains, and glossy brown spots that appear on the outside of a latex paint; surfactants are not necessary in the manufacture of paints, they evaporate and they do not belong to the ingredients of the painting. They do not cause any harm so you do not have to worry too much. Leaching often occurs during cool weather conditions or the day before the weather cools.

However, just because there is no harm to health; it does not mean that they are visually pleasing; in fact, surfactant leaching is easily interpreted as a house with “diseased” walls. It is important to know how to treat them efficiently to prevent them from appearing regularly; so here are some tips so you can eliminate them completely, both inside and outside.

But, why do they appear?

[one_half_first]The first thing we must do to solve this problem, is to understand it. Spotting occurs when moisture condenses into the new paint and extracts the surfactant quickly. This can be avoided when taking the proper precautions when painting. Most of the time this leaching condition cannot be avoided especially when you live in a cool and humid place. Sometimes, there is nothing you can do when you know you’ve tried everything you need to do to avoid it.[/one_half_first][one_half_last][/one_half_last]

So the best way to deal with them is to know that they regularly appear; in any case, it is good to keep a reserve of paint constantly, the walls always need finishing touches as they are always stained.

Surfactant

How to treat the problem on interior walls?

The walls inside the house that suffer from surfactant leaching are the ones that present the greatest difficulty; when there is no good air circulation, the problem can be and will be recurrent if a definitive solution is not taken.

To get to that point, the first thing to do is eliminate all trace of surfactant leaching; this is achieved with the following materials:

  • A cloth
  • Bleach
  • Ammoniac

Depending on the color of your wall, you may find that bleach may be more effective than ammoniac; but in any case, you must moisten the cloth or rag with enough liquid.

Another option is to fill a spray bottle with bleach or ammoniac; after having moistened the entire area affected by surfactant leaching and its adjacency, begins to rub with the rag.

This way, you will see how the stains disappear completely. Remember that you are fighting a living organism, so you need to “eliminate” it and also prevent it from reproducing.

The problem of the walls in the interior is that the conditions of the environment lend themselves so that the fungus regenerates; so it is necessary to take some forecasts when repainting.

These are some helpful tips you can do to prevent surfactant leach from appearing:

  1. Do not paint if weather conditions are below 50 degrees or during late afternoon.
  2. If blotching and stings appear you can rinse it with a garden hose.
  3. Most of the time weathering removes the stain itself for a couple of months.
  4. Avoid painting during late afternoon.
  5. Do not paint during spring season and fall.
  6. Do not paint during rainy days.

Use oil base paints if you live in a humid area.

The type of painting will be your greatest ally to prevent surfactant leaching from appearing again; you can even find paint that fights the formation of this horrible fungus.

Also, remember that:

  1. Leaching should not affect the durability of the paint.
  2. A dish detergent and sponge can also be used.

The spotting happens when humidity condenses on the new paint and draws the surfactant quickly. This can be avoided when you take proper precautions when applying paint.

Another great alternative and that could even help you create another decorative concept in your home is to use lime paint. Thanks to this old painting, the problem of surfactant leaching will not be something that you have to worry about.

It is a great alternative to give your house a more vintage look and you do not have to worry about the color; using natural pigments you can get practically any color of your preference.

Removing surfactant leaching from exterior walls

The outside can be a very complicated area, especially when surfactant leaching occurs due to natural causes at a certain time of the year. It could be said that the same climate helps to eliminate it; but if he did it in its entirety, then he would not appear again.

The first solution is to use water under pressure on the surface, this will eliminate traces of surfactant leaching almost immediately; the next thing is to apply the paint. Remember that the paint must be applied in climatic conditions that allow its correct curing; otherwise you will suffer the same problem again and again.

What do I do when I do not want to paint the outside wall?

Even in a brick wall or especially in the small stairs that precede the main door, this kind of “enemy” can be formed. Obviously, not all exterior walls can simply be painted. For this there is a protective chemical that will prevent the new formation of surfactant leaching without altering the color.

This solution is ideal to apply when you have a brick wall or something similar. During the winter especially you will notice how the moisture seems to expand through all the joints and even the bricks.

The first step is to eliminate that accumulation of saltpeter, the most efficient way is using a steel bristle brush; with the scrape the entire affected area until it releases the remains that cause the spots.

Once all the white stain has been removed, it is washed with running water and allowed to dry the wall. Only then must apply the protective anti-humidity primer; does not have color, so the aesthetics of the wall will be protected.

Other reasons why surfactant leaching is formed in the exterior

Many times the reasons are given for the manufacture of the house. Drainage as well as irrigation systems can cause serious moisture problems; the same can not only be seen in the exterior but in the interior.

We as Decorating Visita Casas had to deal with the surfactant leaching of a very unique wall. The inclination of the soil caused that the water both of the drainage of the roof of the house like of the system of irrigation; will stagnate in a corner. Little by little the humidity was climbing inside the wall to damage the image of the same on the outside; while inside the green mushroom was produced.

The process to eliminate it consisted of several stages:

  1. Remove all badly adhered wall debris
  2. Use a wire bristle brush to remove the surfactant leaching
  3. Apply waterproof anti-leaching protection
  4. Repaint. But for this we had to wait for the most suitable climatic conditions.

The customer was surprised because we did not move the drainage nor did we suggest changing the position of the irrigation system; it simply was not necessary. So when you want to do this kind of repairs, inform yourself first, thus avoiding overhead on the price for unnecessary works.

Also keep in mind that this problem will arise most of the time on the walls facing north; that is to say, those walls that almost do not receive sun during the day.

References

4 Ways to Clean Walls

How To Wash Walls

Home Improvements : Tricks to Cleaning Painted Walls – YouTube

Read More
Photographs
How tos, ideas, walls

Displaying Photographs | Decorating Visita Casas

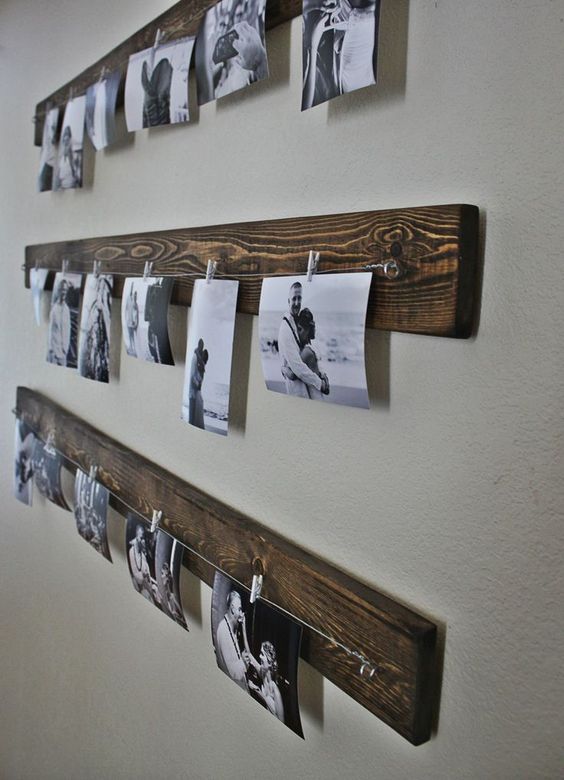
At present, the culture of photography is something that has been much distorted. Although the photographs can be seen anywhere in the house; the portability of the devices with which you can take a photo, has made us stop appreciating them so much. Black and white photos nowadays are actually more expressive than those with superbly gorgeous colors. Displaying photographs for decorating is better than without a photograph without a frame.

It is true that the photo album is something beautiful that used to be in every house; however, today you may have some pictures in the cloud. If you love the pictures, you love to decorate and you want to explore a new horizon of possibilities with a minimalist, modern or vintage style you have arrived at the article indicated! Get comfortable and talk about the wonderful decorative photographs.

Displaying Photographs like a Designer

[one_half_first]Do you remember when the visitors came to the house and your grandmother or your mother were looking for your photo album to show the family story? How did we get from that to the cell phone? Photographs on the cell phone screen do not generate that level of privacy that physically achieves a photograph in front of us.[/one_half_first][one_half_last][/one_half_last]

However, it is not about returning to the age of the grandmothers and begin to fill an album every year again; is more about the artistic aspect and treasure the most shocking moments.

So, although the ideas that we are going to give you below are the techniques that we at Decorating Visita Casas use; do not let your creativity be limited by our vision. Use this article as inspiration, not as a set of rules to follow.

And we’ll start with grayscale photographs in a minimalist setting. For combining those elements; we have as a result the classic style, a way of displaying the photographs that transports us to an ancient time: that is why black and white photographs are used.

But there’s a lot more behind all of this, so we’d better look into it thoroughly, would you say?

The magic of black and white photographs

The artistic aspect of the black and white photographs is given because indirectly we associate them with an old event; beyond the inclusion of color in the screens.

However, when combined with the image quality offered by today’s lenses; we get amazing results that escape the imagination.

Another great detail of black and white photographs is that they are perfect for hiding imperfections. Many professional photographers use grayscale for those photographs in which design programs would ruin the concept of natural photography.

Instead of editing the imperfections, they cover them by removing the pigments; the defects of the skin do not disappear from view, but decrease considerably and a more “real” appearance is obtained.

Photographs

A group of black and white photographs will always be a topic of conversation; Best of all is that you do not have to limit yourself to a single theme.

You can use photographs of many events with intimate approaches and not all have to be taken by you. But that is not the best part, the best begins when we combine everything with the minimalist style do you know how to do it?

Combining the minimalist style with photographs to create the classic style

Photographs

The frame makes the photograph more attractive and attention calling; especially when the frame is elegantly stylish in appearance. It is way better when the photograph and the frame blend to give an explicit appearance for the people who look at them.

Photographs can be seen anywhere in the house. But mostly they are in the living room to be displayed and be seen by people. Some photographs are even placed in the bathroom for more life in that room. It is better to have a colored wall when decorating black and white photos with frame.

But the wall can still be in white and the frames come in black or vice versa. Although sometimes a white wall makes it seem dull. With this kind of technique; the photos you show will be more focused and given more attention by the people that sees them.

In decorating photographs it has the capability to be noticeable depends no more on its ability to speak to the person rather than on its own interesting appearance image.

Without a doubt, striking black and white photography does not draw out with its play of colors. At this point, secure attention to masterpiece, lighting, point of view and the context are important.

This is the kind of shot that you have when it comes to black and white frames and photographs.

And do not forget that the frames must be thin and instead of glass as a protector you can use acrylic; these elements are an essential part of the minimalist.

You can also complement the photo gallery display with LED lights dedicated to making them the center of attention.

The new place to place photos

Photographs

Our clients often ask us what other place besides the living room and the wall of the stairs is good for putting pictures.

For now a tendency is emerging that seeks to somehow rescue or maintain the values: placing photographs in the children’s room.

The photos on Facebook or on the cell phone are not used to treasure the memories is something that you must understand; Do not let yourself be devoured by the technological age and do not let your children devour.

A photograph of when they went to the zoo or their birthdays are very special memories to have them in IG; Incorporating them into the decoration of their room makes them more than just souvenirs or trophies.

They are a window to the happiest moments of your life and something very intimate that only those people who have the privilege of entering your room will see.

You will put the first pieces of the collection, you will see how your child is responsible for making it grow.

Wallpapers photos?

Yes and No. It is circumstantial. Many times it is not only the photograph but the background in which they are placed.

When a long hallway in your house which, despite having decorative wall lamps and several photographs; Feels empty. Then the best solution may be wallpaper.

And when the wallpaper of a room seems to devour you or very overwhelming every time you walk next to it; then you may need photos.

It is necessary to compensate for the lack of simplicity or the excess of opulence. What scenario do you face in this situation?

I recommend that you use small pictures or simple resolution so you can rotate them easily without having to replace the frame.

And something that can help you a lot! Is to use portraits with long forms; Even if you put a small picture inside. The way the photographs are displayed can change completely when the frame also assumes part of the protagonist.

Chaos Organized

Photographs

The way of distributing the frames does not always have to be the traditional one; Art evolves with us and all those inflexible norms now no longer exist.

The best way to organize your photo presentation is by cutting patterns with the shapes of the frames you will use.

Once you have all the pieces, which you can create using any type of paper and a scissors; then you can measure the wall or simply “arm the decor” superficially.

Imagine that you are going to build a wall with many bricks of different sizes and shapes so something much more fun awaits you when you decide to put together your own exhibition of photographs!

References

Take a Picture: Decorating with Photographs

How to Decorate with Photographs

5 Mistakes Your Making Decorating With Photography

Picture Perfect: Decorate With Black And White Photographs

Read More
Purifier
How tos

The Secrets of Best Home Water Purifiers

Water, source of life, health and well-being. But how much is it costing us to keep this natural resource in good condition? With so many technological advances; and still we do not give with what allows us to supply potable water to the world. At least there are what famous water purifiers. And thanks to them enough water can be made available in our homes.

The history of water purifiers is ancient, as are the Egyptians. There for 4000 and 2000 years before Christ. Since then it has boiled, allowed to evaporate in the sun; introduced metals such as silver or copper or just let it pass through the sand. These processes are very simple and in some parts of the world they are still used. Do you want to know more?

Let’s talk about purification

[one_half_first]There are several techniques that have been used for thousands of years; from then until now the methods change but the bases are still maintained. The most common to be used in our homes are boiling and filter. They are almost free; or at least everyone can apply them. But we have to know the basics before going further; so let’s start with the most basic of those both.[/one_half_first][one_half_last][/one_half_last]

The Boiling

It consistsin leaving to the fire the source of water with the purpose of killing the bacteria and parasites that are in there. This process has been the most common in all households; and over time has been perfected, until pasteurization.

Purifiers

It receives its name from the scientist and chemist Luis Pasteur; who was looking for a way of partial sterilization of liquids for consumption.

It is not sought to completely change the chemo composition of the liquids that are submitted to it, on the contrary; it only seeks to eliminate what could well do damage to our body. But leaving others, since there are microorganisms that are necessary for the proper functioning of our body; and are found naturally in the water we consume.

Filtration

The filtration consists in passing the liquids through different materials sufficiently porous to allow it; but not so much as to let drain some microorganism that could be harmful.

These materials, usually consisting of pieces of clay, and although they allow the passage of water in small quantities; is effective enough to provide the vital liquid for human consumption.

Some types of filters use active compounds such as carbon. Which are adhered to unwanted compounds such as dust and certain chemicals present after the source of water has been treated; and also removes the hodor that could be generated in water.

In the last century began to use different chemical agents for the purification of water intended for households; one of these compounds is chlorine.

It is very common to hear things like letting the water stand for a few minutes before consuming it, and that is true, sometimes. As the chlorine with which water is treated evaporates little by little until it is imperceptible to taste.

Advantages of water purifiers.

How many times have you seen people take it directly from the tap? And how many times have you done it without knowing if you can really do it?

Well, I will tell you that it is not very advisable; because usually people who drink water directly from the tap do it because it has a filtration system connected directly to that faucet or to the entire piping system in your home.

Water purifiers are always a must have in your home. You should be aware that not all the water that passes through a pipe; and is supposed to be for human consumption is perfectly treated.

Stomach diseases are very common in countries where water treatment is poor; and does not provide a true sense of quality. In third world countries, or developing countries, unfortunately; contaminate their own sources of drinking water.

Coming from inland lakes to which nearby industries throw their wastes; thus causing intoxication on more than one occasion who consumes it. Even using filtering and cleaning methods, water loses its purity.

Purifier

However, when the society handles that little detail and begins to rationally use the water it consumes; you, yourself can account for the advantages you will have in the long term, and it is not only the horror of money. There is something much more important, less medical treatments for stomach upsets.

How should you maintain the water purifiers in your home?

Depending on the type of purifier you use in your home; there will be different methods, ranging from cleaning to replacing it. The stones that come in some filters can be washed to remove any dirt that is trapped in its surface; while others require to be replaced by new ones.

And is that the active carbon that some of these possess lose that ability to absorb impurities and chemicals. That’s why you should be very careful to check them regularly to check their status. Each filter has its instructions; so be sure to follow it correctly.

Home methods of water purification.

Now we will mention some home methods to give that extra touch of water purification in your home.

Lemon

Purifier

Something as simple as lemon juice can help. A few drops for a certain amount of water but do not completely disinfect the water, help kill bacteria as the cause of cholera.

You can let it set for a few minutes and leave it directly in the sun after adding lemon drops.

Chlorine

Purifiers
Purifiers

While chlorine may be helpful, you should know how to apply it. If you do not add enough it will not kill the bacteria that are in the water, and if you apply too much its flavor will be horrible.

An excessive amount of chlorine is dangerous for the body, so with just 2 drops per liter of water and then let stand for at least 30 minutes is enough to evaporate excess chlorine and you can consume the water.

Fabrics

You can remove certain impurities from the water using only a piece of cloth; if it is thick enough, the earth or mud will be trapped in it.

Put it on a container, hold it with a piece of string or tape and pour the water. If you use a white cloth will be better, because you will realize that the water you thought was clean really has a lot, a lot of dirt.

Settlement

Settlement is to leave the water at rest for some time so that the solid waste it may contain falls to the bottom.

This system is basically implemented in water tanks, both aerial and underground, where it remains quite enough for this process to happen.

Take a container, fill it with water and leave it for a long time at rest. You will see how the earth is deposited to the bottom of the container.

You must be aware that all these methods of purification, homemade or not provide great help to your health and that of your family, so always remember them.

References

Water Services How Can We Take Care of Water?

Why Care About Water? – National Geographic Video

Clean Drinking Water

The Importance of Caring for and Respecting our Water Supply

Read More
How tos

How to install a decorative wall paneling

In the interior design, colors, lighting and textures make up the triangle that will give life to the decoration. And many times the answer is not a new color for the wall or a window. Sometimes, the need to improve space is only achieved through texture; and it is for this reason that today we will talk about decorative wall paneling.

Because if it is to add texture and a three-dimensional effect taking advantage even more the color that we have chosen for our furniture and walls; I assure you that one of these panels is the answer to your needs, join us to install it!

The Need for a Decorative Wall Panel

wall paneling

[one_half_first]Too many times people have come to Decorating Visita Casas expressing their discontent regarding a wall in their home; in less than a year they have already tried to decorate it with three different colors without success. If you are suffering a similar situation in which the pictures, large mirrors and sets of colors; they simply are not helping you to achieve an appearance on that wall as much as you want.[/one_half_first][one_half_last][/one_half_last]

Do not keep insisting on those methods; the same Einstein said it:

You cannot expect to achieve different results if you always do the same

When the situation reaches such extremes, the key is to reinvent the wall itself. No, you do not need to demolish it, here we are going to give you two alternatives to “make” a new wall with current elements of interior decoration.

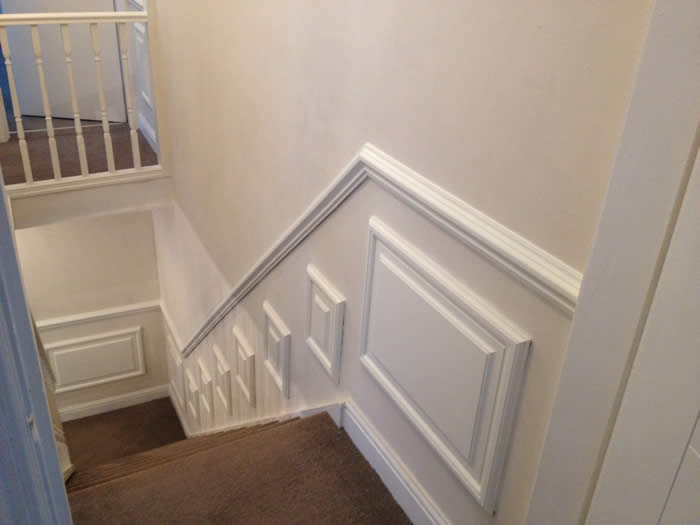
Decorative wall panels. They are a vertical shaped concept of decoration with laminate flooring. That is, instead of installing a floor on the floor we already have; this time we will install a new wall on the current one.

The good thing is that the alternatives that this method offers us are full of wonderful surprises; which is just what you need if you are going through a creative depression because of your wall.

Here we will talk about the decorative lining with PVC slabs and the decorative lining with slate stone. So take note and forget about that crazy idea of buying so much paint; let’s reverse your budget on something you really love and it will be worth it.

Slate stone for interior walls?

wall paneling

That’s right, using the slate stone only for the front of the house or for the garden is already a thing of the past. But you need not be scared, the slate stone for interiors is different; the steps to install it are also different.

That is why we will give you several tips so you can install it yourself; because the best thing of all this project of renovation of your wall, is that it is a DIY project of a single day.

Many times paint takes two or even three days, so rejoice; you just need hard work and a day of your weekend to enjoy a completely renovated wall. So, do we start by assembling this type of slab?

Materials to install a decorative slate stone wall paneling

  • Measuring tape
  • Slate Stone Wall Panels
  • Mason’s water level
  • Mix to stick Slate
  • Mason jigsaw trowel
  • Adherence promoter
  • Rubber mallet

Of course you should not overlook the security features. You may need a screwdriver, paper, pencil, a calculator; much desire to enjoy your new wall as soon as possible!

Wall Paneling
Wall Paneling

The first thing to do, will be to calculate the square meters of the wall measuring both the width and the height.

Then go to your favorite store where you can get the Slate Stone and once you have chosen the design that you will use to decorate the wall; Check carefully how many square meters of slabs the box contains.

That way you will know the number of boxes you should buy so you do not over material and for that much less lack.

Unlike laminate flooring, stone slabs do not need to be a long period of time in the room before being installed; that is why this project will take a day or less.

Installing the slate stone wall paneling

After clearing the work area, you should make sure you have removed the plugs and switches to work really efficiently.

The correct thing is that, if you must remove some element of your electrical installation; first remove the current from the house by lowering the fuses.

The next thing is to make a mark on the wall about 8 “from the ground; There will be located our line of slab guides, why 8 ” exactly?

Because it is a multiple of 5 and helps to better distribute the slabs as most of the thickness of them is a multiple of 5.

Once you have marked on the wall then just subtract the mixture and begin to fix the tiles. Some blends come with very specific instructions, the same with slabs; it is good to check if you are working with any particular case.

wall paneling
wall paneling

No, you do not need to hit the wall until it opens small holes in it. Although you are going to perform a very similar work, not to damage the wall on which you will place the coating; it is best to use an adhesion promoting component when preparing the blend.

You could place this element as an option, but the other alternative is to take a hammer and a chisel to open many holes in the wall. For that reason, just buy the adhesion promoter to prepare the mixture with it.

The thickness of layer of mixture that you must apply in the slabs will depend very much of the thickness of the same ones; in such cases it is best to refer to the manufacturer’s instructions. But what is important and nobody tells you; is that you should place the lines following the same technique as if you were building a brick wall.

Finally, and that is optional; you can apply a product dedicated to this type of slabs to give it shine and provide protection. Although it will not be under direct sunlight and other climatic factors; do not forget the children.

Installing a “wood” decorative panel

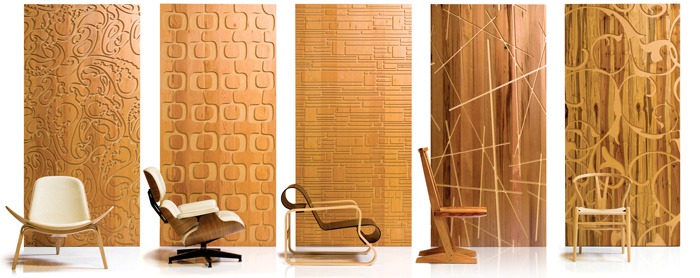
The HDF is a beautiful material that gives our floors a beautiful and warm appearance. However, it is impressive how the technology of laminate floors has moved to the walls; so efficiently.

But this time not in the form of slabs of wood, although the appearance may be practically the same; the currently recommended wall cladding is PVC.

A decorative PVC wall covering can easily give our room a green shade, a more life-like appearance or magically disappearing imperfections we both hate.

Wall Paneling

In addition, the decorative PVC coating is perfect for both kitchen and bathroom. It is a thermal and acoustic insulation material and is not susceptible to mold.

Its installation is very simple, just follow the indications given by the manufacturer since each of them has its own nomenclature. However, here are some tips that will be very useful to you; you know, what nobody tells you, we here at Decorating Visit Houses we tell you.

  • In order to guarantee a stable coating, the distance to which the screws of the fixing profiles must be located should not exceed 24 ”
  • Premium PVC sheeting already comes with glue on them and can be fixed directly to the wall without the need for screwed profiles
  • Even in bathrooms, it is necessary that the walls are completely dry before placing the coating; although the material does not allow the water to stagnate or prone to bacterial growth once it is installed. It is necessary during the installation that the condition of the wall is optimal.
  • Although indicated for walls, you can also use these panels on the ceiling for a uniform finish. They are great for small dedicated closets or bathrooms.

Lining with decorative wood panels

Wall Paneling
Wall Paneling

That’s right, you can also use HDF panels for laminate flooring; however, in this case do not do the coating in a place where they are exposed to a lot of water.

Its installation remains very similar to the one made on the floor. But you will need fixing panels and even many times a mesh; everything will depend on your type of wall.

This last method is the most tedious, but remember this; for every square meter you need about 30 minutes while you adjust. Then you can do the job in five minutes.

Practice makes the master, do not forget!

References

PVC Wall Tiles – Decorative Wall Tiles – Wall Decor

3D Wall Panels | Interior Wall Paneling | Textured Wall Treatments

Accent Walls | Decorative Wall Panels to Update Any Room

Best Decorative Wall Panel Design Ideas & Remodel Pictures

Read More
baby stuffs
How tos

How to organize all those baby stuffs and toys

One of the most overwhelming moments when my daughter turned 2; was to realize a reality: she had more things than me. The amount of baby things like clothes, shoes, toys, diapers, drawings, baby stuffs all in general; the house was 64% she, and the rest of us.

I realized that I had to do something quick or the things of the baby were going to end up burying us; was in the phase of controlled disorder the next step after that point was nothing more than uncontrolled chaos. If you are having trouble handling all of your baby’s things and you feel that the mess will soon get out of hand; then you came to the right article to solve your problem.

Stopping the avalanche of baby stuffs

baby stuffs

[one_half_first]I’m going to give you one of the most valuable tips I’ve ever had in my life and that has to do with babies: never underestimate the speed at which babies grow. And that’s one of the main reasons why we accumulate so much of the baby stuffs. With much enthusiasm people give us gifts and we buy and buy more accessories; clothes, shoes and toys of all kinds. The problem happens when we realize that, after putting on those clothes that we both loved; the next time we try to put it on, it does not fit![/one_half_first][one_half_last][/one_half_last]

Then we are faced with a dilemma, should we buy just the necessary because obviously soon nothing of that clothing will remain; or should we give vent to our imagination and credit card?

It is always good to have choices, baby clothing can be inherited from one generation to another or donated. But not to suffer a chaotic collapse of so many baby things; it is good that we maintain an organization from the first moment.

So let’s analyze the following elements, in every house where there is a baby there must be this; but in addition to naming them, we will tell you how to make the most of them to have everything well organized.

A cabinet with many drawers

baby stuffs

One of the most important pieces in the decoration of the baby’s room, not only because it adds aesthetic and that soft touch to the room; But because its functionality is as crucial as that of the crib.

In addition, over the years a cabinet with many drawers can become an excellent ally for the child and later for a teenager.

But how could you make the most of furniture with drawers? For the secret is knowing how to choose very well; always thinking about the future.

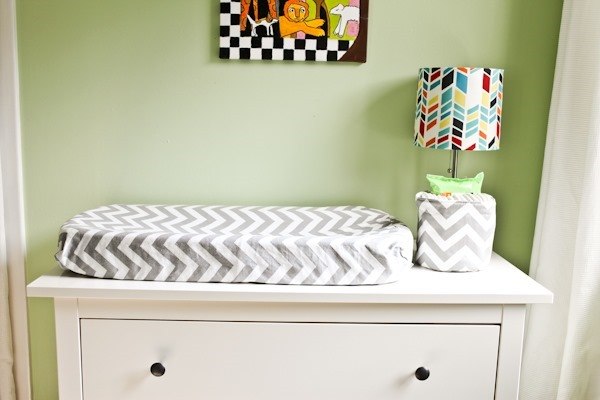
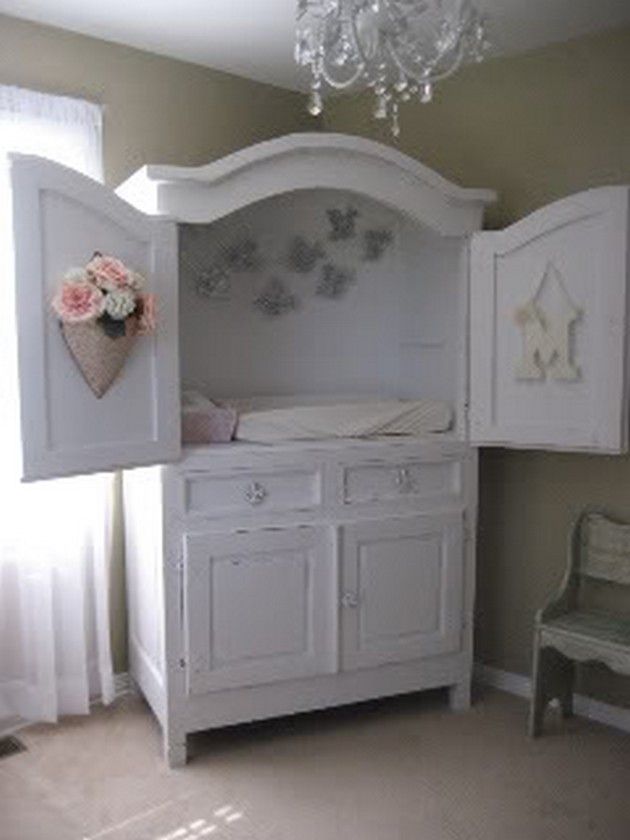
That is why in my opinion the best piece of furniture with drawers that you can add to the baby’s room is the one that can serve as a changing table.

baby stuffs

A spacious space at the top of the cabinet with drawers means that you will not only save money; but you can turn that same piece of furniture into an excellent place to put the toys.

And the best of all is;  that the same piece of furniture can be used by your baby as a hairstylist, even if it is a boy, teach him to take advantage of that space at the top.

If you have a girl then you will have no problem convincing him to add a mirror to the top of the furniture and buy a matching chair with the moldings of the furniture.

No matter if it is metal or wood, the important thing is that it has an average height similar to the island of your kitchen; so you can change the baby comfortably and you will have all the diapers at hand.

Diapers!

One of the biggest reserves you will ever get in your life; it is better always to have them in the drawers ready to be used and; always remember to place the furniture with drawers relatively close to the crib.

Many times you will have to change the sleeping baby. So I do not recommend keeping the diaper reserve in the lower drawers, but in the first or second.

Following this simple technique, you will be able to organize absolutely all the clothes of the baby, your child and later your son and adolescent. Everything from a simple piece of furniture bought intelligently.

Organizing the toys

I have discovered a concept that may not attract much attention. It is true that applying it in all parts of the house is not the most ideal, but a perfect place to implement it is in the baby’s room.

I mean the modular decor.

Just as the babies’ current toys “transform” as they grow to adapt to them; the same goes for decoration.

Many mothers and fathers have come together and thanks to all of them we now have many modular decor ideas. An interactive decoration whose elements remain invisible and only when they are needed come to light.

baby stuffs

It is similar to minimalist decor; only that in truth the function of the modular decoration is not to have just what is necessary, but to have everything but stored in such a way that it seems that there was nothing.

It is very important to teach our children from childhood to keep all their toys after using them; but you must also respect his/her decision to always have a toy or a group of specific toys on hand.

So the first thing that you must have to be able to organize the toys is a trunk.

Classic toy trunk taken to another level!

baby stuffs

The trunk is not very pleasant for the children because in it the toys mix, look disorderly and even seem to suffer. But the concept of treasure chest (in this case toys) is very attractive.

How could you work on this element so that your child respects and uses it? Well, making it bigger! Distributing it in a better way! And that’s where the concept of modular decoration comes in.

baby stuffs

A decoration that your child can modify according to their tastes or mood and still you can maintain order.

Instead of having a large trunk for all toys, take advantage of one wall of the room and create a large set of drawers decorated with your child’s favorite figures. And that each drawer is intended for a type of toys.

I ran with the luck that my baby loves LEGOS, so all this modular shelf takes the LEGO concept. She has fun arming and disarming her “toy trunk” but she already knows that the yellow drawer is for the dolls.

Take advantage of as much space as possible

v

Surely there will be toys or elements that will be only decorative, for those cases; the best thing you can do is take advantage of the height of the walls in the room.

But heads up!

I recommend that you do not place on high floating shelves or anywhere your child does not reach with his hands; fragile toys or elements that could be damaged if they hit the ground from that height.

That is why it is good to reserve those elements of height for stuffed animals.

Last but not least, teach he/she to donate!

The act of giving someone is one of the most wonderful ways to cultivate the emotional intelligence of our children. Teach him to let go of material things and give them to those who have less possibilities or resources than he.

To never be materialistic. But do not force him to do it, just plan the possibility that to buy a new toy, you need to let others go.

And if you have doubts about how you could organize the rest of things, then let me know to bring you more advice; This time on how to store the items that go inside the diaper.

References

Baby Nursery Furniture – Babies”R”Us

17 Best ideas about Nursery Furniture on Pinterest

Baby Gear, Baby Furniture Sets & Baby Room Decor

Read More
How tos

[Guide] How to Make a Kid’s Theme Bedroom

Remember when you were just a kid, you really want to have that pink colored room with your favorite cartoon characters on your cabinets? Every kid dreams of a wonderful bedroom full of warm and cuddly pillows and their favorite toys scatted all over the room. Other kids want Paris furniture, crafts and decorating that would create a more mature look as a theme for their room. Every kid wants to have their dream bedroom where they spend sleeping nights or play with their doll playmates.

In putting a theme on your kid’s bedroom, you don’t need to spend so much or throw away existing items in the room. All you need is a good planning on how to make your kids theme bedroom. The first thing you should do is to ask your kid what theme they want to have for their room. Some little girls want a pink room with cabinets for their dolls and teacup sets while the cute little boys want their sports items such as their baseball bats and gloves within their reach. Other kids want it to have their little fairyland where they could sleep and play.

Usually, you don’t need to have a major make over for your room unless you have the budget or time for it. You don’t even need a professional decorator that would cost you a lot of money. Survey the room that your kids have right now. If you are not satisfied with the color of the room, you could add better wallpaper that would suit your kid’s personality. Arrange the beds and the tables in such a way that the space is more utilized. You could use a theme that matches so that the look of the room would be harmonious.

You can also use matching colors on the sheets and pillow cases. You can also put more toys in his bed and even hanging curtains and decorative fish nets above the bed because it adds more personal touches on the room. You could also put framed pictures of family and friends on the wall that he really likes. This would remind him of his childhood and happy times together. A nice clock would also be added to the theme so that he would be able to see the time or learn how to read one.

Now that you have the dream room for your kid, the problem is he might want to stay in his room most of the time. Just kidding! Making a kid’s theme bedroom is really easy. You don’t need to spend a lot for a kid’s theme bedroom. Remember that a kids’ bedroom is important for their well being.

Creative Idea: Design Your Kid’s Bedroom with a Theme

One of the things that you can do for your home is to design your kid’s bedroom with a theme. Sounds like a room make-over right? I know you are thinking of expenses and effort and many other problems. But remember this; having a room make over could be inexpensive. You don’t need to hire a professional decorator that would cost you an arm and leg. Yes, you need to exert an effort but this could be fun and enjoyable if you have the right perspective. After all, you are doing this for your little princess.

How to design your kid’s bedroom with a twist? Your girl would surely appreciate if you put a theme into it. Theme varies depending on their likes and favorites. The theme would be your guide on what to do with regard to the decors and designs. Little girls love Princess Room Theme because they feel that they are little princesses in their own bedroom. Use a little princess furniture, crafts and decorating and voila, you’ll feel that everything is in its right place. This method is the easiest way to start changes for the room.

Usually, the start of designing the room is the hardest especially if you do not hire a professional decorator. But for sure, you can do it very well especially if you put your heart and focus into it. Ask your child what she wants to have for the room. If you are making this as a surprise for her, most girls love princess room as a theme. Observe also her favorite designs such as cartoon characters for example. If you want the fastest and the most inexpensive way to design the room, working on the space and the existing décor you have could help a lot. If you already have a theme like this, you can use these items and just add some personal touches to make it look better and new.

Change the positions of the bed and other furniture as to maximize the space. You could add do-it-yourself shoe racks and accessory wall because your child would have more accessories and will soon grow up. This way, you would prevent clutter and unorganized cabinets. Add wall decorations such as her favorite photos and make a collage out of it. You could buy cheap curtains that have lots of frills and add this near her headboard. Match her pillow cases and bedding designs and add fluffy pillows. At the end of the day, you will be surprised that you are able to make these changes in your kid’s room without so much fuss. For sure, your little princess would love her Princess room. Thanks to your creative ideas and valuable effort, inexpensive room makeover is really possible.

Read More
How tos

How to Paint a Mirror?

“How to paint a mirror?” This might be a frequent question you keep asking yourself if you are the kind of person who love to always check your reflection in the mirror. Some people possibly think that these questions might be out of the box but it is really possible if you want your mirror to be out of the ordinary and also be as beautiful as you do.

There are actually several ways to paint a mirror. It is very easy and you can do it yourself. There are some things you can use in painting the surface of your mirror and reviving its old crystal clear reflection. Basically the paints that you are going to use are that of the painting glasses.

Definitely, you would like to get creative and would want to try it, so below are the basic steps to remember on how to paint a mirror.
Decorative mirror
• Be Creative. Choose the design for your mirror.
Make a draft of your design. Every work before starting needs a plan. One advisable way to get creative or to arrive on a good design is to browse on books or any online crafts website. You can get various tips and a wide arrange of ideas in several coffee table craft -books and in any website.

• Wipe it Clean.
Make sure first that the reflective surface of the mirror is free of dirt and grease. You can also use a rubbing alcohol to wipe greases or some suggest in using warm water or vinegar. Because of the natural oils from our hands, it is suggested or you may be required to put on latex or surgical gloves while handling glassware. Your mirror needs to be dry and you can wipe it with a clean cloth or towel.

• Paint It!
You can use markers, acrylics, glass paints, leading strips, artists’ oil or any medium you would like to use. Acrylics and glass paints are the most suggested medium to use on painting on a mirror or to any glass wear because they dry quickly. Allow time to let it dry and there you go, you have your mirror painted. It is suggested that you do not use window cleaner on the painted portions if ever you attempt to clean the mirror as it can damage the paint.
Artistic painted mirror
If you want the paint designs not to be permanent, you can use a pretty mix thick of powdered tempra. It will stick to the glass and can easily be removed either through washing it off with water or through using a scraper. Anyone can paint a window or mirror for any room in your home as long as you read, as long as you are being resourceful – knowing some paintings tip, widening your imagination and engaging to arts. Painting on mirrors is just like basically painting on a canvas that you will certainly enjoy!

Read More
How tos

10 Tips to Make a Small Room Look Bigger through Decorating

Everyone desires to live in a big room. Most people who are starting to live by themselves will live in a bedsitter for a start. When living in such a small room, one usually tries to make it bigger however much it is small. They try to live big in a small room. It is possible to make a small room bigger through designer decoration. Here are ten tips that will undoubtedly make you room bigger.

· White it out

[one_half_first]A good idea to make your room bigger is to paint the walls and the roof white. White is reflective and makes a room have a cloud like an effect. It also makes the room look airy, calm and serene. Painting the room all white will also make the boundary between the ceiling and the walls unrecognizable hence making the ceiling seem higher. Architects love white color on their projects because it enhances the architectural design building. White color, therefore, prevents a cluttered look in a small room and makes it look spacious.[/one_half_first][one_half_last][/one_half_last]

However, if you feel the white color will make the room look cold and boring, add a few dark colored items for example, dark colored furniture, throw in some dark colored rugs on the floor.

· Keep a low profile on furniture

Pick furniture that is at least 10centimeters above the floor. Overstuffed and clunky furniture pieces should have no place in a small room. Pick a sofa that is on legs, that means it will be elevated to about 15 centimeters above the floor. For a table, a round one is ideal. This is because its round corners will enhance easy movement of traffic. You can also use light and reflective table tops, especially for marble or glass tables. When choosing chairs for your small room, pick chairs are high but have low backs so that they don’t clutter the room or block the view. To keep your floor open avoid coffee tables and instead use side tables.

· Add mirrors on the walls

Mirrors are meant to trick the eye. Mirrors will create a great sense of openness in the room. In addition, a mirror has reflective properties and will, therefore, reflect light making the room more lit and it will also reflect the view making hence tricking the eye to view the reflected view as part of the room.

· Ditch the drapes and curtains

Curtains block the view of the exterior of the room. They also filter the amount of light getting into the room. As we saw in the idea of the mirror, it’s all about tricking the eye. Doing away with the curtains will extend the view of the room to the exterior. Drapes also occupy some significant space and eliminating them is a nice idea to expand your room. If you will need more privacy use some shutters or some lightweight blinds. If you must use curtains, mount them on a bar that extends past the window space so that you can push the curtains away to expose the whole window.

· Flooring

The kind of flooring design that you choose will define how spacious your room looks. A flooring pattern that flows from one room to the other uninterrupted will create a notion that the room is spacious. If the floor is made of timber, choose wider boards. If you choose to tile your flow, take the large format designs to achieve a continuous flooring system. If you find it expensive or impossible to change the floor pattern of your room, look for a round rug and place it at the center of the room.This will create a continuation between the furniture without adding more mats. If you prefer the old format rugs, choose a size that fits the area that is not occupied by the furniture. Interior designers insist that the rug should not extend up to the sofa space as this makes the room visually squeezed.

· Doors

Doors occupy a lot of space in a room. Consider the swing space for a door, it’s up to a square meter depending on the size of your door. Consider using slide doors or completely removing them. If you remove the doors completely, all the rooms will seem to be connected. If you have cupboards and shelves in your room, you can also remove all the doors to make them open. This creates more space since the initially enclosed space is now part of the room. A sliding door is, however, expensive and may need some complex modifications.If you really need the doors for privacy you can adopt the use curtains that have the same color as the walls.

It is also a good idea to use barn doors. Barn doors are very beautiful when they are not made up of contrasting material.

· Shelving

Shelves are a very important component of a room. It is useful for storing small items that can otherwise make the room full and disorganized. However, when shelves are not properly designed or placed in the wrong place, they eat up a lot of space making the room worse than if they were not there. The best shelves are those that start from the floor to the ceiling. This design gives a sense of a high roof to a room hence drawing the eyes of any onlooker upwards. Interior designers also advise that you should not have a lot of storage space in a small room. It is important to combine both closed and open since an open format will make the room feel cluttered however much you try to minimize the storage in those shelves while a closed one will make you lose that personality.

It is also a good idea putting shelves in the least expected places such as pathways, over a door way.

· Emphasize the vertical and the horizontal

Employing one element in the room that will emphasize the verticality of the room will increase the sense of openness. It also enhances the feeling of movement and flows in the room. You can adopt the following elements to emphasize the vertical of the room, a tall shelf or a shelf mounted just below the ceiling, vertical shiplap or bare hanging bulb.

To emphasize on the horizontal, you can run some shiplap right up to the walls and ceiling. This will have an effect of a seamless transition from the walls to the ceiling hence emphasizing the height and width of the room. Everything is focused on enhancing movement. Look for example the legged sofas creates a sense of dynamism, the mirrors will create a sense of an extended view. All these are trying to emphasize on the horizontal dimension of the room.

· Art and decorative pieces

Art will make a small room detailed. It plays a big role in spaciousness and look of the room. Place artwork above your eyeliner to create a sense of  a high roof. If you have a collection of artwork, place them over some furniture starting from the largest in size to the smallest. Some pieces of art can be arranged according to the kind of material they are made of. You should also consider placing them over a piece of furniture, choose one that has a connection with the pieces of art so as to create cohesion.

There is a common saying that one man’s meat is another man’s poison. If you are having a small room, showcasing some outdated items won’t help. It will instead make the situation worse. The main aim of decoration is to maintain harmony between the concentration of your favorite items and a spacious area. You should, therefore, decide on a handful of items you really love and keep the rest away. A secret to keeping your decorations in place is to rotate your favorite decorations every two weeks so that each one becomes the center of attention at some moment. This also helps to ensure that you don’t get bored with the same decorations every day.

· Keep it simple

Small spaces are all about editing them to look bigger. Avoid too many knickknacks or group them so that they look like they were installed. If you have a lot of pieces, possessions, and patterns the room will definitely look cluttered. Avoid busy patterns and too warm or cold colors. Artwork or decorations should not be overdone, consider placing them on one accent wall.  The furniture you place in the room should be simple, don’t go for some funny design furniture that will make the room full and imbalanced.

In conclusion, the bottom line here is just being strict with yourself and intentional and careful about everything that goes into your room. Everything narrows down to being simple, organized and obeying a few design rules.

In a small space, everything counts. Having a small room in a house can make you feel confined and uncomfortable. You do not have to be annoyed; because there are simple reasons which you can use through the use of certain designs. There are particular tricks that, when applied, can make a small room look bigger.

Large livingroomHere are some of the known tricks you can try:
1. Open up the room by maximizing views of the outdoors; it will make your room look wider.
2. Stick to light colored walls. Light colors reflects spacious environment.
3. Good illumination provides spacious home.
4. Put away table tops which are not needed. They seem to occupy space and provide a crowded look.
5. A white painted ceiling may look higher and spacious than darker paints.
6. Diagonally designed flooring usually results in a spacious room.
7. Select medium sized tiles even in bathrooms because it makes the room more spacious.
8. Do not buy oversized furnitures; it will eat up a lot of space inside the house.
9. Simple window decorations will help your room look bigger.
10. Mirrors can also make your room look bigger.

Small elegant bedroomKeeping your room tidy and organized can help make your room look bigger; because there are lots of spaces to move freely. Do not cover your walls with a lot of decorations; it looks untidy and confined when you put so much wall decorations. Arranging the furniture with focus will help you achieve the spacious look you want. Take out large rugs, fixtures and other things inside; it will make you feel more relaxed and comfortable.

References:

Read More
How tos

Affordable and Simple Do It Yourself Home Decor

The general consensus is that one should approach an expensive professional if you want to redecorate your home in style, just like a country style. But to tell you the truth, this is not necessary at all. Well, if you are looking to remodel your house to be an exact replica of some picture perfect magazine ad, then of course you will need a professional and a deep pocket. On the other hand if you are one of those smart people who don’t mind getting their hands a little dirty and save a lot of money then you can look forward to remodel your home in an elegant and stylish manner by yourself. It is better to decide on a budget and then start your remodelling.

A cost effective way to give a new look to your walls

[one_half_first]A cost effective way to give a new look to your walls is to use wallpaper instead of paint. Today you get wallpaper of every style, pattern and colour to suit your requirements. Most important, they are very cheap. Depending on your budget and your room setting, you can go for floral patters or other designs which can make your room look brighter, more spacious or add the illusion of more height.[/one_half_first][one_half_last][/one_half_last]

The design and patterns that you can get in wallpaper (such as ceiling tip) are almost impossible to replicate if you use paint.

You would be surprised at the incredible things that you can find in your own local supermarket. With a little imagination and creativity you can transform your home into a showpiece in just under a few hundred dollars.

Do it yourself decorating

Original ideas are great, but you can also get lot of creative ideas that are fashionable, sophisticated and affordable from the internet and home improvement magazines. You don’t have to follow the instructions to the dot. Just take the basic idea and improvise it to suit your home and style.

Room lighting
Room lightingAs for your furniture, don’t worry if can’t afford the sleek designer models that you ogle over in a magazine, there is an alternate cheaper way to get what you want. Make a trip to your local second-hand or thrift store and look out for sturdy pieces of the furniture you need. You will be amazed at what you can do to an old and beat-up piece. Whether it is a coffee table, dinning table or any other piece of furniture, just make sure that they are sturdy and durable. Look out for real wooden pieces, as furniture made of particle board are practically useless. With a little effort and time you can transform these junk into eye-popping classic or trendy furniture.

Nowadays you can get information to do anything by yourself. If you have the time then go to your local library and search for home decorating or remodelling books to help you out. Or you can just type in the keywords ‘home decoration’ in Google search engines to get literally countless innovative ideas for your remodelling or decorating project.

Home Decoration at its Finest

Everyone dreams to have a beautiful home, one which is elegantly decorated. Nothing is better than to live inside a beautiful and classy house, with all the furniture, appliances, and decorations are beautifully created and placed. Others hire the services of an interior designer to make sure that their home will be decorated with an expert, equipped with the latest trends in home decorations. Home designers know where to buy the best furniture or the best decors that can be placed in any part of your house. However, when you hire an interior designer, you might not be able to monitor the quality and the price of the decors your designer will get. You also won’t be able to express yourself in the design of your home. Hey, you always have the prerogative to design your home all by yourself. Have you thought of the classy Dollar Store decorating?

Classy Dollar Store decorating

Elegant livingroomWell, classy Dollar Store decorating is all about styling your home with all the decors from the Dollar Store. It is incorporated with the adjective ‘classy’ because you can have every classy decoration that you want at the Dollar Store. You can find classy decorations for your living room like wallpapers, figurines, candles. There are also classy materials for your kitchen such as towels, kitchen wall papers, refrigerator decorations, and many other kitchen materials available at the Dollar Store. Even decorations at the bathroom, you can buy from this store. Bathroom wallpapers, hanging pictures for the toilet, and shower curtains are available. The bedroom materials are also at the Dollar Store, ranging from hanging paintings to figurines and to other furniture that can give accent to your room. All of these decorations are at their best quality.

Sophisticated dining roomClassy Dollar Store decorating does not necessarily have to be expensive. It is all up to the home owner or designer as to how to choose the best and classy decorations out of those available in the store without having to spend too much. It is possible, making the house really look elegant and beautiful with only the cheaply priced decors to be used with the whole interior designing. It just needs time, effort, and attention. A designer must be very keen to details because home decoration is not that easy though it is not that hard also. It makes everything easier for the home decorator if he or she has the decors that are needed for every part of the house. The complexity of the home decoration is also up to the preferred style of the homeowner. The more modern and creative the ideas are for home decorating, the classier it would appeal to all your neighbors and visitors. Classy homes always get attention. Not only that, a beautiful home creates the positive ambience for all the members of the family.

You can make an elegant decoration yourself

Arrange the collections that you have wisely. There are a lot of ways that you can make an elegant decoration yourself with the use of your collections. You may arrange it in a corner or make a shadow box for each special collection that you have.
Small elegant bedroomHang decors at eye level. Hanging decors very high may not gain appreciation. Hang it at a lower level where it can be considered a part of the room’s decoration. Experiment with different arrangements and this would really help in giving you the variation in decorating. Monotone decors also help in making your room look spacious. This would help in giving your room a spacious look even if the room is smaller.
Elegant livingroom
These are some of the tips that you can follow to give your home a new look. You do not have to spend much on expensive decors to give your home a new look, it is just a matter of mixing and matching things and a little artistry to give your home the look that will surely be appreciated.

Every day we are challenged to use our creativity

It has been said that art imitates life and so we all need inspiration to create. Therefore, inspiration in art is needed for us to grow and live life into a more positive way. Enjoy life and the artistic inspiration that it gives.

Get the most out of your inspiration. By simply having something or someone to inspire us is enough to make our work light and easy. Every day we are challenged to use our creativity. Seeing a variety of original ideas usually gets other artists inspired and from that they can create their own unique way of expressing themselves. You see, it’s just another strategy that we need in finding inspiration in original art. Reading is undeniably one of the greatest sources of inspiration. Books put a lot of ideas in our minds; it is somehow a driving force that can start to tickle our creativity which triggers off our senses in creating our masterpiece and consequently, everything else will follow.
In general, life is our inspiration. It is everywhere, but only if you know the right places where to look.

Read More
How tos

How to decorate a temporary living space?

Home is the most special place in the world. In fact, there is a very popular African proverb that “Home is not where you live but where you belong”. Everyone wants a place to call home in this big world. Everyone wants to feel safe under the shelter of home. Everyone does not have the financial stability to purchase a home of their own. So, those who can’t afford a home of their own live in rental apartments.  Everyone dreams of decorating their dream home according to own choices and lifestyle. But instead we sometimes have to live in rental temporary apartments. The biggest disadvantage of living in rental apartments is that we cannot even decorate the living room of the rental apartment according to our own choice let alone decorating the other rooms like bedrooms, kitchen and balcony.

[one_half_first]Living room can be regarded as one of the most important part of the house as the family members spend the most of their time in this room. This room reflects the memory of long chats with best friends or the chaos of a family gathering or even the lazy evenings are spent in this room doing nothing. Is it fair to left such an important part of the house undecorated?? Doesn’t that reflect the laziness and indifference of the people living in the house? But the idea of decorating the living room can leave the owner of the house perplexed.[/one_half_first][one_half_last][/one_half_last]

As decorating a living room requires a large amount of investment which the owner might be reluctant to spend on a temporary or rental apartment. And sometimes there are lesser opportunities or options to decorate the rental apartments as the renters are not allowed to make changes in the structure of the house like painting the walls. But it is imperative to find a solution between these two paths. So, here are some tips and tricks to decorate a temporary living room without changing the total structure of the living room:

  1. Do the repairs

First things first, the things in the rental apartment that needs to be repaired should be done without any delay. There can be an electric line which needs to be repaired the light of the living room that needs repairing. So, without waiting for the landowner you should do this small job by yourself. Repairing damaged elements of the rental house may help you build an emotional connection with the house and with the living room.

  1. Paint the walls

The land-owner of the apartment may not allow you to paint the walls according to your choice and you may get forced to keep the walls untouched and pale. But there is no harm to paint the walls by the color white. In Fact, the landowner may not object using pastel shades on the walls as these colors can be easily changed. Painting the walls may remove the dullness of an old apartment and give the apartment a much needed freshness. If painting the whole apartment is way beyond your reach, then you can just paint the living room as it is considered the focal point of any rental apartment.

  1. Go bold and bright

A bold and bright color on the walls of a living room may give the room the much needed glamour and can certainly grab eyeballs. But due to the obligations of the land-owner and financial restrains we may not be able not use vibrant colors on the walls. But that does not mean that the living does not deserve the boldness and freshness of a bright and bold color. You can use colorful and vibrant curtains or sofas to add a zest of color and boldness to your living room and save it from the dullness it previously had!!!

  1. But still stay minimalistic

Going bold and bright does not mean that you need to overcrowd the living room with unnecessary furniture or using all elements of vibrant color. Balance the proportion of the room. Be practical yet quirky. If you are using a bright color sofa, then use simple artwork in the walls. Or use neon shades flower vases. Don’t overload the room with colors. And don’t use furniture of flamboyant designs. Be simple with your choices.

  1. Let the soft pillows give a rock-solid impression

A pillow unlike a book should be judged by its cover. So be bold and colorful with the pillow covers. They can also add a glimpse of happiness to the interior decorations of the dull living room. Pillows play very important part in the living room. They become a part of the long conversations that we had in the living room with our best friends or with our loved ones.

  1. Be smart with the space

A temporary living room can be a small place to adjust all your furniture. To make the living room feel less crowded use furniture that best compliments the dimensions of the living room. If needed, replace your old large sofa with a new comparatively small sofa. It can make the place look larger and eventually increase the architectural beauty of the rental apartment

  1. Be innovative

It is undoubtedly hard to decorate a temporary living room  but being innovative and smart can save you a lot of money and energy. You can make some DIY art pieces with unused or wasted stuff and create something new and innovative. For example, you can turn some old pieces of wood into a stool or you can use old bottles to make lights, you can color the empty champagne bottles and use it as flower vase etc.

  1. Go green and recycle

Green is always soothing for the eyes. So, putting a small tree can give a soothing visual to the eyes and add up to the freshness of the living room. Trees like considered can be regarded as the best option in this case. Flower trees of small sizes can also be taken under consideration. You can also grow herbs like thyme and rosemary in your home as they can be planted in small pottery and consume very less space. If you don’t have enough space left to keep a tree in the living room, then you can hang them on the wall. You can even make the hanging pottery at home by using DIY tricks.

  1. Second hand furniture can also be considered

You can also consider the option of buying second hand furniture if you have financial problems or your budget is limited. People also give furniture on rent. You can also consider that option.

  1. Work with Geometric patterns

Using floral prints has become a clichéd idea. You can work with geometric patterns while using the rug. Or you can use table cloths of geometric patterns. Experimenting with patterns and colors adds freshness to your living room and a touch of modernity.

  1. Work with different frames

A mirror in living room can make the living room look bigger. Also experiment with different kinds and sizes of frames. YOU can use posters of famous motion pictures to hang them on the wall which can add a sense of quirkiness to your living room.

Decorating a temporary living room can be difficult as you have to brainstorm a lot and financial restrains also work as an obstacle in this process. But using some tricks and ideas these problems can be solved.  Just being innovative and smart can easily solve these situations.

Another idea is to utilize your home articles more than they’re designed to do. You can minimize the total number of household articles that are needed this way, lessening the effort required to move your furniture to your next home. Wide but low bookshelves can double as a television cabinet. Just remember to keep style injected into each article. You really don’t want a boring old chest as a living room table, do you?

Living roomAdding more portable decorative articles might be your ultimate solution to your ever changing dwelling. Simple and common decorations like plants or wall hangings such as paintings and artwork can best suit any home, even without semi-permanent decorations such as wall and floor paint jobs. If you ever need to move again, just tuck them away and you’re ready to put them again to your new home. So, are you ready to move again? Don’t worry, follow these general tips, and you will always have that color and life that your next living space would ever need.

Read More
How tos

How to Choose a Countertop Surface?

Looks can be deceiving in countertops. While the look alone is tempt you to purchase, material’s durability, maintenance and cost are some key factors to be consider in choosing a countertop surface. Whether you are building a new kitchen, or remodeling an existing one, you got to be very careful in the choosing the countertop materials. Remember that it will be the first thing that people notice in your kitchen, and it truly can set the tone of your whole design scheme.

Countertop materials that usually use are natural stone surfaces which include granite, marble, slate, limestone and sandstone. Among the surface that has been stated, the most commonly used is granite. The advantage in using granite as a surface material in counters is it is very strong and durable and highly scratches and nicks resistant. It is usually resistant to etching caused by acidic substances. In addition, granite only needs a low-maintenance, cleans easily and offers a depth of design that’s difficult to match with synthetic materials. Expensive, heavy and requires a strong base are some of the disadvantage of granite. While there are pros and cons in choosing granite, no one can change that granite is still the most prominent natural stone employed for kitchen and bathroom counters.


Meanwhile, marble on the other hand is softer than granite in a way it needs to be sealed more often which usually take place twice a year. A marble requires more maintenance than granite because it scratches easily and reacts to acids. However, the two natural stone surfaces have similarity. Marble like granite is very resistant to heat. Another thing that is similar between the two is the price; both are expensive but anticipate that you pay even more for marble. Slate, limestone and sandstone and soapstone are other natural stone surfaces. These surfaces are usually prone to etching and staining so you better treat them with care. They are less expensive than granite though still more expensive to man-made materials.

Manmade solid surface countertops are becoming noteworthy and increasingly being made to look likes natural stone. Unlike the natural surface stone, manmade solid surface doesn’t need special maintenance; all you have to do is just have a regular wiping of the surface. Manmade solid surface is custom-made to the proper length so you will find that there are no seams. It also comes in a wider variety of colors than natural stone surface. If you’re looking for something out of the ordinary and less expensive, this is the one for you.


The most affordable countertop that you can find in the market is the plastic laminate that is sturdy and comes in thousands of colors and designs. This material can easily installed by a crafty do-it-yourself homeowner. It can resist stains and mild abrasions well. Though it is the least expensive, nicks and scratches are readily apparent and not at all resistant to heat, so you must always protect the surface from hot pots and pans. If you are still undecided, you can always have mix and match surfaces that fit to your taste!

Read More
How tos

How to Use Candles for Decoration

Are you one of those who wants to have a refreshing and at the same time unique decors for your home? Then this will give you an introduction to candles. This is what you need if you are looking for a new way to brighten your home. Before, candles are used in our household by reason of its utility. As time goes by, candles are transformed from a lighting utility to a décor. Now, candles come into different shapes, sizes and forms which you can use to decorate your house. There are also candles which are scented and good for relaxation. With this combination, you can say that scented candles will give a new twist to your home decoration.


There are only few people who appreciate this décor because a lot are not yet exposed on how simple candles can make an impact as a house décor. If you want to know How to Use Candles for Decoration, the first thing you must do is to see the actual candle decors and select those designs that satisfies your tastes. There are a lot of candle stores which you could visit or you can search Internet sites for these decorative candles that are also affordable. Before buying candles in bulk especially the scented ones, try first to light one candle in order to smell it. If you like the smell, then you could buy in bulk already. Of course, you may want to try the other scents which are relaxing as well.

The questions that you should answer when purchasing these candles are where you are going to placed these candles and how many are you going to use. Usually, candles can be placed on tables coupled with a nice flower arrangement. However, there are parts of your house where you could place candles such as your bedroom or relaxation room. You may also want to collect candles and place it on a shelf for everyone to see. The corners of your homes are good place for the candles as it also serves as a lighting fixture.


For safety purposes, make sure that your candles are placed on ceramics or glass to avoid starting a flame. This also helps to avoid unsightly scattering of the melted wax. Of course, if you have small kids who might play with these lighted candles, make sure that you are placing these candles beyond their reach. One of the hazards of using candles for decoration is that it may start a fire. However, if you take the necessary precautions, you will be able to maximize the use of the candles. Now that you had your introduction to candles, you can start to have a more relaxed home through these scented candles and for sure, people will be surprised on the changes in your home.

Read More
How tos

How to Strip Wallpaper without Exerting Too Much Effort

Admit it. Redecorating your house by stripping your existing wallpaper can be really time-consuming and tiring as well. However, if you are worried that your wallpaper is already worn out or is already out of style, you really don’t have other choice but to strip it. You may hire a professional decorator which could take care of replacing your wallpaper but probably it would cause you a lot of money. But of course, if you alone are going to strip the wallpaper, it would be harder.


Still, you have to replace the wallpaper. Here are some simple suggestions that may look into on how to strip wallpaper without having too much effort:
• Ask the help of your family and friends. The work would be faster and easier if you would get help from other people. Ask your friends or family to help you in stripping the wallpaper. You could prepare small snacks for them so that they would be enticed in joining you in this activity.
• You could also seek people who are interested on used wall paper. In exchange of getting the wallpaper, ask them that they be the one to strip it out of your wall. This way, you get to remove the wallpaper without too much effort and at the same time dispose it easily instead of throwing it on your waste bin.
• Consider the activity as a work out for you. This may look like exerting an effort but think that this is actually a work out which helps you get a better figure. The more you sweat, the more fats are burned for you. Either way, you win. You were able to remove the wallpaper and at the same time you get a free work out.
• You can also strip your wallpaper one at a time. This may work out for you if you are really busy and the other mentioned suggestions regarding it without exerting too much effort don’t work for you. You may a lot about an hour a day or several hours every weekend to strip the wallpaper. The downside is you get an unsightly wall in case you have visitors.

• Have a full blown one day stripping of the wall paper with a scented candle and a relaxing music. Make this activity your “me” time. Even though this job may actually too tiring, you could use it as a form of unwinding by being yourself and having silent moments while removing the wall paper.

Now that you have suggestions on this topic without exerting too much effort, you can actually make one of these options as your choice. After all the hard work, you would feel rewarded to see your new wallpaper.

Read More