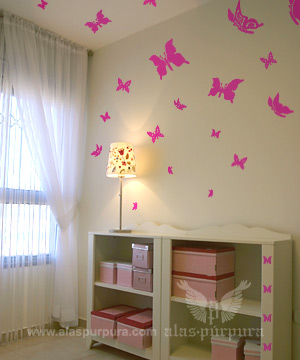
Making a butterfly wall paper border need not be too hard. Imagine the pride and satisfaction you’ll feel as you gaze at your finished product. Just follow these easy steps for this creative do it yourself decorating idea.
What to do:
1. The first step in making a butterfly wallpaper border for a butterfly themed girls bedroom is to create a tentative design to follow as a pattern on a piece of paper using a pencil. Then, think of the right color scheme for your border design. Choose hues that are in harmony with the other colors in the room, including the window curtains.

2. Next, take down measurements and estimate the amount of wallpaper border you are going to need. Accordingly, buy the necessary length and width of self-sticking wallpaper. If unavailable, substitute with canvas strips to be stuck to the wall using heavy-duty wallpaper paste.
3. Paint the wallpaper border first with the color for the background of your butterfly design. For the wallpaper border butterfly design itself, butterfly stamps can either be homemade (stamps cut out from potatoes/sponges) or store-bought. Get them in various sizes and shapes for variety. Coordinate the stamps with the tentative design that you have.
4. Use a paintbrush to apply paint on the stamps you are going to use. Do this carefully. Colors may be single or multiple for each stamp but remember to be quick or the paint on the stamp will dry.
5. Practice making impressions that fit the design you first had in mind. Once you get the hang of it, proceed in making your butterfly wallpaper border.
6. When you’ve finished making butterfly impressions, you may want to consider putting additional details into your border, like adding defining lines for each butterfly’s body, legs, and wings using another paintbrush. If you want to avoid making painting mistakes, try wallpaper cut-outs instead. You also have the option of adding background details such lines that swirl to hint that the butterfly is moving. Long dashed lines behind a butterfly will indicate it has been gaily flying about.

7. Give your butterfly wall paper border time to dry. Afterwards, take a spray sealer and spray on a moderate layer. Avoid spraying it on too thick or else your border will crack. Take the necessary precautions while spraying like opening windows for ventilation.
8. You are almost done! Take a pair of sharp scissors and cut out the dry wall paper border according to your desired effect: scalloped edges or closely cut to the edges. Take off the backing by peeling it off, stick the border into its proper place and voila! You now have your personalized do-it-yourself butterfly wall paper border.


2 comments