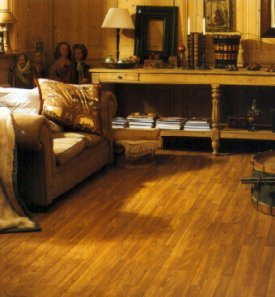
Laminate flooring is probably the easiest item to use for a do-it-yourself floor installation operation. It is very easy to carry around, sticks on quite easily to the flow that you apply it to (depending on the way it is applied), and most of all, it can mimic the look of any kind of floor finish without the accompanying maintenance hassle of the originals. But like other kinds of flooring, laminate flooring can also break down and get messy. Here are some ways to repair laminate flooring.

Laminate flooring is usually available in tile-like pieces. It is carefully pieced together on the floor, to make it look like one big floor of any prescribed design. So the easiest way to repair laminate flooring would be to remove the damaged part, and just replace them again with a new “tile”! Sounds quite easy for floor repair job? Think again; just how difficult would it be to break the symmetry and rework it using new pieces of laminate flooring?
Well, chances are that laminate flooring would be dead stuck to the floor as you might have expected. After all, you did it so that it would look and feel like a genuine floor without the need to maintain it so much like the floor that it represents. Chipping it off is risky, because you might unintentionally chip off the “healthy” tiles as well. But if you have no other choice, you might as well follow these tactical steps:
The damaged part is already damaged, so it is automatically slated for replacement and is considered more or less worthless. So, to remove the damaged part, start chipping it off from the center. Break it off using a chisel and work your way carefully towards the end of the tile. You may want to split it in just two pieces however, cleaning it up would be such a drag if you still need to sweep many little pieces away.
After breaking the tile off, pull it out cautiously without damaging the adjacent tiles. Remember, if you accidentally lifted off another adjacent tile, it would also mean that you have to replace that tile as well. Prevent the dreadful domino effect as much as possible.
Remove the last remnants of the material that you have used to stick the laminate flooring into place. Be careful though, the material can also get stuck to another tile, so you have to chip the defective area from the normal areas before trying to pull them off. And did I mention to prevent the domino effect at all costs earlier?
Lastly, apply the new laminate flooring as if you are applying it for the first time. Use a very thin layer of the sticking material around the area near the other tiles though. You don’t really want the sticking material to ooze out new tile and getting the floor messy afterwards.
A Guide on Installing Laminates
Are you planning to renovate your kitchen? Recreating the surfaces of your kitchen and counter tops will definitely create a great impact without compromising your budget. There are several materials available in the market and choosing one may seem like a daunting task. Why not choose laminates instead?

Laminates are made of melamine resist and is ideal for kitchen surfaces and counter tops since it is heat resistant and needs low maintenance. With the wide array of designs and colors to choose from, you can even create a more pulled together look by picking a laminate that matches your chosen theme.
As we all know, hiring a professional to install laminates for your home would cost a fortune. However, why shell out a hefty amount when you can do it yourself. You do not have to be a rocket scientist to figure it. All you need is the proper tools and the basic knowledge on how to cut laminates.

• Start your DIY project by detaching the surface that you are about to work on from the adjacent wall. However, if this is not possible or appears to be too time consuming, you may move on to the next step.
• Then, prepare the areas you need to cut by meticulously measuring it to custom fit your kitchen surface and counter tops.
• After this, apply strips of masking tape to the cutting line and to surfaces where the saw base will run along to avoid damaging the plastic laminate.

0 comments