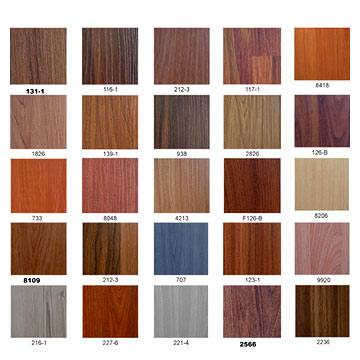
Many homeowners choose unfinished hardwood as their flooring due to many reasons. Hardwood gives any floor a natural beauty and a classic look. Wood floors are also good investments since they can add value to your homes. That is why decisions like installing hardwood floors should not be taken for granted.
What makes hardwood floors (like Mohawk floors) different from other types of flooring is the fact that it is a beautiful natural product. It is considered to be one of the oldest flooring materials, making it comfortable and very durable. Hardwoods are also very versatile, giving homeowners a lot of possibilities for accessorizing and adding inserts into the wood floor. But its performance and appearance depends mainly on how it is installed and its finishing process. Installing wood floors can actually be done by any homeowner. All you need is the right material to use and of course, your wood floors.

Materials / Tools Needed:
o Hammer.
o Finish nails.
o Measuring tape.
o Masking tape.
o Hardwood flooring glue.
o Notched trowel.
o Hardwood floor strips.
o Tapping block.
o 1/4″ lauan plywood underlayment.
o Pneumatic stapler.
o Safety glasses.
Before installing or restoring hardwood floors, it is important to take note that they should not be installed in an area below the ground since these areas increase the risk of damaging the floors due to moisture. Another important thing to remember is that hardwood floors should only be installed on solid and sturdy surfaces. If you have checked the area, then you can now proceed with the installation. Follow these steps in installing hardwood floors:
1. Mark where the joists are using a pencil, chalk or any marker. These joists are the beams which serve as the supporter of the floor.
2. Hardwood has the tendency to expand during warm weather and contract in cold weather so it is better to stop the flooring at this point to give ample time to the change in the wood. Start measuring 3/8 inch from the baseboard and draw a line on it.
3. Looking at your starting point, find the longest wall that is straight as the starting point. Place one end of the board to the baseboard line. See to it that the hardwood plank is perpendicular to the joist of the floor. This will serve as the supporter of the flooring.
4. Using a hammer, nail one end of the board into the sub floor and the joist since a pneumatic stapler cannot reach this area anymore.
5. Just repeat the process of putting down the boards. Always see to it that the tongue and groove ends are fitted together. In attaching the flooring, use the pneumatic stapler.
Hardwood floors require some maintenance and actually do add beauty to your home. With its natural beauty, it can give any home a classical or traditional look. If you want this kind of ambiance in your homes, then consider hardwood floors in your houses as the best solution.

4 comments