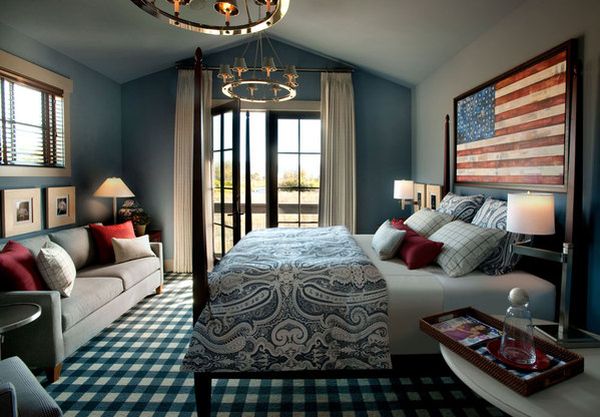
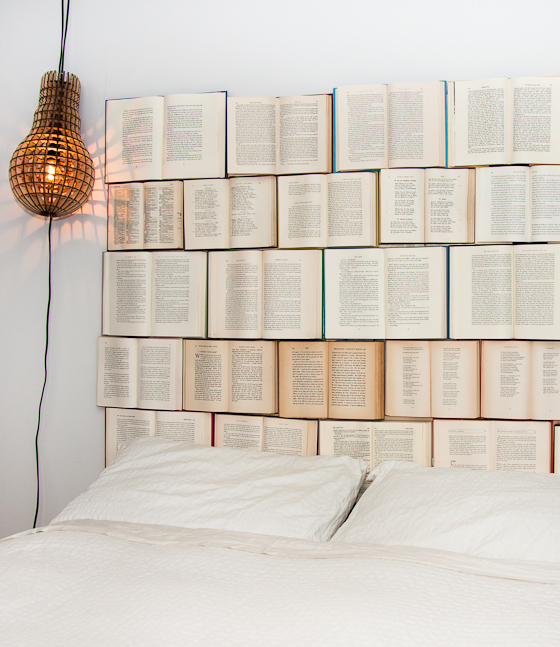
Headboards for your bed are essential, and they will certainly make your sleeping more convenient. It can also make the room look smaller or larger, animate it through colour, provide elegance and nobility through a black velvet covert or fashion your room with dazzling gold and glitter.
When you have a headboard, you can lean your pillows on it while watching television or reading a book. A lot of people do not care about the health of their backs and that’s reason why they reach eldery ages with back problems. It is not a matter of job consequences, at least not a hundred percent of the cases, but wrong resting positions.
However, when you go to the mall and search for headboards, you find their prices so expensive. Especially those that are beautifully designed, they have these extreme prices that you cannot afford. So you start questioning, how to make easy, inexpensive headboards? Here in Decorating Vista Casas we tell you how; remember it is not a health matter but also headboards give a great visual impact to the room.
Tips on Making an Easy and Inexpensive Headboards
So, to answer the previous question, you just have to define how you want it to look like. What is your theme? For example, do you want something that can be useful as well? You can try using cork, you can cut it just the size of your bed so it will just fit right behind your head. What is the use of having a cork headboard? Well, it can serve as your “to do wall” where you can post papers and other stuff to remind you of everything that you will need to do during the day. If you want to decorate it more, you can put designs around the cork board such as flowers or other abstract designs in this case your imagination would be the limit!
Another thing that you can do is to maximize the functions of standing screens. Or what about bi-fold doors? You can design it by covering them with fabric or wallpaper so they don’t look boring. But heads up! Just make use of screws to attach it to the walls, and you already have your customized headboard.
Have you ever tried shutters when doing inexpensive headboards?
Well, you can use them for your headboard to save, just be sure you decorate it with your favorite paint color. You can also have it painted with different designs such as floral or other elements of the environment so it will lighten your bed and the whole ambience of the room.
In fact; you can use anything that fits the size of your bed. Just be sure it can support itself. Almost any kind of wood would work, yet keep an eye on the differences between wood types, since some tend to be dry and others tend to hold humidity. You can just have it painted or decorated in any way you want. For a natural wooden color simply varnish it. If you want to have it designed without removing the natural color of the wood. You can have it carved with designs and then apply the varnish.
It is all up to you!
The only thing that you have to be sure is that when you create your own headboard, you have to be sure your head can lean comfortably with it, after all, that’s the ultimate purpose of a headboard. You also have to be sure it is safe, certain ideas might look nice at first, but, considering where you live, the material your walls are made of, the weight of the possible headboard some ideas might be riskier than what they look like.
An example of this; a headboard with shelves and plant pots on it. It would definitely make the room nicer, indoor plants are something great to use as decoration, but you do not want one of those pots falling down to your head while watching a movie or having some private time with your SO. You don’t have to sacrifice quality or make something risky just to save some money. Always consider the comfort and convenience of your family members before settling with inexpensive headboards. The idea is to make a inexpensive, decorative but functional headboard.
Here are some ideas of headboards you can try or use as reference to create your own; remember that there is no more satisfying feeling than decorating your house with things you have built yourself. Also; the DO IT YOURSELF campaign is the new tendency. So here are a lot of DIY headboards.
Tufted Headboards
If you are the kind of person that likes staying on budget; saving as much money as possible, but at the same time you love fancy furniture just do the following. First of all; here are the materials that you are going to need in order to make your own tufted headboard.
A big board about the size of the bed, height depends on your likes, but keep it simple. You could use a squared shaped board or if you get the board cut on an oval shape it would also be nice.
I like diamonds shaped bumps. You can use any sort of decorating adds on that suit your preferences. Such as cloth roses, simple decorative bottoms,or any other kind of swarovski.
The most important element on your headboard is the foam, it should be a high.density one. The thickness that i recommend you is about two (2) inches. You will not need a single piece of foam measuring the size of the board, it can be purchased on plates of smaller sizes. Of course; you are going to need batting in order to cover the foam once it is glued to the board.
Last but not least the fabric. Make sure to get one that does not trigger any allergies you may have, if you do have any. The fabric will determine the decorative aspects of the headboard together with the adds on you decided to use. Color choices on the fabric should be determined by the colors on your wall; remember to be creative but respect corresponding matches!
Assemble process
The first step is to mark your board dividing it into squared segments, about 8×8 inches or 10×10 inches for perfect squared bumps, or 10×8 inches for diamond shaped bumps. Once the marks are placed you have to drill the points where the decorative elements, such as jewels, are going to be placed. After that; the foam has to be attached to the board using a high strength spray adhesive on the board and then applying soft pressure on it over the board. Once the foam is firmly attached to the board, you need to put on the batting over it and start marking the spots you previously drilled for the jewels.
Now; you will need to use a knife or long scissors to open the foam on the marks placed over the board before, remember these are the points you marked for your decorative elements.
After the marks are opened on the foam you need to lay the fabric down over it and start using upholstery needles in order to place the decorative jewels. Once the first row of jewels is placed; use a staple gun to fix the jewels on the back of the board. You need to repeat this process for every line of jewels that you marked. Of course on the second line of jewels you’ll notice how the tufting goes.
In order for this to work properly you need to start the tufting on the middle line marked on the board; then when you go for the second row, make sure the pleats are facing downwards at the moment of setting the headboard behind the bed. This to avoid dust or anything like that may fall from the ceiling getting in between the pleats.
Chest Headboard
Some bedrooms are too small for all the things that you require in there. If you are the kind of person that has many things, then the Chest (or Vault) Headboard will fit perfectly on your needs.
Making a chest headboard requires more work than just buying a plain chest. But the amount of money you save makes it worth it; specially if you have old wooden furniture laying around that you are planning to throw away. Most furniture is not the same width of your bed, but you can use the side panels of an old wardrobe for example, to set the depth of the chest headboard. In fact; the only piece of board you may need is the back part of the furniture piece.
The process to elaborate this headboard may vary depending on your likes. You can even tuft it using the instructions that we already gave you or be creative. Paint; carving, varnish are just a few of the options available.
Just make sure not to use it for dirty laundry or you will regret that fishy smell coming from the top of your head at 3:00 am.
These 2 ideas above not only aim for a fancy looking bedroom, they also prove to be useful either on comfort or storage/space creation. However; if you are looking for something more decorative, fancy and that does not require a lot of handwork, then take a look at the pictures below and go for one of them. I especially love the big art painting; the geometric forms and the simple but gorgeous curtains. I can tell you, there is more than 7 ideas that you can use.
References
Which is the Best Mattress of 2017? Updated Ratings and Reviews
The Great Bed of Ware – Victoria and Albert Museum


0 comments