cracks
How to repair...

How to Repair Small Cracks in Concrete | Decorating Visita Casas

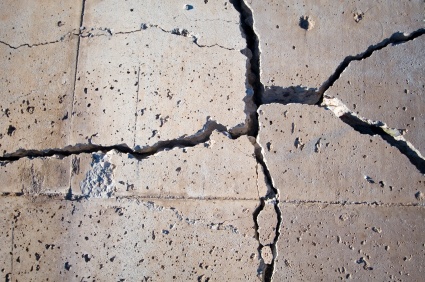
If you have cracks in your concrete, water may seep in most, especially during rainy season. The winter season may also increase the damage due to freezing temperatures and also cause the soil underneath to erode. As soon as possible, you should do something about this before it can cause further damage to your home. Repair this as early as you can and check the other parts of your home; as well as there are many more damages that needs fixing. Now, how will you repair these cracks in your concrete? How will you get your home prepared for the sudden change of weather and temperature?

Everything will depend on the type of crack or fissure we are facing; the key thing is to never consider cracks as a simply aesthetic problem. We must be prepared for the worst; so before looking for a superficial solution, first learn to determine what kind of harm we have in front of us.

A superficial or deep crack?

[one_half_first]Before you begin to give solutions to the horrible cracks that affect your home; first we will teach you how to check if they are surface cracks or if the foundations of your house are compromised. For this you will need a hammer and, although the goal is not to break the wall; yes you must strike firmly the crack in all its extension to rule that the cement behind it has not been affected.[/one_half_first][one_half_last][/one_half_last]

If the wall begins to crumble before your eyes and with simple blows the cement head; then pay attention to what is hiding behind the crack, maybe you have a rusty pipe.

In any case, your problem would not be a small or simple crack; so the solutions below are not for you. But, if the cement does not sit, then continue reading and solve that aesthetic problem together.

Why do these cracks form?

When we see cracks in the walls of our new home after only six months of having acquired it, we have doubts:

  • Have we been scammed and construction is not integrated?
  • Is the life of our family at risk in this new house?
  • Why did we have to touch the faulty house?
  • Is it normal for the entire neighborhood to have cracking problems?

The best way to answer all these doubts is to answer only the last one: Is it normal for cracks to appear? And the answer is yes.

This happens especially in new houses. It occurs during the first years in all construction. The materials settle definitively, the water remains disappear and; Exposure to environmental conditions such as changes in temperature, humidity and earthquakes also favor the appearance of these small cracks.

Thus behave all constructions, without exception.

These small cracks appear on the walls; specifically in the central part of those that exceed the three meters of length.

The area close to ceilings and beams, corners on door frames and corners under windows; all are prone to these small cracks.

No, they do not damage the structure of the building. Nor are they due to imperfections in the design; Deficiencies in the construction process or the use of low quality materials.

However, if it is an old building; then it is necessary to consider more carefully the occurrence of these cracks following the check indications given at the beginning.

But for these small cracks there are many alternatives when applying a solution; here is a list of possible materials you will need if you want to repair them yourself.

Materials for Repair

These are the possible materials that you can use to repair small cracks in concrete.

Spatula: It is the basic element to begin the repairs

Caulking Gun: it’s required to use it in the next step.

Sealant: Although there are several brands, such as Sikaflex; the good thing about this product itself is that it is flexible. Up to 50% flexible and can be painted. Thanks to it, we can cover the small cracks that tend to come out due to the mobility of the building.

Stucco powder: Its great advantage is that it allows us to prepare a more or less consistent mixture according to our needs. For this we will follow the manufacturer’s instructions; But Stucco and water will always be used.

Plastic Stucco: Offers the advantage of coming already prepared and in a white color very easy to paint. It is perfect for small cracks, but is not recommended for deep cracks.

Epoxy products: Small cracks do not always appear on walls only, also on floors. For them, it is best to use epoxy sealants; always follow the manufacturer’s instructions. There is a product A and a product B, which upon mixing, produce the sealant. It is very resistant but not flexible, it also works for walls.

Sandpaper: To eliminate imperfections once the work has been completed.

Cloth or brush: which you will use to clean the surface before applying the sealant material.

Repairing Cracks – Step by Step

As you may have seen, there are many options of materials that you can use to repair those horrible cracks; everything will depend on the circumstances. Whether you live on a very high floor in a building or if the crack is on the floor of the garage, there are several steps that you must follow verbatim in order to have a final result that you can consider a success.

The first one is to open the crack. All these materials have a capacity of adhesion and an expansive quality that is necessary to repair the crack; however, if the space to expand and settle is very small, the final work will be a failure.

For that you need the spatula. You should always expand the crack a bit to repair. How do you do it? Then you must support one of the corners of the spatula maintaining a 45 ° angle of inclination and then slide it through the crack.

This must be done twice, both to the left and right to form a “V” inside the crack. Opening the crack in this way, you will then create enough space for the material to settle.

Then remove all debris and dirt using the brush or cloth. It is necessary to perform this procedure with much patience, only this way you can prevent cracks from appearing again.

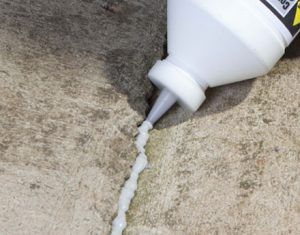
Now, depending on your case, use the sealer that suits you best. Although most people rely on the spatula to perform the spreading work inside the crack; others prefer to use a sponge. Both cases are acceptable.

Remember that usually you will need to apply two layers of sealant; but always wait until the first has completely dried before applying the second. You should also sanding excesses once a layer of sealant material has dried.

Once you have corrected any unevenness after the repair, it is time to apply the paint.

Final Tips

If the crack is in the concrete of the floor; it is best to use a hammer and a chisel to make the “V” shape instead of the spatula.

Remember that you can apply a primer to the sealant once it is dry before painting, so you will achieve a color with a more uniform finish.

Although it’s a weekend job, you have to be patient in waiting for the first coat of sealer to dry. Never overload the first layer, otherwise the cracks will reappear.

References

Masonry Work | Article about Masonry Work by The Free Dictionary

Masonry Basics – The Tools You Need and How to Use Them

17+ best ideas about Masonry Work on Pinterest

Read More
How to repair...

How to Clean CD Scratches

These days, CDs have been replaced by a number of other more technologically advanced tools such as the USB and mp3 players. The trend of downloading movies, music and games has also reduced the popularity of CDs. Nonetheless, there are still some CD aficionados out there. To some, CDs have a charming and reminiscent quality to them that many more modern tools do not posses. Regardless of this however, there is one large flaw that all CDs share: scratches. Scratches on CDs are not only easily acquired but also damaging to the CD’s content. Often, even just one scratch on a CD can deem in unreadable by even the most sophisticated devices.

Fortunately, scratches on CDs are not always irreversible. One simply needs to know how to clean scratches in order to restore CDs to what they once were. With a clean, damp cotton ball, go over the entire surface of the CD, both the front and the back side. Make sure to clean away all dust and foreign particles that may have settled into the plastic then pat it dry with a soft cloth. Be sure not to use textured cloths or towels when cleaning CDs as these may cause even more scratches to appear.

Second step

The second step makes use of some household glass cleaner. From an appropriate distance, spray the CD with the glass cleaning liquid then rub it gently into the plastic. After this, use another smooth damp cloth to rinse out the glass cleaning liquid then again, pat the surface dry.

For the last step, a tube of toothpaste is required. After applying a small amount of toothpaste on scratched areas of the CD, buff the area using another soft cloth. Be sure to use an ample amount of force when buffing out the scratches but be careful when doing so. After several minutes of moving the rag in small circular motions, rinse the area clean with a bit of water and then pat dry once again.

Using toothpaste

If the CD still does not play, one can either repeat the previously mentioned method or try a new one. Like toothpaste, baking soda is also a well-known substance used. Mix some baking soda with a few teaspoons of water so that a generously thick paste comes about. After thoroughly cleaning the CD with some water and a clean, soft cloth, apply the baking soda and water mixture to the scratched area. With another soft cloth, rub the baking soda into the CD scratches, buffing them out with every movement of one’s hands. After a few minutes, rinse the baking soda off and dry up the CD.

If these common household materials do not work in your mission to clean scratches, one can visit an appliance store or a hardware store and purchase a CD cleaning kit. Typically however, these household items can get the job done as long as the scratches are not too severe. With a bit of effort and perhaps a bit of experimentation, one’s CD’s will be in perfect store-bought condition once again.

Read More
How to repair...

5 Minute Repair Stained Glass Tutorial

A work of art as delicate as a stained glass, definitely makes it a more intimidating experience than normal when we hear that crackling crack!

Repairing a stained glass window was something that was simply out of our league here at Decorating Visita Casas, until we tried.

After our experience with the mosaics, the stained-glass window was not so intimidating to see it close up. Maintenance is relatively simple once you have become familiar with the products that are used and; developing the technique to repair it, is a work of patience and practice Today we teach you how to do it!

Read More
How to repair...

How to Repair Ceiling Cracks

Yes, your new home may look great. It may seem perfect when it comes to ambience, tranquility, coziness, and comfort. All of your furniture, old and new, are properly placed in their respective places. There seem to be no problem in your picture-perfect home. Then all of a sudden you noticed something when you looked up – there is a crack on your ceiling!


When it comes to unsightly crevices and holes, most people consider having them fixed by a professional. If there are a lot of cracks, then you may do so but if it’s not that many, you can do the fixing yourself. Now, are you wondering how you will do it? Are you that eager to restore your beautifully-designed ceiling? For repairing your ceiling, you will need these materials: stepladder, vinyl spackle or joint compound, putty knife, safety glasses, and fine grit sandpaper. Here are the steps on how you will do it.

• Assess the Situation
You must analyze and determine how much vinyl or joint compound you’ll need to fix the ceiling. Visit the closest DIY store to buy what you need. Buy vinyl immediately, not just plain plaster. Vinyl can expand with temperatures and stresses and your ceiling repair will last longer.

• Put on safety gear
The number 1 rule for home maintenance is to always put on your safety gear. And for repairing your ceiling, you must put on your safety goggles. In cases like this, debris might fall down and this will increase the possibility of getting your eyes damaged if you didn’t put on your safety goggles.

• Apply the adhesives
Using a putty knife, apply the spackle or joint compound to the crack. Like using a paintbrush, apply the adhesive in a “back-and-forth” motion with the putty knife. Press the spackle into the putty knife from several directions.

• Feather it!
Blend it with the rest of the ceiling by feathering your patch on all sides.

• Allow it to dry
Allow the patched ceiling to dry thoroughly. Joint compound may take a little longer, while vinyl spackle dries very fast.

• Sand lightly
By using the sandpaper, sand your ceiling lightly until the edges of your ceiling patch are flush with the rest of the ceiling. If you’re already satisfied with what your ceiling looks like, you may paint it already. But if not, you may repeat steps 1-5 until you get your desired outcome.
Now that you already know these steps on how you will repair ceiling cracks, next time you won’t have any problem if you have seen one again in your ceiling. By this, you will feel that sense of fulfillment coz you have done it all by yourself and that you have made your ceiling presentable as it was before.

Read More
How to repair...

How to Repair Double Pane Windows

Windows had been one of the most vital parts of the house. When the door is closed for safety, you can always open the windows for a breath of fresh air. As well as other items and parts of the house, they can also be decorated and styled according to the preferred theme of one’s home. You can put curtains on them, some other decorations depending on the occasion and you can also hang some small plants and chimes near them so that when the wind blows, you will be able to smell the fragrance of the plant, and hear the relaxing sound of the chimes. Windows can also be identified as single pane, or double pane.


Dual Pane windows are and effective way of conserving energy that’s why many people use them nowadays. Now, what if for instance you have a dual pane window in your home, and suddenly it was broken? How will you repair it?

• Take note of your window’s dimensions
Measure the width, height, and total thickness of your window before you can buy a replacement. Buying the correct size of a window is as important as properly installing it. The easiest way of doing this is to measure the dimensions of the frame and note them down. You will need to give the individual thickness of the glass units in case you want the same spacer.

• Unscrew and remove units properly
Once you had bought the proper replacement for your window, you are now ready for doing the repairs. First, gather all the necessary equipment within your reach. Unscrew and remove the units one-by-one and properly take out the broken windows. If there may be smaller pieces, clean them properly with a vacuum.

• Put on the adhesives
Squeeze and apply some caulk to the frame, where you will be installing the new window. Make sure that you apply the caulk evenly so that there would be no air gaps for you to avoid the entrance of chilly air. Place the new unit gently and make sure that it fits in the frame properly.

• Screw down tightly
Once the new window is placed in properly, screw it down tightly, check the free-drilled holes in the frames. and screw the dual pane window accordingly. After securing the screws, try opening, closing, or locking the unit. If the new windows are working fine then install the new window frame. Place the screws to assure firm grip. In case you find more air gaps, then apply more caulk as well.
Repairing windows is quite easy if you just know the measurements of your window. And what’s important as well is that, you should have the proper materials, and be responsible enough to secure the small parts like the screws, nails, etc. now that you have your new window, you can open it once again for a breath of fresh air, and for a better view of the world around you.

Read More
How to repair...

How to Repair Air Ducts

Have you been paying a lot every month for your electric bill? Have you always wondered why your electricity have been reaching its highs no matter how much you conserve energy by turning off your appliances and lights when not in use? But the real question is this. Does it really have something to do with your lights and appliances? Or maybe you are not aware that there had been a problem with your air ducts?


Poorly sealed air ducts can be one of the biggest energy and money losers at home. If you are much confident with your insulation wraps, that doesn’t solve the problem or it does not stop air leaks. Now, here are some ways on how you would repair air ducts.

• How to Seal Air Ducts with Mastic
Mastic seals are faster to apply than tape. They also last longer and seals better.
1. Clean the surface with a damp cloth if it is filled with dust, oily film, and grease.
2. Load brush with mastic and cover the entire joint continuously. Use the end of the brush to work the mastic into joint. Spread mastic atleast one inch on each side of the joint and it should be thick enough (about1/16 inch) to hide the metal surfaces.
3. If the gap is greater than ¼ inch in the duct connection, then use fiberglass reinforcing membrane in addition to mastic. If it is too sticky on the side, cut enough membrane to cover the joint, press it in place, and then cover with mastic. To completely cover the membrane, apply enough mastic. However, if the membrane doesn’t have a sticky side, apply a thin layer of mastic, press the membrane then apply the finishing layer of mastic.
4. Wrap ducts with insulation. It can be installed over wet mastic but try not to move the ducts too much for it could damage the mastic seal. Before applying the mastic, make sure that you’re done with all the duct support work.

• Round to Rectangular Transitions
Fiberglass reinforcing membrane may wrinkle when it’s run along a joint between round and rectangular ducts. Use a utility knife to make it flat, make a series of slices about every 2 inches then wrap it around the duct.

• Mastic Recommendations
Use a UL 181A-M and UL 181B-M. These types of mastic are designed for the repair and installation of ducts. It can be applied through brush, gloved hand, trowel, or caulking gun. Even though mastic is still wet, you can already apply insulation.

Now that you have learned on how to repair your air ducts, surely you won’t have any more problems with your electric bill. And when the time comes that you’ll notice your bills running high once again, you will never fail to check your air ducts and be ready to repair them.

Read More
How to repair...

How To Repair Sagging Floor Joists

Ever felt like the floor you are walking on is not solid or even? Ever had that feeling that your footsteps goes thumpety thump, thumpety thump when you are walking? It must be that your floor joists are sagging. Say what? Since these floor joists are placed during the very early stages of a building or home construction, some people may have never even seen their floor joists. But though you may have never seen what is underneath your floor, these floor joists play a major part in supporting the structure and in the security of your floor and the whole building.


You may ask yourself, if I have not seen it, then how is it possible for me to repair sagging floor joists in my house?
While it is quite difficult and may require advanced skill from the worker, it still is an achievable task. You must understand where the problem is coming from. Sagging floor joists may result from age. Over time and pressure, wood will flex and bow causing it to sag. Even floor joists which were installed properly in the beginning, will give in at some point. This is especially true for older buildings or homes, making it necessary to repair sagging floor joists.

To enable you and your family to feel secure that you are walking on solid ground, the following are helpful guide in repairing sagging floor joists. If your house has a basement, the ideal way to fix sagging floor joists is by use of a brace. You need to install a beam vertical to the joists in the mid section. The beam has to be the same size as your joists. This can be done by use of boards.

The boards to be used to create your beam need to be able to cross from wall to wall across your floor joists. Cut the boards and attach together with the use of adhesive and nails. The next step is to put the brace in place. Wedge a board in a slight angle in between the basement floor and your beam. Using a hammer, straighten the base of the wedge to push up the beam to take the sag out of the joists. Once done with the procedure, check whether the floor is already level enough, if not continue with the same step. It is best to install posts every after few feet to serve as support. This will help in postponing future sagging of the floor joists. Although, it is recommended to get a contractor for professional help for this kind of job, it can still be done properly by yourself if you just carefully follow the steps mentioned in above. After all, to whom is it better to entrust the safety of yourself and your family than your own hands?

Read More
How to repair...

How to repair tear in leather couch

One of the best places to lounge and relax after a long day of work is your ever dependable couch. It is a must in every home and you will rarely see a home that doesn’t have one. Among the most popular materials in couches would be leather. Not only does it give such a modern touch but it’s also easy to maintain and will incur lesser stains specifically for genuine leather materials. Leather couches also grow beautiful with age specifically showing off its patina.


Despite the durability of leather, without proper care or due to unexpected accidents, owners of leather couches may usually encounter cracks or tears. Most people do not find the means on how to repair tear in leather couch simply because they feel it’s too tedious or has no remedy.

With the help of your local hardware store, purchase a leather repair kit. Assessing the damage on the leather, you may also have to buy the same or closest leather material or color in case the tear is too large to mend by sewing or sealing alone. There are a few techniques on how to repair tear in leather couch and one technique is to apply glue or compounds specifically used for leather. Some leather kits already have this while some kits are for mending using sewing techniques. For an even and less noticeable repair, most professionals use leather glue compounds.

Since leather is a porous and slightly expandable material, regular strong glues or glues used for hard materials won’t be able to repair that. It may actually cause more damage to the material and you may just end up buying a new couch. To start off, most leather kits will have a prepping agent or solution for you to clean the damage area to ensure the mending material will adhere later on. You may also clean the damaged area first with leather friendly soap and water and let dry before applying the prepping agent. For leather tears that are larger or have pieces missing, a patch would be needed and most kits would have this already. After sealing the area, you may proceed to applying the main mender or compound. Make sure to follow the instructions and application procedures on the product based on the manufacturer’s specifications.

Usually, compounds for leather repair will have to be completely dry prior to using a protective coating. Once the area is ready, ensure that it’s clean and smooth out any uneven parts with the tools and solutions provided in your leather repair kit. Lastly, apply leather conditioner to enable the repaired area and materials to blend in. Leather conditioners also help in making the area more durable and stretchable to avoid future tears and damage. Consider applying the leather conditioner on the whole couch as well. There are also leather protectors available in liquid or wax form. These will protect from minor scuffs and scratches as well as stains.

Read More