Remodeling

Are you planning on a replacement window?

Vinyl is a flexible synthetic material, which is why installation is very easy, and does not require the complexity and confusion from major construction and home revamping procedures. It is also easy to maintain, in fact, it does not even require you to keep it tidy at all times, because it won’t easily chip off, won’t fade, and does not crack, bend or go out of place easily. In addition, cleaning it only needs a less than rigorous wiping using a clean cloth.

Replacing a window

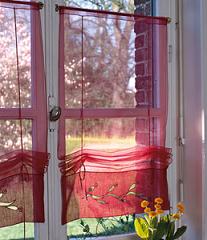
These kinds of replacement windows aren’t exactly that cheap, but they’re not that expensive either. Affordable to the thrifty, as one might say, and of course this is not just some commercial gimmick. Imagine all the benefits of having a very efficient replacement window for a price that is comparatively lower to its value as a construction material.

Additionally, vinyl replacement windows can potentially increase the cost of home resale, because of the sparkling finish combined with all of the other benefits that we have mentioned earlier. With vinyl replacement windows, opportunity develops, and estate business can now have the potential to go one step further. It can literally increase the value of an estate property when properly and correctly applied to a home.

Wooden window

If you are planning on a replacement window, a vinyl replacement window might not be the all-mighty transcendental option that you can have, but it is highly recommended. Like any other major home upgrading project however, careful planning would be necessary to avoid any unwanted slipups.

Read More
Remodeling

Escaping Common Remodeling Mistakes

Remodeling nowadays had been made readily available to anyone, with the myriad of different guides and do-it-yourself media about remodeling. You only have to follow the exact procedure indicated in the guide and you’re ready to go. However, in this new field of do-things-on-your-own remodeling, there are some common mistakes that can ruin your entire experience. Knowing them may not be enough, because also knowing how to go around these mistakes is the way to go to ensure that your remodeling project goes smoothly.

Floral stencils

Keep an eye on what you really plan to add. Taking too much items and articles or too much remodeling is one thing that can potentially ruin if not totally destroy, the intended symmetry of the room. Check your remodeling project once in a while, and try to match what you have currently accomplished to its surroundings. If you think that you’re starting to go way overboard, stop, and start trimming the little excess that had accumulated. Besides, if you don’t plan on staying on one place forever, why do such labor?

Expect an estimated increase in expenses from what you had originally intended. This is not to say that you should actually spend more when there’s an actual increase in expenses, but you should more or less be ready in case your calculations added up more than what you had expected. Remember, you always have the option of spending less, or economizing your expenses, you’ll just have to be patient in scanning all products and services that you can use.

Synchronize everything according to what you actually have. Never try aiming for a style different to what is already provided. For example, trying to go for ultra-modern design may be futile, when your furniture is of the late 20th century design. This also means that you shouldn’t modify something that the original creators never really intended to, and that you should stick to upgrading the things that it can already provide.

Painting walls

Never, I repeat, NEVER try doing it yourself if you can’t really do it. Even with the hundreds of magazines and guides out there, there ought to be someone who’s not really inclined for remodeling work. It’s not that we are giving an insult, but let’s face reality. Would you really expect yourself to be able to do some hip Victorian style room with the crude and even less than elementary skill of yours? I guess not, and even if you have an interactive step by step guide, if you can’t do it properly, do not attempt to.

Finally, some things have designs and structure that are rightfully theirs to keep. That’s right, there are just some things that do not require remodeling at all, they are all better with their natural (or manufactured) design.

Read More
Remodeling

Opportunity at an Economic Slump: Home Renovations

An economic slump is not really what we can actually call as a crisis, but it’s not really that tranquil. During this time, many business firms and establishments based on a single autonomous economy are still during their unstable stage, and are still adjusting to the infant economy to where the business is situated. Naturally, a generic price is also yet to be firmly established, and so opportunities can arise to the person who is keen enough to observe this, and the first thing that comes to mind is something that you can use for potentially many years to come, one’s own home.

Hallway decor

Gaining a proper stand during this era is important, as it is the only time where you can virtually exploit any aspect of home renovation that you can grasp. People at the business themselves are force to endure quite a hardship, with their business literally creeping its way up rather painfully, although Adamant home owners gleefully dance away as they typically don’t have to worry about prices going skywards away from their dreams.

If you can think of home renovation combined with an economic slump, only one word comes to mind, “now”. Grab this one and only opportunity to find a good home renovation project, before things can even settle down and re-stabilize. If you’re lucky, you may even be sitting on your newly furnished home with even more than what you had actually intended to renovate, provided that you have a lot of back-up plans and wild card choices hidden up your sleeve to play against the struggling entrepreneurs.

Well, chaos would most likely ensue as soon as every person would start exploiting the moment, but it is less likely that it could spell an end to a worldwide franchise. Other major companies that can endure the storm would most likely build up and reinforce as soon as the business gets rolling again. But then again, it is a battle against time, because if they can’t manage to revive their business in full operation within a given span of time, it could mean the very of the entire business altogether, with closure of establishments and mass resignation of their employees.

French styled upholstered chair

Nevertheless, the dream of finally being able to use that extra saved cash for home improvement can become a reality during these kinds of times. If you’re one of those lucky homeowners who managed to save a fortune in being able to get a very good real estate deal, then it is this exact time to dish all of your funds out for the improvement of one’s home. Well, if you’re still in doubt about risking those savings against mortgages, you can always do some well spent research to confirm things before actually venturing into spending a little extra cash for home renovation.

Read More
Remodeling

Redecorate Your Room: Fast and Affordable

Updating the design of your room does not need you to work physically hard to exhaustion or having to spend too much. There is really no need for very elaborate changes and furnishings. Remember that home trends change quickly and if you intend to change the design of your room to match these trends, it would be both taxing and very expensive on your part. To update a room quickly and inexpensively, a few solutions may be taken which can bring a new life to your once dull room. The following are a few suggestions on how to update your room without having to empty your wallet.

Victorian styled girl room

• First things first, get rid of your junk and clutter. What most of us do not realize is that the big bulk of the items in our room are things that we do not need. These may be piles of paper or items that have been left in our cabinets but have been unused for years. Throw the paper piles and arrange a garage sale for the items that you no longer need. By doing so, you are able to clean up your room and at the same time, gather funds for new items that you may need to redecorate.

• Acquire remarkable ideas from resources. While thinking about what you want your new room to look like, it would help to acquire ideas from references such as photographs in magazines and in the internet, etc. These references can give you a countless ideas on how to redecorate a room.

• Think about a new arrangement for your furniture. Moving the furniture around until you reach the arrangement that you are satisfied in might be physically exhausting. A technique may be to draw your room and create a scale of the furniture. Rearrange them in the drawing until you have reached your envisioned arrangement for the furniture.

Small elegant bedroom

• Decide on a new coat for your wall paint or have wallpaper installed on your room walls. Think about the color combinations that you want. Choosing the right colors would definitely change the mood of your room. Do you want to make your small room appear bigger? Do you want your large room to be cozier? Colors can greatly influence the appearance of a room.

• Change your lighting or add candle arrangements. Candles for instance do not only add an amazing appeal of a warm room environment but they also add scent to your new room. You may also add lamps to dark areas of your room.

• Consider adding flowers and plants. Flowers and plants do not only answer decoration needs but health needs as well. Not only do they add warm colors but also freshens the air of your new room. Further, adding plants in the room create a welcoming feeling.

Updating your room is pretty simple by first planning what you envision your room to be. Remember that for a room to look absolutely amazing, elaborate and expensive changes are not necessarily needed. Simple changes are enough as long as you love what you have done. With these simple changes, you will be able to do it.

Read More
Remodeling

The form is an essential element when decorating a home

The form is the next essential element to be considered when decorating a home. This will give you the feeling of completeness and fulfillment. Say for example, a square room may appear boring; however, you can add forms that may give the room an amazing look. You can either make the ceiling look lower or higher; or whatever look you may want the room to have. Triangles will also give your room the balance and unity that you may want it to have. You can also create a variety of effects and contrast when using circles and give your room a subtle look when using the oblong forms.

Modern kitchen décor

The next element, which is the most important one, is the color. This sets the mood that you would want your room to have. The color provides the background, creates the harmony in the room, the accent and the variety as well. Colors also do wonders in changing the size of the room or it can create a restful feeling. Colors have effects on the user; thus, it is important to know what colors to use to have the feeling that you want in your room.
Decorative bed pillows

The fourth essential element that you need to consider when decorating a home is the texture. Always remember that this element have psychological effect on the room and it may give a formal or rugged look to the room and thus it needs to be considered when you will be decorating your home.

These are the essential elements that you need to consider for you to have an idea what effects does your decorating plans have in your home.

Read More
Remodeling

Sending you Old Furniture into the Future: Painting old Furniture

Furniture, like any other object in this world, ages and gets old. Even furniture in your homes that have been sturdy enough to last for decades, would also lose its beauty at some point. Conventionally, most people would want to replace them with a new one, who would want to keep something that gets less and less useful, and would eventually get defective anyway? But for people who are on a budget, or people who want to preserve furniture of sentimental value, certain alternatives have to be considered. You actually don’t need to replace your old furniture with new ones. Preserving your furniture can be done simply by painting them, reviving or even surpassing the lost luster that it once had. Here are a few helpful suggestions when painting you old furniture:

Restored antique furnitures

Ask first all of the members of the household if it is okay for the furniture to have a paint job. There’s nothing worse than having your family heirloom lose its antiquity unintentionally. If it is okay for them to have the furniture reworked, then you can start getting those materials needed in repainting old furniture.

First and foremost, you have to strip the old furniture of all aspects of its former self. Chip away bulky and excess old paint and dirt in the furniture by scrubbing it off using a wire brush or a stiff scrub brush. Make the former paint finish dull by using a sandpaper to scrub the old paint off the furniture. Remove all hinges and other parts that are not part of the main body of the furniture and put them together in a container for reattachment later. Then wash the entire furniture using soap and water, and make sure to wipe off all residues using a clean damp cloth.

Second, you should know some common ways of applying paint onto a surface. If you want a “store bought” look into your furniture, then spray paint is highly recommended. Be careful though, spray paints need a lot of free space to be able to work with them properly. Spray paints also demand proper ventilation and well a protected work area, so it’s best if you use them outdoors.

Faux finished furniture

Preserve the paint on your newly painted furniture by coating it with polyurethane. If you have sanded your furniture well before applying paint to it, then applying a coating of polyurethane shouldn’t a problem. Just remember to apply at least two coatings of polyurethane for maximum furniture protection. As for certain painting styles, like the famous “shabby chic”, you would still have consult certain specialists if you want to successfully apply any of these techniques in painting your old furniture. With proper execution of these techniques however, you should have your furniture last until your next paint job.

Read More
Remodeling

Room Updating: The Fast and Budget Friendly Way

Updating one’s room is never that hard and expensive. There are a lot of ways that you can update your outdated room without having to spend so much and you can even do it the quicker way. Here are some tips on what you can do to get your room a makeover that it needs. First thing that you can do is to have the plan on what to do with the room that you want to arrange. Decide if you would just use the available things that you have or if you are willing to spend some amount for your redecorating plans. Then, plan out the things that stays and the things that goes out of the room. See which things needs replacement and which of the things needs repair. This way you can start cleaning up the room by placing all the things that are not needed in the garage.

Delicated and classic bedroom

Start cleaning up. Tidy up the room for you to better plan out where to place things. You may want to have a look may want to have a research on beautiful lay outs that you can make use of in the room that you are designing. If you want to change the mood of the room by changing the colors of the wall, you can make use of the paint or make use of wallpapers to design the walls of your room. You can now start deciding on the colors of the curtain that you will have.

Decide where goes where. If you want to have a working space in your room make sure that you separate space where you can place books, computer or other things that you will use for your work. And the work space should not be placed at a spot that is prone to disturbance. Start arranging. Start from the bigger furniture before you do the details of the room. You can also start from the undermost things like the carpet. Place the carpet first, then arrange the chairs or the beds or the entertainment showcase that you have.

Rustic and cozy style bedroom

Then update the bed. Be sure that you have the colors of your beddings and your pillowcases coordinated with the color of your room. It may not necessary match the color of the room but make sure it coordinates to make it look good. These are just some of the ways that you can update your room with a minimal cost or at no cost at all to you. This would help you redecorate your room to give it an updated look. Updating one’s room would not mean spending thousands of dollars to make it look good. It is just a matter of how you arrange and match things to give it the look that you wanted your room to have.

Read More
Remodeling

Decorating your 2-story Window with Style

It is such a pleasant site that you have a two story house with a two story windows to match. However dressing a window that is 15 feet high can be a very difficult to dress. Designing it the custom way can be one of your solutions. Here are some ways that you can dress up these windows on your own. These are treatments that can make your two story window look beautiful and unique with your own taste and style.

Window decorative curtains

The first thing that you can do is to purchase window scarves that can be purchased in 6 yards length. You can hang these scarves on a pole or you can use it as a window panel. The panels may be available in different fabrics like the sheer, silks or velvet. Then you can design it with you personal touch. Have it beaded, add jewels or add weights that may look good at the bottom part of the panel. The weight would prevent it from blowing into the room.

If you cannot find the right scarves that you are looking for, it is better to purchase a fabric and then you can sew it yourself. Estimate the length of the fabric that you may need. Add lining to the fabric of your choice to prevent it from fading. You can also sew the side of the fabric if it does not have the attractive side seams and prevent from buying fabrics whose sides cannot be sewn.

Decorative window shelve

Another option for you is to make gradient light curtain panels by making a series of panels or coordinating window panels. You can buy a 6 foot sheer window panel, a silk window panel and a six foot velvet panel that are of same colors or colors that coordinate well with each other. This kind of panel may allow you to have an effect that will allow you to have the light filtered a lot of times and have a little light coming from the center of the panel. To make it look better, remove the headers and the hem sectio9ns of your panel before attaching them. You can choose different colors of your choice; it is just a matter of color coordination.

In hanging your panel, you can either choose to cover the whole of the window or add panels in between them to give it an accent. If you want to have curtains that can open and close, you need to make a full window treatment and have tiebacks at the bottom of the panel because it would be very hard for you to reach the poles to adjust the curtains. These are just some of the things that you can do to treat your 2 story window and give it the look that would surely add beauty to your home.

Read More
Remodeling

Five things that will turn a discarded door into a precious possession

You have a discarded door in your house that is still good but you don’t need a door anymore, so what will you do? Of course you will not going to junk it just like that. Try to be creative enough to explore on other possible uses to it. We have listed five things you can do with a discarded door.

1. Your discarded door is perfect as a dining table for your family. You just have to add legs to it. You can either buy those from the hardware store or apply your carpentry skills by utilizing the available pieces of discarded woods in your backyard. It is also advisable to apply wood stain to the legs to match it with the color of your discarded door. For a door with carves, get to your hardware store to have a piece of glass cut in a way it will fit the size of your discarded door. For a door with smooth surface, you can put table cloth or table mat that can be easily change or replace anytime you want it.

Table made with a discarded door

2. Use the discarded door as your extra working table for large workstation. Just place low filing cabinets against the wall and place on top the discarded door, the one with smooth surface should be facing up. If the door has the hole for its doorknob, make sure it is position at the back portion so it is not obvious and you can still use it to let the wires, cords or computer cables pass through it. Then place you computer monitor, printer and other things you are using for work. Just make sure that heavy objects be placed over the filing cabinets to keep balance in your discarded-door-turned-working-table.
3. Have it as your headboard. Just place the carved discarded door onto the wall of your bedroom then move your bed against it. You can also play with it by putting simple frames to a discarded door so it will look classy. Depending on the size of your bed, you can always adjust the size of your headboard. You can utilize a seven-foot door horizontally for a king-size bed or place it vertically for a single or twin-sized bed. You can use the entire seven-foot door horizontally for king-sized bed or adjust it for smaller size beds.
4. If you are into painting, it will be helpful to use it as a support for your canvass. Just mount the discarded door against the wall according to your preferred elevation then you can place your canvass cloth and start your painting session. For a heavily carved door, you can explore further more by painting an abstract. After placing your canvass, you can start your painting by tracing the patterns of the carves and produce a unique abstract art piece.
Dining table made with a rustic door

5. Make it your wall decoration. If your house is spacious enough and have a big wide wall, you can make the best out of a discarded door. You can hang it in your spacious wall and have an instant decoration. You can also employ some enhancements or twists such as adding frames or sketching an art piece on it. Remember, the more creative you are the more it will stand out.

So that’s it, just that simple and easy. Now, you don’t have to think of where to junk your discarded door but rather you will choose which among the five suggestions will turn your discarded door more precious. Lastly, you have to be careful as well with your discarded door especially if it is coated with paint. Some paints contain certain amount of lead, a substance that is hazardous and can even cause brain damage if accidentally ingested by children or adult alike. Make sure you have clean it and safely remove any other coating it has before use it.

Read More
Remodeling

Sentimental Memories in a New Home

An old house must have many old memories to share, and renovating or remolding must be very hard for the owners because they don’t want to take away every little thing in the house that will make them remember their past. So, there are many people who post questions on remodeling an old house, protecting existing fixtures while you work, and the like. These are the things that concern them, especially the old ones who have invested a lot of unforgettable moments in their house.

Rustic and cozy style bedroom

So, how do you really remodel your home while you also protect existing fixtures that are unforgettable? Of course, the very basic of renovating or remodeling a home is that you always have to find what you do not need and put them away. Separate then gather what you just need at home. Again, separate the existing fixtures of your home that you would want to keep.

But before you do that, you have to decide whether you’ll put them back at the same location at your home or you will redesign them? If you will keep them in the same place, mark the location so you would not be lost. If they are small fixtures, you can put them inside a box so nothing will be lost. Just be sure you label each so you will know where you are going to use it. You can assign codes so you won’t get confused.

On the other hand, for fixtures which are hard to move, you have to decide. You can always try remodeling them in such away that you don’t have to move them. It will save time and effort. You can always find ways to decorate those fixtures to make the style of the home a little different without moving some things.

Living room

Upon figuring out finally of what to do, you can go one separating these fixtures depending on your plans. Better put together the things that are placed together so you wouldn’t lose anything of them. You can mark each or put the things according to their use or place at home. This will help you effectively especially when you are already moving things out. Everything will be a mess so better keep those memorable fixtures inside a storage room or place. Be sure that the place is free from any dust or insect that might affect the quality of fixtures. You can make these fixtures look old but still of good quality by redesigning them. You can do that by adding some designs around them or by moving them, facing the other angle. There are a lot of ways to redesign an old home, keeping every little memory that the house possesses.

Read More
Remodeling

Revive the Appearance of Old Appliances

Usually old appliances are thrown away when their value gets depreciated due to damages such as scratches, dents or it’s just that they don’t look appealing with today’s modern standards. Of course the old gadgets won’t look as trendy as the new ones out in the market. The new designs have the edge in terms of performance and appearance. The old ones may still be in running condition but their looks are very much considered to be “phased out” and not appealing enough to blend in a modern home.

The Old Reliable Appliances vs. Newer Ones
Even though the old appliances may seem dull and beaten on the outside, with proper maintenance and usage they will be able to perform like they did when you first bought them. Even the appliance retailers and repair personnel will tell you that the older models are stronger, more enduring and may outlast the newer models.

Antique oven

This is because the appliances made in yesteryears were really made to last. If compared to today’s mass produced goods, older ones are more durable as they are documented to last from several years to a decade. The newer appliances however make up for this issue by offering extended warranty deals. Within this warranty period, you are assured that no matter what happens to the appliances the company will repair or replace it for you. These deals were not offered back then because there is no need for it.


Old Appliance Make Over

It is impractical to throw something away, especially if it is still in working condition. If the issues were purely aesthetic appearance, you can do some measures to make your old appliances as good as new. You can resurface your old appliances with veneer panels. This will let you hide the flaws, dents and damages. Instead of replacing your cabinets, you can just repaint them or cover them with veneers. For some appliances, you can repaint them using special appliance paint. Appliance paint is cheap and is usually available in local hardware stores. In repainting stoves and ovens, you will have to use heat and fire resistant paint. There is also a specialized paint for refrigerators and dishwashers. Be sure to use the specific paint to the respective appliance.

Antique wooden refrigerator

Another great idea to redesign your appliances is by using decorative magnetic sheets. These are readily available in stores but if you want to add a personalized touch you can make your own. All you will need is magnetic sheets, vinyl wallpaper with the desired design, contact paper (color coordinating), adhesive (spray-on is recommended for ease of use), and scissors. Cover the magnetic sheets with the contact paper and layer in the vinyl wallpaper. Apply adhesive and let it rest for several minutes. Let the magnetic sheets stick to the metal surface of your appliances.

Read More
Remodeling

How Quick Can You Get with Your Living Room?

If you are expecting visitors in a week’s time, you are probably thinking of doing some quick living room makeover. Since most of your guests would stay in your living room, you know you have to spice the space up so as to impress your visitors. But how are you going to make it presentable without having to exert effort and spend money too much? There are many ways in which you can make some quick living room makeover. You first have to set your goal. What do you want to see? What changes do you want to happen? You can set the mood, quick repair the damages, or rearrange your furniture. You can do all of these in just a one day so you won’t have to cram in preparing the entire house for your visitors.

Elegant livingroom

If you want to set the mood in your living room, you can do so by changing the color of the paint of your walls. If you want to have a dimmer ambiance in your living room, you can use some dark colors such as brown, black or gray. If you want to have a brighter perspective on your walls, you can choose bright colors such as yellow, orange, or white. However, if you think painting your walls would take too much time, you can resort to putting some wallpaper that is easy to paste on your walls. There are many designs available, and laying it out on your wall would surely take less of your time.

If you are not satisfied with the results, you can add some lights in your living room. You can choose from a wide variety of light colors, depending on what you want to achieve. You can soften the lighting so it would appear dimmer. You can also add some pieces of wall art to add to the mood of your living room. You can choose from small pieces to big pieces, though the bigger the furniture or wall art you add, the better effect it will give to your room.

Sophisticated rustic style livingroom

Actually, you can really do a quick living room makeover even with just playing on colors. You can have a uniform color for every piece of furniture or décor you are going to add in your room, or maybe follow the color of your sofa so that you can achieve a single family of colors. Or if you want, you can also play on the contrast of colors. If you have one color for your sofa, buy some decors with different colors. This would surely brighten your living room.

As for the damage, you can do some quick repairs, yes. But if that would need much time, you can just settle first with some covers like curtains or wallpaper if you have damage on your windows or walls. It is a quick living room makeover, and you have to be real quick in preparing before your visitors come in.

Read More
Remodeling

Repaint, Revamp, Resale!

Painting your home will make it look new and ready to be sold. Prospective house-hunters will be attracted to the vibrancy of the fresh paint and it will entice them to really take a look in the interiors. All of us want to save money when doing restoration or repairs and painting your home is a cost-effective means to double its sale potential. But no matter how much we’re trying to fit things in our budget and you decide to repaint the house yourself, you can do so rest assured that you will do it flawlessly so as to save time and of course, paint.

Painting rooms

Last Minute Repairs
Don’t try to hide the cracks on your walls or water stains with paint. Buyers will always look into those details so detect the source of the moisture and repair them instead of covering them up. Get your walls fixed before painting.

Choosing the Colors
When you choose the palette for the house, stick to neutral. You can opt to paint in fleshy tones but a lot of buyers would appreciate interesting but neutral color combinations. Try to imagine yourself as the buyer of your home: consider the versatility of the colors you brush on your walls to easily match with furniture and other home accessories. This applies to both interior and exterior of the house.

Where to Repaint
Check your timetable. If you have limited time and budget, paint on the front portion of your home: the front door and entry area. This is the first thing that people will see so a good impression of the entry area is important. Don’t paint a room for any particular age group so the buyers will be able to choose their. Balance the dark and light colors as long as the palette is neutral and not dated. Check all over the house for any areas that need repair particularly the walls and ceilings. As mentioned, get the piping fixed and remove any nails or screws hanging on the walls. Have the gaps properly filled, apply primer and then paint. For the illusion of space, use lighter colors. Don’t forget to apply a quality primer to prevent wax bleeding.

Painting walls

Besides your sales talk, the house itself will speak to the buyers. Repairs before repainting cannot be emphasized enough so that the time and effort you put into painting will not be wasted by the return of water stains and further deterioration of walls. The landscaping and miscellaneous fix-ups will also make a good impact on buyers but the paint job will be the most noticeable of all since the colors will balance the entire house. It will give the house its age and buyers usually base their furniture according to the paint job.

Read More
Remodeling

Things to Know about Granite tiles

Thinking of using granite tiles for your floors and countertops? Do you know how to choose the right ones? Here are some fundamental things that you should know before you go about buying granite tiles for your home.

How granites are formed:
Granites are actually stones that are formed naturally beneath the surface of the earth. They are formed as layers of rock in the earth’s core by repeated heat and pressure impacted on them by the earth’s atmosphere. It is a type of igneous rock formed from the liquid magma present between layers of rock. The pressure and heat and the subsequent cooling hardens the liquid to a solid rock. The magma constitutes of certain elements like mica, feldspar and also quartz. These are responsible for the crystalline appearance of the granite when its formation is completed. The hardness and durable quality of the granite is from the repeated treatment of the stone under various temperatures inside the earth’s core over several hundreds of years.

Grey granite tile

Processing of the raw granite:
Once the granite is excavated it is sent for processing in plants specialised for treating the raw granites. The first stage is the cutting stage where the huge chunks of rock are cut down to blocks which can be handled comfortably. These blocks are then reduced to slabs and tiles of various sizes and shapes by using wire saws. These saws are sharpened with the help of abrasives like aluminium oxide, diamond and sand. Water jets at high pressure are used alternatively with the saws for cutting the granites. After the cutting stage the stone undergoes polishing which is usually limited to one side. Then the final product is calibrated and gauging is done on it.

Now the tiles made with granite are completed and fit for use in your homes. Granite finds it use mostly in the kitchen where the countertops and table tops are fitted with it. It can be used outdoors too and the tiles that are left behind can also be used in places like the surrounding area of the fireplace, as cutting boards and also as coasters.

Granite tiles

Most people prefer granite countertops as they are heat resistant and also are easily cleanable. They require very little attention and regular care. But still some amount of looking after is needed. You can add some sealant to the granite for proper protection from moisture. And it should be polished at regular intervals with polishers and cleanser to retain that shining and dazzling look. With sparkling looks and durable quality no wonder granite tiles are the most popular choice for decorating both your interiors and exteriors.

Read More
Remodeling

Creative Ideas to Make Your Plain Window Roller Shades Fun!

Ever looked at your window and stared at those really boring plain roller shades? Ever wondered where you could possibly find ideas for customizing window roller shades? Look no further! This article will give you a few suggestions on how to get started.

Window roller shade

Painting
First, think of all the possible colors you can use that would go well with the entire room the roller shades are in. Match the colors you will use with the room including its walls and fabric. Acrylic paint should be used when hand painting your roller shades and remember not to apply the paint too thickly to avoid cracking and flaking once they dry. Before you start painting the shade, pull it down and then put a pencil mark where the top section of the shade joins the roll. The pencil mark will specify the limit of where you have to paint. If you do not do so, an important part of your design mural will disappear into the roll, rendering your creation incomplete.

You have the option to paint a mural on your roller shades (use a projector to blow up the image on the shades to help you) or just paint freehand simple designs like dots, stars, stripes, etc. If freehand painting sounds too difficult to you, you may want to use stencils to trace the mural or simple designs before painting for a uniform effect. You have the freedom to personalize your shades with designs that reflect your lifestyle and interests. Paint a guitar, ballet shoes, a baseball diamond, a club scene, Japanese temples, Che Guevara – you name it. It is décor that can be integrated into a room that has a theme.

Green window roller shade


Fabrics

The first step in decorating your shades with fabric is to purchase fabric that matches your room’s interior decoration as well as adhesive spray, and extras such as trimmings and tassels. Next, unroll your window shade onto a table and cut out a piece of fabric half an inch bigger than your shade on all four sides. Spray one side of the roller shade with the adhesive spray and then place the fabric over it to make it stick to the shade. It is advised that you cut away the fabric overlapping the shade for a clean look. The last step is to add the extras – buttons, beads, tassels, sequins, ribbon, etc. – to the bottom part of the shade. Reminder: Embellish only the last few inches of the shade’s lower portion or else you might hinder it from functioning properly. Once finished, roll the shade back up, install it and it is once more ready to use.

Read More
Remodeling

Learn How to Faux Paint Finishes

Do you love to admire antique stuffs but just do not have sufficient money to buy one? Well then, try to make your own. Do not spend that much money on something you can make yourself. Antique houses and furnitures look classy and make you feel cozier. But the cost can sometimes be too much to handle. An alternative solution would be to make or buy a new, cheaper one then finish it with faux painting. Below are some step by step instructions on how to faux paint finishes:

Step 1 First try to find the furniture you want to customize. It would be better to start with something small like a counter top or a bar table and possibly a part of your wall.

A man fauxing paint finishes

Step 2 When you have settled for item you want to configure, start by sanding its surface well using coarse sand paper so that paint will stick properly and the rough look will add to the distressed effect.

Step 3 Then apply your first coat of paint. Note that the color of this first paint will appear least on the finished product.

Step 4 After drying the first coat of paint, add a second layer to the entire surface. This layer should be the first wax layer and should be applied using cloth. Let the wax settle.

Step 5 Next, apply another coat of paint with a different color than that of the first one. After it dries, repeat the process of applying the wax layer. Hence, you now have two layers of wax and paint.

Step 6 Apply a crackle medium with the same consistency as your paint. Use a brush and cover the whole surface.

Faux finished furniture

Step 7 After the medium dries, paint in the final layer of your paint using tough bristle brushes; this will add to the distressed effect. The paint should contain the color that you want to appear most. Upon applying the paint, notice that it will crackle as the medium did. Be careful to properly cover and complete the surface evenly on you first try for when the paint dries up and you pass it again, you will loose the crackle effect.

Step 8 Once the final layer has dried, sand the surface carefully and gently. Forceful sanding can remove the crackle effect, so it will be ideal to go smoother on the whole surface.

Step 9 To maximize the distressed effect, sand the corners and high points of the item or wall, rougher.

Step 10 After sanding, clean the surface then apply the final layer of wax. Do this until ou have achieved the antique look that you prefer.

Don’t forget that success does not come without fruit of labor in your part Do your best and follow the given steps above.

Read More
Remodeling

How to Make Door Step Decorations out of Bricks?

Home decoration is one of the most difficult jobs for many of us. You have to ensure that you make the best out of it because people will usually judge you based on how your house looks like. But, do not forget that every part of your house is important in creating the impact that you want to have. That is why you should know how to make door step decorations out of bricks for you to ensure that the entrance of your house is as elegant as you want it to be without spending too much money for it. You can have the best door step that you want but you do not have to use and buy extravagant and expensive decorations. You must only know the techniques and some ways on how to make door step decorations out of bricks. The following are some simple ways on how to make door step decorations out of bricks. These tips can help you in deciding what to do and how to put decorations at your home for you to save more money that you can use in more important things.

Original mosaic doorstep

• First, collect all the bricks that you have. You do not have to buy new set of bricks if you already have bricks that were unused in your home. This can help you save money especially if you are in a tight budget. Collect all the bricks that you can use for you to have a plan on what to do and what kind of decorations you can make.

• Decide what pattern or design that you will use.
You have to make a genuine plan because if you want to have the best output, do not put things in random! Decide base on color, theme, size, and other stuffs that you can notice. This can help you in making door step decorations better than anyone has.

• Execute your plan. Do it carefully and follow your plan meticulously. There is no room for mistake because it is very hard for you to fix damages and errors once you already executed the plan. Your door step will give your visitors the idea of what is inside your house so you have to ensure that it is as elegant as possible.

Classic door step

Home decoration is not as difficult as you think. You can enjoy doing it without the problem of budget constraint. You only need to be as creative as you can and explore many ideas for you to create original decoration in your house. Now that you know how to make door step decorations out of bricks, you can surely make your door step the best in your neighborhood. Always remember that you do not have to spend and buy expensive things just make sure that it will happen. By the use of your creativity and ingenuity, surely, you can pull it through and you can have your dream doorstep decoration!

Read More