Kitchen

Focal Point Design Synthesis and its applications in Home Kitchen Design

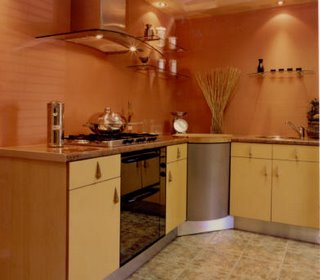
A focal point is basically the point of interest in an image, landscape, or scenery. It provides the eye with an immediate attention to which it focuses itself onto, and is usually the first thing that the observer ever sees or notices, consciously or unconsciously. There have been many wide applications of this technique, especially in photography and in the arts. But it is also know to be applied in general interior design and decoration as well, “stimulating the eye to create an art with its own self” as sometimes stated. The kitchen is one good place of a home, and like all rooms in a house or establishment, kitchens too can be applied with the focal point technique.

Country styled kitchen

For the central focus to the room, you can start with something that generally contrasts every other object or articles found in the room. You can choose from a wide variety of different objects to apply this, but you can generally do it to an object that you want to make as the key visual interest in the room, the exact first thing that can be noticed, or something that can create a contrasting but colorful difference in the entire room.

Kitchen tables are a good example. If you are going for ultra-modern design, then I can suggest a sleek combination of black and white, with table being white, and the center pieces and articles on the table being black. Even in this rather crude representation, you are able to create a smooth design are can create a streak in the observers eye to make it its center of attention.

Another good suggestion is to position the small objects found in the kitchen in a peculiar manner that it literally “protrudes” out of the attention of a person. Just like how we use color contrasts to take the attention of one’s eye towards something, you can also use the positioning of an object to instantly direct the attention of the observer to a certain object upon inspection of the entire room.

A simple way to do this is put away every single article placed on a table, leaving only one single article in the center. This way, the eye can focus on only one particular object on the room, plus it adds that sense of modern neatness in a way that is impossible in overly detailed rooms (you can even combine contrasting techniques to further amplify the effects).

Modern kitchen décor

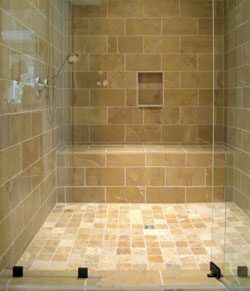
Additionally, repeating patterns around a distinct shape can also make one’s eye focus on a certain area. This time using the kitchen’s counter top as a reference you can try to make it go for a tile design, creating a regular pattern throughout the countertop, only to be interrupted by certain spots where the pattern goes different from the rest of the design.

A combination of all of these techniques is most appropriate, and with a good theme and design for your kitchen, the dark gloomy days in your medieval castle kitchen are finally over.

Read More
Lamps

Enlighten Your Room with Hurricane Lamps

In decorating a room, you do not just give details to the color of the room, the furniture arrangement, the curtains and the color coordination. You also need to look into smaller details like the decors that would give your room an elegant touch. This can be made possible by adding hand crafted objects as hurricane lamps. This can help in dressing up or dressing your room down, thus you need to be careful in choosing the hurricane lamp that you can choose.

Cranberry hurricane lamp

The hurricane lamps are simple masterpieces that you can use in decorating a room that can give your room a great look depending on your hurricane lamp choice. This can help set the mood of the room and give it a comfortable feeling. These kinds of decors may be placed in your room along with the other decors or you can place it in the table alone. This will make a great centerpiece on your table.

The hurricane lamps can also make a perfect decoration during the winter months giving your table a festice look by adding hollies and berries. This can also make a great decor during fall or spring when decorated along with the clear marbles or scented candles. By adding colored changinf leaves and some pines in the fall or light pastel flowers during the spring season, these just prove that a hurricane lamp can be a perfect decor for any season. You just need to be creative to put pieces together to make a great decor out of the hurricane lamp. You can also make a candle holder out of this hurricane lamp. Choose the glass type of this lamp, palce a candle inside the glass, this makes a perfect centerpiece for a dim light atmosphere or for a romantic candlelight dinner.

Hurricane lamp

Choose the hurricane lamp that would suit your room theme best. Choose if you would go with the glass or the trasparent one that would make a great stick on decor. This is found in craft stores and this makes a perfect light in the dark if you want to have a dim light environment. The plain glass would lessen the harshness of the light. You can also choose the misted glass. This is a very nice decor to look at but it also dims the light from the flame. There is also the glass with a dim color. This is the perfect choice if you like an illuminated light with a nice sheen.

This is the perfect touch that you can give to your room. This would make an all year round decor that you do not need to change. All you need to change are some treatments around it to make the hurricane lamp’s beauty stand out in any season.

Read More
Lamps

Stained Glass Lamp Shades: Home Decorating Ideas

Stained glass for a decoration never goes out of style. This is a decoration that can give your room a sophisticated look. One great thing that you can purchase to make your room have this elegant touch is the stained glass lampshade. This is a room decoration that is not only functional but can give your room an attractive light as well. The stained glass is made out of colored enamels fused into pieces of glass and fire them at a 1100 °F temperature. There are a lot of colors that can be used to create a great stained glass that can be used for lampshades.

Lovely glass lamp

Stained glasses are used in church windows before and they create an elegant window that some still exists nowadays. Then these were used by the wealthy people who wanted to have this king of window treatment in their homes and women used these in their offices. Then these evolved and were used on decorations like the dragonfly and the cherry blossoms by Louis Comfort Tiffany.

Nowadays, you can also find lamps that are made out of stained glass and it really gives your room an elegant touch. However, lamps made from known artists like Tiffany would really cost you a lot; however, there are reproductions that you can buy at a cheaper price. Thus decorating your home with a stained glass lamp shades is never that expensive. This is a great masterpiece that you can place especially in your living room or your bedroom because this is where you can appreciate the light that a stained glass lamp shade brings. Just imagine a room with colors playing across the walls and the floor of the room setting a calm mood.

Rustic glass lamp

There is a lot of types of lamp shades that you can purchase. There are stained glass lamp shades that can be purchased with a floor or table length bases. This can also be made out of brass or pewter to give the lamp stability preventing it from tipping over. These lamp shades also have different designs like the floral theme, geometrical shapes, whimsical or animal designs to fit the room theme that you have.

Designing a room using the stained glass lamp shade is never that hard because of the different styles that would suit any theme that you currently have in your room. You have a lot of choices. You can purchase the stained glass lamp shade online, or from art stores where you can choose from a variety of designs that would surely suit your taste. There are available stained glass lamps in the market that would suit your budget and that can give your room an elegant design that would suit your room perfectly.

Read More
Remodeling

Opportunity at an Economic Slump: Home Renovations

An economic slump is not really what we can actually call as a crisis, but it’s not really that tranquil. During this time, many business firms and establishments based on a single autonomous economy are still during their unstable stage, and are still adjusting to the infant economy to where the business is situated. Naturally, a generic price is also yet to be firmly established, and so opportunities can arise to the person who is keen enough to observe this, and the first thing that comes to mind is something that you can use for potentially many years to come, one’s own home.

Hallway decor

Gaining a proper stand during this era is important, as it is the only time where you can virtually exploit any aspect of home renovation that you can grasp. People at the business themselves are force to endure quite a hardship, with their business literally creeping its way up rather painfully, although Adamant home owners gleefully dance away as they typically don’t have to worry about prices going skywards away from their dreams.

If you can think of home renovation combined with an economic slump, only one word comes to mind, “now”. Grab this one and only opportunity to find a good home renovation project, before things can even settle down and re-stabilize. If you’re lucky, you may even be sitting on your newly furnished home with even more than what you had actually intended to renovate, provided that you have a lot of back-up plans and wild card choices hidden up your sleeve to play against the struggling entrepreneurs.

Well, chaos would most likely ensue as soon as every person would start exploiting the moment, but it is less likely that it could spell an end to a worldwide franchise. Other major companies that can endure the storm would most likely build up and reinforce as soon as the business gets rolling again. But then again, it is a battle against time, because if they can’t manage to revive their business in full operation within a given span of time, it could mean the very of the entire business altogether, with closure of establishments and mass resignation of their employees.

French styled upholstered chair

Nevertheless, the dream of finally being able to use that extra saved cash for home improvement can become a reality during these kinds of times. If you’re one of those lucky homeowners who managed to save a fortune in being able to get a very good real estate deal, then it is this exact time to dish all of your funds out for the improvement of one’s home. Well, if you’re still in doubt about risking those savings against mortgages, you can always do some well spent research to confirm things before actually venturing into spending a little extra cash for home renovation.

Read More
Furniture

Painting of Wood Furniture

If our solid wood furniture will be taken care of properly, it could last a lifetime or even generations. Just imagine a treasured piece of furniture which has found its way from our grandmother’s attic into our possession, but then, its color or shade isn’t quite right for our home décor. The stripping, staining, and refinishing are just some of the options for us, but these are going to be time consuming, difficult, and most of all messy. Wood furniture painting can be done by an amateur who only needs to collect the right tools for the job, which are the paint, primer, paintbrush, mixing sticks, polyurethane, drop cloths or newspaper, and some cleaning products.

Faux finished furniture

Wood painting like any other worthy projects always begins with the necessary preparation. The first one is to, thoroughly clean our furniture with soap and water. For nightstands, dressers, or furniture with drawers, we should first take out the drawers, and clean them as well. And we should leave the drawers painted outside its dresser. For the tables, it can be painted with or without its legs attached to it, but then, let us always make sure to clean up and down its legs. And let us not forget to clean every parts or surfaces of our furniture that will be painted.

After we had cleaned our furniture and dried them completely, its surface will need to be primed. The best material to be used for this is the bonding primer. If our furniture has a very glossy finish, the bonding primer will surely attached itself to the finish that will also provide a good base for the paint. But still, it would never hurt us to sand down our furniture’s finishing even a bit, just to be able to help the primer to do its job.

Painting a bench

The next step is being considered as the most fun part, which is the choosing of the paint color that we like. We should choose a color that will compliment the room in which our furniture is going to sit. The glossy paint are the ones that should be generally used on furniture, not unless we are aiming for a very specific weathered look or even doing a layered paint. After our piece of furniture has been given with a fresh coat of a new glossy paint, we can now add any special touches that we would like to have such as, texturing, sponging, painted artwork or even just a new elegantly looking drawer handles or knobs.

It is really fun to have a furniture painting; we can even do this with the help of our loved ones and even our friends and make it as our simple bonding moment with them. It could be hard and tiring, but then, if we are going to do it with our colleagues it will surely be memorable and our painted furniture will surely have an instant sentimental value for us.

Read More
office

Reviving the Office Area With Décor and Plants

The workplace is one of the spaces that consists of people with the highest of stress levels. This is because of the focus these persons put into their work that they sometimes forget to rest. This is why their stress levels increase rather than decrease. One solution for this problem is that the work area’s overall design should be properly coordinated. It should be relaxing as well as balanced in order for the employees to calm their minds and bodies while they work.

Office decor

In order for the office to be relaxing, you can choose to design with either of the following things: one, man-made décor or two, natural beauty (e.g. plants). The designs of the room can easily change the mood of one person. For example, the color of the walls has a big effect on how the person will feel and act. Dark colors will make the employee feel too much stressed while bright colors can lighten up the emotions of the person. It is always better if the workplace is balanced with simple designs in order for the employee to be serene and composed.
Plants in the office

A good idea will be the use of plants. Plants are natural things that able to remove the stress from people. Studies say that once a person looks at a green object, it will relax his or her mind. Plants also help up liven up the emotions inside the room. It won’t only be a décor but it will also help you have a peaceful mind and an kind of entertained feeling. You can choose different kinds of plants. There is a variety of sizes, colors, and shapes to choose from. It will be better if you choose your own design of plant in order for you to be more entertained and relaxed by just looking at the plant itself. On the other hand, you can even treat these plants as your friends in the office especially if you’re pressured! Plants are also good listeners so you can pretty much release the tension to them.

Read More
walls

The Process of Putting Wallpaper On the Ceiling

Designing your ceiling will add further beauty to your home. You can either paint it or put on wallpaper. The main focus of this article is to teach you how to paper the ceiling. It won’t be that easy so better prepare yourself! Remember, papering the wall is easier than the ceiling. It is because you can reach the wall easier unlike the ceiling where you need to stand on something so you can reach it. Thus, you will likely need some equipment for this task.

Putting wallpaper on the ceiling

Before we give the procedures, you should make sure of the following first:
• Prepare the different equipment to be used (e.g. wall paper, paste)
• The room should be empty or with things that you’re not afraid to get stained.
• Have a scaffold that can lift your weight. Make sure that the plank is in the right measurement so you can reach the ceiling with ease.

Now, for the next procedure, let’s follow this simple step-by step guide in papering a ceiling:
1. Take out the different furniture inside the room then put on old cloths on the floor. After that, focus on the ceiling and decide on what kind of direction you will be using for the pattern of the wallpaper.
2. Now, set up the scaffold. The scaffold should be high enough for you to reach the ceiling. It will be better if the scaffold is placed in a manner that it can reach both ends of the room.
3. Next, measure the ceiling with the use of the tape measure. Make sure that there will be extra inches so if ever adjustments will be made, you can effortlessly do it. Measure the wallpaper to be used and cut it according to the first measurements done with the tape measure.
4. Fill the paper tray with water then dip the cut end in the tray. Roll the paper and let it lay around for a while.
5. Premixed wall paper will then be put into the paper tray. With the use of the paint roller, glue it thinly to the ceiling area where the first edge of the paper will be placed. Place then the corner of the paper on the edge as well as the right side. Make sure that you are aligning the paper while putting it on the ceiling.

Floral ceiling wallpaper

6. Roll the paper until you reach the end of the room. You can use your hands to press the paper unto the ceiling for better results. You can also use a smoother in order to have more security. To trim the end of the paper, you may use a dry wall knife. This knife will help you cut the excess with ease.
7. Continue the process until all parts of the ceiling are covered. Make sure that the patterns are matched accordingly for a better appearance.

You can’t do this alone so it will be better if you let someone help you! Also, you can ask for some other instructions and tips from professionals. Good luck!

Read More
Tips

Tips on Buying Upholstered Chair

Buying an upholstered chair is not an easy task because you need to really look into what you are buying. You need to make sure that what you are buying is of high quality by checking the design and the construct of the chair. If you look into even the smallest details of the construct, you will be assured of a product worth the price you pay for it. Here are some things that you may consider when choosing an upholstered chair.

French styled upholstered chair

You should check the chair construction. You should see to it that the frame of the chair is made of hardwood. This would make sure that the chair is durable. You should also check on the joints of the frame where it should be doweled well even two to three times and it should also be held in place with the use of glue and screws to make the frame secured. You should also check on the webbing that are in between the frames and the spring coils. Make sure these are tightly woven and check if there are gaps or sags. Then check for the spring coil used. Check for its type and design as each design would determine the type of the quality of springs used. There are single, double and the zigzag types of coils. The sinous type is the coil with a lower quality. More coils that are together and the closer that they are would mean a higher quality of the design. They offer a greater support for the chair.

In purchasing a chair, you need to pay attention to the details of how the piece is tailored. Check for the quality of the buttoms, the tufts, the quilting, they should fit well and not loose. Try to check for the cushion as well. It should fit the corners of the seat well. It should not have any lumps on it and a muslin fabric should be used to cover the padding of the cushion and make sure that this muslin fabric should not be flimsy and it should also not be torn. Then you also need to check on the fabric patterns. Take into consideration the size of the pattern that should be proportional to the size of the chair.

Upholstered chair

The next thing that you need to consider is the comfort that the chair can give you. Try it out if it offers you the comfort that you are looking for in a furniture. If it is a chair that you are looking for, then you should look one that offers you the comfort that you are looking for when sitting on the chair and resting. These are the things that you need to consider for you to have the chair’s value of your money.

Read More
Floors

Mosaics are ideal floors for shower sliding doors

The doors themselves can be of an array of unique designs and themes: either mosaic design, colored, or by a technique called sandblasting. Mosaic designs have the glass themselves carved and crafted with intricate designs and some are designed from inside the glass. These are ideal for sliding doors that generally only have two large glass sheets. Common themes for mosaic design include a frosted design or any design that would make the other side of the glass out of visible. Colored designs make use of tinting the glass itself. It has the same principle as painting a wall section of a room; but of course, is treated with a different technique than the usual. After all, it is glass; and a glass is very different from a concrete wall.

Shower flooring

Sandblasted glass makes use of very fine uniform particles that are accelerated onto the glass; often to create intricate graphic designs. Its difference from mosaic designs is that it involves a blaster gun to decorate rather than conventional tools when sculpting glass. This is also a very good way to design your shower glass doors; and you can even request for unconventional designs to suit your designing preferences. Regardless of application methods, a way of designing your shower doors is great because it adds to the total atmosphere that bathrooms can provide. After all, the bathroom is the sanctuary of cleanliness; and an article in a bathroom, such as shower doors, also requires a good design as any article of any room in the house.

Read More
Decoration

How to Create a Japanese Inspired Dining Room

We all know that the Japanese inspired dining rooms are composed of some low tables whereas the diners sit on the floor with a pillow on it. This is also one of the characteristics that Japanese are being popularly known. Now let us discuss some of the interior design which creates a Japanese inspired dining room tips for all of us who wants to have a Japanese inspired dining room in our own home.

Japanese styled table

The first one is by simply putting some artwork in our dining room. We could simply hang some Kimono which is traditionally worn by the Japanese or we can even put some Japanese swords in our wall. If none of these two attracts us, we could simply choose to put some large landscapes which are a reminiscent of toile for the Japanese or even some painted fans if that interest us. Another interior design which creates a Japanese inspired dining room is that we should have some wall treatment. For some Japanese, their choice of wall colors should just come from the color palette of white, cream, black, and red. Aside from those colors, gold is also being popularly known and used by the Japanese in most of their designs.

The third one that we should always consider is our window treatments. We could simply use a shoji screens made out of rice paper to serve as our window shade which could be just under a very simple gold or black fabric covered with some cornice boards. The fourth one involves our chosen furniture; as mentioned above, Japanese don’t usually use chairs. They just sit on the floor with some tatami mats. But then, if we wanted to follow this Japanese tradition and yet don’t find it very comfortable for us, we could then make use of some pillows where we could sit to have a much softer and comfortable seat.

Japanese decorating style

Aside from all of those tips that have been mentioned above, we should also take some consideration with some of our tableware which should be also a Japanese inspired one; as well as our chosen fabric patterns and a lot even more. An interior design which creates a Japanese inspired dining room is a very stylish and trendy one. This is the one which is popularly being used by a lot of families who wants to experience a Japanese ambiance while eating in their own dining room. Now, we could enjoy eating like we are really eating in a real Japanese inspired restaurant at the comfort of our own home.
We just have to learn some Japanese cooking for us to be able to have the greatest experience that we ever wanted to have without having to spend much.

Read More
Feng Shui

Feng Shui Tips to Encourage Adventure and Self Discovery

1. For rooms in your home, there are several common recommendations. You can use plants to liven up some rooms that have natural sunlight coming in through them. Plants are symbols for the wood element, and wood is the symbol of life. So make sure you keep the plants healthy and alive. Remember to water them and clean them. They are not only there as a symbol, they can also help filter the air in the room.

FengShui kitchen

2. Fire is the symbol of passion and strength in Feng Shui. It is usually put into a room through the use of candles. But because having unattended candles can be dangerous, substitutes such as a table lamp with a crimson shade are recommended. It is also believed that the fire symbol works best for irregularly shaped rooms.

3. Having statues made of clay can be used for representation of the earth element in your rooms. Or you can also use clay pots filled with soil and rocks. The earth element represents stability because it is on it that we build our homes and office buildings. It is what nourishes us and helps us strengthen our lives.

Feng shui styled living

4. The element metal can be symbolized by bronze, silver, or gold. It represents abundance and guardianship. Because of its properties, the metal element lends itself to creativity easily. It can be in the form of practically anything.

5. For the water element, an aquarium is almost always the best way to go. But sometimes, water fountains may serve the purpose well too. You need to keep the water flowing and clean because this element works best when it is moving.

Read More
How tos

How to Hang Objects in Brick Wall

In personalizing your own home, there are so many things that you can do. You can add furniture, shelves, flower vases, etc., but the most common to do is hang some personal choices of objects on your walls. This is a very easy task. You’ll just select a design you personally want and then find a nail or anything which you can use in order to dangle it. But wait! Don’t be excited to hang up your favorite portrait or design just yet.

Pictures hanged on a brick wall

Determine first the kind of walls you have. Is it brick? If yes, please be reminded that hanging objects on brick walls might be easy but with carelessness might lead to having your walls some cracks or crumbles on your precious wall! You wouldn’t like that, would you? So before anything else, follow the tips and instructions that we will give you. First and foremost, determine what kind of picture hanger that you would use. For brick walls, the best choice would be is the concrete and brick one. It can hang not only light objects but heavy ones as well. Of course, this is when it is installed properly. This kind of hangers is easy to use. In using it, just find a position for your object on the wall then insert a nail (small and brass-plate one) and hammer it to the wall gently.

Next, choose what kind of screw that you can make use of. For this one, we suggest that you use concrete screws. These screws are very hard and really can handle support. It is not only applicable to brick walls but you can use it in other types of walls too. For this one, you will have to use an electric drill hammer. Don’t just drill but make sure that the hole will be smaller than the diameter of the screw and evenly insert and tighten securely the screw and you’re done.

Pictures in the kitchen

Lastly, anchors are also the ones that you should use. We highly recommend lead anchors. It is a very strong and durable anchor and they are specially designed for heavy objects. You’ll use an electric drill again for this one but you should set it into a lower speed. Drill a hole that is fit enough for the lead anchor then lightly tap the lead anchor on the wall. Screw and tighten it until it expands and securely hold the anchors on the walls.

That’s all about it. All the stuffs mentioned can be bought in your local store or hardware. Also, if you’re just a kid, let an adult help you in hammering or drilling your anchors or screws. The final advice we can give is that be careful in applying these stuffs in your brick walls. If you really can’t do it, you can ask your nearby carpenters to help or guide you instead! Good luck!

Read More
Painting

Protecting Your Room Before Painting

Painting your room is a fun activity giving your room a new look with a new theme that you would want to have. This is also one way of updating your room which has been painted ages ago. However, painting can be very messy because it easily drips and run and get the things in your room painted. You might mess up the things that you do not want to have a paint on. Thus, it is very important to take precautionary steps to protect your room and your things from mess when painting. Here are some ways that you can do to protect your room and things from getting messed up with paint.

Painting walls

• First, remove any furniture found in your room. If you do not have any space in the house where you can move it, just move it at the center of the room and make sure that you cover these furniture completely using a plastic sheet so that it will be protected from accidental painting.

• Be sure that you remove the lamps, the wall decorations, the throw rugs or other things that you would not want to paint on. Remove the switch covers and outlet covers and place them in a plastic bag along with the screws so they will not be misplaced.

• Then with the use of a painter’s masking tape, tape the baseboard to mask it off if you will be painting another color other than the one you used for the wall. Position the tape in between the floor and the baseboard so that no part of the floor is exposed. You can also use additional masking tape around the window frames that you have, this would help preventing accidental paints on the window frame. Position the tapes closely to the edges of the window frame as possible.

Painting with sponge techique

• Also make sure that the floor is well covered with drop cloths on the floor to protect it from drips or runs of paint. If you do not have drop cloths, make use of newspapers. But because newspapers are thin and can be easily torn, you need to use it with extra care. Always remember never to use plastic sheeting becuse they are slippery and may cause you accident. Plastic sheeting does not stay in place as well, thus it is not advisable to use it to cover the floor when painting the walls or the ceiling.

These are just some of the ways that you can make use of when painting your room. These are the basic things that you need to remember so that you can protect your room decors, furniture, outlet and switch covers from being accidentally painted on. Painting the room is never that hard nor messy. If you follow the precautions before painting a room, you will surely have a nice finish on the room without the mess. Be ready with the things that you need to use to protect other parts of the room that you do not intend to paint. Before starting the painting process, make sure you have everything needed to paint the whole room.

Read More
Remodeling

Redecorate Your Room: Fast and Affordable

Updating the design of your room does not need you to work physically hard to exhaustion or having to spend too much. There is really no need for very elaborate changes and furnishings. Remember that home trends change quickly and if you intend to change the design of your room to match these trends, it would be both taxing and very expensive on your part. To update a room quickly and inexpensively, a few solutions may be taken which can bring a new life to your once dull room. The following are a few suggestions on how to update your room without having to empty your wallet.

Victorian styled girl room

• First things first, get rid of your junk and clutter. What most of us do not realize is that the big bulk of the items in our room are things that we do not need. These may be piles of paper or items that have been left in our cabinets but have been unused for years. Throw the paper piles and arrange a garage sale for the items that you no longer need. By doing so, you are able to clean up your room and at the same time, gather funds for new items that you may need to redecorate.

• Acquire remarkable ideas from resources. While thinking about what you want your new room to look like, it would help to acquire ideas from references such as photographs in magazines and in the internet, etc. These references can give you a countless ideas on how to redecorate a room.

• Think about a new arrangement for your furniture. Moving the furniture around until you reach the arrangement that you are satisfied in might be physically exhausting. A technique may be to draw your room and create a scale of the furniture. Rearrange them in the drawing until you have reached your envisioned arrangement for the furniture.

Small elegant bedroom

• Decide on a new coat for your wall paint or have wallpaper installed on your room walls. Think about the color combinations that you want. Choosing the right colors would definitely change the mood of your room. Do you want to make your small room appear bigger? Do you want your large room to be cozier? Colors can greatly influence the appearance of a room.

• Change your lighting or add candle arrangements. Candles for instance do not only add an amazing appeal of a warm room environment but they also add scent to your new room. You may also add lamps to dark areas of your room.

• Consider adding flowers and plants. Flowers and plants do not only answer decoration needs but health needs as well. Not only do they add warm colors but also freshens the air of your new room. Further, adding plants in the room create a welcoming feeling.

Updating your room is pretty simple by first planning what you envision your room to be. Remember that for a room to look absolutely amazing, elaborate and expensive changes are not necessarily needed. Simple changes are enough as long as you love what you have done. With these simple changes, you will be able to do it.

Read More
Tips

Simple Painting Tips for a Room

It is not a hard task to paint a room and make it look professionally clean. We just have to have the right plan, the patience, and our desire to save some money by simply executing it by ourselves. We should also have the knowledge on how to paint a room well.

Painting walls

The very first step that we should do is to make sure that we already have enough paint that we needed in doing the said job. The greatest way for us to do this properly is to always get the general measurement of our room which includes the count of our windows and doors. If we don’t have any idea in doing this thing, we could simply seek some help of the painting experts in our town. They are the ones who are going to teach us on how to paint a room well. If our room already has a darker color or if we’re just going to apply a darker color, we might need some few extra coats of paints just to have an even color as a result. The good thing about this is that almost every hardware store are using some machines to program a very specific formula of colors. This will surely help us; most especially if we needed to run out and have more paint to be able to finish our job.

For us to execute our job well, we need to be sure that we have all the tools that we needed for it such as the following:
• A masking tape; the wide one.
• A newspaper which will serve as the resting place of our tools to protect our floors from having some paints on it.
• A paint stirrer; a wood is much advisable to be used.
• A pan which will be the one to hold our paint that we are going to put into our roller.
• Some angled sash brush.
• Small dishes which will help us carry our paint when we are using brush.
• And lastly, some roller and roller based which is specially designed for the right texture of our wall.

Wine tone painting

When we already have all of this, we may then start stirring our paints to mix its color well, after which, we could now then start painting the edges of our room and follow it properly until we finish our whole wall. We just have to put at least 2 coatings of our paint until we reach our desired color and let it dry. If we wanted to have a great finishing, we could always seek some help from the experts who really knows on how to paint a room well. It would be a bit expensive; but then we are assured that we will be having a great result.

Read More
How tos

How to Install Subpanel Center in Basement?

Your main electrical panel can only accommodate a certain number of connections. There will come a time when it will become too occupied to have any more link attached to it. This is a problem when you decide to ‘extend’ your electricity to the least used areas in the house like the basement. During this situation, it is not advisable to add another circuitry. Instead, you can install a sub panel. Most homeowners will employ a professional electrician, but if you are up for the challenge you can do it by yourself. Here are some things to remember to know how to install a subpanel center in the basement.

Plan on it
As with any installation, it is imperative that you plan everything. From the target location to the tools you will need, you have to strategize everything to the bone. Check your state’s electrical standards first so you will have a guide to follow. Measure the basement and draw a plan, keeping in mind the future improvements you will implement after you install the subpanel.

Installing a subpanel

Ready your materials
Clean your basement first. Installing a subpanel in the basement can be arduous when there is a lot of clutter in the room. Make sure that you have all of the tools and materials you need. Place them where you can easily reach them. Set up a good lighting to avoid accidents, in doing electrical works one mistake can be fatal. Be sure that the lighting will not get in the way of the installation process.
If there is an existing yet non-working subpanel in the basement, it would be better to remove it first.

Mark the walls
Use a pencil to outline exactly where you desire to install the sub panel. This will help you do a precise work and keep you from going astray from the plan. Be sure to get the exact measurement of the sub panel so that everything will fit perfectly.

Mount the Sub Panel
Prepare the subpanel first for mounting. It is advisable that any covers, doors and partitions be removed first because they can get in the way in the installation. .
After doing this, you can attach a plywood backboard first. Make sure that it is sturdy enough to stay attached to the wall while bearing the weight of the sub panel. Be sure that it is securely fastened to the wall. Attach the subpanel to the board.

Subpanel center

Install the sub panel
Double-check the sub panel if it is securely mounted. Follow the instructions given by the manufacturer. Attach the wires as described in the users’ manual.

When you are done, test it if it works. If it does not, contact a professional to troubleshoot it to prevent the risk of burning the subpanel.

Read More
walls

How You can Remove Surfactant Leaching

Surfactant leaching is a term that describes the spots or the streaks that appears on the surface of a wall where you have just applied a latex paint. These are sometimes brown in color and sometimes, seems to be colorless. This is also known as the water spotting which is a common problem that you can have when it comes to using latex paint. Although this may not be harmful at all, this is not a good idea to always remember the very proof of water spotting especially during the time that you are beautifying your home.

Ceiling leach

The surfactants are one of the ingredients of paint that can help make the paint’s performance get better especially when it comes to the paint’s color, stability, leveling, flow and stability. However, when the latex paint takes too long to dry, this would cause surfactants to rise to the paint’s surface, thus causing surfactant leaching.

This is a problem that most painters encounter when they are using latex paints during the spring and fall seasons. This is because the temperature during the daytime is low and the humidity is high. When the moisture condenses, the spots occur which results to the unsightly streaks on the newly painted wall. There are other causes of surfactant leaching such as pressure washing, applying the next paint coat (without letting the first coat to totally dry up), painting in interiors that are unheated, and applying a heavy coats of paint that will likely result to streaking.

Removing the streaks or the spots is not actually difficult. Just be sure you are being careful of what you are painting even after a day or two. With the use of a wet cloth, wipe the streaks out and this may work. A gentle hose spraying may also do the trick. If this is not an effective solution in removing the streaks, you can make use of a dish detergent and water and should wash the staining out. Another way to remove the spots is to use a multi-purpose cleaner. However, in surfaces that re exposed to the weather, it may just disappear in month’s time.

Wall leach

If nothing works especially in areas where it is not exposed to the weather, just allow the paint to dry in two weeks to a month. Then choose a perfect time to repaint the whole surface, a time that would affect the drying process of the paint. This will prevent you from dealing with the same problem all over again.

To avoid surfactant leaching in the future, choose the perfect time wherein you don’t have to wait for days to let it dry. This will help you in preventing the leaching to occur and save you the money, time and effort when you need to repaint.

Read More