Decoration

Add Style and Glamour to your Small Apartment

If you think having a small apartment cramps your decorating ideas then this article is for you! Small apartments make decorating a challenging job as you have to make the available space [which is very little] look stylish and appealing. Here are some tips to add style and glamour to your apartment.

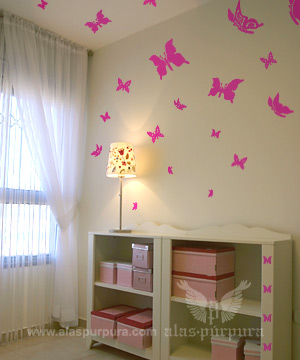
Let us start with the color arrangement. Try colors which make the place look spacious and bright. Orange, red and yellow shades are suitable for small spaces. Give more attention to the window treatments. Add adequate blinds and curtains to block any direct sunlight which does not augur well for your room. For the walls you can use tapestries. These lend elegance to the room and are useful as a cover for the wall in case your landlord is not in favour of painting the walls with your favourite color. Sofas can be given a fresh look by adding brightly colored covers to them.

Small elegant bedroom

Maintenance is an important aspect in choosing the various colors and décor. Brown or grey walls are best manageable than white ones. When shopping for furniture, look for Futons which double as a bed to accommodate a guest. Loveseats also do not take up much space and also add style to the décor.

Decorative screens make good décor pieces for small apartments as these transform a single room and make it look like two. The screens should allow light in to give the appearance of large space. For the dining area a bistro table will occupy less space and at the same time give a cozy look. Hanging plants on the walls and adding mirrors that are strategically placed will make the space look bigger. One most significant thing is keeping the place clean. A clean space free of your laundry strewn about and messy leftovers and other items will create a feel of a large space.

Small laundry place

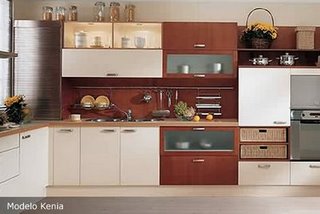
If the space still looks small with you following all the above guidelines then most probably your storage aspect is lacking. Take a look at the local stores which offer a wide range of economical and space saving ideas. You can go for a bed that has a chest of drawers underneath it where you can store a lot of things. You can also go for a coffee table or even a footrest which comes with storage areas. This way you get to avoid lot of cluttering. Shelves on the wall are also another space saving idea. With some imagination on your part you can transform even the tiniest space to a stylish and elegant looking beautiful room.

Read More
Furniture

Historic and Captivating Jacobean Furniture

The furniture design used during the period of King James I and King James II is referred to as Jacobean furniture. This style underwent various changes during this time period under the impact of the different reigns. In the beginning stage the Elizabethan style, which reigned supreme from 1603 to 1688, inspired changes in the Jacobean style. Later the commonwealth style which was stark and sported very little decorations influenced the Jacobean design markedly. In the last stages of the Jacobean style the Flemish Baroque style wrought distinct changes in the furniture style.

Jacobean chairs

Colonial Americans patterned their furniture style based on the early Jacobean furniture designs. But the designs that emerged were very archaic as skilled designers were few and far between at that period. The style that resulted was termed as early American furniture. The furniture that was made during this period was tough and durable. But they were giant sized and very awkward to use. Cupboards, wainscot chairs, circular tables and chests constituted the pieces that evolved during this time. The famous Brewster and Carver chairs, which had spindles occupying the frames of the chairs, were named after the two renowned Colonials of that age.

The wood used for the furniture was mainly from oak and pine wood. Chairs with spindled frames, rounded Spanish legs which had intricate patterns and rush seats characterised the chairs of this period. The tables and chests of drawers had elaborate patterns carved on them with numerous scrolls and opulent panels and twists done on them.

The basic patterns involved in the Jacobean style were very clear-cut and down to earth in quality. Squares and rectangles were the only shapes employed and the fronts were mostly flat and plain. The pieces were joined by pegs and sported mortise and tenon joints. Veneering was done on the furniture making it look lavish and flamboyant. A lot of inlay patterns were also used. Elaborate painting works were done to make these pieces look rich and stylish.

Jacobean dining table and chairs

The upholstery for the chairs and settees in the Jacobean style was done with silk, velvet and crewelwork. Some used leather, linen and tapestries too to give the furniture a magnificent and stately look.
If you are in search of true authentic Jacobean style furniture then the auction houses of England are your choice. As most pieces done during this period were tough and durable, they have lasted for many years and some are found to be in good shape even now. The historic Jacobean furniture is very much in demand for the opulence and style it portrays. Many replicas of this style of furniture have come up in the stores making these designs within your reach.

Read More
walls

Making a Butterfly Wallpaper Border: Another DIY Decorating Idea

Making a butterfly wall paper border need not be too hard. Imagine the pride and satisfaction you’ll feel as you gaze at your finished product. Just follow these easy steps for this creative do it yourself decorating idea.

What to do:
1. The first step in making a butterfly wallpaper border for a butterfly themed girls bedroom is to create a tentative design to follow as a pattern on a piece of paper using a pencil. Then, think of the right color scheme for your border design. Choose hues that are in harmony with the other colors in the room, including the window curtains.

Butterfly styled room

2. Next, take down measurements and estimate the amount of wallpaper border you are going to need. Accordingly, buy the necessary length and width of self-sticking wallpaper. If unavailable, substitute with canvas strips to be stuck to the wall using heavy-duty wallpaper paste.
3. Paint the wallpaper border first with the color for the background of your butterfly design. For the wallpaper border butterfly design itself, butterfly stamps can either be homemade (stamps cut out from potatoes/sponges) or store-bought. Get them in various sizes and shapes for variety. Coordinate the stamps with the tentative design that you have.
4. Use a paintbrush to apply paint on the stamps you are going to use. Do this carefully. Colors may be single or multiple for each stamp but remember to be quick or the paint on the stamp will dry.
5. Practice making impressions that fit the design you first had in mind. Once you get the hang of it, proceed in making your butterfly wallpaper border.
6. When you’ve finished making butterfly impressions, you may want to consider putting additional details into your border, like adding defining lines for each butterfly’s body, legs, and wings using another paintbrush. If you want to avoid making painting mistakes, try wallpaper cut-outs instead. You also have the option of adding background details such lines that swirl to hint that the butterfly is moving. Long dashed lines behind a butterfly will indicate it has been gaily flying about.
Butterfly themed bedroom

7. Give your butterfly wall paper border time to dry. Afterwards, take a spray sealer and spray on a moderate layer. Avoid spraying it on too thick or else your border will crack. Take the necessary precautions while spraying like opening windows for ventilation.
8. You are almost done! Take a pair of sharp scissors and cut out the dry wall paper border according to your desired effect: scalloped edges or closely cut to the edges. Take off the backing by peeling it off, stick the border into its proper place and voila! You now have your personalized do-it-yourself butterfly wall paper border.

Read More
Lighting

LED Light Bulbs: For High Intensity and Powerful Lighting

Proper lighting of high intensity and power-efficiency is the need of the hour. LED light bulbs are considered as the most power efficient and bright lights that suit both your home and office. They are economical and convenient to use.

If you are in search of an effective and affordable lighting for your homes then the new MR16 halogen compatible LED reflectors are the best choice to light up your homes. They are very power efficient and are easy on the eye giving you a bright and colourful living space to work in. No wonder building planners and interior decorators prefer these LED lights instead of the conventional 12 volt light bulbs. The mechanism behind the LED reflector light is entirely different from the volt bulbs. It uses Lumileds Luxeon LED which gives intense and powerful lighting that is power saving and also luminous than the old bulbs.

Led light

The LED reflector bulbs are multipurpose sources of light that can be employed in various fittings to create an opulent and stylish décor. The new vaulted ceilings incorporated in offices and homes are apt for these reflector LEDs. These also find good use in track lighting mechanisms.

You have a variety of colors of LEDs to choose from just like the volt bulbs. They come in red, blue and green colors and you can use them in your décor and get the same effect as the traditional bulbs with more power efficiency and appeal. Moreover these last for longer time periods than the old volt bulbs. These can also be used in flood lighting and spotlight beam lighting systems effectively. Changing from the earlier volt bulbs to the newer reflector LEDs has one main advantage which is the amount of power you get to save. The LEDs can go on for about 50,000 to 100,000 hours which means they can last for up to ten years. This is more than what the regular light bulbs in use give.

Led lights on the stairs

With the recent economic trends people are looking for time and money saving measures that will be profitable in the long run. Reflector light bulbs are efficient in the use of power and they also reduce your electricity bills considerably. Moreover unlike the halogen or fluorescent bulbs that need constant changing, these reflector bulbs last for long periods saving you a lot of money. Whether it is for the office or home décor the lighting chosen should be luminous and at the same time save on the power and the bills. Opting for the LED reflector lights would make your lighting a power efficient and stylish one.

Read More
Bedroom

Bedroom Décor: Important Facts to Consider While Decorating

A good night’s sleep can do wonders to your body and mind. It helps you to relax and rejuvenate. A bedroom should have a proper décor that is stylish and at the same time help you to unwind at the end of the day.

Here are some important facts to note in decorating a bedroom:
Colour of a bedroom should be chosen in such a way that makes it look larger and pleasing to the eye. Lighter shades give a look of ambience and restfulness. While subtle colours are suited for older age groups, teenagers and kids prefer brighter hues for their bedroom. Lighting should be soft and muted to give a relaxed atmosphere to the room. Valence lights and different hued lights can be used wherever needed. Stronger, focussed lights can be used for bedside reading.

Pink girl room

While choosing the furniture for the bedroom, always stick to minimal amount of furniture as possible. Crowding the room with furniture will shorten the space available and make the bedroom look cramped.

The bed should be the highlight of the room and its size should match that of the room’s size. Go in for comfortable, elegant and trendy beds that help you to sleep with maximum luxury and relaxation. The bed and mattress should blend with the surrounding wall colour and the lighting. Besides the bed, the side table and dressing table are the only other furniture to be added. The side table is useful to keep books, telephone and any medications. The bedside lamp can also be placed here.

Dressing tables are a must for women and should be equipped with lots of drawers to accommodate things. Closets should be designed so that all things like clothes and accessories are kept inside and not left hanging about the room, making it chaotic and messy. Your bedroom should reflect your character and exhibit your qualities. Add personal effects like photos, paintings and handwork which merge with the surrounding décor. Choose shades that you are comfortable with.

Rustic styled bedroom

As far as possible do not keep any electronic appliances like computer, television in the bedroom. These cause unwanted disturbance and lead to restlessness and insomnia. Proper ventilation should be present in the bedroom. Choose thicker window drapes to prevent outside light from entering into the room at night. An air freshener or if possible, a bowl of fresh cut flowers will add to the beauty of the room and give it a lovely setting. Always keep in mind that comfort should be the priority in choosing the décor for the bedroom. The décor should be such that you have a good night’s sleep and get up refreshed and ready for the day.

Read More
Kitchen

Tips and Ideas for Planning the Ideal Kitchen

Planning a kitchen can be a challenging task at most times as it has to be modern and at the same time practical and effective to serve its purpose. Kitchen is the hub of activity in most households; hence care should be taken in its planning.

Here are some tips and ideas to get the model kitchen that satisfies all your needs. The first thing in planning a kitchen is the placement of various appliances like the refrigerator, the stove, and the sink. These should be placed in such a way that will make it comfortable and easy to do cooking instead of running to and fro, making even a simple task of boiling water a laborious one. The area between the refrigerator, stove and sink should be at least 26’.

Modern kitchen décor

Providing proper counter space is an important aspect. There should be 24” space on one side of the sink and at least 18” on the other side. There should be 15” of counter space on the handle side of refrigerator to help in unloading groceries and other items from the refrigerator. The counter space can be beside the refrigerator or on the opposite within 48” of minimum distance. Appliances like microwaves and ovens should be provided with ample counter space [15” or 16” deep]. Dishwasher should be kept adjacent to the sink for easy cleaning. There should be a standing room space of about 20” on one side of the dish washer.

Work aisles should be placed with a minimum of 42” space if it is a single cook kitchen and in case of multi-cook kitchen larger space should be provided of at least 48”. Work top counters should be of different heights to suit the various needs. A shorter one for chopping and also in case of seated access, a taller one if the cooks are tall. The shorter one can vary between 28” and 36” and the taller one not more than 48”.

Country style kitchen décor

In the case of cabinets, 13’ base cabinets, 12’ wall cabinets and 11’ countertop cabinets will be optimum if it is a small kitchen where the available space is less than 160 sq. ft. If the space is more, then bigger sizes of 16’ for base, 151/2’ for walls and 161/2’ for countertops can be used. It is not advisable to put a cabinet over the cook top, but in case of space restraint if a cabinet is used then it should be about 24‘ from the cook surface if there is a fireproof surface and if there is no fireproof then 30” of space should be provided for safety.

There should be optimum clearance space for all doors [cabinets, refrigerator, dishwasher, ovens, and entry doors] so that there is no cramping of space and work interference. Planning a kitchen should be done meticulously to avoid inconvenience and also to help make cooking a pleasurable experience.

Read More
Tips

Modern and Trendy Decorating Tips

Decorating a house is a truly challenging task which should be handled with utmost care given to every small detail. Even small disruptions will spoil the overall picture; hence care should be taken to follow certain guidelines when it comes to decorating. Choosing the right colour, fabric, fabric textures and lighting plays an important role in decorating. Proper selection makes a great deal of difference to the end product.

The colour, furniture, accessories and the architecture should be done in such a way that all appear as a whole unit reflecting your individuality. Thematic buildings are the latest trends in decorating. The whole place will have a particular trait in common. For example, if it is a modern architecture than every small detail will focus on simple, sleek, classy, modern techniques. If it is a classic building than a more ornamental type of decoration is needed.

Modern kitchen and dinning room

In some cases you can also blend these two entirely different styles to get a completely new look. But this needs very meticulous planning and every minute detail should be looked into. A small mistake can spoil the whole proposed look, so exercise caution while venturing into new forms of decorating. This can be done with the help of a professional designer. If hiring a professional designer is not in your budget than you can always do it yourself with some basic ideas on the colours and furniture. With regards to the proper colour, always choose subtle, subdued colours. Too many bright colours will produce a jarring effect and will not be pleasing to look at. Whenever possible, stick to one colour tone throughout the building. This will make selecting other accessories easier.

Furniture should be kept as minimum as possible. Wooden furniture is the all time favourite. They impart elegance to any type of architecture, modern or classic. Metal furniture can be used if it merges with the other accessories. Combining both will give a contemporary look to the entire project.

Modern bedroom

Decorating the wall is another aspect to be done with care. The walls should not be crowded with pictures but at the same time too much empty space will not be charming at all. If it is a big picture, one or two on one wall would suffice. If the pictures are small, then you can either hang them diagonally or centre them on the wall. Proper lighting should be given so the pictures are highlighted properly. Paintings of Andy Warhol [1928-1987] and Roy Lichtenstein [1923-1997] are superbly coloured pieces which have inspired many reproductions. These add posh to your wall provided you choose brighter colours for the walls.

Ideally if it is a masterpiece then the piece should be hung separately so it is featured properly. One or two smaller ones can be placed on either side of it to add grace to it. There are no hard and fast rules when it comes to decorating, but the proper amalgamation of all the things like colour, furniture and accessories gives the decoration an entirely trendy and modern look.

Read More
Styles

Give a Classic Touch with Rustic Decor

When it comes to the theme of the décor, the picture that comes to our mind is a traditional Victorian mansion or a country house with all its splendour. This is because we still dream of castles and ranches and these traditional homes always are in vogue whatever the change in trend we might see. Rustic décor is a theme desired by many people while decorating their homes. The reason for this is the cosy and comfortable feeling of being at home that the rustic décor depicts.

Rustic style bedroom

Decorating your home or your office on rustic décor depends on what kind of look you have on your mind. You may favour a country house type replete with log cabins and farmhouses. Though the exact replica would be very unsuitable, designing your home with some of the décor on the lines of the rustic theme of your choice and blending it with your existing décor will be the best option. Authentic rustic décor themes are based on different time zones and you can pick a theme of your fancy, like a classic Victorian period theme or a country theme. Colonial themes are also in vogue.

If your choice is a country or colonial theme then your décor will be a practical and down to earth one. Hand made quilts and earthen pots go well with this type of décor. You can add some folk paintings which add to the rustic feeling. If you are an avid admirer of country themes then you can hang up some antler heads or bear heads which will be truly authentic and attract attention instantly. If you are for Victorian type décor you need to style your décor on stunning and fabulous designs which have intricate patterns done on them. Ruffled curtains, wicker baskets and magnificent table cloths and drapes make up the Victorian rustic theme. Artistically patterned wood furnishings and embroidered cloth furnishing will add effect to the theme.

Rustic styled kitchen

The rustic theme is liked by many because you can decorate your home fully on the theme or add bits of it to your regular home décor. Whichever way you choose, the rustic theme makes its presence felt. Try using rustic pieces of furniture to add the classic touch. A traditional chest of drawers, a grandfather clock or a wicker basket will give the room a traditional look. The main criteria in the rustic décor are to use as many natural products as possible. These make you feel the traditional set up unfold before your eyes. Rustic décor does not depend on any particular set of rules, so you can add anything and everything that makes you feel comfortable and also makes the room appealing and rustic.

Read More
Tips

Simple Steps For A Customized Layered Window Treatment

To attain that desired customized effect that you wish your windows to have, one of the best ways to do so is by trying out the layered window treatment. This article will help you in this home remodeling project. Create a layered window treatment and watch the transformation of your windows!

The Materials
Start off by purchasing a cornice kit that is to your liking at the department store. The window treatment we are going to make will use a padded effect so buy a cornice kit that is Styrofoam and is fitted to our purpose. At a craft store, buy fabric glue, batting, a staple gun, and fabric. Carefully reflect on the color and design of the fabric since it must be in harmony with the room wherein your window treatment will be installed. A few things to consider in the fabric selection are the other pieces of furniture in the room, the color of the upholstery, floor covering, and cushions. Also, check out the other fabrics in the room and assess their characteristics (e.g. weave, texture). In addition, be sure to purchase enough fabric to be able to cover the entire cornice.

Roman curtains

What To Do
Open up the cornice kit, carefully read the instructions and then put the cornice together. Once assembled, the cornice frame is to be enveloped in batting which is to be attached to the frame using the staple gun and/or fabric glue.

Place the fabric flat on your working table and then put down the cornice frame on it. The objective here is to successfully cover the board entirely, with the fabric ends placed unseen at the interior of the board so that the cornice will look seamless once you mount it over the window. Attach the fabric evenly and securely using the staple gun and fabric glue. For added embellishment, you might want to glue roping to the edges of the cornice for further definition. Use fabric glue if you decide to do so.

Window roller shade

For the multilayered window treatment, three panels may be attached to the window treatment. Make use of two curtain rods. The top panel is to be attached to the cornice board while the center and lowest panels are to be placed on the double curtain rod. The material for the panel fabric, once again, should take into consideration the rest of the room. Pick fabric that will aesthetically bring out the best possible effect. Buy heavy material for the top panel, a less heavy material for the middle panel, and for the last panel, a sheer fabric. When arranging the lengths, one third of each layer of panel should be visible.

Read More
ideas

Tips and Tricks to your own Wet Bar

Having a wet bar at your home is a means to a revolutionary dining experience packed with entertainment to you and your visitors as you now have access to your foods and drinks just as you are also enabled to clean up once you feel like doing so through the incorporated sink with running water.

A typical basement wet bar is comprised of a bar top, storage areas, seating, and other fixtures for display. Now, as you combine these, along with, say, a refrigerator, and other useful kitchen equipments to be able to prepare drinks and food, you will certainly be amazed at how multi-functional and convenient your wet bar can be. This will also delight your guests as they will now get to experience dining and drinking in a fabulous way.

Circular wet bar

Now for the bar top, you may use stone, wood, tile, or any material that is being utilized for countertops. It is oftentimes shaped like an “L,” in a straight figure, or semi-circular. Also, as you are planning for its size, do consider that it doesn’t take much room, but will still be making space for placing drinks, seating, and other forms of entertainment. Having a sink or fountain may also suit your liking, and moreover can serve as your seating too. Next, for the seating, you may want it to be in a particular style. Some suggestions include swiveling, moving, and even those that have footrests with them. Would you want chairs that are in the form of bar stools, bar chairs, or a simple stool? It’s all up to you.

As for the displays, take into consideration where you want your serving ware to be stored. They may be placed under or at the back of the bar. You may also put picture frames, a mirror, and other signs too. With regards your storage facilities (mini refrigerator, wine cooler, small dishwasher, etc.), try to think about how much storing space you might need. Most likely, children’s beverages and other handy drinks can be placed in the mini containers, while those that need larger facilities can be placed in a separate larger area.

Simple wet Bar

Furthermore, if you desire applying a certain theme for your wet bar, also plan ahead, imagining what materials are to be used and even researching for sample themes. For instance, if you want to have a wet bar that portrays the 1950s, try adding a rootbeer fountain, a storage area for ice cream and other delights, black and white checkered stools topped with countertops made of stainless steel. For a classic look, try combining soft colors and delicate pieces, along with your own China tea set, and glass ornaments. Meanwhile, if you like to go contemporary, you would want to have bold and bright-colored fixtures. Nevertheless, whatever style your wet bar might be, as you combine those elements together with your own ‘brand’ of style, it will be definitely be in the groove.

Read More
Remodeling

Creative Ideas to Make Your Plain Window Roller Shades Fun!

Ever looked at your window and stared at those really boring plain roller shades? Ever wondered where you could possibly find ideas for customizing window roller shades? Look no further! This article will give you a few suggestions on how to get started.

Window roller shade

Painting
First, think of all the possible colors you can use that would go well with the entire room the roller shades are in. Match the colors you will use with the room including its walls and fabric. Acrylic paint should be used when hand painting your roller shades and remember not to apply the paint too thickly to avoid cracking and flaking once they dry. Before you start painting the shade, pull it down and then put a pencil mark where the top section of the shade joins the roll. The pencil mark will specify the limit of where you have to paint. If you do not do so, an important part of your design mural will disappear into the roll, rendering your creation incomplete.

You have the option to paint a mural on your roller shades (use a projector to blow up the image on the shades to help you) or just paint freehand simple designs like dots, stars, stripes, etc. If freehand painting sounds too difficult to you, you may want to use stencils to trace the mural or simple designs before painting for a uniform effect. You have the freedom to personalize your shades with designs that reflect your lifestyle and interests. Paint a guitar, ballet shoes, a baseball diamond, a club scene, Japanese temples, Che Guevara – you name it. It is décor that can be integrated into a room that has a theme.

Green window roller shade


Fabrics

The first step in decorating your shades with fabric is to purchase fabric that matches your room’s interior decoration as well as adhesive spray, and extras such as trimmings and tassels. Next, unroll your window shade onto a table and cut out a piece of fabric half an inch bigger than your shade on all four sides. Spray one side of the roller shade with the adhesive spray and then place the fabric over it to make it stick to the shade. It is advised that you cut away the fabric overlapping the shade for a clean look. The last step is to add the extras – buttons, beads, tassels, sequins, ribbon, etc. – to the bottom part of the shade. Reminder: Embellish only the last few inches of the shade’s lower portion or else you might hinder it from functioning properly. Once finished, roll the shade back up, install it and it is once more ready to use.

Read More
Furniture

How Many Years does it Take to be an Antique?

An antique can be any piece of furniture, tableware and other items such as books and jewelleries that are made much earlier than the present. Antiques aside from being an old item are also known for its degree of craftsmanship and counting other unique features such as its condition, rarity and it looks.

In short, antiques are most likely to be some sort of valuable collectible items; it is no wonder why these things are hot items for thieves as you can see in movies. You can usually get antiques in antique shops, in an auction, on a real estate (where it is being pass down), museums or even inside your house.

Antique rocking chair

Antique items though old never goes out of fashion and must still be in good condition. You might have some old looking grandfather’s clock in your house or that vintage looking lampshade in your grandma’s bedroom. But are you sure all that the old things you see in an old manor are really antiques? How can you identify if an item is an antique or not? Most of definition of the word “antique” stretches out that an item as least as 100 years old deserves the label in the United States technically. Furniture mostly falls into this age category. However in European Standards, an item is said to be antique if it was made (most likely handily made) before 1832 and during the Industrial Revolution.

To further support the previous statement, an old item, like antique picture frames, can be considered either as an antique, vintage or a collectible item. Take note of the following:
• You can call an item a vintage item if its age ranges from over 40 years of age. You cannot call a 20 year old item vintage.
• Vintage and antique can be collectible items. So, there is no age bracket in collectible items.

Antique wooden furniture

Age issues of items becoming antiques also depend on the items. One additional fact to know is that in automobile, you can consider it an antique if it reaches over 25 years of age. This is based on the definition given by most of the worldwide organization and the Antique Automobile Club of America. They based it on a fact that a car reaching the age of 25 years, is very hard to economically maintain and thus is considered a rare survivor; reaching this age is as twice as the design life of any modern car.

When it comes to firearms, there is what they call a threshold or a cut-off year. In the United States for example, guns made before 1899 are considered to be antiques and in every nation, the thresholds varies. Antiques are works of art and they are timeless master pieces. Spending a lot for antiques is not a waste of money at one point.

Read More
walls

Wall Paper Border Ideas for a Personalized Kitchen

The kitchen is where many people spend a lot of time. Personalizing the kitchen’s décor through customizing its wall paper border is one way of adding a cheerful note to your day. Start now with these kitchen decorating tips: kitchen wall paper border ideas.

Wallpaper borders are often repetitive in designs which give you a boring, monotonous effect. Try using wallpaper cutouts instead to help narrate a happening. The cutouts will be different from one another and will thus draw the attention of visitors towards the one-of-a-kind wall paper border. One good theme of a “story border” is that of welcoming visitors of the family into the kitchen. Try inserting words into the border to spell out a message to help tell the “story.”

Light-blue wallpaper border

Self-sticking wallpaper is also another option that can really add interest and variety to your kitchen. Cut a few strips of self-sticking wallpaper and have your family members, especially the kids, press their hands into paint/s (bright yellow, blue and red are great for this method) and make imprints on the plain white strips. Have each member write their name and/or signature below their hand imprints. This will hopefully help foster family togetherness since it is a “group” effort. Consider the hand imprint border as a work of art by the entire family.

When the kids grow up and leave the nest, you’ll have a nostalgic time looking at their cute handprints when they were younger displayed on the wall. Aside from handprints, you can use stamps on the self-sticking wallpaper or even use stencils and rub-ons to get you personalized wall paper borders. Stamps can be bought from crafts stores or simply just cut out from potatoes if you are on a tight budget. Still another option for the self-sticking wallpaper is to decoupage photographs onto your wall paper border if you have interesting pictures of you and your family. Let it serve as an open family album for friends and relatives to browse.

Wine styled wallpaper border

If self-sticking wallpaper is not readily available in your local department store, a great alternative is the use of long strips of canvas to be glued to the walls using extra-strength wall paper paste. Note that canvas strips can be taken down and stored away until they are needed again. To break from the household monotony, why not use unorthodox kitchen wall paper borders? For the extra bold, buy children’s wall paper depicting different scenes, like a jungle, a circus, a rocket ship, a boat, a carnival, a beach, etc. Watch your kitchen turn heads with this idea – not everyone has the guts or the flair to get away with this daring move.

Read More
color

Home remodeling: colors to paint the interior of a house

You can have hundred of paint colors in your fingertips in making a room in your house livelier. Many are called but only few are chosen. Perhaps this biblical passage suggests that picking the right paint color to paint your house can be terrifying and daunting but it is not difficult. Painting a house might sound easy and simple just like picking colors in a crayon box but once you get yourself into the hardware store you will suddenly find algebraic equations and scientific names in choosing paint and colors. And if ever you did have some history of house paint jobs, often times you just do not meet up to par at times.

Perhaps the most versatile aspects of interior home decoration are paints. Changing wall colors at will is easy and expensie yet it can be a daunting task but the finish output would be worthwhile. So here are some tips, advice and everything you need to know about colors before getting those fingers of yours on the paint brush.

Green painted bedroom

Home remodeling: the best, and worst, colors to paint the interior of a house:
1.Red
Red is a color that simulates and is very powerful. It creates the feeling of warmth, aggression, love and luxury. It may be the color of romance but don’t ever think of painting your bedroom or perhaps any room in the house in full red because a lot of cases implies that people regret this act. Having a red room creates an overwhelming atmosphere. However if you would like to go for all red, it is suggested that you use different shades; color wheel is your buddy, choose the red family. For living room, burgundy and maroon and other deep subtle shades of red are ideal. Red, at its worst is overdramatic – a powerful aggressive color.
2. Blue
The best color for bedroom for it give serenity and comfort. It works in any room making over-bright colored rooms settling. It is the color of loyalty, harmony, peace and at its worst, it is a cold color.
3. Yellow
Yellow is a stimulating and cheerful color which is perfect for kitchens. It invites the sun in the kitchen and lightens dark room. However it is a color that can irritate people. Do not paint the baby’s and the children room yellow for it disrupts
4. Green
It is a nature color that is why it is refreshing to the eyes. It works just about in any room; it can make dim rooms a little bit vibrant. Just don’t go too much dark though, use different shades.
5. White
The safest and the most cleanest look you can get in any room. It suits almost every room however it’s too plain and dull.
6. Black
The color of formality, void yet it shows dust in your walls. This color is unadvisable for any room repainting if black is not your kind of interest in style.
Wine tone painting

Colors are very powerful. They can tangle with your emotions, makes you sad or happy. They can create an abstract in any interior, perhaps in home decorating; they can make your living room look larger or smaller. Indeed, choosing the right paint colors in the very interior of your own private abode builds not just a house but a home. At the very least of it all, in picking colors always follow your instinct.

Read More
Tips

Tidbits on using a Primer

Using primers can help you have an even and durable coating to your painting. In using this, consider the paint type, surface, and state of the surface to be painted on. Priming is not just an additional expense that just entails you to spend more. Nevertheless, this definitely makes your wall smooth and heavy-duty. When you prime, you can be sure that your project will stand the test of time and will allow you to save in the cost. Concealing dirty surfaces and cracked spots, filling in crooked facades, and even developing the color of the paint coat, you are off to a quality job.

Now, if you are thinking about when to use a primer, try to read on. You can make good use of primers when your walls are stained with mildew or other marks. Moreover, if it has not yet been painted or spackled before, priming is advisable too. Hence, experts go for priming prior to painting, except when it is already in great condition. In doing this, however, be sure to paint within a week of priming because the quality of the primer can lower once you do not do so.

house painting

Then, in selecting the primer to be used, you have to take note of various factors. First, screen the kind of paint you will be making use of as well as the surface’s condition and type. In this way, you will be sure that your primer fits these qualities and will result to the best.

In general, those oil-based primers are suitable to those topcoats that are also compatible with oil. Meanwhile, those that are latex-based must be used with latex-based coating. However, such latex-based primers are compatible too with oil-based. With this, due to the compatibility issue, developers have promoted primers that are made of universal oil or alkyd, now making the users’ more at ease with the selection process.

When it comes to the surface, since different types of surfaces also affect the outcome, be cautious enough too. General purpose primers go well with internal surfaces as well as ceilings (those that are porous). Usually, it takes four hours before these dry, and 16 hours for them to be cured and for the coating to be applied. These are recommended for use in chipboard, softwood, hardboard, plaster, plasterboard, and plywood. On the other hand, wood primers are like general purpose primers considering that they prevent paint from soaking into the wood.

Painting rooms

When the surface is made of stone, metal, or brick, the primer prevents water from penetrating it. These water repellent primers should be allowed to dry for an hour and then left again for 12 hours before applying the paint. Hence, for surfaces made of metal, you must be careful that are not corroded and infested with rust. As for those out of galvanized and ferrous metals, aluminum, new steel and iron, the best primer is that which contains zinc phosphate.

Read More
Tips

Do it Yourself Painting Tips in Choosing Flat Latex Paint

Houses run down as time passes by. This does not only include the structure of the house but the paint of the house as well. There are also other houses that look rundown because they are not painted. If you would like to have your house repainted but you do not have the money to hire for someone to paint it for you then you might want to read this. You can achieve your goal by doing it yourself.

Painting your house yourself will save you a lot of money. This will also enable you to design it yourself while you are painting. Doing it, yourself, gives you a lot of possibilities. Though in painting a house, there are some instructions that you must follow in order for you to be able to do it correctly. Here are some practical tips that will help you in painting your house. Before anything else, you must know what part of the house you are going to paint. Do you need to paint the whole house or you just need to paint a few areas? You must also determine what color you want to paint the house with. This will let you determine how much you are going to spend for the paint and for the brush.

Wine tone painting

The next step will be buying the things that you need. Your primary need is paint and brush. If you are going to paint a lot then you may want to buy a large brush and a lot of paint but if not then buy only small ones. Now you should take into consideration the kind of paint that you will buy. It is greatly suggested that you buy a flax latex paint. This kind of paint is very suitable for painting a house. In choosing flat latex paint, you must also take into consideration the color.

The next thing you will need to do is to prepare the other things that you need. These include your outfit and protection materials for your things. The outfit you are going to wear is very important because you do not want paint to get on your clothes nor on skin. You can choose to use clothes that you are no longer using. The protection materials for your things can be plastic or newspaper. This is to protect your things from getting paint on them. You can also put newspapers on parts of the floor or the ceiling.

Painting walls

Before you start painting, you can also move your things away from the area you are going to paint. Now, it is time to paint. When painting, it is a rule that you should paint with constant strokes and constant direction. This will ensure that you will have a beautiful outcome of the paint. If you want, you can start painting your house with white paint as first coating and then finishing it with another coat of your desired color. You can do as many coating as you want for as long as you first let the previous coating be dry before you put on another coating.

Read More
Painting

Prepping Basics before you Paint

Painting successfully entails good prepping. Hence, if you are a budding painter or interior designer, the handy painting tips below is sure to lead you into becoming a pro. Because paint will not be able to conceal cracks as well as other flaws in your walls, preparing well before painting is advisable. Through this, you can have a long-lasting foundation and outcome.

First things first, you need to transfer your fixtures somewhere farther and then cover them. If some of them cannot be moved, you just have to ensure that they are well-covered. You may also use a drop cloth (preferably out of heavy canvas and sealed back) to ensure lasting protection. This can also be reused throughout the years. If receptacles, radiators, and other electrical devices are present around the room, you may use masking tape and even sheets out of plastic.

Painting rooms

After this, you may now prep the walls. In doing so, first dust it. Then, you can use an all-around household cleaner to remove spots or those that can affect the paint later. In performing this, be sure that you wear rubber gloves. Do a down-up motion so as to prevent staining. Next, rinse them using sponge with clean water. You may also spackle these blemishes, then allowing them to dry. Spackling means filling holes, as well as cracks and other defects using spackling paste. Following it, you can then sand and patch. To sand, utilize 120 to 150 grit. This will enable you to take off the sheen or gloss from the recent paint coat.

Once the surfaces are glossier when touched, you will now prime the walls. In priming, you are covering the imperfections in there. More so, this is a great way to under-coat. However, if you want to paint above the primer, you may opt using a primer that is intended for finish paints. If you will be applying wallpapers, utilize a primer that has “sizing.” This will enable the wallpaper to stick onto the wall as well as aid you when you want to remove it later faster.

Green painted bedroom

Next, by using a painter’s tape, fasten on the trim. A cutting brush (2-1/2”) really intended for trimming will then allow you to do this. Half the length of the bristles, dip it then paint through the trim evenly as you keep the paint wet.

Then, prior to loading the roller as you prepare to paint, immerse the roller through the water then squeeze until it is damp. This water coat will allow spreading the paint without difficulty onto the surface of the wall. Begin at the top going down using the roller. Paint following a W shape, again making sure that you keep the roller wet as you paint. Coat it evenly and make sure that you do not pull it against the wall. Painting now becomes more efficient!

Read More