How tos

How to Paint a Dining Room with a Chair Rail?

Dining rooms can be really hard to paint and even to decorate. It combines both form and function that can be achieved by getting creative; at the same time, you are having a little fun while painting and decorating your dining room. Learning how to paint a dining room with a chair rail is not that difficult. However, painting requires some effort to achieve professional results. Like most painting projects, proper preparation is essential to receive a high quality paint job. Check the following steps for more information.

Step 1 Cover or remove the furniture, lights, switch plates, drapes, and wall art. Cover the floor. Pick the paint color you want to use, you can choose either gloss or “sheen” level. Choose the color that complements and contrasts the color of your dining room wall. Alternatively, you can even paint the sections of the wall the chair railing created different, complementary colors.

Step 2 Prepare surfaces. Preparing requires you to remove nails and tapes, scrape or sand loose painting, cleaning and filling the holes or cracks.
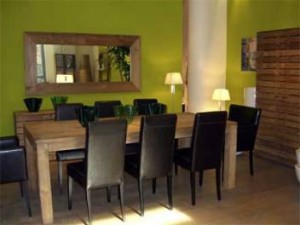
Green painted dinning room

Step 3 Now that your room is prepared, you can start the actual painting process by “cutting-in” on one wall. First, use a 2 inch brush and painting the edges (where you taped). It is best to “cut in” about 3-4 feet at a time, and then roll in the middle section. Use only downward direction in rolling. Using this process so that you keep what is known as a “wet edge”. Do not wait until the paint dries to pull off the tape or you will get some peeling. If necessary, apply second coat by simply rolling again

Step 4 Use the chair rail to divide the wall horizontally or vertically of your dining room.

Step 5
Use the chair rail to create a faux window in your dining room and attach them to a wall in the shape of a window. It is advisable to use additional chair railings to create sections of the window. Use any paint techniques, like a mural that is good for an outdoor scene behind the chair railing.

Step 6 Use chair railing to frame a wall mural in your dining room and attach chair railing to the wall around a mural. Use color that complements this technique, this will work well for any type of a mural, especially modern art and landscapes.

Painting walls

Step 7 Use chair railing to create narrow stripes on your dining room wall and attach chair railing vertically to the wall to make “pinstripes” on you dining room wall. This technique will add depth and dimension to the dining room wall as well as draw the eye upwards, making the ceilings seems higher and the room larger. Use paint color to chair railing that is contrasting, yet complementary. Using the chair rail, you did not only find something to work on to but you have actually found a meaningful task to accomplish. With just seven steps, you will be able to know how to paint a dining room with a chair rail. Just like decorating, painting is fun.

Throw all those preconceived ideas out of how to use chair railings and create a dining room uniquely your own. In just short period, you will have a dining room that you, together with your family and guests will enjoy.

Read More
How tos

How to Grow a Butterfly Garden in Florida?

Growing a butterfly garden is a great way to beautify one’s yard and help attract many different beautiful butterflies found in Florida. Most of the butterfly gardens are also attraction for beneficial insects and hummingbirds. Productive butterfly gardens do not require a large land area because a great impact can be brought by even a few key plants.

Whether you grow it in a patio container or over several acres, butterfly gardening can be as simple or as complex as you wish to make it. Regardless of the size, the same basic concepts are applied. There is a most important thing to understand if you want to know how to grow a butterfly garden in Florida, that different butterflies have different requirements change throughout their life cycle. A butterfly garden that is well- planned should appeal to many different butterflies, and cater to both the adults and their larvae. It is very essential to choose a proper garden design and plants. Those will help influence which butterflies are attracted, how to remain in the area and reproduce there.

Butterfly garden

It is really not necessary to include larval host plants to attract butterflies, but adults tend to stay fairly close to the areas where their larval food plants can be found. These things require planning and there are few basic rules to follow. Be as creative as you wish, but start with a plan that considers the requirements of the butterflies you wish to attract and the plants you will use to lure them.

Butterfly gardening is a not difficult pursuit and must be based on butterfly preferences, not human ones. Fortunately, butterfly and human favorites are mostly compatible. Do you wish to know more on how to grow a butterfly garden in Florida? Find out how to start planning as you read this. Planting and growing a productive butterfly garden is not hard, but it requires proper planning and a little basic research. Even Florida boasts over 180 different butterflies, you can’t attract species that do not naturally occur in your region, nor can you grow plants that aren’t adapted to the soils and climate in your region. To help you get started, follow these easy steps to plan your garden.

Monarch butterfly

First, provide a butterfly region map and determine the region from which you live. Then, look for your region in the Florida butterflies tables, highlight the species that occur in your area, and use habitats that can be found within 1/4 mile of the site you are considering for your butterfly garden. Research a butterfly nectar plants by region list for you to know where in your region you can find a source of butterfly nectar plants. If you have planned and decided all the needed requirements, then you are very ready to grow your own butterfly garden. This listed very easy ways on how to grow a butterfly garden in Florida.

Read More
How tos

How to Make Decorative Pillows?

Pillows are integral parts of our lives. These are what we need every time we sleep. We really exert effort to find the best pillows for our house especially for personal use. It is very important that you have nothing but the best because they are the things that accompany you in your sleep.

But most of the time, people settle in ordinary and dull looking pillows. If you want to be creative, original and have the best pillow in the world, you should know how to make decorative pillows. By making some, you can put yourself, your own creativity that is the best design in the world because the most special thing about it is, you are the one who made it and your own design is the one you used to actualize it. The following are some steps on how to make decorative pillows. You can use these tips for you to make your own pillows and for you to have the best out of it. It can really help you and give you the chance to release your creative juices and your resourcefulness and achieve the best design that you imagined.

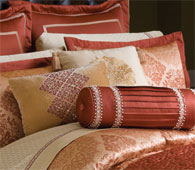
Decorative bed pillows

• Choose the right color.
You can base it in your personality or your favorite color. You can decide for a central theme in your house or different themes in every room. It is important that you decide on this matter because it can really help you in having your dream pillow decorations. You can base your color selection on the availability of the fabrics and the choice of the cloth that you want. You can use dark colors if you want pillows that cannot be easily stained.

• Choose the right fabric for you.
You should have basic knowledge about it. Not because it is expensive, it is the best. Remember that it depends on you, on what you need, and what you want. You can check out in every store that offers cloth and fabric and you can assess what you want. It is important that you do it to test if you have allergies or unwanted reactions towards the fabric.

• Choose the right pattern.
You can put your personal preference in this part. You can put your own name, your favorite characters or just imaginative designs that you can think of. You do not have to be an expert but you just have to ensure that you choose the pattern that you are most comfortable with. No need for extra expenses!

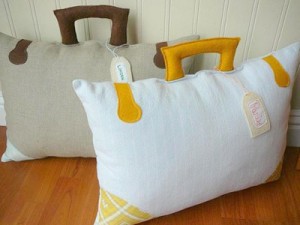
Suitcases shaped pillows

Knowing how to make decorative pillows is important if you want a personalized touch of your room or of your house. You do not need to buy ready made pillows because you can make it by yourself. It is important that you know the knowledge for you to execute it the right way. Now, making pillows is not that difficult with the help of these tips. Just follow the tips and execute it the right way.
Read More
Floors

How to Stop Kitchen Chairs from Scratching Hardwood Floors?

Walking into a room with hardwood floors makes one admire its natural elegance and beauty. Many times, the floors set the tone for the entire room. However, one of the things that mar its beauty is scratches on the hardwood floors. Some scratches can be treated, prevented and disguised. Certainly, one preventive idea is on how to stop kitchen chairs from scratching hardwood floors. Sometimes, one will tend to apply the area rug solution to avoid the scratches from the kitchen chairs. However, kitchen chairs move around a lot and it is one of the things frequently used in the kitchen. Unless you want to cover up the whole area of the table and chairs, you might as well refrain from having hardwood floors in the first place if that’s the case.

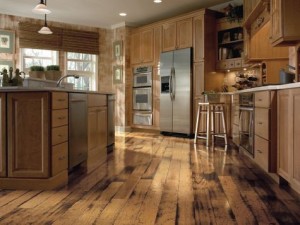
Kitchen wodden floor

Kitchen chairs often have wooden legs or metal legs. Both types can really do damage to your hardwood floors by moving around and scratching surfaces. But there are simple ideas on how to stop kitchen chairs from scratching hardwood floors. You just need the leg work:

• POLISH UP can be applied only to light wooden chairs. Often, it’s the rough edges of the legs that scratch the hardwood floors. To stop this, you can consider softening up the edges of the legs of the chair and its bottoms by sanding and oiling it up. Then you can finish it with some polish or wax. This way, the chair leg bottoms will have less friction on the floors and will glide, not scratch the floors when it moves. However, the more you use the kitchen chairs, the more you need to polish it up regularly to avoid roughing the edges (of chair leg bottoms) out.

• PAD WORK can be applied to both wooden and metal chair legs. For a better fit, measure the area of the chair bottoms and make cut-outs on felt or rubber. Glue in the felt or rubber cut-outs to the chair leg bottoms. Let it sit and give it time to dry before using the kitchen chairs. Both felt and rubber have smoother, non-scratchy materials that can be helpful to minimize scratches on your hardwood floors. You just need to redo it again if the material has already worn out.

• WHEEL ON is actually an idea for office chairs. Wheels can actually scratch only the surface of polyurethane-coated hardwood floors but not on the wood itself. Superficial scratches can easily be treated by waxing kits, therefore not much damage to the floors. As a kitchen chair however, putting wheels may pose some hazards when you have kids around. This is only applicable if there are only a few adults around and you are not expecting social gatherings in your kitchen area.

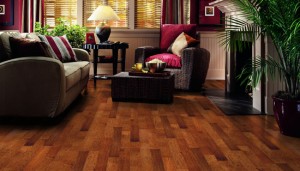
Hardwood floor

• COVER UP is probably the best option on how to stop kitchen chairs from scratching hardwood floors. Again, you measure the chair leg bottoms for a perfect fit. Often, the bottoms are shaped square, rectangular or round. With some exceptions of artwork and carvings on the legs, the bottoms will pretty much take one of these three shapes. Create a pattern on soft padded materials or heavy fabric like felt, denim or old carpet rugs no longer in service. Create a pattern for inner shape which is the exact measurement of the chair leg bottoms. Then create a larger outer shape about 4-5 inches wide where the inner shape is at the center. Cut the edge of the large shape, with the idea of pouch bags and open-top boxes in mind.

Pouch bag is sewing an inside fold around the inner shape and sewing an elastic strip at the helm of your outer shape. Open-top box is like having a box with 5 sides. You sew in the square bottom and then sew in the four other sides that stood up. When five sides are made, sew in an elastic strip at the outer hem. You can make creative cover ups, colorful or discreet depending on your taste, for as long as you make it functional. Unsightly scratches diminish the beauty and art work of the hardwood floors. You can stop, control and prevent it from happening, you just need a little leg-work trick.

Read More
accesories

Egyptian Cotton For Smooth And Silky Bedding

Since we spend a considerable amount of our lives sleeping, care should be taken while selecting the bedding. There are a few facts to keep in mind when it comes to selecting the right type of bedding. Proper bedding should be soft, silky and smooth and at the same time should be firm and able to withstand pressure. Egyptian cotton is regarded as the best when it comes to selecting the cotton for bedding.

Egyptian cotton down comforter

Cotton is the perfect choice of material for bedding as it is soft in consistency and is invariably more comfortable than other materials used in bedding. The main factor that makes it the best choice of material is its tendency to let air in, making it very comfortable to use. You do not get the sticky feeling that occurs with other materials. It is washable and the dirt and stains come of easily. The resistance to wear and tear is very high, perhaps the highest of all the fibres that are in use in the textile industry. They actually turn more soft and silky when washed repeatedly for long periods.

They are optimal for use both in summer and winter. In summer they keep you cool and comfortable and in winter they warm you up by retaining warm air in them. And another significance of using cotton is they are good for people who have skin ailments like eczema or those with sensitive skin that does not augur well with synthetic fibres like nylon. These synthetic fibres cause irritation to the skin and hence should be avoided. Egyptian cotton is the most preferred of all cotton types as it is of fine quality and gives a lustrous finish. It is a type of long staple cotton that is cultivated in Egypt, hence the name Egyptian cotton. The thread count is high in long staple cotton while the other varieties sport a lesser thread count. Due to this factor the quality is better in the Egyptian cotton.

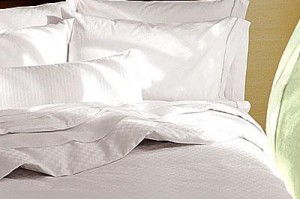
Egyptian cotton bedding

Generally fibre of any material has threads woven in it in horizontal and vertical directions. The number of interwoven fibres present in a square inch of the material makes up the thread count. A count of more than 150 threads per square denotes good quality and the Egyptian variety has at least 180 threads per square inch and those with such high threading are called as cotton percale. The softness of a material increases with the thread count and the spill resistance also rises proportionately to the thread count. You get a softer, silkier and long lasting fibre with increased thread count.

So what are you waiting for? Go ahead and indulge yourselves in the splendour of Egyptian cotton bedding.

Read More
Bedroom

Things You Should Note Before Selecting The Best Down Comforter

People are often at logger heads when it comes to choosing the right down comforter. One has to see about the quality, affordability and choose from the innumerable range of down comforters that are available in the market. Here are some facts that you should know before you purchase a down comforter:

Fill power: Fill power denotes the quality of the down comforter. A good comforter should have at least 550 fill powers. 650 and above is considered as luxurious quality. As the power increases you get better thermal properties and also the puffiness is great at higher fill powers.
Cluster count: This shows the amount of full down clusters and the broken ones. The broken ones are referred to as “fly”.

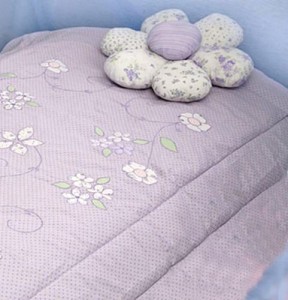
Girl's down comforter

Goose down: Goose down is considered as a better one than down made from duck. Down that is obtained from mature geese [those that live in cold climates] have more amount of clusters in their body. The more the clusters the better the warming capacity will be.
Down proof fabric: High quality Egyptian cotton should have a high thread count and the callendering should also be optimum to make it a good down proof fabric. Callendering is the compression of cotton between giant steel rollers to fill in the empty spaces that are normally not visible to the eye. Thread count should be higher than 300 to make the fabric down proof for many years [about 10-15]. Other than Egyptian cotton down proof fabric, cambric cotton down proof fabric made in Germany or Switzerland has a satin finish and is durable and feather soft.

Stitch of the comforter: There are open, closed, and channel tri-wall stitches. Open stitch has a movable filling like in the Karo-step and ring stitch. Closed ones have a fixed type of filling in a small box, like a baffle box and sew-thru stitches. Channel tri-wall has a triangular area wherein the filling cannot move. This is the most comfortable of the three types and is the most preferred one also. It is couple friendly as it allows adjusting of the filling to one side which is useful in summer, when one needs more warmth than the other. Cold spots can be avoided while using the baffles comforter. It also enhances the function of the comforter. For warmer climates the sew-thru stitch is best suited as it requires less amount of filling.

Down comforter for marital bed

Temperature: The optimum temperature range for a year-round use of the comforter is about 60-70 degrees. These will make the comforters cosy and comfortable during any season.
Eiderdown comforters: These are the most luxurious of all comforters and have a softness and warmth that is incomparable. Swiss Batiste is the best suited down proof fabric which has a satin finish and is feather soft and silky done especially for eiderdowns.

Other than Eiderdowns, Canadian, Siberian, Hungarian and Polish white goose downs are of fine premium quality which promises the utmost in style and comfort.

Read More
Garden

How to Get Rid of Caterpillar from Garden

If you are having problems with caterpillars then maybe you’re one of those who wish they would skip this stage and move on to pupate directly into butterflies. Unfortunately, not all caterpillars become beautiful butterflies. Some species of moths and worms also go thru the caterpillar stage.

As all caterpillars are known as voracious feeders during this stage, many of them are considered pests. Most moth species have this reputation because of the damage they cause to fruits, vegetables, flowers and other agricultural produce. Getting rid of caterpillars may seem synonymous to getting rid of all the leaves in the plants. They may be small but they sure seem to eat a lot, hundreds of times more than their size. Many caterpillar species have been subjected to pest control and still many have become resistant to pesticides. They are also difficult to get rid of organically.

A caterpillar

Some of the ways on how to get rid of caterpillar from garden are as follows:

• Handpicking
Perhaps the most environmentally friendly way to get rid of them is to resort to handpicking them off from the plants itself. But sometimes you tend to miss a few because they often take in the colors and textures of the plants they eat. This may result to inefficiency after some time.

• Pest meets Pest
Another way to get rid of some of them is to introduce predatory pests into your garden. These include birds, frogs, lizards and wasps. Caterpillars in their diet produce substantial source of protein. This can reduce the number of caterpillars dramatically. However, be careful because you just might be exchanging one pest for another.

• Play on Sprays

Non toxic organic sprays may also work like chili and garlic solution. This is done by mixing garlic cloves and chili in water. Then you can spray the mixture on affected plants so that you can minimize the onslaught of caterpillars to your poor crop.

• Crop Rotation

Rotating your crops is a good way to get rid of caterpillars which are restricted to eating one species of plant. However, this won’t work to polyphagous caterpillars because they have an insatiable appetite for food and feed on different types of plants.

Butterfly


• Keeping Healthy

A healthy and well taken cared of garden is perhaps the best way to combat the caterpillars. Like a healthy body beating a sickness, a healthy garden can withstand the attack of caterpillars. A good prevention is to destroy nests and eggs of such species so they will already lose the chance to pupate and propagate.

Know what kind of caterpillars you are trying to get rid of first to know what you are dealing against. Different species require different ways to get rid of them. Some are known to feed on specific crop; some are known to become active in certain months of the year. Some wants to chew on just leaves while others want to chew off young stems. Depending on what you have in your garden and the type of caterpillars you’re battling against, you may want to consider one or a combination of solutions above on how to get rid of caterpillar from garden. You may not be a 100% successful in your attempts in the beginning so be prepared for a truce and share a leaf or two every now and then until you get rid of most of them.

Read More
color

How to Paint a Room Red

Have you ever seen interior walls that are dull and uninviting? Well, start saying goodbye to those walls because it is now possible to have a welcoming and cozy room each time you arrive from work. Know how to paint a room red because this color represents love strength and passion. It also suggests a bold and exciting environment, but can also come off as aggressive. The following are tips and steps how to paint a room red.

1. Select your paint. Latex Paint is easy to use and has fewer odors. Oil Based Paint makes paint harder and more durable as it dries.

2. Choose Finish. Finishing for walls can be flat or matte, eggshell, satin, semi-gloss and high-gloss. For ceiling use pre-mixed flat white paint.

Red room

3. Get Your Equipment. You can use paint brushes, roller frame, roller covers, paint trays and paint sprayer. For walls use paint scrapers, putty knives, spackling compound and sandpaper. Prepare tape, drop cloths, old sheets and rags, safety glass, rubber gloves and dust mask for masking and safety equipment

4. Prepare the room.

• Remove all furniture inside the room as much as possible. Put down any curtains and wall decorations. Remove the wallpaper and clean all the surfaces to be painted.
• When there are paints that is peeling off, scrape it.
Protect your floor by laying a drop of cloths or old sheets over every inch of the floor to protect it from drips and splatters.
• In ceiling, apply tape to the wall corners where they meet.

5. Time to Paint. If you choose to paint with the standard brush and roller or use a paint sprayer, the order stays the same, always work from top to bottom.
• If you want to use “Cutting-In”, prepare 2-inch angled brush, paint 2-3 inches around any edges that connect areas you want to paint and areas that you do not want to paint. Typically, these are the areas walls meet the ceiling, in corners, around any windows, doors, outlets, light switches and above baseboards. Wipe any drips or mistakes as soon as possible using a damp rag or paper towel.
• If you want a “roll” process, line your paint tray with either a disposable liner or aluminum foil and pour your paint into the deep end of the tray, a couple inches of paint is plenty. Prepare your roller frame by attaching the roller cover to the frame and dip your roller into the paint in the tray. Roll back and forth along the textured, angled part of the tray to remove excess paint and distribute it evenly on the roller.
• If you want a diagonal way, roll a large W or M in that section, to distribute paint through that space. Using up and down strokes, even out and fill out the rest of the 4×4 section. Roll the next adjacent section and repeat until all the walls are covered.

Room painted in red tile

6. After the First Coat
• Allow the paint to dry at least 3-4 hours and assess your work. Usually, paint shrinks as it dries, so you may not be able to see lighter areas until the paint is completely dry.
• You can apply second coat is possible if necessary.

7. Clean Up
• Wash your tools in a sink and soak bucket of warm water for a few minutes before cleaning them. These steps will make clean-up faster and easier.
• Place your brushes or roller covers in a zipper style plastic bag and place in the freezer if you have a plan to paint again using the same color.

One of the most expensive ways to give your room a look fresh is to paint it. Painting is easier because there are tools available to assist you. And one way to add an attractive style to your house is painting your room with red and brown.

Read More
Cleaning

Cleaning Carpet Stain

One of the most dreaded post-party expenses is probably the bill for cleaning carpet stain. Tell-tale signs of the party lingers the most on the carpet because it’s the last to be cleaned and not the easiest one at that. However, sending it to the cleaners may not be at all necessary if you know how to remove it yourself with simple cleaning solutions available right in your own home. Yes, a do-it-yourself simple steps and no additional cost.

Begin with the first aid:
• Blot not rub: Remove liquid spills first by using clean white cloth or white paper towels without any print. Blot the spot until almost dry. Rinse the cloth with warm water and blot the spot again. Don’t rub or scrub the area as the stain might get wider and deeper. With another clean dry white cloth, blot the spot again until dry. Repeat the process if necessary to remove as much stain as you can.

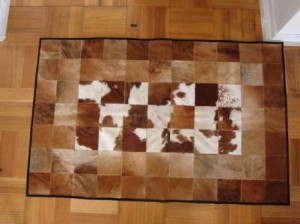
Livingroom rug

• Scrape and blot: For any semi-solid spills on the carpet, it is best to scrape it off first before applying the blot process above. Semi-solid spills are even harder to remove when dried up.
If you are unsure on how to get stains out of your carpet, always try the ever-dependable water first. If the stain cannot be taken out by simple blot-and-dry process, you can try the vacuum cleaner. A strong vacuum cleans the carpet more deeply than a piece of cloth.

However, stains can be a little more persistent than that so you might want to try cleaning solvents for cleaning carpet stains. Before you apply any cleaning aid or solution, it is best to know the type of your carpet first. Is it synthetic fiber or made of natural fiber? A different process for cleaning carpet stains may apply depending on the type of carpet as well as the kind of spills on the carpet.

For synthetic fiber carpets:
You can use a detergent solution and a vinegar solution. First, you dip the clean white cloth to the detergent solution and dab it repeatedly to the carpet stain by pressing the cloth to the spot for a few seconds every time. Wait a few minutes for the detergent solution to break down the stain and then blot dry the soaked up spot with another clean dry white cloth.

Next is to dip a cloth into the vinegar solution and dab it repeatedly to the same spot for a few seconds. Wait a few minutes for the vinegar solution to remove the residual detergent. Then rinse the spot by blotting using a clean white cloth soaked in warm water. Do the blotting repeatedly until the stain lightens or is removed. Then blot dry using another clean dry cloth.

Leather carpet

For natural fiber carpets:
Instead of dipping and dabbing, you can spray on the spot. You can use a detergent solution and vinegar solution alternately with lukewarm water when removing the stain. Just like the process with the synthetic fiber carpets.

Another tip for blotting soaked spot is to work from the outside towards the center. That way the soaked area and the stain will not spread out. Always remember that the best way to prevent carpet stains is to act fast and remove the spills as soon as possible. The longer you delay, the deeper the stain will get and the harder to remove it. Most carpets in the market today come with stain-resistant treatments. This way spills can be removed easily if you act on it right away.

Read More
Floors

How to Clean Hardwood Floors

Back in the old westerns, it used to be that hardwood floors are cleaned with buckets and buckets of soapy warm water and scrubbed clean stripping the floors of dirt, scrapes and its old glory. Over time coupled with harsh forces of nature, hardwood floors will just look like well worn slats if we don’t take good regular care of it.

One way of taking care of it is to know how to clean hardwood floor. Like any regular floors, we have to keep dirt and dust particles off as much as possible by sweeping and vacuuming as frequently as needed. Make sure that when you vacuum though, you use a soft brush only when it comes to hardwood floors. This is to avoid light and faint scrapes when using hard brushes designed for tiled floors. Strategically placing floor mats at each entrance of the room with hardwood floors can also keep some of the dirt off and keep it outside. Whether you have real hardwood floors or polyurethane-coated ones, it is best to keep a few pointers in how to clean wooden floors. Like any wood surface, hardwood floors require special care and attention, too.

Hardwood floor

Aside from the regular sweeping and vacuuming, here are a few ways on how you can clean your hardwood floors and maintain its polished look for a longer period of time:
Mopping regularly like once a week can improve the clean look and clean feel of hardwood floors. Using a warm soapy mixture, dip the mop into it. Make sure it’s only slightly but evenly wet and not dripping with the mixture. Use single direction strokes on the length of the slats so that when you dry it up afterwards, it won’t have faint traces of strokes in different directions. Repeat the mopping process but just use fresh water this time. This will clean off the soapy residue of the solution on the floor. And then buff dry with clean old towels that you use as rugs. This absorbs any remaining moisture on the floors. Remember that hardwood expands when exposed to excessive water, so avoid drips, soaks and pools on its surfaces.

Cleaning of stains may require the aid of some professional cleaning product especially designed for hardwood floors. Make sure to spray on the solution to stained spots only and do as directed. Some solutions may be too strong and can affect polyurethane coated hardwood floors’ surfaces. The blot and dry process using soft rugs can be very helpful on the stain removal process. This avoids stripping off the laminated look of the wood surface.

Kitchen wodden floor

Buffing can help in restoring the polished look of hardwood floors by bringing back its luster. You can apply a commercial grade wax or wood shiners available in the market and buff the floors using a soft rug or cloth. Apply as evenly as possible to attain a great finish look. Hardwood floors signify simplicity and natural beauty. It denotes timelessness and elegance as well. To achieve the look, one must take care of it by regular cleaning and maintenance. This way, hardwood floors can last more than a lifetime of beauty and comfort.

Read More
accesories

Problematic Roller Shades: To Replace Or Not?

Roller shades have been in vogue for a long time and are still preferred by many for their elegant look and style. Many of the classic ones still remain enchanting and beautiful. But with the passing of the years it is natural that these become faded and worn out. Some have problem with the control mechanism and a few others have faded out or torn fabric in them. This mars the overall appearance of the shades and the owners of these roller shades want them replaced by a better looking shade or if possible repair the existing one.

White plasticn roller shade

Malfunctioning of the control mechanism present in the roller shades is one of the main problems faced by users. The shades do not open up or are stuck up mid way. You can try tightening the springs to make easier rolling of the shades. Trying to correct a stuck up roller shades will result in the tearing of the fabric so it is better to leave it as such and in most cases this will end up in you getting a new control mechanism. The old forms of controls are not in production anymore. Hence, repairing the old ones is a very difficult task and most people opt for new ones.

Another problem often faced by users of roller shades is whether to keep the fabric and change the control mechanism alone. This is practical as you can save the expense of buying new fabric if the old one would suffice. But with the emerging trends in the roller fabrics and the new productions methods which are quite exemplary, the decision to keep the old ones is not very optimum and it may not be as economical as thought by the users. It is actually profitable to buy new ones as these are more long lasting and resilient and with new controls in place they stand the chances of staying for a longer time than by keeping the old fabric in place.

While speaking of the fabric, another situation where the roller shades are not up to the mark is the tearing or ripping of the fabric of the roller shades. The older shades used mostly vinyl coated fabrics which if made of light weight are more prone to tear than their modern counterparts. Those made of threads or polyester is easily torn and should be replaced as they cannot possibly be repaired. In case of torn or ripped fabric it is safe to replace them than considering doing some repair on them like changing part of the fabric that is torn. A little bit of sewing or correction is possible but it may affect the entire appearance of the shade. Changing the entire fabric is the best alternative possible in such a situation.

Wodden roller shade

There are cases where the surrounding window frame is damaged by the constant friction caused by the bottom rail of the roller shade. The hem bar, as the bottom portion of the roller shade is called, will cause damage to the nearby wall or the window frame. This can be corrected by trimming the hem bar with a saw or by altering the fit of the roller shades. Proper functioning of the roller shades should be ensured while fixing them to avoid spoiling of the fabric material. Though many users of roller shades would like to repair the existing ones it is more economical to just replace them with newer ones for better functioning and aesthetics.

Read More
walls

Precious and priceless Ceramic Mural Tiles

Tiles made of ceramic have been in use for a long time in ancient Egypt, Babylonia and China. But the ceramic mural tiles used in America is based on the Moroccan tile pattern which dates back to the 13th century. Though it has occupied a part of the décor for many years it was not used regularly and it reached the pinnacle only during the 1920s when the Arts and Crafts movement was at its high. Due to the change in the perception nowadays, with the arts and crafts age being seen with renewed interest, these tiles are now very much in vogue. Interior decorators, artisans and architects have begun to view these ceramic murals with a fresh look and are incorporating it into their wall décor with stunning success.

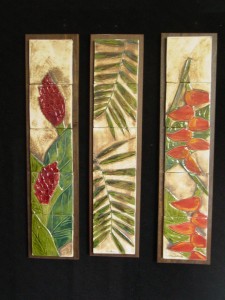
Ceramic mural ideal for the kitchen

The production of the ceramic mural tile is a very intrinsic art and needs thorough study of the earlier tiles that were in use. The type of clay used and the various types of paints all differ and should be learnt thoroughly. The ceramic murals need special firing techniques and also instruments like kilns which should be studied completely before embarking on producing one. Total dedication is needed to make it a real success. This is what many artisans who specialise in ceramic mural tiles do. They engage in constant research of the various changes in the tile design and pattern and try to create innovative and novel designs using the latest development in technology. They give a new look to the ancient tile patterns with the help of recent advancement in the firing and curing processes.
Ceramic mural in blues

These mural tiles often come with a high price tag which most people find very hard to digest. But if you come to know about the various technical details that goes into the preparation process of these tiles, then the price will not seem very high. As is the case with all hand made and intricate patterns, these tiles too require a lot of work to make them look authentic and attractive without losing the classic beauty they personify. Some artisans price as much as sixty dollars for an hours’ work of making these tiles to the specifications given by the customers. If you get a chance to come by one of these ceramic mural tiles do not forget to think of the work that goes into the making of the tile and the amount of effort the artisans have to put to create such a masterpiece. The high price would not matter to you and you will regard the ceramic tile that graces your wall with profound pride and pleasure.

Read More
How tos

How do I make a cover for a bird cage?

You love your little bird, and your pet is fun to watch, but come nighttime, the show is over and your bird will want to sleep without an audience. A cage cover will serve this purpose well. Moreover, it will keep your fine-feathered friend warm and safe from drafts. You can purchase a cage cover, or you can make one. If you want to know the answer on how to make a cover for a bird cage, let the steps below show you how to do it.

1. Use a tape measure and measure from one end of the cage to the other end, going over the top of the cage with the tape measure. Write down the measurement.
2. Lay the quilted fabric face down on the table and using your pen, draw a vertical line 45-inch long. Measure 22 ½-inches from the center of the line, horizontally, and mark the distance with the pen on the wrong side of the fabric.

Decorative wooden birdcage

Use the following tips in creating the bar of cage:
• The main issue on cage safety is that of bar spacing. Make sure that the bar spacing of your bird’s cage is narrow enough to prevent the bird from getting its head through or between the bars.
• Another important thing about bar spacing is that in an effort to increase the “bird visible space” for a cage, in other words to make it easier to see inside the cage, some cage manufacturers will use smaller diameter bars in order to increase this “visible space” while also decreasing the amount of material needed to manufacture the cage.
3. Draw a semi-circle, starting from one end of the 45-inch line, connecting it at the 22-½ inch marked point, and continuing to the other end of the 45-inch line.
4. Cut the semi-circle out, following the line drawn.
5. Using the bottom of a coffee mug to measure with, draw a small semi-circle at the center of the straight edge of the large semi-circle on the wrong side of the fabric, and cut it out.
6. Take your two large semi-circles and face the right side together. Pin along the straight edge, up to the small semi-circle. Nevertheless, half of the straight edge will remain open.
7. Sew the ¼-inch in from the edge of the pinned fabric.
8. Pin trimming along edge of small semi-circle.
9. Sew trimming in its place.
10. Turn fabric under ¼-inch along both open straight edges and then sew close to the edge.
11. Pin lace ruffling to bottom of cage cover.
12. Sew lace ruffling in place.
13. Sew Velcro to the open edges of the cage cover, positioning one of the sets of Velcro at the top of the open straight edge, and the other set halfway down the open straight edge.
14. Drape the parakeet cage cover over the cage, and hold in place by sticking the Velcro together to keep the cover closed.
Birdcage

Every bird living with people needs a cage. Even if you are nearly always home, and you are able to allow your bird the pleasure of often being out with you, your bird still needs a cage so that it may have a place to retreat for privacy. In addition, it will be safest in its cage when you are out of the house. This does not mean that your pet should spend all his time in a cage. To be happy, your bird will need several hours outside his cage each day – a minimum of three hours spent with you, and preferably longer.

There are lots of other covers you can make, as sofa or other furniture covers or cushion covers, including outdoor furniture covers, and if you are skilful you can even try making swimming pool covers and you will also save lots of money due to its high cost.

Read More
Remodeling

How to Make Door Step Decorations out of Bricks?

Home decoration is one of the most difficult jobs for many of us. You have to ensure that you make the best out of it because people will usually judge you based on how your house looks like. But, do not forget that every part of your house is important in creating the impact that you want to have. That is why you should know how to make door step decorations out of bricks for you to ensure that the entrance of your house is as elegant as you want it to be without spending too much money for it. You can have the best door step that you want but you do not have to use and buy extravagant and expensive decorations. You must only know the techniques and some ways on how to make door step decorations out of bricks. The following are some simple ways on how to make door step decorations out of bricks. These tips can help you in deciding what to do and how to put decorations at your home for you to save more money that you can use in more important things.

Original mosaic doorstep

• First, collect all the bricks that you have. You do not have to buy new set of bricks if you already have bricks that were unused in your home. This can help you save money especially if you are in a tight budget. Collect all the bricks that you can use for you to have a plan on what to do and what kind of decorations you can make.

• Decide what pattern or design that you will use.
You have to make a genuine plan because if you want to have the best output, do not put things in random! Decide base on color, theme, size, and other stuffs that you can notice. This can help you in making door step decorations better than anyone has.

• Execute your plan. Do it carefully and follow your plan meticulously. There is no room for mistake because it is very hard for you to fix damages and errors once you already executed the plan. Your door step will give your visitors the idea of what is inside your house so you have to ensure that it is as elegant as possible.

Classic door step

Home decoration is not as difficult as you think. You can enjoy doing it without the problem of budget constraint. You only need to be as creative as you can and explore many ideas for you to create original decoration in your house. Now that you know how to make door step decorations out of bricks, you can surely make your door step the best in your neighborhood. Always remember that you do not have to spend and buy expensive things just make sure that it will happen. By the use of your creativity and ingenuity, surely, you can pull it through and you can have your dream doorstep decoration!

Read More
Remodeling

How to Apply Decorative Concrete Overlay?

Decorative concrete overlays add appeal to any type of surface. You can make improvements on almost all concrete surfaces like driveways, pool decks, patios, parking areas and so much more. Most overlay applications are on floors but can be made to horizontal planes as well. It enhances the look and transforms plain-looking surfaces to exquisite work of art.

You can do an overlay as simple repairs to concrete. Decorative concrete products are designed not only to cover but to add a new surface to an existing one. Damaged, outdated finishes are the usual surfaces that need decorative concrete overlay. These can be stamped, sprayed, and self-leveled. It can achieve the look of stone works, bricks, granite, slates and wood finish. Resurfacing systems help give the old concrete added strength, flexibility and overall improved appearance.

Decorative concrete overlay

Even if you will not do the installation yourself, it would be to your advantage to learn the basics and be better educated consumers. Gaining knowledge on some of the rudiments can help you save thousands of dollars in repairs and overlays. Some overlay may require extensive maintenance while others require only minimal maintenance. If you’re working on a tight budget, better strike a balance on what you want done and what you can afford.

For do-it-yourself, certain special tools can be purchased inexpensively. You just have to have the list of things you need to get started. The process can be fairly simple provided you have the right tools, complete materials and system design. Here are the simple steps for basic application:
• Priming the floor with a polymer.
Pour into a 5-gallon bucket, add color of choice, mix quickly then slowly add concrete and mix to a batter consistency (like pancakes, smooth without lumps). Pour on floor and spread evenly and thinly, and let it dry.
• Applying concrete sealer. Two coats of acrylic sealers are recommended and should be sprayed on with light coats. Let it dry for 2-3 hours before the next coat.
• Finishing or wax coating. Use a thick microfiber mop to apply finish coats or wax coats. It may require several coats to achieve the result you want. Concrete acid stains or dyes need 24 hours to dry when applied on the floor. Don’t rush the process; otherwise you’ll just be trapping moisture in your slab, making it look lumpy.

With these steps in mind, the essentials of concrete overlaying can become fairly easy. For more elaborate designs however, you will need the manufacturer’s kit on how to apply decorative concrete overlay. Each texture and design may require more skills in color mixing and creating patterns for stamping.

Man applying a concrete overlay coat

There are numerous formulations, color options and finish techniques that a skilled professional can do to create hundreds of different outcomes. It involves molding, coloring, texture creation, and blending. Since stamped concrete is designed to resemble brick, slate, stone, tile and even wood, it can flatter like the real thing without costing as much. It is a great substitute for imitating an authentic look inexpensively. It is such a customized product that it can be tailored to suit your personal design and individual artistic goals and budget. To achieve variations, you can also make a different pattern for the borders and the inner slab. With a little bit of imagination, the right design can achieve your desired outcome… makes it all worth investing on an improvement of this type.

Read More
Doors

How to Install Door Hinges?

Installing door hinges is not a difficult job. This process is actually one of the easy ways and the most common home improvement task. However, doing it is the most complicated step in the process but now worries because you can still do it without professional’s help. All you need to do is to prepare the necessary things needed for the installation. This includes shims or thin pieces of wood that can be slipped under the door to hold it at the right height, nails or an electric screwdriver, the door and door hinges.

The following are the steps you need to know on how to install door hinges:
1. Decision Making.
Carefully choose the part where you want to install the hinges. Remember that when you install the hinges at the right part of the doorframe, the opening of your door is on the left.

Antique style door hinge

2. Marking.
Create a visible mark on your chosen spots on. Usually, door hinges are installed 10 inches from the doorframe’s bottom and 5 inches from the top.
3. Measuring.
If you will place three hinges, measure from the bottom mark up to the top mark and then divide it into two. The answer will be the distance between the bottom and the middle hinges as well as the distance between middle and top hinge.
4. Outline.
Using a pencil, create a clear outline traced from the hinge onto the doorframe.
5. Make another mark.
This time, you will mark where to place the screws. Usually, door hinge package include its own screws.
6. Make a depression in which you will insert the recessed hinge on the doorframe.
Use a chisel and hammer to score the area within the outline of the hinge. Clear the wood splinters away until there’s enough space for the hinge to rest within the depression.
7. Screw the hinge on the place and avoid over-screwing.
If the hinge held firmly in a place while being level with the door or frame, it is properly installed.
8. Repeat the 5th up to the 8th step to attach the recessed hinges.
Some hinges kits do not require both halves of the hinge to be recessed.
Modern hinge for glass doors

9. By reinserting hinge pin, connect the two halves of the hinges.
This process will secure the door to the doorframe. Start the attaching from the top hinge and conclude with the bottom hinge.

After 9 basics steps and materials, your door hinge will be properly installed. You don’t really have to call professionals, the D-I-Y or Do-It-Yourself process and scanning for information would help you know how to install door hinges.

Warning! Be extremely careful when you work with glass doors, you will probably need a professional in this cases.

Read More
accesories

How to Tie Bows Decorative?

Gifts are lovely surprises. What makes them even more enjoyable is how gifts are packaged. Packaging speaks well on how the gift giver has thought of the gift to the very last detail of its inside content and outward appearance. Gaily wrapped gifts are further enhanced by the addition of a ribbons or bows. How to tie bows decorative can be easy and fun. Just a mixture of materials and improvised tools and you’re set on making decorative ribbons.

Tie bows for decorate cards

For the preparation:
• Gather an assortment of ribbon sizes. Strips can be as narrow as 1 centimeter to as thick as 3-4 inches. It’s good to have varied sizes to create various combinations.
• You may need the following: a pair of scissors; a cutter; a ballpen or pencil; a ruler or tape measure; double adhesive tapes; liquid glue; glue gun and stick; stapler and staple wire; glitters and strings.

How to do simple ribbon base for rectangular gifts:
• Get 2 pieces of ribbons of different size and color. The size can be a 1.5 inch strip and a 1 centimeter strip. The color combination should be complimentary. Color choices can be 1) dark and light; 2) bold and discreet; 3) plain and printed; 4) shiny and subdued; and 5) transparent and opaque.
• First, wrap the large strip of ribbon on the gift box horizontally by taping one end in the center of one side of the box and holding the rest as it goes around the box until it meets the other taped end. Tape both ends at the junction or where the two ends met. Twist a little and wrap it continuously in the vertical direction. Cut and tape at the junction. Now, you have made a cross as base. You can move the cross to the sides, upward or downward.
• Next is to do the same for the smaller strip of ribbon by placing it on top of the larger ribbon and following the same instruction above.
• Put tapes strategically to keep the two strips together. And you have a ribbon base.

How to tie a simple bow:

• You can use the large strip of ribbon or the same 2-strip combination like you used in the ribbon base.
• To make a simple bow is cutting about 10-12 inches of ribbon strip, fold it in half, and hold from the middle and make a two-inch fold from the middle going towards the two ends. Twist and tie the two folded parts, one on top of the other. Just like how a boy scout will do it. Plump it up and you’ll now have a basic ribbon.
• Hold the two ends of the ribbon and make v-cuts or triangles. The ribbon ends will now look like fish tails.

Modern tie bow decorative

• Tape the junction of the ribbon to the junction of the ribbon base.
How to decorate further:
• Use the smaller strip of ribbon and cut about 8-10 inches. Fold in half to get the center. Hold one end of the ribbon and roll it around the ballpen or pencil, making about 5-6 turns. Let go slowly. Now you’ll have made a curl. Do the same on the other end to make both ends curl.
• You can make one of this or two, depending on how big the package is. Place the curls in the middle of the bow or slightly beneath it.
• For a glamorized effect, make glue dots on your ribbon base and sprinkle with glitters. Do this on the front side only.

Learning how to tie bows decorative is doing the basics first and accessorizing to achieve a more decorative effect. It’s in the matter of color choices, ribbon combinations and adding a little pizzazz.

Read More