Tips

How to repair termite damage

Termites are just some of the worst enemies that you can encounter in your home. Many houses nowadays are already made of concrete, but some of the inner or outer designs of other homes are made up of wood. Having termite damage on these precious homes would be the last thing any home owner wants to think of. But if the horror had already come past, you generally have no other choice but to face and repair termite damage.


Assess the level of damage that has been done to the house. Are the critters just at the initial stage? Are they planning a major offensive on the largest wooden areas of my home? Are they already preparing for the invasion of your home’s very foundation? We would need a proper intelligence report about their actions in order for us to mount the best counteroffensive and ultimately repair termite damage.

If their forces have just finished settling their base camps into your home as small trails of termites, then it would be the best move to bolster our defenses as early as possible. Apply a special liquid substance to the wood that will enable it to harden and make it impervious to their deadly jaws. There are many commercially available products out there is specifically made to do this, and luckily it just takes a short trip to your local hardware store to secure your wood’s tactical positions.

If the wood has already suffered damage, try to chip away the damaged parts using a chisel or anything that can be used to poke out the areas where the termites have advanced their forces. Use this strategy only if the entire wood is still fully functional after removing the damaged parts.

After removing the damaged part, use a wood filler to reestablish woods defenses back into position. After applying the wood filler, use a sandpaper to scrape of the irregular areas and mold it to return the wood to its original shape before the termite assault. It is recommended that you use a paint that matches the paint used around the area to completely remove evidence of damage.

If the termites have dealt a significant amount of damage to the wood, then it’s best that you retire it out of its position. Cut the damaged wood out of its place using a saw, cut a small part around the undamaged wood, to ensure that no damaged wood remains. Now replace that wood with another block of wood of the same size, and hammer or screw it into place. You can use several small pieces of wood instead if needed.

Remember, if your home is made of wood., or has a significant area of it made of wood, then its best that you remain vigilant for these little critters at all times. It is generally easier to pound them away before they can even position their forces, rather than replacing the losses after they had already mounted an offensive

Read More
Garden, Tips

Decorating the Home With Preserved Fresh Flowers

Decorating your home with the use of fresh flowers would be a nice idea for you to work on especially during the Thanksgiving and Christmas season. However, fresh flowers do not stay fresh for long and so the decoration may not stay as fresh for an extended period of time. Preserving flowers is one way of making them last longer for you to appreciate the bloom of the flowers longer. Here are some methods in preserving flowers and some ideas on how you can make use of these preserved flowers to become a stunningly beautiful décor.


Preserving Flowers
In preserving flowers, you can follow the four basic methods that can help you preserve that beautiful flower that you would want to preserve. Depending on the flower, there are different ways on how you can preserve them. For one, flowers that feel dry and papery like the strawflower would be perfectly preserved through the wired-stem technique. This is the process wherein you just clip the bloom of the plant under the head of the flower. In using this strategy you need to use a flower that is starting to bloom. Then insert a florist wire that is 20 in gauge through the flower’s stem at the end of the head while pushing the other end of the wire into a foam board then let the flowers dry for 3 weeks.

Another method of preserving is the upside-down drying method. This can be effective with a plant like globe amaranth. You can do this by cutting the stems of the flower just when the flower starts to show its color. Then hang the flowers upside down in an airy place to dry for about three weeks.

Another method is with the use of a silica gel to aid the flower in drying. All you have to do is place the flowers heads up on a bed of silica gel which is 1 inch thick. Then sprinkle silica gel on top of the flowers gently and completely cover them and seal the container, letting the flowers dry at least two days or up to a week. Do not over dry the flowers because this may cause them to be brittle. The next step in preserving flowers is the pressing method. Simply arrange the flowers face down in a half folded paper towel or in newsprint. Make sure petals do not overlap. Fold the other half of the paper and carefully place the flowers in between the pages of a book. Then stack heavy books on top of it and allow two weeks for the flowers to be pressed.

Decorating With Dried Flowers
Now you are ready to make use of your dried flowers for decoration. The dried flowers can be used as a decoration for your greeting cards, for your labels or prints or a craft where dried flowers will match. You can make fern candles by drying down ferns and gluing them at the sides of the candles. These make a perfect Christmas centerpiece along with other flowers. You can also make flower mat prints with the use of the dried flowers. With the use of some wooden frames, Latex primer, latex paint, glue and stiff cardboard for backing, you can make a frame of dried flowers that you can use as a décor on your wall. Through this, you’ll have a great floral décor for your wall.

Try doing these dried flower decorations and you will surely enjoy decorating your home with this cost-effective solution to getting affordable decorations that you can do to your own home.

Read More
Tips

4 Projects for Home Decorating with Bottle Caps

Bottle caps as home decoration? Yes, you read it right, bottle caps can be used for home decoration. Even simple items can be used as home decoration as long as you infuse creativity and imagination in making these simple items as home decors. Just think that this is like recycling which transforms an item to a more useful one. But this time, focus on bottle caps as your item and think of ways how to make use of it as a home décor. Instead of throwing it on the waste bin, make it a useful and beautiful home décor. You could also check out the Internet for decorating tips that you can do. It is indeed feasible and you will be surprised on the things that you can do.


Here are some suggestions on how you can use these bottle caps:
Create a floor mat. Use a rectangular rug that is already worn. Now, select bottle caps that have the same sizes and form. Make a hole in the middle where you could insert a needle. Get buttons that fits into the cap. Sew the bottle cap with the button by using a needle and a thread and attach it to the rectangular rug. Do this until the whole rug is covered. This mat can be used outside your house so that all your visitors would pass on this mat where they could rub their shoe soles to remove dirt.

Make a bottle cap wall decoration. Home decorating with bottle caps can be done by using scraps that are just lying around your house such as cardboards. Attach these bottle caps into the cardboard by glue. Form a figure such as flowers or any nice figures you want. You could also color the bottle caps with paint so that it could look more colorful. Hang this cardboard by using a thread and you would be surprised how it gives a new look to your home decors. Use as a design for the decorative fish net. Decorative fish nets can be made by adding some scraps that you usually don’t use. The key in making this project successful is by adding personal touches on your décor. Make use of bottle caps to add personal touches by attaching it through glue.

Use as ornament for your flower base and glass bowls. Color these bottle caps with paint with lively and colorful colors. Once the paint is dry, you could add these bottle caps into the flower base and glass bowls. It is really fun, easy and so affordable. You would be amazed that you can use items that you are about to throw in the trash can for home decorations. This is an inexpensive and unique way to decorate your home.

Read More
Tips

Tips for Inexpensive ways to coordinate Bedroom Accessories

Your bedroom may be the most important part of the house for you since you spend your most intimate moments with it. It becomes your sanctuary every time you want to be alone and far from the busy environment of work and your home. Hence, you must have a relaxing bedroom. A relaxing bedroom would actually contribute a lot to your well being. You will become better rested and serene if you are happy with your bedroom. However, others are worried that having a room makeover is expensive. One of the ways to have a room make over is through inexpensive ways to coordinate bedroom accessories.


If you don’t have money for the entire overhaul of the look of your bedroom, you could just arrange your room in such a way that it looks more organized. You could also add some decors that may show your personal touches by doing your very own décor. Coordination is one of the essential qualities in changing the look of your bedroom. If you feel that your room is cluttered and has a tight feeling, its either you have a very small room, your place is so cramped or your decors are clashing. Having a coordinated room will actually relieve the pressure that you feel. Furthermore, it gives you a sense of peace and calmness if you see that your room is well coordinated.

Look into your room and find out what theme you would like to have for your room. You don’t need to throw away existing decors you have. Just select those items that you think you still need and will be useful to you. Those that you think are clutters should go straight to the waste bin. Coordination means harmony. You could have a balance in terms of your room color and decors. You don’t need to use only one color in our bedroom. You may combine your favorite color with others so that you can still use your other items.


You don’t need to buy new accessories for your bedroom. You could borrow a favorite pink accent from your mom that she does not use or even the cute little lamp shade that you like but is being stored in the box because it has gone out of place in the living room. You could also ask your friends to donate something. Match these items and you can have a cool and relaxing bedroom you could be proud of. You’ll just realize that you don’t have to spend a lot of money in having a makeover in your room.

Read More
Tips

Decorating Tips on Making a Rooster Wall Paper Border

When you are designing a farm or country theme for a room, you will no doubt need some farm animal images to splash it with. There are commercially available pictures and wallpapers you can buy. But if you are feeling up to a weekend project, you can simply make your own stencils. For this project, we will be going through the process of making your own wall paper border.Before you start any project, it is always more efficient to acquire all the materials and tools you need before you get started working. This will save you time and frustration. Also, it will make sure that you won’t have to abruptly disengage from your creative flow just to get some nails from the hardware store.


For this project, you will need mostly common school items. You should get some sheets of tracing paper; the size will depend on how big or how small you would like to make your rooster. You should also have a pencil, a craft knife, a permanent marker, some thick, clear plastic, some mounting glue, a ruler, a level (this is usually used in construction to make sure a surface is parallel or “level” to the ground or wall), and some paint and brushes. Roosters usually have red, brown, yellow, and black colors on them. However, since you are making your own rooster, you can of course color them in whatever shade you like.

Make the stencil by tracing a picture of a rooster. Just trace the outline, don’t mind the details; these will not come out anyway. After tracing, you can enlarge it or reduce it at any copy center near you. But if you are artistically inclined and you can draw the outline yourself, then this would be so much better. Once you have the outline enlarged to the size that you want, transfer the image to the plastic by tracing it with your permanent marker. After tracing, cut out the rooster shape with your craft knife. You now have a rooster stencil. If you want to make your rooster border more creative, you can make several rooster stencils of varying sizes. You can then use different combinations when you begin painting your rooster border.


When you have all your stencils ready, you can start painting your rooster border onto the wall. If you want all your roosters to be painted on a straight line, you should first make a guideline using your ruler and level. If you don’t want your roosters lined up straight, you can just paint them as you go along; mixing up the sizes at the same time.

Mount the stencil to the part of the wall where you want the rooster to appear. Fix it to the wall using your mounting glue. You are now ready to paint your rooster by just filling in the cut out area of your stencil with your chosen rooster color. Be careful when peeling off your stencil so that the paint will not bleed off into the background. Repeat this step until you have as many roosters as you want in your room.

Read More
Tips

Tips on Buying Upholstered Chair

Buying an upholstered chair is not an easy task because you need to really look into what you are buying. You need to make sure that what you are buying is of high quality by checking the design and the construct of the chair. If you look into even the smallest details of the construct, you will be assured of a product worth the price you pay for it. Here are some things that you may consider when choosing an upholstered chair.

French styled upholstered chair

You should check the chair construction. You should see to it that the frame of the chair is made of hardwood. This would make sure that the chair is durable. You should also check on the joints of the frame where it should be doweled well even two to three times and it should also be held in place with the use of glue and screws to make the frame secured. You should also check on the webbing that are in between the frames and the spring coils. Make sure these are tightly woven and check if there are gaps or sags. Then check for the spring coil used. Check for its type and design as each design would determine the type of the quality of springs used. There are single, double and the zigzag types of coils. The sinous type is the coil with a lower quality. More coils that are together and the closer that they are would mean a higher quality of the design. They offer a greater support for the chair.

In purchasing a chair, you need to pay attention to the details of how the piece is tailored. Check for the quality of the buttoms, the tufts, the quilting, they should fit well and not loose. Try to check for the cushion as well. It should fit the corners of the seat well. It should not have any lumps on it and a muslin fabric should be used to cover the padding of the cushion and make sure that this muslin fabric should not be flimsy and it should also not be torn. Then you also need to check on the fabric patterns. Take into consideration the size of the pattern that should be proportional to the size of the chair.

Upholstered chair

The next thing that you need to consider is the comfort that the chair can give you. Try it out if it offers you the comfort that you are looking for in a furniture. If it is a chair that you are looking for, then you should look one that offers you the comfort that you are looking for when sitting on the chair and resting. These are the things that you need to consider for you to have the chair’s value of your money.

Read More
Tips

Simple Painting Tips for a Room

It is not a hard task to paint a room and make it look professionally clean. We just have to have the right plan, the patience, and our desire to save some money by simply executing it by ourselves. We should also have the knowledge on how to paint a room well.

Painting walls

The very first step that we should do is to make sure that we already have enough paint that we needed in doing the said job. The greatest way for us to do this properly is to always get the general measurement of our room which includes the count of our windows and doors. If we don’t have any idea in doing this thing, we could simply seek some help of the painting experts in our town. They are the ones who are going to teach us on how to paint a room well. If our room already has a darker color or if we’re just going to apply a darker color, we might need some few extra coats of paints just to have an even color as a result. The good thing about this is that almost every hardware store are using some machines to program a very specific formula of colors. This will surely help us; most especially if we needed to run out and have more paint to be able to finish our job.

For us to execute our job well, we need to be sure that we have all the tools that we needed for it such as the following:
• A masking tape; the wide one.
• A newspaper which will serve as the resting place of our tools to protect our floors from having some paints on it.
• A paint stirrer; a wood is much advisable to be used.
• A pan which will be the one to hold our paint that we are going to put into our roller.
• Some angled sash brush.
• Small dishes which will help us carry our paint when we are using brush.
• And lastly, some roller and roller based which is specially designed for the right texture of our wall.

Wine tone painting

When we already have all of this, we may then start stirring our paints to mix its color well, after which, we could now then start painting the edges of our room and follow it properly until we finish our whole wall. We just have to put at least 2 coatings of our paint until we reach our desired color and let it dry. If we wanted to have a great finishing, we could always seek some help from the experts who really knows on how to paint a room well. It would be a bit expensive; but then we are assured that we will be having a great result.

Read More
Tips

The Modern Nomad: Decorating Tips for Urban Travelers

There are some families and people who frequently move or change home addresses for different kinds of reasons, mostly due to their careers. This can be a hassle especially when you think about all of the chores you have to do in always transferring your belongings to another place. Think about the different environments each time you move to another home, you have to be very versatile in order for you to adapt into each and every new neighborhood you are going to live in. Decorating your temporary home can even be more troublesome to do because your options are ultimately limited, and anything that lasts longer than the time of your stay is a complete taboo.

Hallway decor

So, how to decorate a temporary living space? You can start first by thinking up decorating ideas that should last long enough until you move again to another home. You should liken your home decorating style to that of a gypsy or a nomad, ever changing, and one attribute that is always associated with it is versatility, regardless of whether it its versatility for functionality, or versatility for convenience. To elaborate further, here are some of the general options that you can do if you’re an urban traveler.
Womans bedroom mural

Choose proper home articles that can go with you easily when frequently changing homes. Foldable and stackable chairs and tables are some of the good examples when it comes to easy portability, but they are quite lacking as a decorative article. A quick remedy for this is with the use of table mats and ready to apply slipcovers for your thin and colorless chairs and tables. Alternatively, you can just choose smaller versions of normal sized furniture, you never know if your next home would be smaller or larger than you current living space, and in the long run, smaller furniture are much safer to use than larger ones.

Read More
Tips

Better Way to Identify a Ceiling Texture Type

Hiding ceiling imperfections is a common problem most house owners encounter; it’s a common problem that should be addressed properly to be able to stop it from worsening. You can easily add texture and bring back the beauty of your home just by doing simple methods. Hand identifying ceiling can be a tiring process, but it will surely bring back the glow inside your house, save you lots of money and satisfy your needs.

Best decorative ceiling

By simply changing color, texture of your ceiling, your home is look amazingly different. It can change dramatically the look of the entire house. There are various color and texture that can make your home or room unique and very attractive. Most of the time, textures are often used to hide imperfections, dry, dull, plain ceilings. Since it can’t be covered with curtain, posters and other decors available for walls, only paint can hide the seams which are not really pleasant to the eyes of visitors. There are paints available for walls and ceilings that are available in leading hardware and online shops.
Ceiling decoration

Here are some helpful ways on how you can put textures and handmade paint your ceilings:
> You will need to buy a bucket premixed flat paint, roller and string.
> Cover any furniture with used paper to avoid mess.
> You can now start edging the whole ceiling with a plain compound.
> You can double the layer of plain paint with another colored paint, you can use paint brush, sponges, your hands, or stencil to add design to a plain ceiling. You can also stipple it with a whiskbroom, crumbled paper or any other material you would like to use.

Read More
Tips

Aesthetics through Economic Interior Design

Decorating your home can be quite a hassle, especially if you have to go through hundreds of kinds of interior design and still can’t decide on any of them. One factor to be considered in choosing the perfect interior design that suits your preferred style is the estimated cost of each of the interior design themes you intend to apply in a room you wish to decorate. Customarily, more elegant designs means higher expenditures, and it is doubtful that any person will choose something less, given the right chance.

Decorating with candles

However not everyone can afford such lavish interior designs, and not everyone would always choose extravagance over the practical. Interior design that centers around creating beautiful rooms with the owner’s budget in mind, more technically referred to as economical interior design, has been the trend of the thrifty home designers as of late. It is not impossible to create designer decors that are both stylish and economical. We just have to keep a few general things in mind.
Oriental decor

First and foremost, initial planning must be done in a very systematic fashion. Decorating certain parts of the room or certain aspects of the room should be done step by step, with each participant of the project given a specific task or role to accomplish. This might be obvious already to most people but most people fail to realize that each hour lost in the process of the designing takes about twice or thrice the amount of effort to recover, and if not addressed to immediately, can indefinitely halt the project altogether. This strategy alone can save you many hours working on you interior design and would help you finish designing much faster and much more efficiently.

Read More
Tips

Intimacy in Large Spaces

Some homes today have large rooms, particularly common rooms, living rooms and family rooms. Large rooms have their advantages but it would be dull to have a spacious area with an uptight atmosphere. So how do you make these spacious rooms feel a little more laid-back? Here are some easy tricks to make a large room cozy.

1. What’s the purpose of your large room? Determine if it’s for an office, a family/entertainment room, common room, living room, etc.
2. Lighting. Notice how orange-y lights in restaurants and spa centers seem to tone down the entire area. You can use similar lighting so the relaxing aura will easily emanate beginning from the lighting.

Large livingroom

3. Wall color. Choose neutrals. Loud colors give a fun and funky vibe but since our aim here is to make the large room cozy, neutrals are advisable. Dark colors will also look nice if you have the right lighting.
4. Furniture. Try not to use furniture that is too big since there would not be space for other accessories you might want to add. You can also base your furniture according to the purpose of your large room. You can use love seats and medium sized coffee tables for a common room. A small couch, sleek table and chair set with a few filing cabinets that are not too wide or too high for offices would also do the trick.
5. Accessories: Carpets and Rugs. Purchasing a nice carpet or rug will also look nice in large rooms. When you invite people over, you can play games on the floor or just lounge around if you have a nice carpet or rug to cover part of the floor.
6. Accessories: Art, etc. If you already have lighting that’s pleasant to the eyes, add some more eye candy by placing art in and balancing it with the room. Try to display some sculptures or figurines in high shelves (if you have high ceilings). You can also put up art in a museum-like setting. If you have too many accessories in the wrong places, the room will be a mess so minimalism would be important in achieving that coziness.
7. Scents. Potpourri or those fragrances that you can plug in will surely add to that much needed coziness.
8. If you have a fireplace, (this is an old trick) putting books on top makes you feel as if you’re inside a café or a bookshop where the atmosphere is light and loosened up.
Big bedroom

9. Music. Classical music or any instrumental music during gatherings in a large room (or even if you just want to unwind) will let your mind be cleared and focused.
10. Other accessories. Include throw pillows in your couch so it won’t look empty. When you want to accessorize further, you can also invest in plants such as a bonsai in a pot but use plants in moderation. We wouldn’t want your area to look like a jungle.

These are some of the 10 easy ways on how to make a large room cozy and more relaxing.

Read More
Tips

Cozy Rooms and Warmer Ambiance

Large rooms may seem to be comfortable, for you get to move around anytime you want without bumping into furniture or breaking a vase. However, you would soon realize that having a large room may create a feeling of isolation. Large space may instill a feeling of emptiness to your family. Now, here are 10 ways to make a large room cozy. And by cozy, it means really means comfort and relaxation.

Rustic and cozy style bedroom

1. You can make a large room cozy by maximizing every space that you have. Instead of placing furniture far from each other, why not put it in one area to avoid excess of space? It may mean a little cramped, yes, but having a cramped space gives the feeling of belonging, of being just one step away from something or from somebody.
2. You can play along with colors. Those that are cozy to the eyes are the shades closest to flesh, like the different shades of brown, gold, the color of the wood. Imagine going inside a coffee shop. Most coffee shops have a cozy interior to make it relaxing to the eyes of the customers. They use these particular shades in their sofas, walls, and tables. You, too, can apply this to your home. Cozy colors are best in the living room and the bedroom.
3. Put in wooden large, wooden furniture. The wooden color of these furniture is good to the eyes, and the size of the furniture will also take up some space.
4. Surround an area with other home decorations such as with a nature theme. If you surround your living room with plants, the coziness of environment will also be felt by your family.
5. If you opt to paint your walls, you can choose from the cozy shades of brown and gold and flesh. You must avoid plain colors, as they are boring, and would also emphasize the large size of your room.
6. If you want to use wallpapers, you can check on patterned, cozy-shaded designs available at the department store. You must avoid horizontal patterns as they also emphasize size.
7. Since a large room may appear too boring and empty, you can fill in some home decorations that would certainly create a feeling of relaxation. They are usually called “feel-good objects.” You can hang some chimes, feel-good plants, and old photos.
Warm living room

8. To take up some space of your large room, you can have a part of it designed with landscape. You can install a fountain or falls on one part of the room because the sound of flowing water is really cozy.
9. You can have a dimmer shade of lights, especially at night. Soft yellow and red can really be cozy.
10. Have some cozy music playing softly in the large room.

Read More
Tips

7 Home Design Tips: Refurnishing your tiles

Decades ago, repainting your old tiles was never considered. This was because of some issues regarding safety and dependability such as paints having toxic materials, can cause the tiles to be slippery and many more. But in the modern world today, we have access to better products that promises better results. Here are some easy to follow steps on how to refurnish your tiles.

Painting tails

Make the tiles “SQUEAKY CLEAN”
Aside from paint, there are also other products that enhance the surfaces of the tiles such as vinyl tile covers, polishes and more. But whichever product you choose to use, it is important that you clean the whole area first THOROUGHLY.Dust, mold, mildew, grime, dirt and other impurities are usually present in the tile surfaces. These impurities may hinder the success of refurnishing your tiles so it is best to remove them. Wash them off using clean water, bathroom cleansers and bleach. Check the area after rinsing to see if there are remnants of the dirt. Repeat until there are no more traces of impurities. Leave the area to dry.

Prepare the Tiles
Once clean, you have to prepare the tiles for paint application. Here are some things you should do.
1. Sanding Since the tiles are shiny, the paint may have a hard time bonding with it. Given this situation, you can use sandpaper or a sanding machine to rough out the smooth surface. Be sure to wear mask and eye protection to prevent you from breathing dust. Wipe the tiles clean afterwards.
2. Bonding Primer After the sanding process, coat the tiles with bonding primer. This topical sealer can prevent molds and mildew from growing in the crevices. Allow it to dry for 24 hours or until the coating is fully dry.

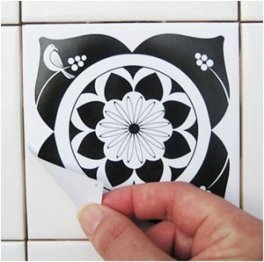
Vinyl tile cover

Paint the tiles Away
After cleaning the tiles and the preparation is done, it is now time to apply paint. It is advisable to use high quality paint, preferably latex paint. This is because latex paint contains acrylic binding agents, these agents help the paint adhere to the tiles. In addition to this latex paint is resistant to moisture, making it impossible for mold and mildew to thrive. Use a paint brush or any paint applicator. Experts suggest two-coat paint application; this means that you apply two coats of paint. You first apply the initial coating and then when it dries up, follow up with another coat. Make sure that you apply paint evenly, for a better appearance.

Other Ideas
If you do not like to use paint, you can settle for vinyl wallpaper coverings. You may also want to consider using it with waterproof polyurethane for better results. You can seek the opinion of a customer-service staff to verify the compatibility of the materials to avoid problems.

Read More
Tips

Modern and Trendy Decorating Tips

Decorating a house is a truly challenging task which should be handled with utmost care given to every small detail. Even small disruptions will spoil the overall picture; hence care should be taken to follow certain guidelines when it comes to decorating. Choosing the right colour, fabric, fabric textures and lighting plays an important role in decorating. Proper selection makes a great deal of difference to the end product.

The colour, furniture, accessories and the architecture should be done in such a way that all appear as a whole unit reflecting your individuality. Thematic buildings are the latest trends in decorating. The whole place will have a particular trait in common. For example, if it is a modern architecture than every small detail will focus on simple, sleek, classy, modern techniques. If it is a classic building than a more ornamental type of decoration is needed.

Modern kitchen and dinning room

In some cases you can also blend these two entirely different styles to get a completely new look. But this needs very meticulous planning and every minute detail should be looked into. A small mistake can spoil the whole proposed look, so exercise caution while venturing into new forms of decorating. This can be done with the help of a professional designer. If hiring a professional designer is not in your budget than you can always do it yourself with some basic ideas on the colours and furniture. With regards to the proper colour, always choose subtle, subdued colours. Too many bright colours will produce a jarring effect and will not be pleasing to look at. Whenever possible, stick to one colour tone throughout the building. This will make selecting other accessories easier.

Furniture should be kept as minimum as possible. Wooden furniture is the all time favourite. They impart elegance to any type of architecture, modern or classic. Metal furniture can be used if it merges with the other accessories. Combining both will give a contemporary look to the entire project.

Modern bedroom

Decorating the wall is another aspect to be done with care. The walls should not be crowded with pictures but at the same time too much empty space will not be charming at all. If it is a big picture, one or two on one wall would suffice. If the pictures are small, then you can either hang them diagonally or centre them on the wall. Proper lighting should be given so the pictures are highlighted properly. Paintings of Andy Warhol [1928-1987] and Roy Lichtenstein [1923-1997] are superbly coloured pieces which have inspired many reproductions. These add posh to your wall provided you choose brighter colours for the walls.

Ideally if it is a masterpiece then the piece should be hung separately so it is featured properly. One or two smaller ones can be placed on either side of it to add grace to it. There are no hard and fast rules when it comes to decorating, but the proper amalgamation of all the things like colour, furniture and accessories gives the decoration an entirely trendy and modern look.

Read More
Tips

Simple Steps For A Customized Layered Window Treatment

To attain that desired customized effect that you wish your windows to have, one of the best ways to do so is by trying out the layered window treatment. This article will help you in this home remodeling project. Create a layered window treatment and watch the transformation of your windows!

The Materials
Start off by purchasing a cornice kit that is to your liking at the department store. The window treatment we are going to make will use a padded effect so buy a cornice kit that is Styrofoam and is fitted to our purpose. At a craft store, buy fabric glue, batting, a staple gun, and fabric. Carefully reflect on the color and design of the fabric since it must be in harmony with the room wherein your window treatment will be installed. A few things to consider in the fabric selection are the other pieces of furniture in the room, the color of the upholstery, floor covering, and cushions. Also, check out the other fabrics in the room and assess their characteristics (e.g. weave, texture). In addition, be sure to purchase enough fabric to be able to cover the entire cornice.

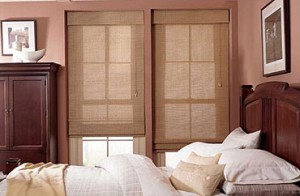
Roman curtains

What To Do
Open up the cornice kit, carefully read the instructions and then put the cornice together. Once assembled, the cornice frame is to be enveloped in batting which is to be attached to the frame using the staple gun and/or fabric glue.

Place the fabric flat on your working table and then put down the cornice frame on it. The objective here is to successfully cover the board entirely, with the fabric ends placed unseen at the interior of the board so that the cornice will look seamless once you mount it over the window. Attach the fabric evenly and securely using the staple gun and fabric glue. For added embellishment, you might want to glue roping to the edges of the cornice for further definition. Use fabric glue if you decide to do so.

Window roller shade

For the multilayered window treatment, three panels may be attached to the window treatment. Make use of two curtain rods. The top panel is to be attached to the cornice board while the center and lowest panels are to be placed on the double curtain rod. The material for the panel fabric, once again, should take into consideration the rest of the room. Pick fabric that will aesthetically bring out the best possible effect. Buy heavy material for the top panel, a less heavy material for the middle panel, and for the last panel, a sheer fabric. When arranging the lengths, one third of each layer of panel should be visible.

Read More
Tips

Tidbits on using a Primer

Using primers can help you have an even and durable coating to your painting. In using this, consider the paint type, surface, and state of the surface to be painted on. Priming is not just an additional expense that just entails you to spend more. Nevertheless, this definitely makes your wall smooth and heavy-duty. When you prime, you can be sure that your project will stand the test of time and will allow you to save in the cost. Concealing dirty surfaces and cracked spots, filling in crooked facades, and even developing the color of the paint coat, you are off to a quality job.

Now, if you are thinking about when to use a primer, try to read on. You can make good use of primers when your walls are stained with mildew or other marks. Moreover, if it has not yet been painted or spackled before, priming is advisable too. Hence, experts go for priming prior to painting, except when it is already in great condition. In doing this, however, be sure to paint within a week of priming because the quality of the primer can lower once you do not do so.

house painting

Then, in selecting the primer to be used, you have to take note of various factors. First, screen the kind of paint you will be making use of as well as the surface’s condition and type. In this way, you will be sure that your primer fits these qualities and will result to the best.

In general, those oil-based primers are suitable to those topcoats that are also compatible with oil. Meanwhile, those that are latex-based must be used with latex-based coating. However, such latex-based primers are compatible too with oil-based. With this, due to the compatibility issue, developers have promoted primers that are made of universal oil or alkyd, now making the users’ more at ease with the selection process.

When it comes to the surface, since different types of surfaces also affect the outcome, be cautious enough too. General purpose primers go well with internal surfaces as well as ceilings (those that are porous). Usually, it takes four hours before these dry, and 16 hours for them to be cured and for the coating to be applied. These are recommended for use in chipboard, softwood, hardboard, plaster, plasterboard, and plywood. On the other hand, wood primers are like general purpose primers considering that they prevent paint from soaking into the wood.

Painting rooms

When the surface is made of stone, metal, or brick, the primer prevents water from penetrating it. These water repellent primers should be allowed to dry for an hour and then left again for 12 hours before applying the paint. Hence, for surfaces made of metal, you must be careful that are not corroded and infested with rust. As for those out of galvanized and ferrous metals, aluminum, new steel and iron, the best primer is that which contains zinc phosphate.

Read More
Tips

Do it Yourself Painting Tips in Choosing Flat Latex Paint

Houses run down as time passes by. This does not only include the structure of the house but the paint of the house as well. There are also other houses that look rundown because they are not painted. If you would like to have your house repainted but you do not have the money to hire for someone to paint it for you then you might want to read this. You can achieve your goal by doing it yourself.

Painting your house yourself will save you a lot of money. This will also enable you to design it yourself while you are painting. Doing it, yourself, gives you a lot of possibilities. Though in painting a house, there are some instructions that you must follow in order for you to be able to do it correctly. Here are some practical tips that will help you in painting your house. Before anything else, you must know what part of the house you are going to paint. Do you need to paint the whole house or you just need to paint a few areas? You must also determine what color you want to paint the house with. This will let you determine how much you are going to spend for the paint and for the brush.

Wine tone painting

The next step will be buying the things that you need. Your primary need is paint and brush. If you are going to paint a lot then you may want to buy a large brush and a lot of paint but if not then buy only small ones. Now you should take into consideration the kind of paint that you will buy. It is greatly suggested that you buy a flax latex paint. This kind of paint is very suitable for painting a house. In choosing flat latex paint, you must also take into consideration the color.

The next thing you will need to do is to prepare the other things that you need. These include your outfit and protection materials for your things. The outfit you are going to wear is very important because you do not want paint to get on your clothes nor on skin. You can choose to use clothes that you are no longer using. The protection materials for your things can be plastic or newspaper. This is to protect your things from getting paint on them. You can also put newspapers on parts of the floor or the ceiling.

Painting walls

Before you start painting, you can also move your things away from the area you are going to paint. Now, it is time to paint. When painting, it is a rule that you should paint with constant strokes and constant direction. This will ensure that you will have a beautiful outcome of the paint. If you want, you can start painting your house with white paint as first coating and then finishing it with another coat of your desired color. You can do as many coating as you want for as long as you first let the previous coating be dry before you put on another coating.

Read More