Girls

Creating a Princess themed Bedroom for your Little Girl

Perhaps being a princess is a young girl’s ultimate fantasy, they daydream about being treated like royalty, living in castles, wearing frilly dresses and everything that goes with it. Let’s face it, we may not be able to bring the actual lifestyle to our little angels but we can give them the next best thing; redesigning their rooms to have the same royal palace effect. Nothing makes little girls feel special than a room designed for royalty, like the ones described in fairy tales. Easy as it may seem, but there really are a lot of things to consider. Here are some ideas to aid you in your conquest to pleasure your little princess.

Princess bedroom

Princess Room Make Over
The color theme is very important. Although pink is very popular to most young girls, you can always ask for her personal opinion. Conceptualize a color scheme that features her favorite color, enhance with other hues for more drama. Take note of elegant looking colors like light blue, purple, lavender etc. Use your Imagination. You can adapt a castle-like effect to the walls; you can draw designs using paint or just buy castle-faux stone designed wallpaper for it. You can also decorate the ceiling, floors and windows. Additional details like a butterfly wallpaper border, or with flowers, faeries, and crowns will also go a long way. The smallest of things counts.

The Royal Bed
As seen in every fairy tale story, each elegant princess has her own equally glamorous bed to sleep on. Make your little girl’s dreams come true and make her one. Get a bed with four high posts; create a canopy with an arrangement of soft fabric or ribbons. This effect is very popular and most girls will love it. Aside from the appearance, the cushioning of the bed should be fit for a princess as well. Make sure that it will offer the best comfort possible. Use silky fabric for the bed sheets, blankets and pillows. Matching the colors in the bed with the room’s color scheme will provide stunning results.

Painted headboard

Other stuffs
Now that you have the room set, you can shift your attention to the extra details. You can replace the knobs of the door, drawers, and dressers with fancier knobs which are usually available in hardware stores. You can also use lighting effects to accentuate the ambience of the room. Add a bookshelf filled with fairy tales so that you can read it to her before she sleeps.

If you are not planning to surprise your princess, you can design the room with her aid. It would be a lot easier for you. And because of her involvement in the project, she will surely love everything in it. Designing your princess bedroom can also be a great bonding experience for the two of you.

Read More
Tips

7 Home Design Tips: Refurnishing your tiles

Decades ago, repainting your old tiles was never considered. This was because of some issues regarding safety and dependability such as paints having toxic materials, can cause the tiles to be slippery and many more. But in the modern world today, we have access to better products that promises better results. Here are some easy to follow steps on how to refurnish your tiles.

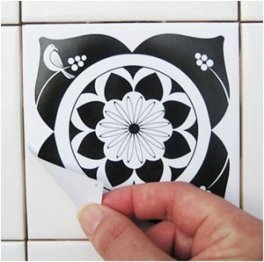
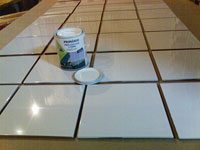
Painting tails

Make the tiles “SQUEAKY CLEAN”
Aside from paint, there are also other products that enhance the surfaces of the tiles such as vinyl tile covers, polishes and more. But whichever product you choose to use, it is important that you clean the whole area first THOROUGHLY.Dust, mold, mildew, grime, dirt and other impurities are usually present in the tile surfaces. These impurities may hinder the success of refurnishing your tiles so it is best to remove them. Wash them off using clean water, bathroom cleansers and bleach. Check the area after rinsing to see if there are remnants of the dirt. Repeat until there are no more traces of impurities. Leave the area to dry.

Prepare the Tiles
Once clean, you have to prepare the tiles for paint application. Here are some things you should do.
1. Sanding Since the tiles are shiny, the paint may have a hard time bonding with it. Given this situation, you can use sandpaper or a sanding machine to rough out the smooth surface. Be sure to wear mask and eye protection to prevent you from breathing dust. Wipe the tiles clean afterwards.
2. Bonding Primer After the sanding process, coat the tiles with bonding primer. This topical sealer can prevent molds and mildew from growing in the crevices. Allow it to dry for 24 hours or until the coating is fully dry.

Vinyl tile cover

Paint the tiles Away
After cleaning the tiles and the preparation is done, it is now time to apply paint. It is advisable to use high quality paint, preferably latex paint. This is because latex paint contains acrylic binding agents, these agents help the paint adhere to the tiles. In addition to this latex paint is resistant to moisture, making it impossible for mold and mildew to thrive. Use a paint brush or any paint applicator. Experts suggest two-coat paint application; this means that you apply two coats of paint. You first apply the initial coating and then when it dries up, follow up with another coat. Make sure that you apply paint evenly, for a better appearance.

Other Ideas
If you do not like to use paint, you can settle for vinyl wallpaper coverings. You may also want to consider using it with waterproof polyurethane for better results. You can seek the opinion of a customer-service staff to verify the compatibility of the materials to avoid problems.

Read More
Girls

Decorating a Sporty Themed Room

It’s not always the boys who have to be considered the sporty ones. In the various events at the Olympics, girls can also dominate. Does your kid daughter, niece, sister or cousin have a flair for sports? Does she display talent and passion for different types of sports? One of the best ways to show support for that inclination is to re-decorate her room with a sports theme.

Basketball themed room

Decorating your princess bedroom always best begins with the walls. Choose soft hues such as baby blue, sky blue, pale pink or it’s alright for her to have dark colors such as navy blue or even black, then you can paint the walls with that. Just be sure to have the proper lighting so as not to strain the eyes. Whether she prefers just one sport or multiple sports as the central theme (others girls themes are for example, a butterfly themed bedroom) , remember to list down all of the elements of the sport(s) as basis for the following decors. For example, if she likes basketball, you can install a miniature net and put up small basketballs on the wall, etc.
Basketball game

The elements would include the equipment for the sport(s), the rules on how to play (which can be represented by fun doodles or caricatures so it won’t be boring to look at and it won’t be hard to understand). For equipment, you can splurge on miniature nets that can be purchased on your local sporting goods store. If you’d like to use wallpapers instead of painting on the sporty design, then it’s up to you as long as it will complement the rest of the colors of the accessories you’ll be using.

Read More
Lighting

Lighting Designs: Are there Options?

Right lighting at home will certainly create a different ambiance to your home, especially to your living room and bedroom. With the right bulbs in use, you are sure to change the mood without too much effort. Therefore, you have to choose the best lighting bulbs depending on your desired results. Below are just some of the interior decorating tips on choosing the best light design and bulbs.

Living room lighting

If your desired effect is to have a proper lighting perfect for your family members who do their assignments or those who like to read most of the time, then pole lighting is the perfect for you. Since it is “pole,” it enables the light to run not only on the floor but also up to the ceiling. You can adjust the lights in different points where you would want the light to reflect. You can just point it to one corner and presto, you will have your own bright light perfect for your reading pleasure. Track lighting also does the same, giving just the right amount of light for the right focus. This saves space because it can be installed and hidden in any part of the room, adjacent to the object or furniture you want the light to focus on. For example, you want to have a dim light for your painting. You can just mount the track lights on the ceiling.

Of course, there are the small, simple bulbs which have a variety of designs to choose from. There are circular bulbs, tubular bulbs, floods, rings, and globes. These small bulbs are so convenient you can just attach them to lamps or to other fixtures. These are perfect for small rooms which will only need a small amount of light. But for bigger rooms, these small bulbs are not capable of reflecting the light enough for that big space.

Best bathroom lighting

The latest innovation for the lighting is the scented light bulbs. These are one of a kind because when you install scented light bulbs, you have the chance of having a brightly lit room with a pleasant smell. These are perfect for the living room where you entertain visitors and to your bedroom where you rest and relax.

Of course, if you want to have a perfect lighting for your relaxation, and you want to invite a calm and quiet atmosphere, use the oldest form of lighting-candles. Just light some candles when you’re doing your bath in your bath tub or when you take a nap in your bedroom or when you prepare a romantic dinner for your spouse. These are just some of interior decorating tips you can follow in choosing the best light design and bulbs. You can choose according to your preference but basically all the designs are created for the better of your home.

Read More
Bathroom

Stepping On Comfort: Picking the Perfect Bath Mat

We give our bathroom mats less credit than it deserves. Bathroom mats not only serve as decoration, but they can also protect us from the slippery bathroom floors and stepping on a mat eases pressure on our feet. What do you look for while picking the perfect bath mat? While scouring the malls and shops for your mat, visualize your bathroom and think what areas need a mat. It could be under the sink, surrounding the toilet or immediately right outside the shower area to dry your feet.

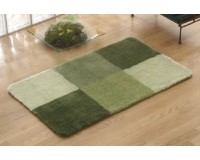
Bathroom mat

Next, think about how big the mat you want is. There are usually bath mats that come in sets usually including one for the sink and one for the toilet whose edges are formed to fit the outline of the toilet and/or sink. Mats come in various shapes, sizes and prints. You could also match your mats according to the color of your shower curtains. Speaking of edges, it is not advisable to use bath mats with too many fringes. Not only is it not too pleasant to look at, it is not practical given that it would be harder to clean these types of mats. Choose mats with smooth edges so it won’t get messed up in the long run.

Another thing to consider is the surface of the mat and what material it is made of. Sure enough, you would be particular of how the surface feels on your feet. Last but not the least, as mentioned above, a mat also provides protection especially the rubberized ones. Remember that the bathroom can also be a hazardous place so choose mats that are rubberized on the other side. Rubber mats are also available on department stores and they can also be placed inside the shower area. When you’ve found your bathroom mat of choice, don’t forget the maintenance. Read the instructions and specifications of your purchased bathroom mats so as not to deform it.

Kids bathroom mat

Choosing the perfect bath mat is not hard. Just remember the tips mentioned here: consider the places where you really need to place a mat or where you think a mat would be appropriately placed. Next, consider the size of both the mat and the floor area of your bathroom. Do not choose a bath mat that is not tailored to fit the the sink or toilet’s bottom silhouette. Third, stick to mats with simple edges so it will not be easily deformed and it will be easier to clean. Consider the material and the rubber material which will prevent you from slipping. Maintenance of your mats is also a mat so you’ll be sure to reuse them for a longer time.

Read More
Furniture

An Older Look for Wood Furniture

If you think that wood furniture is all that you can have, then think again. There are many ways as to how to improve the look of a single wood piece. One of the more popular wood designing is by doing “pickling.” What is pickling and how does it give a better appearance for your wood? You have to see by your self.

Antique wooden furniture

The steps are so easy but just like in any design, you have to be careful so as not to waste effort and time. Here is a simple do it yourself procedure on how to apply a pickling finish. First, you have to choose the color of paint you will apply to your wood. Although the usual shades used for pickling are thinned white or off-white, you can choose from all the lighter shades available. It is recommended that you use a latex paint that is water-based. Because of that, you have to thin the paint. You can do this by mixing it with water. It must be 25% thin.

The next thing to do is to prepare the wood piece you are going to apply pickling with. You can use a sander to remove the paint or simple sandpaper for a cheaper use. Once the paint is removed from the piece ofwood furniture, you could see some dust. You have to wipe off the dust before applying paint so you are sure of a fine coating. Once your wood and paint ready, you can now start applying the mixture on the wood furniture. Use a bristle brush when doing this.

But since you are aiming to achieve an older look of the wood, you have to remove most of the paint to make it appear lighter. You can do this by quickly wiping the surface with the use of a rag. Once the first application is complete, you have to wait for twelve to twenty-four hours. Next, you have to use sandpaper once again to sand the paint but gently this time so as not to remove the paint completely. You have to do the same process again of wiping off the dust then applying paint again for second coating.

Rustic furniture

Repeat the process as you wish because the more paint you apply, the more the paint is being absorbed by the wood, making it darker. To avoid your wood furniture from getting scratches or spills, you can apply water-based polyurethane. You can also apply a second coat of this. This pickling technique gives the best design to your wood by making it appear darker and older. This adds charm to your wood. Aside from that, the pickling strategy is very effective and is easy to do. What is more is that it is very affordable you can do it with just spending on the paint.

Read More
Feng Shui

Mirrors, according to Feng Shui

Feng Shui is still one of the widely followed oriental art principles. These principles are all about having harmony between the person’s surrounding and the chi, which is the life energy. It is all about positioning everything in order and in harmony with nature, and mind you, even mirrors no not only reflect your image. It also reflects chi, so better be sure of where to correctly position them in your home or in your workplace.

Mirror location according Feng Shui

It is one of the Feng Shui basics, how to effectively use mirrors is one of the principles in designing your home. You have to know where to correctly place them because they may either encourage positive chi or invite negative chi. And, according to Feng Shui principles, the placement of mirrors may affect the person’s success and fortune, or misfortune, in that sense. Of course, there is still that famous Ba-Gau, which is usually placed at the door or at the outside premises of the house. Ba-Gau is that eight-sided mirror, which Feng Shui principles say represents marriage, children, career, fame, knowledge, wealth, and health. This mirror, according to Feng Shui, invite positive chi and keep the negative chi away from the home or from the office.

Another way to place mirrors correctly is to choose a spot where it reflects a good view like mountains or fields, which signify vast lands and vast wealth. it also good if you place a mirror with a reflection of a bank or pot of gold, which signifies wealth too. The reflection of the mirror must always be of positive energy so the chi will also be bounced back to the entire room. You can also a mirror where it reflects a window or door because it is where good chi is flowing. Never ever put a mirror at the end of a long hallway. This will encourage negative chi and it suggests dead end. Why not put mirrors along the walls of the hallways so as to expand energy? This will certainly encourage positive energy especially to lobbies and halls of offices.

Feng Shui mirrors

Always remember that mirrors must always be at the eye level so the reflection would not cut the head of a person. This reflection suggests negative energy and is bad for the person reflected by it. Do not also put a mirror directly in front of your bed because direct reflection of a mirror while you are at sleep is negative according to Feng Shui.These are just some of the Feng Shui basics with regards to how effectively use mirrors. There is nothing wrong in following them, especially if you have been a long time follower of Feng Shui. However, be reminded that it is you that creates what happen to your life. Feng Shui, after all, is a cultural tradition.

Read More
ideas

DIY Ideas for Home Marble Tile Mosaics

Marble is known for its elegance as seen in various offices, public buildings and even homes. It exudes a feeling of security when it is incorporated into a structure, due to its inherent hardness. To use it at home for marble tile mosaics is a good idea to help remodel your house, in small or big ways.

Lay marble mosaic tiles in areas such as the patio, swimming pool, wine cellar, bathroom, dining room, deck, fireplace and kitchen. In the bathroom, marble tile mosaics can be applied to the commode tank lid, the mirror frame, sinks, walls, and shower floors. Kitchen countertops, table tops and backsplashes can also be decorated with this technique. Apply marble tile mosaics to showcase the family initial at the foot of your door or put marble tile mosaics over a part of the threshold on the inside of your home.

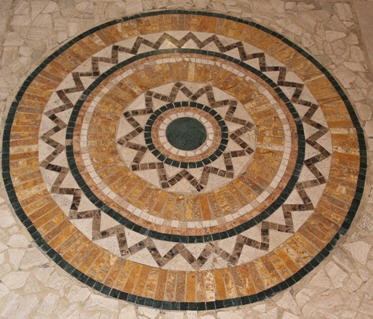
Marble mosaic

Before incorporating marble tile mosaics on a large or small scale with a specific pattern in mind, use chalk or color pencils to mark the design onto the floor or small item while coloring the necessary areas. Use this as a sort of guide while mounting the marble tiles. Designs can range from the simple stripes and shapes (e.g. hearts, diamonds, circles, squares) to whole pictures, flowers, animals and sea creatures. For the less gifted with drawing, you can make use of stencils to put down the design you want to mosaic.

There are many small projects you can apply mosaic marble tiles to. Vases can be decorate with tiles in different patterns the same way as stone benches can. For great table and living room lamps, use mosaic marble tiles to add designs to their bases. Picture frames can be decorated with tiles as long as they match the other colors in the room they are placed in. A big plate that has a marble tile mosaic will make a great centerpiece for a table.

Green marble mosaic tile

For a unique container, take a sturdy plastic bottle with a wide mouth and apply marble tile mosaic designs on it. Tile a platter with a marble mosaic and set it down on the center table in the living room to hold the TV remote control and magazines. Cabinet doors can be tiled for a quaint, whimsical effect. Your bed’s headboard or footboard can also be tiled with a mosaic design. Tile the exterior of your book shelf or even the frame of your closet door. Outside, set up two potted plants that have been placed in plastic pots that have been tiled with marble mosaic. Take your imagination higher and find other things to decorate with marble tile mosaics!

Read More
Bathroom

Decorating Your Bathroom Mirror with a Twist

Decorating mirrors for your bathroom can be quite difficult if you are a first-timer. Considering that you are just off to a brand new niche, you might want to learn first the craft’s basics, then later, proceed to the actual decorating. First things first – What is your main purpose with your mirror? Is it just simply for decoration? Or is it part of the medicine cabinet? How about the lighting that’s above your mirror, and the other things around your mirror? Consider these and start your project with ease.

Bathroom decorative mirror

Think you’re on the groove for some etching? Well, this is a wonderful idea to start with. However, if you are really into this, you’d better figure out if you really want to leave a permanent etching onto your mirror. To do this, you will need an etching cream, knife, paintbrush, and clear contact paper.

As you decide on the pattern or design you want for your mirror, you may get ideas from the current style of your bathroom. Are you going to paint the mirror? Which colour?Does it have floral prints? Then it might be perfect to draw butterflies and bees along the contact paper and cut the pattern using your craft knife. When already cut, stick it on the mirror and upon following the instructions indicated in the cream, apply it using the paintbrush. Now, the time you have to wait for in removing the paper is based on the instructions too, so you have to read it well and off you go, your personalized mirror is right on your very eyes.

Moreover, if you want to have that classy or antique look on your bathroom mirror, decorating it with a customized frame is definitely a plus. You can plan for this by determining the space needed as well as the lighting you have above the mirror. Seek help from a framing store and let them help you in measuring what is needed for your desired mirror and from there, you can also buy from them the frame materials you need. Now, as you put in the frames, together with the help of the handyman, you also have to note that it also has to be fixed by nailing. As you do so, you may also paint it for a finishing touch.

Modern bathroom mirror frame

To make your mirror look like a spring outdoor window, you might also want to add up some old shutters (available at flea markets) or new ones (found at hardware or supply stores). However, just make sure that you have adequate space to put in these, or you might end up crowding your bathroom. Now, these are just some of the means to beautify your bathroom mirror. Designing it according to your own liking is based on your creativity. To determine the best technique, make sure you have the resources or you have the capacity to maximize whatever you feel is just great for your bathroom mirror.

Read More
Kitchen

Budget-Friendly Tips to Brighten Up Your Kitchen

The usual implication of home improvements is that they are way too expensive. This is a misconception since there are many ways to improve your kitchen without going overboard with the expenses. The following suggestions in this article are easy home improvement ideas for the kitchen that will cost less, considering the fact that most of the work can be done by yourself.

Paint Anew
Changing the color of the room can instantly make a feel kitchen feel brand new. For a cheery feeling, chose bright colors to your liking that energize. Paint the walls, cabinets, counters, kitchen island, seats, etc. to make everything look fresh.

Kitchen decoration

Light It Up!
This alone would make a kitchen look grand and new. The simplest way to do so is letting the natural sunlight do its part. Do this by removing those dark, thick curtains over the window and put on sheer curtains that welcome the sunshine. Adding other lights over the work areas for a warm glow is also a good idea.

Change Hardware and Fixtures
Replacing old fixtures, handles and cabinet hinges can work wonders. Elegant handles on freshly painted white cabinets look fabulous. To add class to a sink, simply replace the faucet with something graceful and chic. If you go for the vintage or antique look, go to the flea market to buy fixtures or handles. While at the flea market, be on the look out for other things (e.g. wind chimes, wall hangings, decorative dishes) to add to your kitchen, where it costs less than in department stores.

Add Accessories Found at Home
Go up into the attic or even just go from room to room in the house to search for things that might be good kitchen additions. Furniture need not be bought from the store to be added to the kitchen.

Go Green
No only do potted or hanging plants add color to your kitchen, they also increase the oxygen levels of the room. If you already have a garden in the backyard, put some of the flowers or small bushes in pots to transfer them into the kitchen.

Kitchen

Refurbished Cabinets
Instead of spending money on new cabinets, try replacing the cabinet doors only. Doors with glass in the middle can change the cabinet’s look completely. You might also want to remove the cabinet door altogether, to allow easier access and better display opportunities.

Redecorating your kitchen while on a tight budget should never lessen the creativity or the passion involved. Allow your thinking skills to resolve redecorating problems related to the budget and you might just end up having a whole new concept of design for your “new” kitchen.

Read More
accesories

How to Choose the Perfect Rustic Cabin Accessories

Today, with our hectic lifestyle, a hideaway where one could spend a weekend or a vacation in peace and quite, far away from the demands of our daily life is something that is coveted by most of us. Though technological advances have improved the quality of our life on one hand, it has also lead to a more complicated lifestyle with high demands that invariably adds a lot of stress in our day to day life. Leasing or buying vacation homes have become quite common nowadays and what can be better than a rustic cabin to meet their needs for peace and quite and a chance to be as close to the nature as possible?

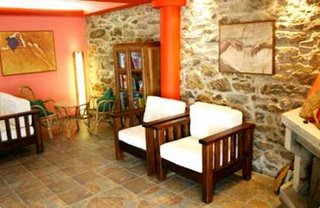
Rustic style

But then, if you decide to become the owner of a coveted rustic cabin you will have to find the right accessories to match a rustic décor. To create the right atmosphere for a rustic cabin you have to keep in mind three basic factors while looking for accessories. They are: simplicity, purpose and ambience.

Simplicity: This is the most basic as well as the most important aspect that you should keep in mind and fortunately it is also very easy to grasp the idea and implement it. Your choice of accessories from handles and hinges to lighting fixtures should be simple but elegant. A charming but traditional piece of decoration will be perfect for a rustic décor and provide the much needed warmth and peace to your rustic cabin. A simple piece of elegant wood carving or a bowl of dried flowers will look more beautiful in your rustic cabin than any elaborate or stylish decoration.

Purpose: While choosing accessories for your rustic cabin you should keep in mind the purpose of your cabin. Your choice of accessories should blend in with the décor and never obstruct the functionality of the cabin. Take care not to clutter the space with too many or conspicuous decorations. Small and understated accessories are perfect as they will blend with your décor and moreover they will not be obstructive. Some of the best accessories are one which also provides a practical purpose. Say, a set of quaint mugs hung near the fireplace will enhance your décor as well as serve a purpose.

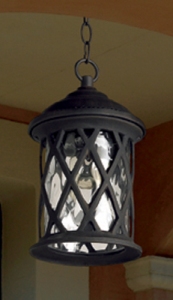
Rustic lamp

Ambience: Since the purpose of your rustic cabin is to provide peace and warmth to you, the accessories should be chosen to reflect this mood. A peaceful atmosphere can be obtained by choosing the right accessories. Go for the simple but elegant and graceful look. Keep your accessories to the minimum such that they do not obstruct or clutter your space. A rustic ambience is achieved when your accessories portray both simplicity and purpose. The most important factor is to keep the space clean and neat. Avoid loud colors and elaborate decorations. The accessories should blend in with your rustic décor and create a feeling of harmony and peace.

Read More
Remodeling

Things to Know about Granite tiles

Thinking of using granite tiles for your floors and countertops? Do you know how to choose the right ones? Here are some fundamental things that you should know before you go about buying granite tiles for your home.

How granites are formed:
Granites are actually stones that are formed naturally beneath the surface of the earth. They are formed as layers of rock in the earth’s core by repeated heat and pressure impacted on them by the earth’s atmosphere. It is a type of igneous rock formed from the liquid magma present between layers of rock. The pressure and heat and the subsequent cooling hardens the liquid to a solid rock. The magma constitutes of certain elements like mica, feldspar and also quartz. These are responsible for the crystalline appearance of the granite when its formation is completed. The hardness and durable quality of the granite is from the repeated treatment of the stone under various temperatures inside the earth’s core over several hundreds of years.

Grey granite tile

Processing of the raw granite:
Once the granite is excavated it is sent for processing in plants specialised for treating the raw granites. The first stage is the cutting stage where the huge chunks of rock are cut down to blocks which can be handled comfortably. These blocks are then reduced to slabs and tiles of various sizes and shapes by using wire saws. These saws are sharpened with the help of abrasives like aluminium oxide, diamond and sand. Water jets at high pressure are used alternatively with the saws for cutting the granites. After the cutting stage the stone undergoes polishing which is usually limited to one side. Then the final product is calibrated and gauging is done on it.

Now the tiles made with granite are completed and fit for use in your homes. Granite finds it use mostly in the kitchen where the countertops and table tops are fitted with it. It can be used outdoors too and the tiles that are left behind can also be used in places like the surrounding area of the fireplace, as cutting boards and also as coasters.

Granite tiles

Most people prefer granite countertops as they are heat resistant and also are easily cleanable. They require very little attention and regular care. But still some amount of looking after is needed. You can add some sealant to the granite for proper protection from moisture. And it should be polished at regular intervals with polishers and cleanser to retain that shining and dazzling look. With sparkling looks and durable quality no wonder granite tiles are the most popular choice for decorating both your interiors and exteriors.

Read More
walls

Decorative Wall Covering Suggestions for the Budget-Conscious

Interior designing need not be outrageously expensive. Creative wall covering ideas for the do-it-yourself interior designer are an example of a money-saving option. Here are some suggestions with fun titles on how to decorate your walls while still on a budget.

The Beaded Wall
If you are a genius at making patterns try out this whimsical wall covering idea. For this kind of wall, you may use monochromatic beads or multiple colors, either covering up the whole wall or just a small portion of it. You may try spelling out words with the beads or even depict a picture with them. About the beads, you can buy different kinds in different shapes and sizes. To be on the safe side, use a pencil to lightly sketch out your design or shape on to the wall before you start sticking the beads on. Have an extra-strong household/crafts glue on hand to stick the beads into place.

Delicated and classic bedroom wallpaper

The Chalkboard Walll
If you are an artist with the craving for self-expression always, you may opt for the Chalkboard Wall. Special chalkboard paint bought from a department store can immediately change a wall into a chalkboard. Simply apply it on the wall as you would regular paint with a paintbrush. Let the paint dry and then affix a small wooden box in a convenient spot on the wall using a nail or strong glue. The box will hold the multi-colored chalk and eraser. Each day that you wake up, you can create a whole new wall design and even write down reminders on the wall if you are inclined to forget things. This wall will also definitely be a hit among the kids.

The Placemat Wall
Placemats can be tastefully made into wall décor with the right eye. Make a balance between the colors and the texture of the placemats. You can decide to use various types of placemats in one design or just one type in different colors. The idea is to give the impression of a quilt or of a modern artwork. Placemats made of plastic, fabric, bamboo, etc. may be used, but make sure to use extra-strong household/crafts glue to affix them to the wall. The various textures that the placemats lend to the wall add uniqueness and interest to the room.

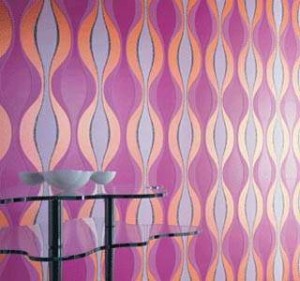
Psychedelic style wallpaper

The Corkboard Bulletin Wall
Inexpensive corkboard tiles stuck to the wall with extra-strong glue or spray adhesive is another budget-friendly wall covering idea. It is also functional at the same time. You can place photos, artwork, notes, reminders, and all the manner of personalized items to display on the corkboard using pushpins.

Enjoy these creative wall covering ideas without breaking the budget.

Read More
Lamps

Antler Lamps & Chandeliers with Rawhide Lamp Shades for Rustic Décor

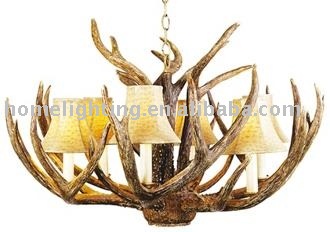
Antler lamps are elegant and absolutely unique. Natural antlers are rare and are coveted by both outdoorsmen and animal lovers. Lamps and chandeliers made from antlers are best suited and most desired by those who prefer southwest lighting and western décor.

Antler ceiling lamp

Antler lamps are made from the ‘antler sheds’ which the animals shed every spring as a natural process. These antler sheds are found in a few places including Jackson Hole, WY. Every year antler sheds are gathered from these places and are used to make antler artefacts like chandeliers, lamps and even furniture. White tail deer sheds are widely used to make antler lamps that are quite popular. One more favorite antler lamp that is popular among rustic décor lovers is made from mule deer sheds that are slightly darker in shade and larger than the white tail deer sheds.

The points or forks and tines as they are called in the antler shed is different in each shed which is what makes every antler lamp to be unique it its own right. This unique feature makes every antler lamp or chandelier to be a one-of-the-kind priced possession. Drilling and patching techniques are employed to create the best quality antler lamps that are perfect without displaying any hardware or even a trace of the wiring.

Antler lamps

Nothing can be better suited to provide rustic lighting than antler lamps, which makes them perfect for cabins, log homes and western style ranch homes. If you are looking for lighting fixtures to compliment you south-western décor or your western furniture, then antler lamps and chandeliers are your best choice. You can enhance the rustic effect even further by using authentic rawhide lamp shades for the antler lamps, chandeliers and sconce. These lamp shades are enhanced with hand lacings that give a warm glow to show your rustic décor to its best advantage. Moose and elk sheds are the most striking among all antler sheds and are used to make some of the most remarkable and exquisite antler lamps and chandeliers. This is due to the large size of the sheds that makes it possible to create stunning designs in elaborate chandeliers, huge floor lams and exquisite antler furniture.

Another attractive feature of these antler lamps and other light fixtures is that they are virtually maintenance free. If rustic décor is your cup of tea then antler chandeliers, lamps and furniture made of authentic rawhide will enhance your décor like nothing else can.

Read More
Painting

Smoother Finish for a Beautiful Room

You got it. You now have the right room for you. You chose to have your walls painted rather than wallpapers. You are now about to choose for the paint that will make your walls look brighter and more appealing to the eyes. You just have to put in mind that you must choose the paint that gives a smooth finish to the wall. Meaning, you have to be very careful in choosing because there are some kinds of paint that only deceive your eyes. You might probably say you can’t see all the imperfections of the wall but it is just the paint’s reflection of the light that does the cover up. So, you have to choose wisely the paint you will be using.
Wine tone painting

For you to know more about which paint to use for a smooth finish, here are some tips. You probably know about the oil-based and the latex, since they are among the paints that are available in almost all stores. The oil-based, though it is thin, is very durable and always go along smoothly on all surfaces. The problem with this is that it is very hard to clean up. You might spend too much time cleaning it up and it is usually expensive.

On the other hand, the latex paint appears to be thicker, and with just one coat, you can already see a smooth finish. It does not smell bad, and what’s best about this is that you only need a shorter time to clean it up. If you have also heard of primer, then you would know that it is much better than paint. It fills any rough spot on the wall, leaving the walls with a smoother finish.

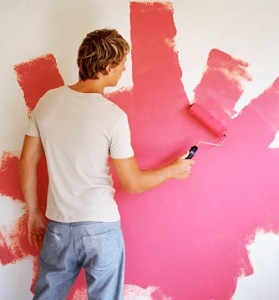
Painting walls

But, hey, the best paint to use to give your walls an assurance of the smoothest finish is none other than emulsions. It may probably cost higher than the above mentioned paints but it is certainly the best and most effective. It disperses evenly the paint’s molecules. However, if you really have no budget for this, you can try the semi-gloss latex paint. You can also have the smoothest finished if you ensure that the semi-gloss latex paint is rolled properly on the surface. It needs meticulous rolling to have a smoother finish. You can check for the specifications of every paint available in the store. You just have to be careful with choosing.

All your home decorations will look good if they complement well with your walls. The wall paint is also a key to the ambience of the whole room, whether it will look brighter and loud or darker and calm. Everything is in your hands so better be careful, enjoy and prepare everything for the wall painting.

Read More
Bathroom

Select Bathroom Fixtures to Complement your Bathroom Décor

Bathroom fixtures can be chosen to provide you with the ultimate comfort and at the same time complement whatever décor you have chosen for your bathroom. Updating or modernizing your bathroom fixtures can transform your old looking bathroom into a stunning and spectacular room, one that you can be proud of. It can also work out to be cheaper than replacing your fixtures. You have to be very careful while selecting the fixtures as they have to serve the requirements of the intended user. Moreover their placement in the bathroom or toilet should be such that they can be easily accessed for use.

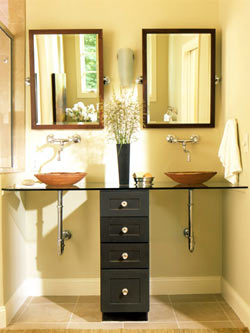
Double vanitory

Before making your decision, invest some time to research on the available models and brands and about their design, quality and price to choose the best that will suit your décor and budget.

Bathroom fixtures can be chosen to either enhance or underscore your existing décor or it can also provide a neutral backdrop which you can alter using different accessories. The following tips can help you out. Consider including bars or table spaces to place towels for the convenience of seated bathers who can use them to dry their hands before leaving the bathtub. Also provide storage spaces at convenient locations for shampoo, soaps and other toiletries.

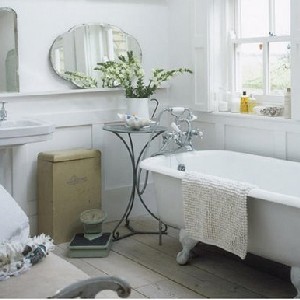
Antique style bath

You can also combine different styles of fixtures to give your bathrooms a different look. Make sure that all the fixtures blend well with each other. Remodelling your bathroom will give you better return for your investment and moreover your bathroom will dazzle with a new look that will enhance and complement the décor. Your remodelled bathroom might even turn out to be the best room in your entire house.

Read More
Floors

Choosing the Best Floor and Wall Covering Fabrics

Though the color, designs and the texture of different fabrics may vary, all of them provide warmth and charm to any room they grace. There are endless possibilities to mix and match your wall and floor coverings to bring out the best. Though fabrics were traditionally used to cover the walls, they have gracefully given way to the more practical and easy to use wallpapers. Today many retailers have papers and fabrics that have the same design or pattern for your convenience.

90_0

The following tips can help you to choose the best wall and floor covering fabrics for decorating your home.
The flooring should be chosen in accord with the room’s usage.
• If the room is going to see a lot of traffic, especially with high heels or dirty soles, it is better to choose hard and easy to maintain floorings like marble, tile or stone.
• In rooms where you prefer to walk barefoot, it is advisable to choose warm and comfortable carpet or even hardwood flooring.
• Also it is better to avoid paint in places where you expect a lot of people to walk about. Again, marble or tile flooring is best for these rooms.
• But before you finalize on any type of flooring, try to visualize their effect under the room’s lighting.
• Once your flooring is all done, make sure to take good care with proper maintenance if you want your carefully chosen flooring to last long.
• Also keep in mind the dimensions of the room and how much floor and wall covering they will need. This is very important, as they can affect your budget and ultimately the style and design.
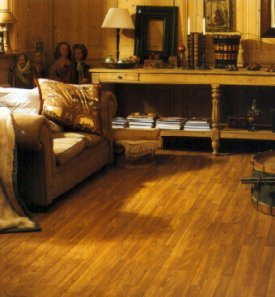
Laminated floor

• Make sure to choose the wall and floor covering simultaneously as they should blend well or complement each other to enhance the ambience of a room.
• Fabrics can be employed to provide soundproofing in particular rooms where noise is an issue, like a game room.
Curtains and blinds can make any room exotic or rustic or they can used to create whatever mood you desire with appropriate lighting.

Read More