How tos

How to Stop Bathroom Odor?

Bathroom is perhaps the most critical part of the house that needs our attention. Some people say that you can see the personality of a person by just merely checking its bathroom. Surely, you wouldn’t want to give negative impressions to people right? Therefore, why not check your bathroom now? It is very distressing to walk into your bathroom and smell an upsetting bathroom odor. Having a plain dirty bathroom with clogged drains, mold and mildew, plus a kitty litter box are some reasons why this problem happens. Here are some tips and suggestions on how to stop bathroom odor.

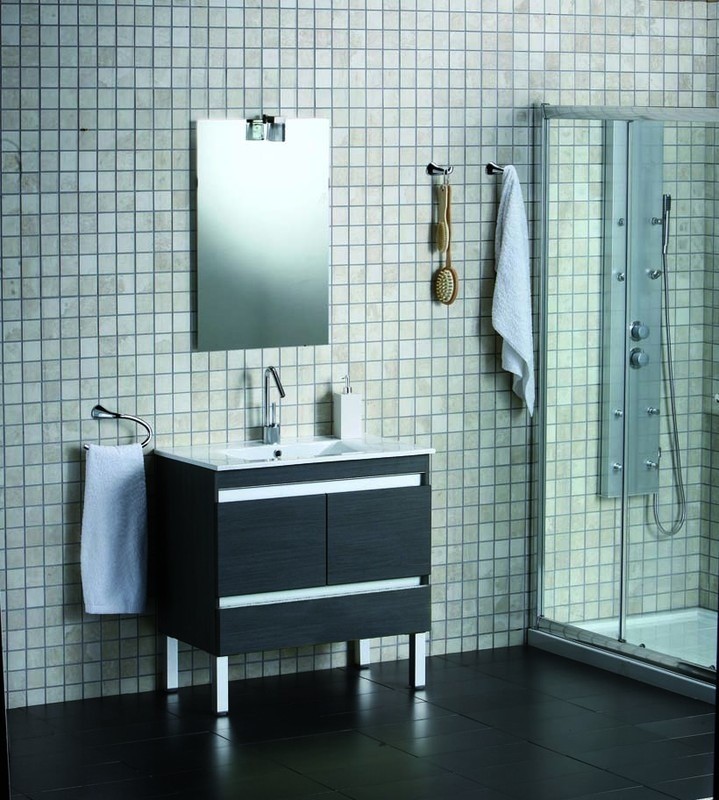
Modern styled bathroom

If the bad odor is a result of a dirty bathroom, simply clean the whole place. Wipe any moisture away from the areas using some paper towels. These areas include the floor, heater vent near the toilet, and of course, the toilet in general. You can use all purpose cleaner detergents in spraying the affected area. This type of cleaner disinfects as it thoroughly cleans. Do not intend to mix ammonia and bleach together. Use this on your floor, tiles, toilet, sink, bathroom ceiling, walls and bathtub. Wipe it using paper towels until it becomes visibly clean. Pour a few drops of an appropriate fluid mixture such as chlorinated hydrocarbon. It contains a small amount of a volatile fragrant fluid added to water in a toilet bowl prior to the use of the toilet. Spray sand odor remover in the areas you just cleaned.

Below are also tips given to get rid of the bathroom bad odor. The simplest and easiest way to eliminate unwanted odors is to light a match. It is proven that flame would burn up the unwanted bathroom odors. Use air freshener sprays, plug-in air fresheners and light scented candles. Aside from their fragrant scents, the flame will burn the unwanted smell. Install your fan because it will blow the exhaust. For eliminate mold and mildew from tile grouts, simply spray one part bleach and five parts water onto them and repeat until they disappear.
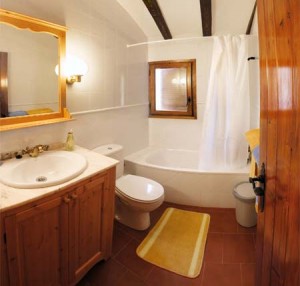
Classic bathroom

Unclogging your drain is a good preventative tip that has to be done every after three or four weeks. Pouring a cup of baking soda down your drains and then a cup of white vinegar is the easiest way to unclog it. If your drain removes the water slowly, plug the overflow openings and then apply plunger. If you are sure that your drain is clean but still emits an odor, pour vinegar or bleach down the drain.
If the unwanted smell came from a cat litter box, simply rinse the litter box and pour some white vinegar on the bottom of it to help stop the odor. Leave it for at least fifteen minutes then rinse it with cold water and dry using paper. The vinegar can neutralize the smell of ammonia and the baking soda that controls odor. The simplest way to stop bathroom odor is to clean the whole area. Seeking for information is the best way to avoid these unwanted smells. People keep on looking for ways on how to stop bathroom odor but the truth is that every individual in the household is one best tool in maintaining its cleanliness. Bathroom also known as comfort room should be a comfortable place as the word implies.

Read More
Decoration

Wedding Ceremony Decor

Getting married is the biggest decision in people’s lives. But if you think you are very much sure, then its time to walk down through the aisle and face the altar. Preparing for a wedding is not just easy; you have to think of headpieces and tiaras, wedding invitation and wedding cakes and even wedding decorations. Of course, you want your wedding to be very perfect, it’s a once in a lifetime experience.

Decorating must focus on: The aisle. All eyes will look at the bride while walking down the aisle; Reception decorating. Provide your reception site a beautiful part of your wedding day; Wedding cake table. Give beautiful showcase to your wedding cake but do not let it stand alone; Giveaways. This giveaway for guests on your wedding is a long-standing custom. And it favors simply add fun to the wedding reception.

Wedding tables decoration

Wedding ceremony décor allows you to choose the special decorations that add beauty and meaning to your wedding day; Wedding reception table decorations. In order to create a great decoration, coordination is the only key. Some brides take a cue from their cake when choosing accessories for the reception; Décor for chairs. The color of the chair’s cover adds so much to the look of the reception site. This is so simple step that can add an abundance of elegance; Dyeable Products. Add some color to your favors, decorations and other accessories to bring personality and style to your event.

The accents you chose for your Wedding ceremony décor will be part of your family heritage. Both of them are beautiful decorations which set the mood for the day and treasured keepsakes which can add meaning to future family weddings.

For other accents, if you want to add your personal stamp to the proceedings. Candles were used at the altar as part of the ceremony. For the bouquet that you will carry down the aisle, consider the Fresh-Look Flower Holder, with natural-looking stems that make silk flowers look like they were just picked. Don’t forget the beautiful guest books, plume pens and ring bearer pillows to coordinate with your chosen theme.

Wedding cake

When it comes to wedding décor, the decoration from the smallest to biggest details is important. If it is a church wedding, decorating the lobby of the church or the entry doors doesn’t have to be too elaborate. You could place an arrangement of 2 to 3 feet high floor candlesticks on either side of the doors. You may have a thought of choosing accessories which reflect your wedding theme or those have special meaning for you. There are a lot of couples that include family religious items in the ceremony such as bibles, prayer shawls, etc., to pay tribute to previous generations and keep them alive in memory.

Read More
How tos

How to Clean Micro Suede Couch?

A micro suede couch is also known as a love seat. It is a small piece of upholstered furniture on which two or more people can sit side by side. It is designed with leather and the flesh side is turned outward and rubbed up to make a velvety nap. Regardless of its attractive texture and feel, many buyers shy away. The advantage of using this micro suede couch is its being easy to clean. Suede has the ability to last like cloth or vinyl; however, its material requires a special care and cleaning procedure. The following are the materials needed and the steps on how to clean micro suede couch.
Before anything else, you will need soap with low pH level, a spray bottle and a light-colored cloth.

Black suede couch

Step 1 The first thing to do is to crate a mixture of water and a squirt of low pH soap in a spray bottle. You can use Neutrogena gentle facial cleanser. Most facial soaps have a low pH level.

Step 2 After preparing the mixture, lightly spray it into stain. Saturate the stain if and only if it is a large area or a deep stain. The quicker you get to stain, the lesser mixture is needed to be consumed. This only means that the less drying time, the less time for the stain to become difficult to get rid of it.

Step 3 The final step is to gently rub it with light-colored cloth. You may notice that the stain is moving to the cloth. To remove the entire stain, you have to repeat spraying and rubbing using cloth a few times. Clean it again with light-colored cloth and gently dab it at the spot to remove the excess mixture.

Instead of using the mixture mentioned above, you can also use fine sand paper to remove the stain completely. If the stain is too small, use your pencil eraser. To keep the stain out, use circular motion when rubbing. Just be careful in rubbing. Do not rub the spot too hard.

Micro suede bed comforter

If your micro suede couch gets water spot in between treatments, allow the spot to dry in natural way and then gently brush it using specialized brush. If you find it hard to remove stains, seek for professional cleaners to treat and remove the spots. If other solutions fail, you can purchase stain remover solutions available in stores. If you choose to use any chemical, make sure to test it in not easily seen place first to see how it will react.

It is very important to take preventative measures when caring for your micro suede couch. Moreover, you should brush you suede regularly using special suede brushes. The couch will last if you take good care of it. Firstly, always treat your suede couches with a protective coat. Many companies produce specialized suede protectors. This protector must be applied by simply rubbing it into the outer layer of the material. Applying this protective coat regularly will keep your couch fresh and will help you ensure that your micro suede couch is water- and stain-proof.

Read More
air conditioning

Choose the best Air Conditioner

Air conditioners let people stay dry and cool in even the hottest weather conditions. There are air conditioners that cool a room faster than others, though some certainly last longer than others. Air conditioners perform at its best if they are placed in the proper room. It is important to choose the unit of air conditioner with cooling capacity that can handle the room where you desired to place it. A small unit is adequate to cool a room. On the other hand, an oversized air conditioner will cycle on and off, increase electric bills, waste energy, strain the unit, and do a poor job of removing excess humidity from the air inside the room.

Modern air conditioner

To have an air conditioner that can cool the room, multiply the length by the width to get the square footage. In addition, if you choose an AC unit, match the room size with the BTU rating, which is printed on the packaging box. Room air conditioners consume at 5,000–24,000 BTU’s per hour. Small room air conditioner operates at 5,000–7,000 BTU’s per hour and can adequately cool 100–300 square feet while mid-sized models may run at 7,000–8,000 BTU’s per hour. Moreover, they can cool a room of up to 550 square feet. An 8,000 BTU Fedders room air conditioner retails for about $170 and the 10,000-BTU LG window unit sells for about $250. The amount of air conditioner always depends on its brand name. Examples of these brands are Panasonic, Samsung, Sharp, Condura and Lennox, Carrier, Coleman, American Best, Xenon, etc.

Before you purchase an air conditioner, you must know the following:

• You should know where you want to install the air conditioner so you will know what the size you need is. Measure the square feet of your room and the room window because you have to purchase an air conditioner efficient enough to supply and circulate air. It is significant to measure your selected room or rooms carefully. 90% of your decision-making must involve the size of the room, which is the one you want to keep cool. If you are not sure in your first measure, measure it again until you get the right one. Measure the window where you want the unit to be placed. It will also help you to save energy with the air conditioner you choose, the most appropiate is the size of the machine according the size of the room, the most energy you will save.
Installing an air conditioner

• You can measure the room air conditioner’s efficiency by the energy efficiency ratio or EER. The EER shows the ratio of cooling capacity to the power input. If the EER rating is higher, the more the efficient the air conditioner is. It is a requirement that room air conditioner should have an energy efficiency ratio of 8.0 or greater. When you are buying a new room air conditioner, do not forget to look for units with an EER of 10.0 or above. Check the Energy Guide label for the unit, and look for room air conditioners with the ENERGY STAR label.

Do consider the given tips above to help you determine the best air conditioner fitted to your preferences. You can also choose a portable air conditioner if you live in a small flat and you do not want to spend lots of money.

Read More
Photos

Digital Photo Printing on Canvas: Art Creations of the Future

This generation asks for more quality in less time, hence the nickname “instant-generation”. With all the hassle that we have nowadays, it is definitely used to our advantage as the DIGITAL PHOTO PRINTING has emerged to help us create high quality art in the shortest amount of time possible.

Imagine your photos on the wall mistaken for a real painting. That is how great digital photo printing is, and it gets better! You can actually put a picture of yourself or anyone in any place and you can completely change your backdrop without making is look like you simply copied and pasted. If you have a digital camera, digital photo printing on canvas is the only way to go since it is the right choice. It has rapidly become popular because of its high quality photo prints which can be edited and perfected to match any occasion or capturing the precious moments in life.

Digital photos printed on canvas

Thanks to new generation quality work of art, digital photography has stormed the world and united photography and modern art. Photos will never be the same as these printed digital photos onto canvas from a digital photograph gives a sharper and more striking print than any other printing method. Masterpieces are created as these prints provide a unique perception of the world around you. You can actually get the same glossy, elegant look of an original oil painting when you print the digital image on a canvas with great texture, preferably a museum quality canvas. You can even get custom made frames to suit your images and give it that authentic look. It would be something special that you’re family can keep and be proud of.

Wondering whether or not this would be a good gift? Wonder no more! This is not a “good” gift because this is a fantastic one! Digital photography has a broad variety capacity and endless possibilities that will enable you to explore your creative freedom! An amazing work of art can be done with your imagination even without the skills of Picasso due to digital printing. Each of the unique digital photos on canvas that are made, no matter the size, are of the top quality. The canvass prints give you the feel of having an original painting that is totally your idea and it provides your environment that extraordinary artistic touch that will effortlessly complement any décor for your home or office.

Taking photos

Creations of wonderful art are easy to achieve when you know what you need to have the right digital photo printing on canvas. It’s a good thing that Photo Printing companies are making sure that digital photo canvas is produced to the liking of the customers for complete satisfaction. From the tiniest print to the largest, they are made with an amazing printing on canvas technique that is always right on.
The Photo Printing companies do their job and when you plan on making a digital photo print on canvas, you need to concentrate on choosing the right digital camera and consider its resolution and the time of capturing the picture. And remember, it is fun making a digital photo print on canvas so keep your mind in a creative bend!

Read More
Tips

How much does it Cost to Cut a Concrete Slab?

Creating a slab is not that easy. Slabs are usually made of thick piece of stone, wood or other solid material which are broad and flat. Its purpose is to prevent the walls of structure from sinking that is why slabs have become one of the most basic foundation of any modern structures especially buildings. Failing to use slabs can cause the structure to sink.

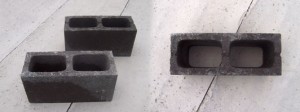
Hollow concrete slab

There are three types of slab foundation used in construction:
• The first is the traditional T shaped slab foundation where in it is used in areas where the ground freezes. First, the footing is placed below the frost line and then the walls are added on top. The footing is usually wider than the wall to provide extra support on the foundation. Then after the wall is constructed, a T shaped slab if put.
• Second is on top Slab-on-grade foundation where this is used in areas where ground does not freeze. The edges of this type of slab are usually thicker that it’s interior.
• Last is the Frost Protected slab which only works and used on a heated structure. Unlike the traditional T shaped slab which the concrete is poured three times in an operation, the Frost Protected slab is only poured in one operation.

These three are the common types of slab foundation. So one might ask and put into consideration in building an architectural structure or let us say that you need to dig up your concrete slabs because of gas leaks in the basement. So basically you need a replacement for that so one would ask if how much it costs in cutting a concrete slab. There are lots of factors that need to be considered on how much it would cost in cutting slabs and some citations would link to the type of the saw being used – the lifespan of the blade and the operational cost and the productivity in using both saw – the band saw or the regular saw.

Concret slab wall

Another point to consider on the cost of cutting the slabs would be pricing. Factors such as the materials used for concrete slabs which usually are made of high mass materials, the type of slabs method to be used, as well as the measurement of the area would first likely to be considered. Depending on the manufacturer or the contractor, the price range would vary. Labor is also considered in the cost of cutting slabs. The price varies depending on which type of forming process of a slab is being used. In some beam/slab system, slab form may simply span beam side to beam side. While in some the slab must be stored in much the same way as is the beam bottom. In the former case, slab form productivities of 0.08-0.10 are common while in the latter productivities of 0.10-0.12 or higher may be warranted.

Read More
How tos

How to Cut a Window through a Concrete Bat?

Nowadays, it is important that we know how to decorate our own house. It will give us the impression that we want, and through the visual impact of our own home, people will judge our lifestyle and personality.

Different decorative measures and designs are being used by different people. Some varies from sizes, colors, themes and others. Some also try to resort to exotic designs and one of a kind decoration. An example of which is window through a concrete bat. Although many want to try this at their own home, they just do not know how to cut a window through a concrete bat. That is why most of us search for some ways on how to do it perfectly and without exerting too much effort. Now, we will know the right techniques and tips on how to cut a window through a concrete bat. This will greatly help us in improving the design of our own home and it will really add great impact to our house without the need of spending too much money.

Home window

• Prepare all the necessary materials.
Canvass for the materials that will be used. Make sure that you have all the equipment to be used. You can buy from different supermarkets and hardware stores across the state and you can search for the cheapest brand. But make sure that the quality will not suffer. You can read reviews from the internet for the perfect materials to be used.

• Carefully prepare the plan.
Be creative in making your own plan. You can base it on the interior arrangement of your house to match the theme that you want to set. It is important that the connection of the designs and decorations is preserved for you to achieve your goal in decoration. Make sure that you consult other people for you to decide on what to do and how to do it.

• Have a professional to do the job.
It is a very difficult job and it requires expertise. Do not do it by yourself especially if you do not have the experience in doing it. You might do something wrong that is why it is highly recommended that you ask an expert to do the job for you. You can give the plans to him and he will do it right away. Just make sure that you are always there to guide him in his work to see him while accomplishing the task.

Bow window

Home decoration is really a tricky job to do and it requires knowledge and expertise. But if you know that you do not have the experience and the knowledge, you should not settle for something that is ordinary and easy to find. You can always make use of different tools and ways to execute and find the dream home decoration that you want. These tips can help you on how to cut a window through a concrete bat. There will be no more difficulties and additional problems if you will just follow the instructions. After all these things, your beautiful dream house is already set!

Read More
How tos

How to Build a Loft Frame for Dorm Bed

Space can definitely enhance your dorm living experience. More space means more available area to walk around and put all your ever-growing number of stuff in. Creating that space automatically brings to mind how to build a loft frame for dorm bed. Admittedly, this is a task that may require some carpentry skills and a little know-how. There are prefabricated kits and plans on how to build a loft frame for dorm bed available online. That’s the easy way to go about it if you’re confused on where to begin and if constructing one is not your thing. Generally, a loft bed is just like any ordinary bed except that the legs are extended and they lift the bed 5 or 6 feet off the floor.

Building a loft bed frame

Attached below are five easy-to-follow steps on how to build a loft frame for dorm bed. But first, you must gather some facts before you begin your plan. Know what the dorm requirements are before moving a little further into planning. Take measurements on the mattress size and ceiling height. Just imagine if there is still room when you suddenly sit upright from the bed or if you are almost kissing the ceiling yourself. Create the design with a purpose. Is it for storage or study area? Think about what kind of stuff you’re likely to put underneath the bed. Whether you plan to sit or move around under the bed, this is one important detail that you must include in the design on how to build a loft frame for dorm bed.

When you are done with the measurements and the design you can begin the process of transferring the design from paper to wood:

1. Put the frame together: Cut wood to fit your bed and make it at least 3 inches longer and wider than your mattress. This 4-piece frame should allow for the thickness of the boards and allow movement on each side of the mattress. You can use screws or lag bolts to put the frame together.

2. Attach the slats to the frame: Cut four slats. One goes on each end and the two remaining slats should be evenly spaced between them. They will look like four parallel planks evenly spaced out. Attach the slats using lag bolts. Make sure the frame is straight before attaching it. There should be support braces to add extra support in holding the weight. To cover the spaces the planks made, you can cut a piece of 3/8 inch plywood to go right on top of the slats to make the flooring for the mattress. No need to attach it, just lay it on top of the planks when you have finished the whole loft frame. This way, when you are looking up from beneath the bed, you’ll see wood instead of slits of materials from the mattress.

3. Attach the legs to the box frame: Cut legs for the bed which will most likely be 5 or 6 feet in length. The beams can be made thicker depending on how heavy the mattress and the person sleeping on it will be. You can attach the legs right to the sides of the frame, but first turn the frame face down to make it easier to tack on legs. Then turn the bed over and set it in place when done. Also make braces for the legs for added support.

Finished loft frame

4. Build a ladder to the bed: Depending on which side has the space for getting into the bed and most applicable to the design, you can build rungs along one side of the bed to use as a ladder. Should be attached no more than one foot apart, which makes about 5 or 6 steps.

5. The finished look: Sand all the wood surfaces to have it smooth before applying a clear finish for a more polished look, or you can apply stain or paint of your choice. A loft bed can definitely add much needed space to your room. Just remember that for anything that needs to be built, one must always have a plan. A lot of considerations need to be included in the design on how to build a loft frame for your dorm bed, from little details like mattress size, leeway, dimensions and materials to the general purpose of creating one.

Read More
How tos

How do I Repair Mildew from Interior Drywall?

Walls and interiors of houses on humid places are usually infected with mildews. Mildews are networks of molds growing on organic substances. They depend on organic substance and this serves as a food for them. Mildews usually appear as green-brownish colored spots you see on ceilings or in your bathrooms wherein they get everything; food, water and maybe a little bit of sunlight. You would usually get fuzzy or get annoyed with mildews once it starts to branch out and spread. As they multiply and spread, they emit a foul and unlikely odour and they become hazardous to your health. To most people, having mildews grow in their places is unsightly and they would usually get fussy about it.

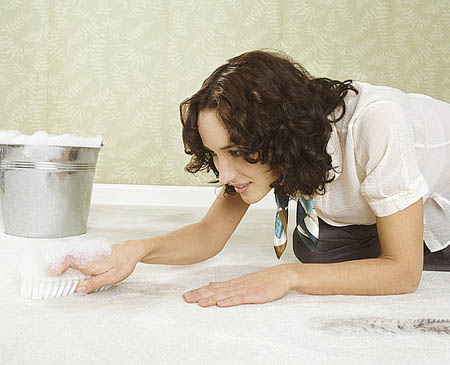
Lady cleaning floors

What is even worse is that it can raise hell into your eyebrows once it grows inside an interior drywall where there is an interior moisture phenomenon. This can be caused by roof leaks, wet lots and walls that usually come crawling inside every space. Interior drywalls are good breeding grounds for molds and mildews as they get everything they need from moisture. Removing it is no easy but this task can definitely be done. The following are the tips on how to remove mildew from interior drywall.
Luckily removing mildews is easy. Prepare the following things:
• a bucket of warm water
• soft bristled scrub brush
• a rag
• bleach
• laundry detergent
• rubber gloves
• goggles and face mask (optional)

Instructions:
Step 1
Prepare the area. Turn on any fans or windows for mildews are strong smelling and they are not good for your health. You can also wear a mask if desired. Remember, proper ventilation is vital.

Step 2
Mix the following substance well: a half filled bucket with warm water, ¼ cup of bleach and a cap of laundry detergent.

Step 3
Put on gloves, goggles and you can even wear a long sleeve to protect your body.

Extremely mildew wall

Step 4
Dip a scrub brush in the solution. You must gently scrub the mildew. Scrub it until it is gone. Remember not scrub too hard if you do want your paint to be removed or to be damaged.

Step 5
Clean the area using a clean rag dip with clean water. Let it dry alone or you can have another clean rag to dry it.

Another option is that you can also repaint your interior drywall with anti-mold or anti-mildew paints or have it repaired using a mildew resistant drywall. There are also some mildew and mold removal solutions available in the market. If you have proper budget, you can have your drywall get inspected, repaired and have this interior parasites removed by a professional expert.

Read More
Finance

How do I Estimate a Construction Project?

If you are working or planning to build a house, the cost of it should not be a mystery for you. Do you find it hard to estimate your construction projects properly? If you are using the present project payments on the previous project expenses, it only means that you are not estimating properly. You may not be estimating correctly because you are not covering the costs and you are not looking forward to ensuring profits. Are you really estimating or just guesstimating?

Proyect of home

How do you do your estimation? For you to estimate properly on your construction projects, be sure to make some time and effort to go into details. You just can’t look at the site and see what has to be done and guess the costs of materials and the time to be consumed to do the construction properly. Guesstimating will likely put you into trouble. This is so because what you might do is rough estimate and you will overlook on areas that you should need to include on your estimate. Actually, estimating is not that hard as you may think. You just have to take time in doing this and exert your effort.

In estimating, take everything into account and make a profit. If you want to earn money and have the success in every project, be sure that the construction estimate is accurate and fair. To plan the project properly, estimate the possible costs of the materials and the hours accurately so that you are able to cover these expenses thoroughly and fairly. Break it down into its components and factor everything including the labor and any possible permit fees. It’s better for you to be generous rather than come up short at the end. It will leave you profit after you complete the project. If you guesstimate, you can overestimate and you may lose the contract to someone who can undercut your costs or otherwise underestimate it and come out in the red.

Building a house

Decide what types of materials you are going to use for the project. You should compare your construction estimate thoroughly based on scientific methods and techniques. If you made correct estimation, you’ll come out with good profit and finish the construction on time. It is necessary for you as contractor to know how to make a correct construction estimate so it would be clear to you the type of work that the job requires. It is beneficial to the customer for he will have a clearer idea of the work involved and i addition, the cost of the project he is required to pay. He will also be aware how much time it will take to finish the project. Don’t be in the habit of guesstimating for in the end, you will be the one who will have a great loss. Estimate properly for your benefit as well as the customers’.

Read More
Tips

Tips to Choose an Air Purifier Humidifier

One of the greatest investments a person can make is an investment on his health. All other material things can be replaced, but a healthy body… we just can’t. Anything our body takes in…air, water, food and supplements can both be beneficial or detrimental to our health. The fact is, clean air no longer comes free and doing nothing about it would cost even more in the long run.

Of the four, air is the only thing that we take in our body as frequent as every other few seconds. The rest are just taken in regularly or every few hours. Isn’t it just as important to take a step further and learn more on how we can have an air cleaner at home or at our office? We sometimes spend hours and hours enclosed in a room where allergens and dust particles, so microscopic that it’s near impossible to detect how bad the air roaming around us really is. Newsflash, air pollution is not exclusive to the traffic outside our homes where thousands of vehicles roam! Indoor air pollution is getting to be a concern in the modern day city living.

Purifier and humidifier machine


One of the most important yet the least equipment invested on are air purifier humidifiers. Here are some tips to choose an air purifier humidifier:

• Cost of Filter Replacement – This is an investment. You must know the frequency and cost of filter replacement. How often and how much the filter will cost will set you back on your finances if not taken into consideration before buying the unit. Some filters are replaceable every few months while others, every few years. Always make sure that the filter you will need is available in the local market.

• Cost of Energy Usage – Electrical equipments should be bought to last. However, for as long as you use it, high energy costs comes alongside this technology. Better check the energy efficiency of this electrical equipment so you know the energy consumption per usage.

• Cost of Maintenance – Some types are cleaned by water while others are by hand or by vacuum cleaner. Depending on which type and how often the equipment is cleaned, you might want to prepare for additional expenses if you want it professionally cleaned or serviced every now and then. The longer we maintain its cleanliness, the longer its lifespan will be.

Deshumidifier machine


• Technology Indication and Efficiency Levels
– Some brand or models may claim having a faster clean air delivery rate and HEPA technology based. Depending on area coverage of your unit, you must be prepared for the cost of electricity for the added comfort air purifier humidifiers will bring.

Everybody wants and needs clean air. But one must learn how to establish clean air in your home or inyour office by investing on air purifier humidifier that suits your specific needs and requirements. Should you want your air cleaned or hydrated or both, it is suggested that you make sure that the advantages in using one will outweigh the costs of having one.

Read More
Uncategorized

You’ll Never Get Lost with Floor Reading Maps!

Do you have a fear of getting lost when you are in an unfamiliar place? Or even in your own place, are you hundred percent sure that you know every corners and street? If you want to be sure and be equipped with knowledge about your location, better grab your own floor reading maps!

These maps offer you enough information that you need to know about a specific place. Just like your ordinary map, it will give you the right orientation of the place you are going to. But because this is a bigger map, it contains more information than an ordinary map. Sometimes, it includes establishments and major landmarks for you to know if you are on the right track. Although it is bigger than a conventional map, it is better in other ways especially if you are new to a place.

Floor map

Floor maps offer you a complete view of the place. It is easier to use because you can just lay it down on the floor and explore the place as you want. Do not worry about the signs and symbols being used because every map has its own instructional guide to help the user easily understand how to use it. Most of the maps indicate the key spots in the place wherein you can see their best landmarks and views.

Almost all countries in the world, including their cities and provinces have their own version of maps. You will never get lost because they are readily available in bookstores especially the key cities in the world. You can prepare and plan your trip in advance using these maps. Definitely, it will help you maximize your time because you can now anticipate the time you need to go from one place to another. Also, by using these maps, you can plan your itinerary to save time and effort by taking advantage of the proximity of your one target place to another.

Truly, it is a great help especially to tourists going in an unfamiliar place. It will greatly assist them in making their trip worthwhile by spending their time experiencing the rich and colorful culture and scenic views of the place and not by wasting their whole day just finding the right way. Floor reading maps can really help people on their endeavors in traveling and touring around the globe, across continents.

Detailed floor map

A tourist or just a simple citizen, understanding how to use maps can really give you extra knowledge that you can use for your own sake. This knowledge comes in handy because you can see the sights and find out its secret without the risk of getting lost. Traveling is never been this easy!

Discover the delights of having this innovative and handy floor reading maps!

Read More
How tos

How Do I Keep Roaches Out of My House?

How can we keep something out of our house when it has basically been invading the planet since before the time of the dinosaurs? Roaches smell bad, they can ruin food, and they bring threats to our health. You will not like them as neighbors, more so as house guests! So, make uninvited guests move out of your house… BY MAKING THEIR LIFE DIFFICULT! Make life for the roaches in your house as difficult as possible and they will be gone in no time.

So, how do I keep roaches out of my house? Here are some tips:

Know your guests
Roaches spend most of their lives hiding in the dark. They love damp and dirty places. They also love cracks and can squeeze in just about anywhere. Imagine young roaches fitting into a space as thin as a dime. What you must do:
• Make your home a clean haven… for people.

Annoying roaches

Don’t issue an invitation
Roaches love to eat. They can find all sorts of food just about anywhere. They can spot a spill or crumbs right away. They can sense where you left an open bag of food or candies. They love to party amongst the dirty dishes. And they could be having dream vacations in the trash cans. These are sure invitations for any roach-minded guests in your home. What you should do:
• Always clean up food spills and crumbs right away.
• Seal in bags of food and keep them refrigerated or in dry places.
• Avoid leaving dirty dishes and left-over food in open spaces like tables and sinks. Wash the used plates, cups and utensils right away and clear counter tops and sinks and wipe them dry.
• Take garbage out regularly and put a tight lid on it so it won’t get unexpected visits from the roaches.

Keep your doors locked
Roaches are nosy creatures that put their heads and dirty legs where they are not wanted. What you can do:
• Immediately attend to cracks or openings around baseboards and behind kitchen and bathroom counters. As roaches can fit into small openings, make sure you fill in gaps.
• Check for space under doors and around pipes or vents. These openings are welcome signals for roaches.
• Get rid of stacks of old newspapers, paper bags and cardboard boxes. These make good hiding places for roaches.
• If you’re bringing something from the backyard or garage or storage area into the house, check them out for possible roaches. They can be getting a free ride into your home without knowing it. This is the type of free shipping and handling that you can do without.

Racoons

Cast a dry spell
Roaches need water to live. Without any source to drink, they die within a week even though they can live up to a month without food. What you need to do:
• Always turn off faucets when not in use and keep sinks and other surfaces dry.
• Drain dish drainers and dishwashers regularly and keep them clean.
• Fix leaks and avoid creating unnecessary pools of water where they are not supposed to. Damp places are very attractive to roaches

Remember, roaches do not belong in our homes. We must ensure that every nook and cranny of our home remains roach-free. Keep it up and they won’t invite themselves in our homes ever again.

Read More
How tos

How to Install a Switch for a Ceiling Fan

Ceiling fans add so much convenience and appeal to your place especially in the living room where you entertain guests. These fans consume less electricity than industrial stand fans and air conditioners. Plus, they can cover the whole room all at once. Usually, they are installed with a 3 speed pull chain switch which allows you to configure how fast you want the fan blades to turn. But the daily activities with the fan pus stress on the switch which in time could break. When the switch breaks, the only option for you is to replace it, and here are some instructions on how to install a switch for your ceiling fan.

Celing fan switch

1. Before getting into the details of installing the switch, choose the type of switch you want to install, a 3 speed pull chain as the previous, a remote or a wall switch which is safer and more durable. For this project, we will be using a wall switch.

2. After deciding on the type of switch, you would need to rewire the fan, but before you do it, make sure to turn off the power going to the fan or better yet, turn of the main switch or panel.

3. Go to the fan box use wires #14-2 or #12-2 then connect the wires to the fan. Do this by following the standard color coding rule; the white switch cable to fan white, and the same goes for the rest of the colors – green/ground, black and blue if there is any.

Celing fan

4. After finishing the wire at the fan box, proceed to the switch box. Notice that there would be two wall switches in the same box and all the green wires connect together. These wires should be connected to the ground wire group. Wirenut the connections and direct it towards the back of the box. Then attach the power supply cable to the ceiling fan cable (white). Again, wirenut this connection and push it towards the back of the box. Between the power supply cable and top screw on the switch, connect a 6-8 black wire. The switch is programmed to read ON and OFF. Now, attach fan cable red to the bottom screw on switch #1 and fan cable black to the screw at the bottom of switch #2. Having done all these correctly, the 1st switch should operate the light and the 2nd for the fan. Take note that to set the speed of the fan, you would need to substitute fan switch #2 for a fan switch controller.

5. Finally, set aside the connections properly with a wirenut. Push the extra wires into the electrical box.

Carefully follow the steps given above and you will not be mislead in any way possible.

Read More
How tos

How can I Keep my Dogs Cool in the Summer

People say that dogs are men’s best friend. You can tell him all your secrets, whims and caprices and rest assured afterwards that this will never spread like those you have shared to your human friends. A lot of stories that dogs can save human lives are very interesting huh, but these are sometimes true. As such, wouldn’t it be nice to give back the favour? How about taking care of them and thinking of their welfare once in a while?

Summer days remind us the glory of living on earth. You can think of any activity that you can spend your time with like shopping, skiing, beach hopping; name it and you’ll definitely have it during summertime. But despite these luxurious activities, people are aware of so many death cases during this season. Some causes of deaths are fever, heat stroke and other heat related illnesses. But don’t you know that not only humans experience this kind of thing? Even the dogs do experience such illnesses and reported cases of heat stroke among dogs are increasing almost every year.

Pretty puppy

Knowing these things are not enough. You should do something to keep your pet safe during summertime. You maybe frequently asking yourself, “hey, how can I keep my dogs cool in summer?” Worry no more because you will be learning much on how to answer this question. You don’t need to hesitate to bring your dog outside or at least leave it alone at home because of worrying about its health. The following are some suggested tips you can do to take care of your best friend.

• Be sure to create extra shade for your dog
Make sure to bring canopy, umbrella or anything that can provide your dog an extra shade against the direct sunlight. Remember that unlike the old days, direct exposure to sunlight is now a threat to your health.

• Do exercise regularly

Exercise every day. Do your programs with your dog regularly. You can play with it and do anything with your dog but be sure not to tire him so. Remember that they easily overheat so slow walking or brisk but short running will be fine.

• Limit direct exposure to sunlight
Direct and long exposure to sunlight is dangerous. A dog can develop skin diseases too and cancer like everyone else, so do not let it expose itself to sunlight. This case is common to the dogs with thin fur.

• Bring more water that you expected to use
Refill the dog’s bowl of water more often than necessary. Also, make sure to place the bowl under a shade of tree or umbrella to protect your pet.

• Take your dog as much as possible
Do not leave your dog alone at home. As much as possible, take him with you every time you go out especially if you are going to spend your summer outside and will take time to go back home. This way, you can monitor your dog. But take note that you should not leave him in one place for a long period of time like in the car or somewhere you won’t see him.

Brown labrador


• Avoid shaving the fur of your dog

Never shave your dogs during summertime because fur acts like an insulator and natural sunscreen that will keep them cool. This will also help prevent heat stroke.

• Always check on him
Always check if your dog is doing fine. Take time to look at them and check their safety at all times. Do not expect dogs bark to you whenever they feel wrong.

• Feed your dog on time
Don’t forget to feed your dog on time. Even humans get sick for late meals, how much more the animals?

With all these tips to take care of your dog, there’s no other way to hinder you from going out. No need to worry about them because you can take them with you anytime of the day. Enjoy your vacation to the fullest!

Another dog’s tips:
Stopping dos urinating furniture

Read More
How tos

How to Add a Roof to Cover the Deck?

People usually enjoy on their decks doing things which could unwind them. Decks are for enjoying the outdoors, for entertaining friends and family, and for escaping everyday life for a few hours at a time. Unfortunately, it can’t provide protection from bad weather and it can damper on that enjoyment. But how can you turn your deck into a covered one to continue your family’s enjoyment? Building a simple roof structure over the deck itself can increase greatly the days that you have to enjoy it. This article outlines the steps to take in order to build a simple, yet effective roof over your existing deck.

Simple roofs can serve well to reduce direct sunlight that will create shade and reduce temperature for a few degrees. It will let your family enjoy even when the sun is up. Since the roofs don’t need to support loads, this can be constructed using light weight materials like ply woods. In addition, even tent materials can be used to cover the deck.

Covered deck


To cover your deck with a roof, do the following:

• The first thing you have to do is to build the frame of the roof on the ground. You have to frame up a box the size of the outer dimensions of your deck using 2 by 4 inch lumber.
• Run joists connecting the front of your roof with the rear every two feet along the length of your roof.
• Next thing to do is to tie your existing deck posts into the roof by extending your corner posts with the 4 by 4 lumber.
• Make the front of the roof the height of the house roof with the rear sloping at a rate of six inches over two feet.
• Lift the box frame you built in the first step onto the four corner posts then attach them using the lag bolts.
• Now, install the plywood on top of the frame to provide a flat surface on which to nail your tin when the box frame is secured. It is advisable to use materials that will protect your family not only from sunlight, but also from rain.
Uncovered deck

Finally, install tar paper on the plywood sub-roofing and then follow-up by laying down the tin roofing. Tie the tin roof into your existing roof using metal flashing available at any home supplies store to ensure a waterproof seal at the junction of house roof to deck roof. You can now enjoy outdoor activities even bad weather comes because you have just covered your deck with a roof.

Read More
Cleaning

How to Clean Tile Grout in Bathroom?

A bathroom is an important part of the house and it is considered to be dirtiest therefore maintaining its cleanliness is a must. We usually coordinate it with hygiene- it is a place where we take a bath, brush our teeth and do our “other business” to get ourselves clean. Depending on the cultural context, it has different definitions. Some sees bathrooms as a sacred place, purifying both souls and body. Throughout ages, bathroom has become an evolving place in the house; from simple looking and simple toiletry function up to the full “bath and toilet” bathroom function today. Usually, a modern bathroom is floor and wall covered with tiles. Tiles for bathrooms come in all shapes and sizes, all patterns and textures. Installing bathroom tiles can give your bathroom a sophisticated look; thus, maintaining its cleanliness regularly is suggested.

Cleaned bathroom tiles

The problem with bathroom tiles is when it gets really dirty. You can see discoloration or you can find mold and mildews usually growing on tile grouts. Exposure to water, moisture and other substances such as soap can trigger the growth of mold and mildews and the tile grout is the first breeding ground of bacteria. They are health hazards, known to cause respiratory problems. Grout is a type of plaster which fills the cracks between tiles and it is what usually keeps the tiles together. Cleaning a tile grout is easy; you might get surprise that you might have the proper ingredients stored in your cabinets. Below are some helpful tips on how to clean tile grout in bathroom:

• Baking sodas
This household item can help solve your problems. You can make a baking soda paste and with a bit of water you can clean your grout. Put the baking soda paste over the dirty grout and you can use a damp cloth to wipe dirt away.

• Vinegar
Vinegar is another useful household item for zapping grout dirt away. Using vinegar to clean tile grouts requires the same process. Vinegar is a very cheap and the best part, it is non–toxic.

Moldy bathroom tiles

• Bleach
Make a bleach solution. Mix one part of bleach and one part of water in an empty spray container. Start your spraying on the affected area. You should however do this during the time when people are less likely to frequently use the room. Before retiring in the evening can be the best time to do it. Spray on grouts using this solution at least one to two times per week to prevent mold and mildews growth.

• Use cleaners available in the market.

You can purchase hydrogen peroxide in the pharmacy; mix it with water and you’ll have a hydrogen peroxide solution. You might want to try checking for some cleaning tools that can scrape dirt from your grout.

Once your grout is clean, it is advisable that you apply a grout sealer to maintain fresh looking tile grouts.

Read More