walls

Decorating by Installing a Decorative Wall Paneling

One way of decorating a room to give it a look that you would want it to have is to install a decorative wall paneling. Installing one would not only add beauty to your room but it would also hide the uneven and the bumpy walls that you would want to have covered. Here are some tips on how you can start the installation of the decorative wall paneling.

Installing a wall paneling

The first thing that you can do is measure the wall where you would want to have the paneling. Start by measuring the length of the wall in feet and then add all the measurements. Divide the added measurements by 4 and you will get how many paneling you would need. When buying a paneling, buy some extra sheets in case a pattern needs to be followed when you hang it on the wall. Most paneling comes in 4’x8’ sheets and so you would have an idea how many and how much you may need for your installation plan. You would also need a molding to go with it and so in choosing the color of the molding, make sure it matches the color of the paneling. Prepare carpenter’s horses or if you do not have one, end tables or sturdy coffee tables may do. You would also need rotary saw to cut the paneling and a jigsaw for cutting the paneling at electrical outlet openings. Make sure you have a company when doing this, your spouse or your children may help you in putting up the paneling that you need.

Read More
Painting

Tips on Painting a Room near Perfection

Painting a room is never that hard and costly. It is the most cost effective way of giving your room a new look. However, if you are a starter, how can you paint a room well? Here are some few tips for you to start off with painting your room. It would only require of you a little planning, patience and the willingness to do it yourself.

Green painted bedroom

First step is to buy just enough paint for your room. You can do this by having the measurements of your room, the number of windows and their measurements as well. Go to the store and seek help from their paint expert on how many cans will you need. Take note of this, if your wall has a darker paint or if you are planning to have darker paint, then you might need more paint. But if you run out of paint, you never have to worry because most stores now have machines for you to get the exact match of paint that you need.

If you already have the paint available prepare other things that you will need. Here is a list of things that you should prepare. A wooden paint stirrer which is usually free with the paint purchased, a wide masking tape, covering on the floor which could be large garbage bags or plastic tarp. Then you can prepare an angled sash brush, a roller base and rollers that are designed to fit the texture of your wall, a pan to hold the paint that would also fit the roller that you have, a small dish to carry the paint while you using the brush will also be helpful and old newspapers to rest your used materials and help protect the floor.

Room painted in red tile

With the things needed to paint already prepared, you are ready for the painting. Make sure that you have all the things that you do not want accidentally painted on, away from the walls. The place paint tapes or masking tapes to cover baseboards, edges in the ceiling, windows and door trims and the other places where you would want to be protected from paint. Also tape the plastic tarp over the floor to protect your flooring or carpet.

Stir your paint with the stirrer for a few minutes and start painting from the edgings. With the use of your angle sash brush, follow the straight edge of your wall with the shorter edge of the brush guiding your stroke. Paint all the edgings until the area where the roller cannot reach. After all the edgings, start painting now with the use of your roller. Let the first coat dry according to the package instructions and then repeat the procedure until you reach the color that want to have. Then remove all the masking tape and you can now enjoy your newly painted room.

Read More
Remodeling

Decorating your 2-story Window with Style

It is such a pleasant site that you have a two story house with a two story windows to match. However dressing a window that is 15 feet high can be a very difficult to dress. Designing it the custom way can be one of your solutions. Here are some ways that you can dress up these windows on your own. These are treatments that can make your two story window look beautiful and unique with your own taste and style.

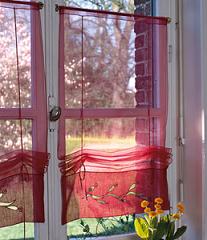
Window decorative curtains

The first thing that you can do is to purchase window scarves that can be purchased in 6 yards length. You can hang these scarves on a pole or you can use it as a window panel. The panels may be available in different fabrics like the sheer, silks or velvet. Then you can design it with you personal touch. Have it beaded, add jewels or add weights that may look good at the bottom part of the panel. The weight would prevent it from blowing into the room.

If you cannot find the right scarves that you are looking for, it is better to purchase a fabric and then you can sew it yourself. Estimate the length of the fabric that you may need. Add lining to the fabric of your choice to prevent it from fading. You can also sew the side of the fabric if it does not have the attractive side seams and prevent from buying fabrics whose sides cannot be sewn.

Decorative window shelve

Another option for you is to make gradient light curtain panels by making a series of panels or coordinating window panels. You can buy a 6 foot sheer window panel, a silk window panel and a six foot velvet panel that are of same colors or colors that coordinate well with each other. This kind of panel may allow you to have an effect that will allow you to have the light filtered a lot of times and have a little light coming from the center of the panel. To make it look better, remove the headers and the hem sectio9ns of your panel before attaching them. You can choose different colors of your choice; it is just a matter of color coordination.

In hanging your panel, you can either choose to cover the whole of the window or add panels in between them to give it an accent. If you want to have curtains that can open and close, you need to make a full window treatment and have tiebacks at the bottom of the panel because it would be very hard for you to reach the poles to adjust the curtains. These are just some of the things that you can do to treat your 2 story window and give it the look that would surely add beauty to your home.

Read More
Furniture

Turn your discarded bed into the hippest living room furniture

You have an extra or a discarded bed and don’t know where to put it. You don’t also want to junk it just like that because you want to economize its use. Then, we say that your living room just got the perfect space for it. You can follow some of the ideas and suggestions below on transforming a bed into living room furniture.

Alternative 1. You can transform your bed, minus the headboard, into a sofa. Just position your bed against the wall of your living room. Then, cover it with a burly cloth. Allow the cloth to go over the bed and down to the floor. You can use sturdy textile for this such as denim, corduroy or tweed. Add big size square pillows against the wall to serve as back rest for your sofa. You can also place some more pillow cushions on top of your makeshift sofa so it will be comfortable for anyone to sit on. You can also add some smaller pillows as accessories.

Elegant livingroom

Alternative 2. Turn a twin-sized bed into a table for your living room components. Minus the headboard, strategically position the bed in front area of your living room. Add a cover so it will not appear obvious that it is a bed that you are using. Choose a fabric with a good design to give you an elegant appeal. You can also decorate it will ribbons or place table runner to accessorize it. Then start moving your living room appliances –such as television set, DVD player, speaker and radio component– and arrange it on top of your bed-turned-living-room-table.

Alternative 3. You can convert your small size bed into a centerpiece of your living room. You can simply put cover around the bed and place it at the center with your sofa around it. You can also place a table runner on top of the cover to add variation to the style. Then put some small living plants on top of it. Choose the best plant preferably those that bear flowers so it will add life into your living room. Decorate it by arranging stuff toys or small pillows around the plant. If you find using the table cover too loaded for the eyes, you can also use it without cover. Just repaint the bed using the color of your choice. Usually neutral colors such as white, tan or dull gray could easily blend with any color and is also very light to the eyes. You can also cover the bed with glass. Just go to your hardware store to have a piece of glass cut in a way it will fit the size of your bed.

Sophisticated rustic style livingroom

Alternative 4. Turn it into a daybed. Just position the bed at one corner of your living room. Put the bed sheet on and place some pillows. For the bed sheet, choose something that is not heavily printed with different designs. Get something that is designed with some geometrical figures instead. You should not also get the bright colors as this will overshadow everything in your living room. If not used as a daybed, arrange it with pillows scattered around to add a little drama. You can also place one or two stuff toys as decorations. This is very useful especially if you have babies in your home. They can play in this day bed without disturbing anybody. Of course, if you feel you want a nap, then this is perfect for you, too.

You don’t have to worry anymore of disposing your bed but instead enjoy the new thrill it will bring to your living room. Use one or combinations of our options above and a guarantee that your bed will become your hippest living room furniture.
Read More
How tos

How to Clean My Room Checklist?

Almost every teen has to admit it: magazines scattered on the floor; pillows and blankets in beds are not made; papers are everywhere; toys and other stuffs invade the territory. Let’s face it, our room is a trash and teens just hate cleaning.

How many times does your mother have to tell you to clean your room? You get annoyed most of the time; but you have to admit it that they are right and they have all the rights in the world to keep telling that to you. But maybe, it runs on the teen’s blood to be some kind of a bummer. But sooner or later, you will have to deal with cleaning your own room. So how does one do it? It is easy. With the help of creating your very own cleaning checklist, you can now say goodbye to mess!

Cleaning your bedroom

Making one is very easy. Just try to list down things you are going to do to clean your room. It’s a little bit of breaking task into:
1. Turn on the music for some energy boosting.
2. Pick up clothes and put them into the laundry basket.It would be best if you sort it out, if it’s clean or if it’s not, shoot in right directly to the laundry bin.
3. Pick up all magazines, books and papers. Trash the unusable papers. Put books on shelves and organize magazines.
4. Pick up every trash you see and trash them right off. Also check for some stuff hidden under your bed. Don’t forget to check on that.
5. Take a break for about 10 minutes. Have a snack; take a short stroll and once your back…
6. You are done with your floor and now make your bed. Change sheets, clean your pillows.
7. Try to organize and put away stuff in your table.
8. Dust. Sweep. Vacuum the floor and every dusty corners of your room.
9. Reward yourself-you are done!
10. Do this every often! Make a schedule.

Extremely untidy boys bedroom

Additional Advice:

• Before going to sleep, try to put things away; sort stuff, put the book back in their proper places.
• Make your own cleaning checklist. Write it down on a whiteboard; put a stick-it note in your table; have it wallpapered or as a screen saver in your computer.

You can even create an easier checklist of your own. Do this very often and rest assured everything will turn out right; no mess, no hassles and no nagging moms. They say cleanliness is next to godliness and the best way to start the act of cleanliness is to start at the very comfort of your own bedroom.

Read More
Remodeling

Five things that will turn a discarded door into a precious possession

You have a discarded door in your house that is still good but you don’t need a door anymore, so what will you do? Of course you will not going to junk it just like that. Try to be creative enough to explore on other possible uses to it. We have listed five things you can do with a discarded door.

1. Your discarded door is perfect as a dining table for your family. You just have to add legs to it. You can either buy those from the hardware store or apply your carpentry skills by utilizing the available pieces of discarded woods in your backyard. It is also advisable to apply wood stain to the legs to match it with the color of your discarded door. For a door with carves, get to your hardware store to have a piece of glass cut in a way it will fit the size of your discarded door. For a door with smooth surface, you can put table cloth or table mat that can be easily change or replace anytime you want it.

Table made with a discarded door

2. Use the discarded door as your extra working table for large workstation. Just place low filing cabinets against the wall and place on top the discarded door, the one with smooth surface should be facing up. If the door has the hole for its doorknob, make sure it is position at the back portion so it is not obvious and you can still use it to let the wires, cords or computer cables pass through it. Then place you computer monitor, printer and other things you are using for work. Just make sure that heavy objects be placed over the filing cabinets to keep balance in your discarded-door-turned-working-table.
3. Have it as your headboard. Just place the carved discarded door onto the wall of your bedroom then move your bed against it. You can also play with it by putting simple frames to a discarded door so it will look classy. Depending on the size of your bed, you can always adjust the size of your headboard. You can utilize a seven-foot door horizontally for a king-size bed or place it vertically for a single or twin-sized bed. You can use the entire seven-foot door horizontally for king-sized bed or adjust it for smaller size beds.
4. If you are into painting, it will be helpful to use it as a support for your canvass. Just mount the discarded door against the wall according to your preferred elevation then you can place your canvass cloth and start your painting session. For a heavily carved door, you can explore further more by painting an abstract. After placing your canvass, you can start your painting by tracing the patterns of the carves and produce a unique abstract art piece.
Dining table made with a rustic door

5. Make it your wall decoration. If your house is spacious enough and have a big wide wall, you can make the best out of a discarded door. You can hang it in your spacious wall and have an instant decoration. You can also employ some enhancements or twists such as adding frames or sketching an art piece on it. Remember, the more creative you are the more it will stand out.

So that’s it, just that simple and easy. Now, you don’t have to think of where to junk your discarded door but rather you will choose which among the five suggestions will turn your discarded door more precious. Lastly, you have to be careful as well with your discarded door especially if it is coated with paint. Some paints contain certain amount of lead, a substance that is hazardous and can even cause brain damage if accidentally ingested by children or adult alike. Make sure you have clean it and safely remove any other coating it has before use it.

Read More
Remodeling

Sentimental Memories in a New Home

An old house must have many old memories to share, and renovating or remolding must be very hard for the owners because they don’t want to take away every little thing in the house that will make them remember their past. So, there are many people who post questions on remodeling an old house, protecting existing fixtures while you work, and the like. These are the things that concern them, especially the old ones who have invested a lot of unforgettable moments in their house.

Rustic and cozy style bedroom

So, how do you really remodel your home while you also protect existing fixtures that are unforgettable? Of course, the very basic of renovating or remodeling a home is that you always have to find what you do not need and put them away. Separate then gather what you just need at home. Again, separate the existing fixtures of your home that you would want to keep.

But before you do that, you have to decide whether you’ll put them back at the same location at your home or you will redesign them? If you will keep them in the same place, mark the location so you would not be lost. If they are small fixtures, you can put them inside a box so nothing will be lost. Just be sure you label each so you will know where you are going to use it. You can assign codes so you won’t get confused.

On the other hand, for fixtures which are hard to move, you have to decide. You can always try remodeling them in such away that you don’t have to move them. It will save time and effort. You can always find ways to decorate those fixtures to make the style of the home a little different without moving some things.

Living room

Upon figuring out finally of what to do, you can go one separating these fixtures depending on your plans. Better put together the things that are placed together so you wouldn’t lose anything of them. You can mark each or put the things according to their use or place at home. This will help you effectively especially when you are already moving things out. Everything will be a mess so better keep those memorable fixtures inside a storage room or place. Be sure that the place is free from any dust or insect that might affect the quality of fixtures. You can make these fixtures look old but still of good quality by redesigning them. You can do that by adding some designs around them or by moving them, facing the other angle. There are a lot of ways to redesign an old home, keeping every little memory that the house possesses.

Read More
walls

The gender of your child should be also put into consideration when choosing the colors

The gender of your child should be also put into consideration when choosing the colors. For girls, you can consider white or pink. For boys, you can try baby green and warm and sunny yellow. You can also apply baby blue for either sexes or some more combinations.

Far west styled boys bedroom

After you have settled with the colors, think of the concept that would be liked by your child. Cartoon characters are very popular to children but their interest doesn’t settle on a single character only as new characters will be surfacing day in and day out. It is important that you have to be creative enough in this do-it yourself redecoration; you may try some classical children characters and timeless superheroes. You can also try a combination of two or more characters. You can have Spiderman theme for boys or Cinderella concept for girls. Your theme should also blend with your color choice.

When done with the theme, it’s now your time to choose furniture items. In selecting the right furnishings, you don’t have to buy the expensive one, simple and classic wooden materials are better. As for its colors, just get out from too bright colors so as not to overshadow your concept. Simple and classical can easily blend with any theme of your choice. Choose also items that are serviceable – from a bed and a desk to a dresser and a lamp. You can also add book shelf and a little permanent cabinet for toys. Just a piece of advice, never consider any breakables or smaller things that might trigger accident.

It is also best if you can add some wall decors such as original art piece. Classical children characters are also good choices as these could be easily removed and changed anytime. The carpet should be also soft and comfortable for his young skin. You can as well play with the curtain and the bed sheet by adding some ribbons or other accessories.

Princess bedroom

For your child’s pleasure, you can also put some more stuff toys of his choice. Lastly, bear in mind that children are naturally jolly and playful. They love to explore on new things and enjoy manipulating things they have. They better enjoy doing these stuffs in an equally cheerful environment with good atmosphere. Providing this comfortable space in your home, your child will really love to stay and do their playful stuff there. Remember, children developed memories that determine their persons when they grow up. So it is your task to make the best out of this do-it yourself redecoration.

Read More
How tos

How to install your wall mounted soap dispenser?

If you are decided already with the kind of soap dispenser for your home, the next step to do is to install it. First consideration is you have to think of which part of your house will your dispenser be placed. Be sure that it should be positioned in an area where it is accessible and within your easy reach. You can have the big one in your shower area, another in your bathroom sink or near the lavatory in your kitchen. After that install it using either of the two steps we have for you.

Modern styled soap dispenser

The first step is you can install your wall mounted soap dispenser using the screw that go along with it when you purchase them. First you have to find the area when you can mount it. You can position it according to your choice and mark the spots where you will put the screw with a pencil or a pen. Drill a hole using a smaller size nail so it will be easier for you to insert the screw. Then position your dispenser on the wall and insert the screw.

The second step to install your wall mounted soap dispenser is by using an adhesive, epoxy resin or other bonding agent. First is to position your dispenser in an area where you want it to be installed. Then clean the area well with wet cloth then rinse it with a dry one. You can also rinse it with a little amount of rubbing alcohol to remove all other dirt or soap residue that may affect the hold of adhesive in your wall.

Automatic soap dispenser

After that, apply enough amount of adhesive or any bonding agent you want to apply on your dispenser holder and let it set for few minutes. The settling time is depending on the kind of bonding agent so it is important to review the guidelines on the box or container of the adhesive. You can also ask the sales attendant of the procedures when you buy it. The next step is to place your dispenser against the wall. Press it against the wall firmly so it will attach well. Then wait for one or two days for it to dry and settle well before place your dispenser in the holder. And that’s it; you have already installed your wall mounted soap dispenser as you may wish them to.

Read More
walls

Give a new life to your room: add a heart wall paper border

Do you want something new for your room? Or, something that will make it appears refreshing for a change? If yes, then you should consider these do-it-yourself decorating ideas for making a heart wall paper border. Why a heart wall paper border? Definitely, wall paper borders add up to the colors of your room. It will add art to your plain walls. From a dull room, your place will appear attractive and further appealing. It will also generate the good vibes and bring in positive energies as heart is a universal symbol for love, a strong energy generator of a good feel.

Heart wallpaper border

A wall paper border will save you from spending expensive accessories or decors for your room while producing excellent and very attractive results. Making it doesn’t also cost you that much as you can use the readily available materials at home. Executing it will be also fun as you can play with the design to make your heart wall paper border suit your character. To start your work, you only need the following materials: a finer cardboard for your stencil. If you find it expensive to buy a cardboard you can use your old calendar board. Scissors, marker, paint and paint brush or stencil brush.
Light-blue wallpaper border

The first step in making your wall paper border is to make the stencil. And, the most exciting about the process is designing your own heart pattern. You will make your pattern using the cardboard and a marker and afterwards cut it with scissors and alas, you have already your stencil.

Read More
Tips

Aesthetics through Economic Interior Design

Decorating your home can be quite a hassle, especially if you have to go through hundreds of kinds of interior design and still can’t decide on any of them. One factor to be considered in choosing the perfect interior design that suits your preferred style is the estimated cost of each of the interior design themes you intend to apply in a room you wish to decorate. Customarily, more elegant designs means higher expenditures, and it is doubtful that any person will choose something less, given the right chance.

Decorating with candles

However not everyone can afford such lavish interior designs, and not everyone would always choose extravagance over the practical. Interior design that centers around creating beautiful rooms with the owner’s budget in mind, more technically referred to as economical interior design, has been the trend of the thrifty home designers as of late. It is not impossible to create designer decors that are both stylish and economical. We just have to keep a few general things in mind.
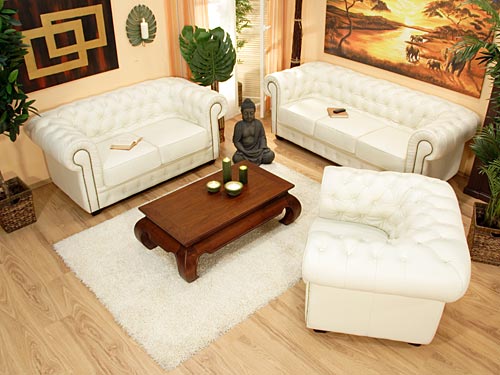
Oriental decor

First and foremost, initial planning must be done in a very systematic fashion. Decorating certain parts of the room or certain aspects of the room should be done step by step, with each participant of the project given a specific task or role to accomplish. This might be obvious already to most people but most people fail to realize that each hour lost in the process of the designing takes about twice or thrice the amount of effort to recover, and if not addressed to immediately, can indefinitely halt the project altogether. This strategy alone can save you many hours working on you interior design and would help you finish designing much faster and much more efficiently.

Read More
walls

A Night Sky Mural in the Room

If you are thinking of ways on how you can have a decoration that would add drama and beauty in your room that is unique, then a mural of the night sky is just the right idea for you. This is the idea that would make your children or your loved ones appreciate with what you have done with the room’s decoration. This is perfect in a child’s bedroom or in your TV room. Here are some ways that you can do to make that perfect mural of the night sky in your children’s room of your television room.

Night sky wall

First thing that you can do is draw a line around the top of the room just about 18 inches down from the ceiling. Do no make straight lines just draw a line with your free hand going up and down. You can use paint tape to mark off the line that you have drawn of a wider size if you are a messy painter. The ¼ inch tapes would help you much because it can easily be used when working with curves.

Then you can use the double faux paint roller kit when painting the ceiling and the upper walls. You can use the navy blue on side of the paint tray with a divider and a midnight blue on the other. You can then start painting the ceiling with the use of short strokes that overlap and you can also change directions. This will give you the depth appearance. After the paint has dried on the ceiling, you can now start installing rope lights around the room or you can also make use of the dormitory lights then attach it to an outlet where you can have a switch control. This is the perfect night light for you or your kids to enjoy.

Then you can start painting a moon in one side of the room. Be artistic. Add a face and a sleeping cap to your moon or draw it with the craters and paint it using a glow in the dark paint. Then you can place the constellation kit that you can buy at stores. Make sure it is for ceiling installation and then install it following the instructions that you have on the package.

Night sky

Your mural of the night sky is now complete in the room. You can however further accentuate it for better results. It only needs your artistic ideas for you to have the look that you would want to have in your room. For a child’s room, you can set the theme in the bedroom by buying space beddings and some wall decorations to match your mural of the night sky. This is just one of the ideas that you can make to give your room a comfortable and unique look.

Read More
walls

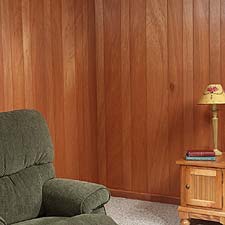
Decorating by Installing a Decorative Wall Paneling

One way of decorating a room to give it a look that you would want it to have is to install a decorative wall paneling. Installing one would not only add beauty to your room but it would also hide the uneven and the bumpy walls that you would want to have covered. Here are some tips on how you can start the installation of the decorative wall paneling.

Wall paneling

The first thing that you can do is measure the wall where you would want to have the paneling. Start by measuring the length of the wall in feet and then add all the measurements. Divide the added measurements by 4 and you will get how many paneling you would need. When buying a paneling, buy some extra sheets in case a pattern needs to be followed when you hang it on the wall. Most paneling comes in 4’x8’ sheets and so you would have an idea how many and how much you may need for your installation plan. You would also need a molding to go with it and so in choosing the color of the molding, make sure it matches the color of the paneling. Prepare carpenter’s horses or if you do not have one, end tables or sturdy coffee tables may do. You would also need rotary saw to cut the paneling and a jigsaw for cutting the paneling at electrical outlet openings. Make sure you have a company when doing this, your spouse or your children may help you in putting up the paneling that you need.

After preparing the materials that you will need, prepare the room. You can start by removing the nails, staples or any other protrusions that you may find in the walls where you would want to hang the paneling. It would everything that protrudes needs to be removed. You would even need to remove encasements in case your window has one.

Installing a wall paneling

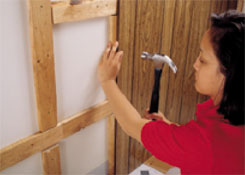
Start the installation. If 8’ is not enough, you can place the molding at the top then add some of the paneling at the top. If you the 8’ paneling is enough of then start at the part of the room where you would want to attach the paneling first. Set aside however small a part of the paneling that you may need to cut because you may be needing it later to fill in some spaces like a the top of the door. Use paneling nails to make it look more natural and hammer each nail at least 12” apart or so in a straight downward direction. Add molding where necessary like in between the two sheets just to hide the seams.

These are just some of the tips that you can follow in installing decorative paneling in your room. This would surely help you in beautifying your room and making it look more comfortable stay, which may also help you hide those uneven walls away.

Read More
Decoration

Design Your Home with DIY Plaques

Designing your home is a very special and fun thing to do especially if you are the one who designed the decorations. There are a lot of fun things that you can do to be very creative with your home décor. There are a lot of things that you can do to design your home or less the budget. One way to design your home is to have the decorative wall plaques that you can decorate anywhere you wanted to place it. Here are some tips that you can follow to design your very own decorative plaque that would surely suit your decorating style.

Baby's room plaque

• Decide what your motif would be when designing your very own plaque. This way, you can work on your décor with inspiration because you love what you are doing. You can make photo plaques wherein you can make use of the photos that you have or you can make floral designs or other designs that would suit you best.
• Gather things that you would need in your planned theme for the plaque. If you decide to present the funny faces of your family, be sure to have the wacky and funny pictures of your family members so it jives with the theme. You can make use of the platter that you have for you to paste the pictures in. Feel free to place the pictures on the platter and save a spot for every family member that you would want to be there. If you have a lot of pictures, let the pictures overlap just, make sure faces are not covered. Design it with sequins or other decorative that you can use to make it look more presentable.
Cars plaque

• For your floral plaque make sure you have the artificial flowers or dried flowers that you can use for your plaque. Have a basket or anything that you can use where you can mount the flowers that you have to make it look more of a plaque. Make sure flowers are mounted carefully and make sure it sticks to where you want to stick it to prevent it from falling down. The flower plaques can be hung on the wall or you can place it in the living room to give it colorful décor that is never out of style. This can also be used as a centerpiece in your coffee table.
• After you have made your plaque, place it where you want to place it because and make sure that the plaque goes with the decorations that you have so it would not look odd.

These are some of the simple and do it yourself home décor ideas that you can use when you are decorating your home. This way you can have the look that you would want your home to have.

Read More
Furniture

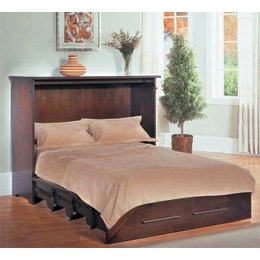
Hideaway Beds: Opt For Stylish Fu-Chests

Do you want to decorate your living space with stylish furniture and at the same time make space for an extra bed too? Then a Fu-Chest is your answer. A Fu-Chest is actually a bed that doubles as a chest of drawers. It is the perfect hideaway bed for your home. At day it imparts style and elegance to your room and at night viola! It becomes an extra bed where you can put up your guest with aplomb.

Hideaway bed

This hideaway bed is appropriate for a good night’s sleep as it comes with a sturdy and comfortable mattress. It is actually a full length one where you can stretch out reasonably well. And moreover your guest can rest well and will be happy over the sleeping arrangement. What more could any host want!

The Fu-Chest comes with a B-fold mattress sporting an innerspring and you can also get a custom made one if you prefer more comfortable and classy ones to grace your home. These come at a very affordable rate.

While shopping for a Fu-Chest you can see two main varieties: contemporary ones and classic traditional versions. They come in either dark wood or lighter ones. You can choose one that holds a wide storing area when it is not used as a bed. Also you can decorate the top area with photo frames or other collectibles of your choice. Try going for one that blends with your existing bedroom décor and further adds class and elegance to the room.

Fu chest bed

So if you are faced with space constraint and are in need of an extra bed to accommodate a guest the Fu-Chest is the best option. Your guest gets a bed to sleep on and you can use it as a chest for your bits and pieces at other times. And it is not very expensive, which is another reason why you should opt for a hideaway bed. Moreover whatever type you choose whether it is modern or traditional the Fu-Chest adds style and glamour to your décor.

Read More
Remodeling

Revive the Appearance of Old Appliances

Usually old appliances are thrown away when their value gets depreciated due to damages such as scratches, dents or it’s just that they don’t look appealing with today’s modern standards. Of course the old gadgets won’t look as trendy as the new ones out in the market. The new designs have the edge in terms of performance and appearance. The old ones may still be in running condition but their looks are very much considered to be “phased out” and not appealing enough to blend in a modern home.

The Old Reliable Appliances vs. Newer Ones
Even though the old appliances may seem dull and beaten on the outside, with proper maintenance and usage they will be able to perform like they did when you first bought them. Even the appliance retailers and repair personnel will tell you that the older models are stronger, more enduring and may outlast the newer models.

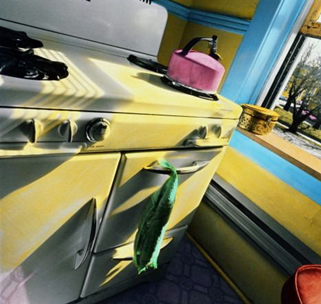
Antique oven

This is because the appliances made in yesteryears were really made to last. If compared to today’s mass produced goods, older ones are more durable as they are documented to last from several years to a decade. The newer appliances however make up for this issue by offering extended warranty deals. Within this warranty period, you are assured that no matter what happens to the appliances the company will repair or replace it for you. These deals were not offered back then because there is no need for it.


Old Appliance Make Over

It is impractical to throw something away, especially if it is still in working condition. If the issues were purely aesthetic appearance, you can do some measures to make your old appliances as good as new. You can resurface your old appliances with veneer panels. This will let you hide the flaws, dents and damages. Instead of replacing your cabinets, you can just repaint them or cover them with veneers. For some appliances, you can repaint them using special appliance paint. Appliance paint is cheap and is usually available in local hardware stores. In repainting stoves and ovens, you will have to use heat and fire resistant paint. There is also a specialized paint for refrigerators and dishwashers. Be sure to use the specific paint to the respective appliance.

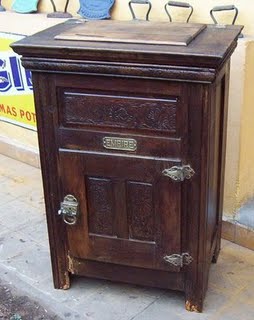
Antique wooden refrigerator

Another great idea to redesign your appliances is by using decorative magnetic sheets. These are readily available in stores but if you want to add a personalized touch you can make your own. All you will need is magnetic sheets, vinyl wallpaper with the desired design, contact paper (color coordinating), adhesive (spray-on is recommended for ease of use), and scissors. Cover the magnetic sheets with the contact paper and layer in the vinyl wallpaper. Apply adhesive and let it rest for several minutes. Let the magnetic sheets stick to the metal surface of your appliances.

Read More
Home Theater

Just When You Thought Speakers will Always be Part of the Scene

Everyone wants to have a well-decorated home theater room. It is because the home theater is the best place for spending time with the family, especially during their leisure time. Friends are usually invited over also to the home theater to watch the latest movie. Therefore, each family decorates their home theater to make it more comfortable and pleasing to the eye of every watcher.

However, when something is quite distracting while watching, the whole viewing experience is affected. Something that blocks the screen will really distract watchers. Mind you, even the theater speakers are disturbing to the eye. Why? It’s because they are just right at the two sides of the screen, or sometimes, they are placed at the front sides and at the back sides. They are really distracting. What do you do to prevent it from disturbing the viewing experience of your visitors? Well, you can always decorate your home theater in such a way that your speakers won’t be noticed.

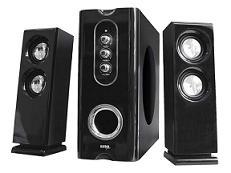
Modest home theatre speakers

For example, you can place the speakers on appropiate furnitures. You can buy floating shelves at the nearest décor store. You can choose from the simple glass to the wooden block. You have a variety of floating shelves to choose from. You can also put away the speakers from the eyes of the viewers by creating a hole in your walls so as to install your speaker system there. It will remain unnoticed since the speakers are now just a part of your wall, unlike when you have shelves beside your screens.

Well, you can still do that, but you can paint the shelves in such a way that the shelves complement the color of the screen or anything that is around it. If you paint your shelves with bright colors, that will surely be distracting. Also available at the décor stores are wall sconces with different shapes. You can place your walls there without having to make it look boring, just like when you only have a square shelf for your speaker.

Home theatre speakers

It depends on what color you would like to have for your wall sconces but these would surely go away from the traditional boring square. You can also put some decorations or figurines or any other elements around the shelves so that the speakers would remain unnoticed. At least, the decorations around the shelves are pleasing to the eye; say a picture of a painting or an angel figurine. You surely have many options when decorating your home theater. You were wrong when you can’t do anything with the speakers because you can think about many ways to hide it or to make it look unnoticed. It is all up to your decorating prowess.

Read More