accesories

Tips on Buying Quality Sheets

Have you ever experienced having your sheets shredded or get all wrinkly when washed? These damages are not necessarily caused by the poor quality of materials in the sheets, the sheets fall apart because they lack in thread count. Thread count is a term used in sheets to measure how much thread there is in a square inch of the sheet. This determines the strength and durability of the sheets, so it is safe to say that the more threads there are the stronger the sheets.

It is the thread that counts
Experts say that quality bed sheets should have some 180 threads per square inch, like egyptian cotton sheets, good quality sheets should have at least 200-220 threads per square inch, 230-280 is better and the best is 300-400. Sheets with higher thread counts are impractically very expensive and specialists say that thread counts more than 300-400 doesn’t make it a better bed sheet.

Funny kids bed sheet

Sad to say, most companies that produce affordable sheets do not comply with these standards. And as the old adage goes, you get what you pay for. Settling for cheaper sheets can lead to disappointment due to lack of quality. Most commercial sheets have only 80-100 threads per square inch, a far cry from the minimum standard of 180 threads per square inch. So before buying a sheet, take time to meticulously examine the sheets. Ask the salesperson about the thread count of the sheet. This measure will save your self from future disappointments. Here are some other things to consider when buying sheets.

The Sheet’s Material
Most companies nowadays make use of non-traditional fibers to cut on costs. Some of these new fabrics shrink after a few washings. Some are easily damaged with daily events. Although there are innovational materials such as cotton/polyester that not only wrinkles less but also costs less. Tell the salesman what you want for a sheet to lead you to a better choice. Take note that the better sheets may cause more but will fare better in the long run.

Girls bed sheet

Company Background
It is also advisable to find a sheet from a trusted brand or company. In buying quality products company reputation plays a large role. Beware of companies that have poor quality control. Not all flaws and defects can be seen at first glance and the moment you spot the irregularity, it may be too late to return it.

Beware of sheets with toxic materials
Some companies are reported to use some chemicals that can be hazardous for the health like formaldehyde, chlorine etc. As of today there are no Federal Regulations that tackles about how the raw materials are processed. This means that anything, including harsh chemicals, could have been used. The only way to be sure is to find a brand that has a label which indicates that no harmful chemicals were used in the production of the sheets.

Read More
Furniture

Locking your Drawer Right

If you are the type of person that treasures your privacy, then you would certainly need a lock for every drawer that you have. You would need lock for your cabinet with files, money, checks, bank accounts, among other private things that need to be secured. Therefore, you have to know how to how to add a lock to a dresser or desk drawer. You have to know that you can install two types of drawer locks, one is the mortise type where you can choose between half mortise and full mortise, and the other one is the exterior or surface lock.

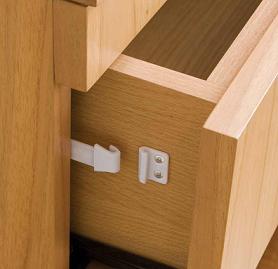
Drawer lock

Below are some of the steps to install both types of locks:
For the mortise locks, they are installed onto the wood of your furniture. For the half mortise lock, it must be installed just half an inch into the wood. On the other hand, the strike plate must be attached to the drawer’s surface. For the full mortise, it should be attached completely to the wood while its strike plate is attached just inside the drawer. Remember that since the full mortise must be completely and fully installed onto the wood, it will need a bigger space.

On the other hand, the exterior locks are easier to do. Exterior locks are composed of two parts. The lock, of course, must be attached to the drawer, while the bolt piece into the frame of the wood. You must be careful in installing an exterior lock. You must check out for the best position of the lock on the wood. With the use of a lead pencil, you should mark the correct positioning of the screw holes of the lock. On the other hand, the screw holes of the bolt piece must also be marked with the use of a lead pencil. Then, it’s now time to use a drill with a bit smaller than the screw’s diameter. This will bore on the wood its needed starter holes. Against the wood, you should hold the lock tight so as to position it properly before screwing it. Do the same thing for the bolt piece.

Cabinet locking

Be sure to always check if the locks are properly working and that they are properly attached and positioned to the wood. You have to insert the key a number of times to check if the lock is really working. You also have to check if it is screwed properly onto the wood to avoid broken lock frames in the future. Remember that you installed a lock so that no other people can access your properties so better be secured you did the installation properly. These are just some of the do it yourself tips on how to add a lock to a dresser or desk drawer.

Read More
walls

‘Bandage’ the Bleeding Walls

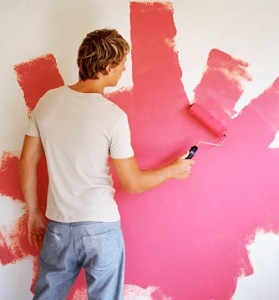
Beautiful walls, the color, the wall accents… but wait! The walls, they look wet and waxy! Such case when your walls seem to have that waxy appearance is called wax bleeding. It could be because you did improper priming or skipped the priming at all. If you have dark walls, it could also be a cause of wax bleeding since dark colors absorb heat more. The paint film may also be not thick enough because flat paints are most likely to wax bleed. Why bleeding? Because the appearance of wax bleeding involves discoloration that affects woodwork, ceilings and hardwood siding. Moisture also causes wax bleeding. Given a long period of time, dirt and other external substances get collected on the paintwork’s top layer thus causing the wax bleeding.

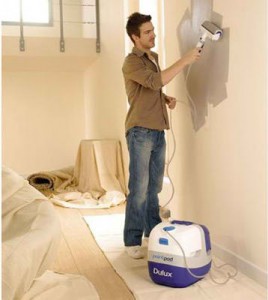
Painting walls

But fear not! There are solutions to treat wax bleeding so you’ll know how to prevent it in the future just in case you decide to remodel your home.
1. Before tearing down your walls to replace them, make sure that what you’re seeing is really wax bleeding. You can try this trick with bleach. Apply a few drops of bleach on the suspected area of bleeding. If the area applied with bleach does not affect the discolored surface, then we’ve got wax bleeding.
2. To treat the stained area, scrub it off using water and soap. That is, for mild stains only. You might need to use tougher solvents to rub off the wax.
3. For prevention, paint your new hardboard within a month’s time with three coats: a primer and two finishing coats.
4. Before you re-paint, select a high quality primer. Priming is crucial to preventing wax bleeding.
5. It was mentioned that moisture could increase the bleeding. Remove any excess moisture surrounding the area before you brush on any primer or paint. To remove moisture, you can use alkyd-based primers followed by a high quality acrylic latex paint. For interiors, use stain-blocking primers followed (again) by a high quality acrylic latex paint. Acrylic latex paint is thick and not flat.
6. Like rocks, wooden walls also weather. Weathering is caused by a lot of factors both internal and external, so consider your environment if you always have wax bleeding on your walls. Remember that moisture and the color of the paint (which increases heat absorption) play key roles in wax bleeding.
Striped wall painted with cold colours

Prevention and treatment of wax bleeding must not be treated lightly. You must consider purchasing high quality primers and paint so the benefits are long-term. If you decide to use cheap paint and primer and you have excessive moisture and/or dark paintwork, there are more chances of recurring wax bleeding which will make you spend more. You must also consider your environment and make adjustments to prevent further wax bleeding in the future.

Read More
Home Theater

Quality Home Theater Experience: Carpet Considerations

Imagine your very own home theater right before your eyes. If you are a lover of the arts and would like to create an entertainment room for your family, you also have to consider the acoustic quality once you purchase a carpet for this room. Think about maximum sound quality and aesthetic values combined – and there, you now have a fascinating home theater experience.

As you see, there are various considerations when you opt to furnish the room with a carpet. You have to take note of the movements of sound all over the place, hence delivering top-notch audio results. And as the sound waves bounce back from the surfaces of the room, if you have poor materials inside, you can really expect also a poor return. Nevertheless, if you are conscious of the acoustic performance of your home theater, you might want to keep in mind some facets to artistic yet sound-sensitive furnishings to your home theater.

Home theatre room

Smooth surfaces will have a bouncing effect to the sounds produced. They will collide, soon meeting other waves. Thus, to make the most out of your entertainment, you can always choose to avail of insulating carpets, specially designed like those you see in movie theaters.

The unique ones, if you will search them in the market, considering a size of 10’ x 12’, you might want to research some more stores that are offering such small size (since those that provide these carpets usually offer those the size of commercial theaters – costing $ 500 to $ 1000). However, just like these carpets, for a fully-functional fixture, you should take note of the advantages of a simple dark-colored one, instead of a fluffy carpet. In this way, you can avoid frequent changing and difficulties in cleaning. You can just imagine how movie theaters spare their maintenance personnel from cleaning the carpets because of the numerous spilling on the carpet.

Home theatre room with carpet

More so, if you are really serious with this, you’d better ask the help of professionals to help you install such carpet. As compared to the normal carpet, these types do require putting on a thick padding underneath. And if you also want to place a carpet onto the walls, you may also inquire if they provide services for such. But before doing this, also consider the measurements beforehand, making sure that you have everything prepared for – as well as the estimated cost to keep your budget intact while decor and ready.

To top all these, of course, it is really beneficial to know first everything that has to be considered (aesthetics, audio, and costs) to make your carpet-venture worthwhile. You just wouldn’t want to miss the chance to provide quality entertainment to your family, and at the same time, enjoy the beauty that a carpet has to offer to your home theater.

Read More
Tips

Intimacy in Large Spaces

Some homes today have large rooms, particularly common rooms, living rooms and family rooms. Large rooms have their advantages but it would be dull to have a spacious area with an uptight atmosphere. So how do you make these spacious rooms feel a little more laid-back? Here are some easy tricks to make a large room cozy.

1. What’s the purpose of your large room? Determine if it’s for an office, a family/entertainment room, common room, living room, etc.
2. Lighting. Notice how orange-y lights in restaurants and spa centers seem to tone down the entire area. You can use similar lighting so the relaxing aura will easily emanate beginning from the lighting.

Large livingroom

3. Wall color. Choose neutrals. Loud colors give a fun and funky vibe but since our aim here is to make the large room cozy, neutrals are advisable. Dark colors will also look nice if you have the right lighting.
4. Furniture. Try not to use furniture that is too big since there would not be space for other accessories you might want to add. You can also base your furniture according to the purpose of your large room. You can use love seats and medium sized coffee tables for a common room. A small couch, sleek table and chair set with a few filing cabinets that are not too wide or too high for offices would also do the trick.
5. Accessories: Carpets and Rugs. Purchasing a nice carpet or rug will also look nice in large rooms. When you invite people over, you can play games on the floor or just lounge around if you have a nice carpet or rug to cover part of the floor.
6. Accessories: Art, etc. If you already have lighting that’s pleasant to the eyes, add some more eye candy by placing art in and balancing it with the room. Try to display some sculptures or figurines in high shelves (if you have high ceilings). You can also put up art in a museum-like setting. If you have too many accessories in the wrong places, the room will be a mess so minimalism would be important in achieving that coziness.
7. Scents. Potpourri or those fragrances that you can plug in will surely add to that much needed coziness.
8. If you have a fireplace, (this is an old trick) putting books on top makes you feel as if you’re inside a café or a bookshop where the atmosphere is light and loosened up.
Big bedroom

9. Music. Classical music or any instrumental music during gatherings in a large room (or even if you just want to unwind) will let your mind be cleared and focused.
10. Other accessories. Include throw pillows in your couch so it won’t look empty. When you want to accessorize further, you can also invest in plants such as a bonsai in a pot but use plants in moderation. We wouldn’t want your area to look like a jungle.

These are some of the 10 easy ways on how to make a large room cozy and more relaxing.

Read More
Decoration

See Hawaii everyday at your Room

Hawaii is most famous for its beaches and its happy culture characterized by bright elements such as flowers and plants. Having a room based on a Hawaiian theme will certainly bring a brighter and lighter atmosphere especially when you design it with the use of the well-known Hawaiian trademarks.

You can start pimping out a boring room by giving style to walls. Since the walls surround the entire room, marking it with a Hawaiian design will already give a Hawaiian feel. If you have the budget, you can have the walls painted with floral prints, especially the hibiscus flower. These floral prints can come in bold and loud colors, depending on your choice. You can also add some prints of leaves. If you don’t have the budget or the time for a wall painting, you can just choose from the many types of wallpaper available at the department store. On the other hand, if you don’t want loud designs such as floral prints, you can just choose wallpaper with plain colors attributing to the Hawaiian culture such as bright yellow, red, green, among others.

Hawaian styled centerpiece

Of course, the flooring should complement the wall design. You can buy carpets from the department store too, or it is also your choice to have the flooring painted. However, carpets are easy to install on your floors. These are also easy to clean with just the use of a vacuum. The design of the flooring depends on your style. You can get the same design of your wall for the flooring, or you can have another Hawaiian design.

For your furniture, you can check out different hanging accessories available in the market. Hanging floral designs that are long and flowing can be used as curtains or screen. You can also use furniture made of bamboo. All of these are part of the Hawaiian culture. You can also set up a small space of your room to install a mini-beach, with beach sand and beach stones beautifully positioned. If you have the budget, you can also ask for the assistance of landscape designers to install a natural fountain inside your room, with flowing water adding up to the Hawaiian ambiance.

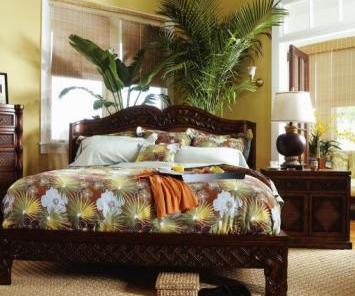
Hawaian bedroom decor

You can also put some flowery plants on the sides of your bed to make it look more beautiful. Meanwhile, your bed can also have a Hawaiian touch by putting on a floral bed sheet and pillows would be interesting if you are a girl. Your headboard can also be designed with flowers or leaves. These are just some of the ways you can turn a usually out of style bedroom into a beautiful Hawaiian-designed room. You and your visitors will certainly have a good night with all the Hawaiian visuals in your room. It is perfect not only for having fun but also for a peaceful sleep at night.

Read More
Remodeling

How Quick Can You Get with Your Living Room?

If you are expecting visitors in a week’s time, you are probably thinking of doing some quick living room makeover. Since most of your guests would stay in your living room, you know you have to spice the space up so as to impress your visitors. But how are you going to make it presentable without having to exert effort and spend money too much? There are many ways in which you can make some quick living room makeover. You first have to set your goal. What do you want to see? What changes do you want to happen? You can set the mood, quick repair the damages, or rearrange your furniture. You can do all of these in just a one day so you won’t have to cram in preparing the entire house for your visitors.

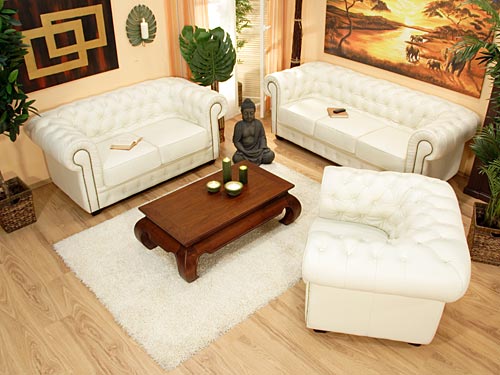
Elegant livingroom

If you want to set the mood in your living room, you can do so by changing the color of the paint of your walls. If you want to have a dimmer ambiance in your living room, you can use some dark colors such as brown, black or gray. If you want to have a brighter perspective on your walls, you can choose bright colors such as yellow, orange, or white. However, if you think painting your walls would take too much time, you can resort to putting some wallpaper that is easy to paste on your walls. There are many designs available, and laying it out on your wall would surely take less of your time.

If you are not satisfied with the results, you can add some lights in your living room. You can choose from a wide variety of light colors, depending on what you want to achieve. You can soften the lighting so it would appear dimmer. You can also add some pieces of wall art to add to the mood of your living room. You can choose from small pieces to big pieces, though the bigger the furniture or wall art you add, the better effect it will give to your room.

Sophisticated rustic style livingroom

Actually, you can really do a quick living room makeover even with just playing on colors. You can have a uniform color for every piece of furniture or décor you are going to add in your room, or maybe follow the color of your sofa so that you can achieve a single family of colors. Or if you want, you can also play on the contrast of colors. If you have one color for your sofa, buy some decors with different colors. This would surely brighten your living room.

As for the damage, you can do some quick repairs, yes. But if that would need much time, you can just settle first with some covers like curtains or wallpaper if you have damage on your windows or walls. It is a quick living room makeover, and you have to be real quick in preparing before your visitors come in.

Read More
Bathroom

Choosing Shower Fixtures to Suit your Décor

Nowadays, glass shower doors have become very popular and are available to suit any type of bathroom. Moreover, they are so versatile that they can be made to fit an elaborate or a modest sized bathroom or customized to suit any type of bathroom décor. There are a lot of options regarding shower fixtures that are essential for any type of shower.

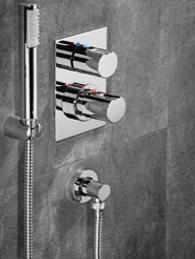
Shower fixtures

Shower Head and Faucet: Shower hardware has seen some remarkable changes and today you can choose from numerous varieties of incredible, stunning and elegant shower heads and faucets. You can either go for state-of-the-art and luxurious wall mounted massager that is integrated with six pivoting shower heads for ultimate indulgence or you can step down for a hand massage unit. On the other hand, if you are comfortable with simple elegance you can opt for a standard but stylish shower head. There are countless other types of shower heads and faucets that are available to suit any décor or budget.

Handles and Hinges: These are essential components that add to the décor of any shower door enclosure and are available in a wide range of colors, designs and textures to match with the rest of the components. Handles or knobs are available in different materials including aluminium and brass finish and some even come in glass. They also come in a wide variety of patterns and designs from which you can choose one that will best suit your shower door. Hinges help to anchor the glass panels of the shower door to the wall and at the same time acts as a pivot to swing the shower door. They are also available in different designs to match with the handles and other shower door components.

Shower head

Towel Racks: These are another important part of a shower door enclosure and some enclosures come included with towel racks, like in Centec. However, many brands offer the buyer an option to choose a towel rack to their requirements. Towel racks are available in a wide range of colors and finishes to blend with your existing shower fixtures. You can also choose from different styles and designs to match your décor, whether it is traditional or contemporary.

Choosing shower fixtures is an easily accomplished job with all the options that are available today. Finding the perfect fixtures to enhance or blend with your existing shower hardware or bathroom décor is a breeze. To make your choice easier, you can get the help of a consultant to come up with the best of everything that is needed for your dream shower door enclosure.

Read More
Lamps

Suggestions to Give You Plain Lamp Shade

The average lamp shade is dry, dull and easily goes unnoticed in a room. Here are a bunch of fun and easy suggestions on how to decorate a plain lamp shade to make it a standout piece of room décor. Choose one or a combination of any of the following ideas to suit your desired effect.

Basically, the first step is to take off the lampshade from the lamp and make sure it’s clean. Once this is done, you can now proceed to do any of the following:

Plain lampshade for a girl`s room

• Button Effect. The variety of shapes, sizes, and kinds of buttons are countless so let your imagination run wild! Either by sewing them on or using a glue gun to stick them on to the lampshade, create patterns that catch your fancy (e.g. flowers, stripes, wavy lines, dots). You might want to use them only as borders or even cover the entire lampshade with them.
• Painting. For this method, use fabric paint. If freehand is your forte, paint simple designs or a mini mural onto your lampshade. You might want to coordinate your lamp with the room motif (e.g. a funky club scene painted on a lampshade for the avid partygoer’s room). You can also use stencils bought from craft shops to paint uniform designs onto the lampshade. Simply tape a stencil on the lampshade and then apply paint with a sponge to prevent dripping.
• “Borderline” Embellishments. A subtle way to decorate the lampshade is through embellishing its upper and/or lower borders. Ribbon, charms, rhinestones, beads, seashells, rickrack, etc. can all be used to create a border for your lampshade. Just use the appropriate kind of glue in the right strength depending on what you wish to use as a border.
Plain lampshade decorated with wallpaper

• Hole-Puncher Ideas. For the romantic “Light filtering out” effect, punch holes into the lampshade so that the light shines out in certain shapes. Punch hearts or diamonds or flowers – choose what you want, but be sure not to punch too many holes or else the lampshade won’t perform its function. For another effect, try punching holes into the lampshade and then thread ribbon in and out of them, finishing off by tying the ends into a bow. You may thread different colored ribbons in rainbow order for a colorful effect or just be monochromatic but in different color shades. You can also try to punch holes an inch above the bottom edge of the lampshade and then suspend ornaments or trinkets from the holes using string.

These simple suggestions on how to decorate a plain lamp shade are inexpensive and very easy to make. Try them and enjoy!

Read More
Boys

8 Home Design Tips: Wild, Wild West bedroom theme

Nothing entices a little boy’s imagination like having his room designed with his favorite fantasy. If your little boy is a fan of cowboys and the Wild, Wild West you can give him a treat by giving him a cowboy bedroom make over. With a slight inspiration from imagination and the drive to please your little cowboy, you are on track to building an impressive Wild, Wild West themed bedroom. Here are some ideas that might help.

The Wild, Wild Flooring
Way back in the era when the cowboys ruled the land, the establishments had animal hides for floor coverings and rugs. Some historians say that these animal rugs were from the animals the cowboys hunted and served as the carpets of the Wild, Wild West. Imitate this effect by creating several faux animal hide rugs/mats around the room. For added drama and effect, rough the edges of the mats as if they were torn and not cut. The faux animal hides are usually available in the nearest fabric store.

Wild west kid room

The Wild, Wild Walls
With the walls, there are a lot of possibilities. You can purchase wall cover that features the desert, cactuses and horses. But if you crave to personalize the design, you can make use of your drawing skills by creating a mural on the wall. You can make use of any design that you think best describes the Wild West. A western town, the sheriff’s office, horses, lassos etc. it is actually up to you. Pay attention to additional details like wall pegs for cowboy hats or coat stands.

The Cowboy’s Bed
No matter how rugged or outlandish the bed design might be, it should be as comfortable as any other beds. More than the design, you should prioritize maximum comfort. You don’t want your little boy having troubles sleeping. The color scheme plays a great role here. Make use of the leather brown-black color combination for the sheets. You can attach wood works to the headboard. Make sure it is securely attached to prevent accidents. It is up to you if you want to repaint the wooden areas of the bed.
Dressing the Pillows
To adapt the pillows to the cowboy theme, you can buy some leather or cowhide pillow covers. If this material causes discomfort, you can settle for pillow covers of the same color.

Far west styled boys bedroom

Additional Details
Paying attention to little things will give a more satisfying result.
• Situate some cowboy or horse figurines, ropes, cowboy hats etc.
• Add some additional western flair by tweaking the light effects and the light holders.
• You can also repaint the closets and dressers, to accentuate the overall look of the bedroom.
• And as for the window, you can paint the window frames with silver or steel colored paint. Instead of the usual floral curtains, use cowboy valances to create that western window effect.

Read More
Lamps

Play with your Lampshades

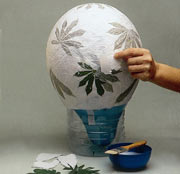
Lampshades seem to be ordinary in every living room. Others think it is just useful at night, when it is on and it is only unique when it is only lit. However, not everyone knows that it is very easy to design lampshades. In fact here is at DIY home décor advice on how to make quick and easy lampshades. Just be sure to follow the steps properly and prepare the materials beforehand so you would not hurry in finishing the pieces.

Making a lampshade

One best thing to make quick and easy lampshades is to remove the old frame covering the light bulb and do another design. You have many ways to do that. For one, you can get a cellophane with your chosen color. You must have a frame to put on the cellophane which will serve as the shade of the lamp. You can use wire to form the shape of the frame or you can use the old frame and just attach the cellophane with the use of a glue gun. The color of the cellophane and of the bulb will determine the color of the shade. If you want a dimmer and darker shade, you can use red cellophane. If you want a brighter shade, you can use bright yellow or orange. You can add beauty and design to the cellophane-made lampshade by putting some small pieces of decors on it. You can paste some glow in the dark post-its on the cellophane so that when the lampshade is turned-off, it will literally glow in the dark. This is just one of the DIY home décor advices for some quick and easy lampshades.
Paper lamps

You can also use a fabric for the shade of the lamp. Check the measurements of the frame of the shade and be sure to cut accurately the fabric depending on these measurements. You can attach the fabric into the frame by sewing it with the use of a sewing machine. However, if you do not have one, you can use a glue gun. Spread some glue first on the edge of the fabric so that it would be the first part you will attach to the frame. Afterwards, fold about an inch of the fabric and put some glue on the lining which you will glue on the frame. However, be sure to leave the rest of the fabric flowing down so that you will use it in folding again horizontally after the first row. Continue gluing rows until you reach the bottom of the frame of the shade. These are just some of the unique and beautiful ways as to how to create easy and quick lampshades. You won’t be needing to spend big with the materials used because all of these are readily available.

Read More
Girls

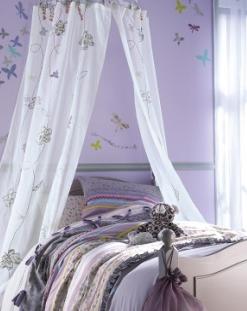
Bed Canopy: Living like a Princess

Most women would probably want to live like a princess. They would want to have a beautiful room, one which would represent femininity. That is why most women design their own rooms, giving a spice of a princess’s life even from the tiniest detail inside the room. Yes, in fact, even the bed can be designed in such a way of a princess’s bed. That is through installing a bed canopy.

Four-poster bed canopy

Buying a four-poster bed canopy with would be too expensive, and there are many easier ideas in creating a bed canopy. Take for example the use of different kinds of rods. It’s easy. Hang one curtain rod just above the headboard, then another above the center of the bed, then another above at the lower part of the bed. These curtain rods can be hung at the ceiling to be sure that they won’t fall at the bed. After installing the rods, get a fabric of your chosen design and wrap it on each of the rod, making a part of the fabric flow in between the rods. Another way of doing this is by using shower curtain rods. By installing the shower curtain rods with the use of hooks, it is easy to put on flowing curtains on the two sides of the bed and on the headboard and the lower part of the bed.

There is also such a thing as crown canopy. A crown canopy is only placed at the headboard of the bed. Just install a cornice board on the headboard’s wall then choose a colored fabric to drape at the cornice board. The fabric will then flow accordingly at the head of the wall, serving as the crown canopy.

Girls bed dosel

A shelf can also be used as a crown canopy. Just put a shelf at the top of the bed, leaning the wall. The fabric must be installed on the shelf to meet the wall. It should be wrapped on the four edges of the headboard. It is advised to use an embroidered fabric outside then something smooth and silky in the inside. Be sure to cover staples with embellishments such as tassels. To simplify things, one can just install some hooks on each corner of the bed, serving as four posters, and then buy a canopy fabric from the department store to be hung at each of the hook. This traditional canopy is made to fit in a four-poster bed.

These are just some of the ways in which women can have a four-poster bed with canopy to feel like a living like a princess without having to buy from the department store. All of these are cheaper ways of creating a bed canopy with only simple materials to be used. These are simple yet effective ideas in creating a bed canopy.

Read More
Tips

Cozy Rooms and Warmer Ambiance

Large rooms may seem to be comfortable, for you get to move around anytime you want without bumping into furniture or breaking a vase. However, you would soon realize that having a large room may create a feeling of isolation. Large space may instill a feeling of emptiness to your family. Now, here are 10 ways to make a large room cozy. And by cozy, it means really means comfort and relaxation.

Rustic and cozy style bedroom

1. You can make a large room cozy by maximizing every space that you have. Instead of placing furniture far from each other, why not put it in one area to avoid excess of space? It may mean a little cramped, yes, but having a cramped space gives the feeling of belonging, of being just one step away from something or from somebody.
2. You can play along with colors. Those that are cozy to the eyes are the shades closest to flesh, like the different shades of brown, gold, the color of the wood. Imagine going inside a coffee shop. Most coffee shops have a cozy interior to make it relaxing to the eyes of the customers. They use these particular shades in their sofas, walls, and tables. You, too, can apply this to your home. Cozy colors are best in the living room and the bedroom.
3. Put in wooden large, wooden furniture. The wooden color of these furniture is good to the eyes, and the size of the furniture will also take up some space.
4. Surround an area with other home decorations such as with a nature theme. If you surround your living room with plants, the coziness of environment will also be felt by your family.
5. If you opt to paint your walls, you can choose from the cozy shades of brown and gold and flesh. You must avoid plain colors, as they are boring, and would also emphasize the large size of your room.
6. If you want to use wallpapers, you can check on patterned, cozy-shaded designs available at the department store. You must avoid horizontal patterns as they also emphasize size.
7. Since a large room may appear too boring and empty, you can fill in some home decorations that would certainly create a feeling of relaxation. They are usually called “feel-good objects.” You can hang some chimes, feel-good plants, and old photos.
Warm living room

8. To take up some space of your large room, you can have a part of it designed with landscape. You can install a fountain or falls on one part of the room because the sound of flowing water is really cozy.
9. You can have a dimmer shade of lights, especially at night. Soft yellow and red can really be cozy.
10. Have some cozy music playing softly in the large room.

Read More
Furniture

Cabinetry: Different Applications of Cabinets in Multipurpose Rooms

Cabinets have now become an indispensable part of our homes. The latest trend in decorating is placing cabinets wherever possible in the house. They have a variety of uses and occupy very little space. With the number of household appliances growing in number by the day, it has become imperative to provide storage areas which are easily accessible and trendy at the same time. Paul Garófalo, design services manager of Merillat Cabinetry says that the chosen style in houses is the multipurpose room. Its uses vary from day to day activities to hobbies and as work spaces. These multipurpose rooms need cabinetry which will enhance the utility of these rooms. Cabinets of all sizes, shapes and design can be added to make the multipurpose room effective and functional.

Wood kitchen cabinets

The various uses of multipurpose rooms are:
1. Leisure room: The multipurpose room can be used to pursue various hobbies like craft works, sewing and scrap book collections. Cabinets can be designed to suit for a particular purpose and can be placed in convenient positions to aid in passing one’s time leisurely without over- cluttering the room.
2. Work room: The multipurpose room can also function as a work place or office room and also as a study room for the kids. Separate cabinets for each purpose, placed strategically will help in bringing all the members of the household to spend their evening together and at the same time not impinging on each others space.
3. Storage room: Miscellaneous things like cubbies, paper wrap holders and dustbins can be placed out of sight with the help of these cabinets. Cabinets can be designed with wheels so that they can be moved around at will. Raday states,” Homeowners might also want to consider the addition of an island of wheels in order to have additional storage and movable work space”.
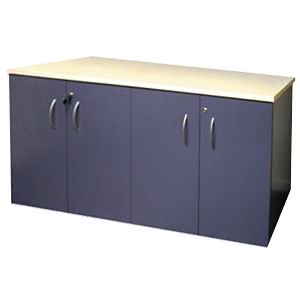
Blue melamine cabinet

4. Daily usage: In addition to the other uses, a multipurpose room also functions as a daily work space, with cabinets for ironing board, washer, dryer and clothes rods. So home owners can do workouts, oversee their kids’ homework, and do the laundry and other house work in the same place without having to shuttle between rooms.

With all these variety of uses no wonder Raday says” the multipurpose room is an example of how high traffic and function can co-exist with hi- style”. Cabinetry in a multipurpose room not only functions as a storage space but also adds to the style and elegance of the room. Selection of the cabinetry that goes well with the surrounding interior décor will add to the beauty of the room.

Read More
accesories

Cheap and Environment-Friendly Decorations for the Thanksgiving Holiday

If you are looking for the perfect bonding for your family, then the best way to do that is to make your own thanksgiving decorations. It is the best home décor idea, one which the whole family will offer time and effort. You do not only get to come up with some beautiful home decorations. You also get to spend time with the whole family.

Thanksgiving day candle decoration

Here are some home décor ideas as to how to make your own thanksgiving decorations:
Of course, visitors will first set their eyes on the exterior of the house. The façade of the house will certainly give a reflection of what is inside the house, so you better start your home decoration with your door. You and your family can use some corn husk to create a beautiful wreath. Be sure to get the natural harvested corn. The style will depend on you. If you and your family would want to have it neatly wrapped, then you can just arrange the husk like a ribbon properly knotted. If you want a little design on the husk, you can put a disorganized look on the wreath, with some fibers of the husk flowing freely. Just get a wreath frame and use a wire to attach the corn husk. For your thanksgiving decoration, you can also create a décor for your wall designs. Since it is all about thanksgiving, why not make the holiday brighter by getting or buying some capiz materials and installing them at your walls. You can cut these capiz materials to make them as wall panels, then the kids can put designs on it after installation.

You can also create some centerpieces for your tables. You can get some candles and some Indian corn husks too. Cut the corn husks into half their size, then put some glue around the lower part of the husk so that you can paste it on the sides of the candle. It will result in a beautiful centerpiece that will adorn your table. You can also use some natural garlands that you and your family can enjoy wrapping around your posts or furniture. These garlands are available in farmer’s markets. Aside from wrapping them around anything, you can also use them in wrapping around your wreath frames that you can hang around anywhere.

Turkey shaped plate

These are just some of the thanksgiving decorations that you and your family can enjoy doing during the holidays. These are simple to make and the materials are available almost everywhere. Aside from the availability and easy access to the materials, they are also cheap since most of them come from natural plants. You do not only make your house beautiful, you also contribute to the preservation of the environment by using these natural decorations.

Read More
Remodeling

Repaint, Revamp, Resale!

Painting your home will make it look new and ready to be sold. Prospective house-hunters will be attracted to the vibrancy of the fresh paint and it will entice them to really take a look in the interiors. All of us want to save money when doing restoration or repairs and painting your home is a cost-effective means to double its sale potential. But no matter how much we’re trying to fit things in our budget and you decide to repaint the house yourself, you can do so rest assured that you will do it flawlessly so as to save time and of course, paint.

Painting rooms

Last Minute Repairs
Don’t try to hide the cracks on your walls or water stains with paint. Buyers will always look into those details so detect the source of the moisture and repair them instead of covering them up. Get your walls fixed before painting.

Choosing the Colors
When you choose the palette for the house, stick to neutral. You can opt to paint in fleshy tones but a lot of buyers would appreciate interesting but neutral color combinations. Try to imagine yourself as the buyer of your home: consider the versatility of the colors you brush on your walls to easily match with furniture and other home accessories. This applies to both interior and exterior of the house.

Where to Repaint
Check your timetable. If you have limited time and budget, paint on the front portion of your home: the front door and entry area. This is the first thing that people will see so a good impression of the entry area is important. Don’t paint a room for any particular age group so the buyers will be able to choose their. Balance the dark and light colors as long as the palette is neutral and not dated. Check all over the house for any areas that need repair particularly the walls and ceilings. As mentioned, get the piping fixed and remove any nails or screws hanging on the walls. Have the gaps properly filled, apply primer and then paint. For the illusion of space, use lighter colors. Don’t forget to apply a quality primer to prevent wax bleeding.

Painting walls

Besides your sales talk, the house itself will speak to the buyers. Repairs before repainting cannot be emphasized enough so that the time and effort you put into painting will not be wasted by the return of water stains and further deterioration of walls. The landscaping and miscellaneous fix-ups will also make a good impact on buyers but the paint job will be the most noticeable of all since the colors will balance the entire house. It will give the house its age and buyers usually base their furniture according to the paint job.

Read More
Decoration

Home Design Tips: Sci-Fi Space Bedroom Theme

Exploring space in a shuttle, setting foot on the moon and other planets and even meeting friendly aliens from outer space, these are only some kid’s ultimate fantasies. For those whose kids are enthusiastic about the space and dreams of being an astronaut one day, this is for you. Your child’s bedroom is his most special personal space so redesigning it with his favorite stuff will make him a great amount of joy. Here are some tips and ideas to aid you in designing a Sci-Fi Bedroom for your child.

Space themed kids bedroom

Create Inter Galactic Walls and Ceiling
This takes skill and creativity; you may want to consider searching for pictures of the outer space for inspiration. For the stars, planets and other bright objects in space like comets and nebulas, use glow in the dark paint. This will make them visible in the dark resulting into a majestic view. Another great idea is to use glow in the dark stickers to form constellations in the ceiling. With the lights turned off, it will mimic the night sky.

Create a Rocket Ship-Inspired Bed
Now that the space is set you can now commence to the next part, creating the rocket ship. To do this get your child’s old bed and visualize a design of the rocket ship; attach wings, shuttle nose and boosters or anything that will make it look like a rocket ship. Be creative, you are free to do anything with it. For the parts and attachments, you can use any materials but it is most practical to use plywood because it is light, easy to work with and most importantly it’s cheap. Once finished paint it with your kid’s favorite color scheme. You can also personalize the bed by painting your kid’s name on the sides of the bed. Get pillow cases that resemble asteroids and planets. The bed sheets, comforters should be space-themed as well.

Rocket shaped furniture

Inter Planetary Shades
You can print images of planets and other heavenly bodies and print it on vinyl. The print out should be exactly the same size as your window, voila you now have a new shade. Remove the rollers from the old blinds and attach it to the new vinyl shade you made. Attach glow in the dark stickers for added effect. Once you have accomplished everything written above, you can say that the bedroom is now out of this world. Tap yourself in the shoulder and watch your child embark on a journey to outer space and beyond.

Read More