How tos

7 obvious ideas for choosing a lamp for your room

There are many kinds of lamps to choose from. You’ll need to decide on the one that suits your room best. For example, if you have a small room, you can choose a desk lamp that has a very compact design. On the other hand, if you have a bigger room, you may want a lamp that has a more spacious design. The same applies to lampshades and light fittings.

How much lighting do we really need?

You want something that has a lot of light and provides the necessary illumination. This is where task lamps come in handy. They are compact, easy to use, don't have too much light and can be placed anywhere in your room.

The first thing to consider is what kind of lighting you want. You may want ambient lighting for a more relaxing environment. Or you may want bright, powerful lighting to help you study or work.

How to choose the best lamp for you?

The following factors should guide you in selecting the best desk lamp for you:

  • - Brightness: You want a lamp that is bright enough to light your room.
  • - Style: A desk lamp is the focal point of a room so you need a style that fits your decor.
  • - Price: You need to pay attention to how much your new lamp will cost.

Furthermore, you need a lamp that fits your budget.

  • - Shape and size: How big is your desk? Will you need a lamp that is adjustable or portable? Is a desk lamp too heavy?
  • - Color: Choose a lamp color that blends with the color of your walls.
  • - Lighting effects: Select a desk lamp with good lighting effects. You can buy one with various light effects or adjust them using a dimmer switch.
  • - Light intensity: You need to select a desk lamp that has sufficient lighting. Some lamps are very bright. If you use a desk lamp frequently, you may want to consider buying one that will last long.

Additional elements to choose a suitable lamp

The following points should be considered when choosing a desk lamp:

  • Choose a desk lamp that matches the style of your room. A desk lamp can be the center of your room's decor.
  • Select a desk lamp that suits your needs. Do you need one with a dimmer switch? Are you comfortable with the brightness of the lamp? How will it affect your eyes? Do you need a lamp with a color temperature adjustment?
  • Consider the type of work that you do. Does the lamp need to be portable? Are you working on your laptop? What size desk will you have?

Desk lamps shapes and sizes

Desk lamps have so many shapes and sizes; there are a variety of desk lamps to choose from actually. Some desk lamps have this traditional look, some have oriental touches in it while others offer contemporary flavor. Desk lights that have exposed lamps tend to produce distracting glares which also causes more harm than actually helping you while you do your work on the desk. A better choice is that of frosted globes produce softer light which more preferred and pleasant so you could productively do your work without any distractions.

Table lampChoosing one of them among the tons of choices available is a personal thing that would give very great touches to any personal room or office workspace may it be public or private. Lamps have different varieties which range from residential to office lamps.

Stone lamps

Other examples of lamps include alabaster stone lamps, art deco lamps, bankers desk lamps, contemporary lamps, craftsman lamps, crystal lamps, functional lamps, iron & rustic lamps, pacific rim lamps, swing arm lamps, themed and juvenile lamps, and traditional lamps.

These desk lamps are more than just for lighting up spaces or just for work purposes. Some have cool designs that could go well with some furniture. They also have different themes, light colors and stand designs that could add artsy touch to your personal room, or work space.

Conclusions

The best lighting for a space can make or break the mood of an entire room. Whether you are decorating a small apartment, or designing a large living space for a family, choosing the right light is crucial.

  1. I have never seen a light that I thought was perfect for every situation. But I have bought plenty of lamps that didn't work out well. What to look for in a light:
  2. The light has to be easy to operate. A lot of lights are very difficult to operate.
  3. Make sure that the light is high quality and sturdy.
  4. Lamps are not only beautiful but they provide an important part of the environment. So when it comes to choosing a lamp, be sure to do the following:
  5. Pick the right height for the space you have to work.
  6. Choose a lamp shade that works with the lamp.
  7. Look at the color of the lamp.
Read More
Painting

Striping Painting Technique: A Little-Known Way To Create A Modern Look In Your Home

We have an article on our blog about Striping painting technique. This technique is used in many areas of architecture and home design, including walls, ceilings, floors, etc.

Striping is a painting technique in which the background color is painted using a stencil. In this post, we discuss various ways to use this technique.

You will learn how to apply various types of pattern, stripe or color paint techniques.

Also, we will show you how to use a simple and easy to follow step by step tutorial on how to apply a stripe design to your own home using our Stripe Paint. We also include tips on how to create a seamless look.

Video on how to paint guards on a wall

Click to play

Repaint your home through handmade procedure

You can check on the internet for new and fun ideas, though they are not unique, most of them are new and not all people wants to repaint their home through handmade procedure, so you are still lucky because you will not have much competitor in using a particular home design. You can also check for new colored paints, it’s also available in most hardware and online shops today. Feel free to visit the internet now for more exciting and amazing designs you can adapt and try.

Striped painting


There’s no restrictions in striping painting, what will be the look of your home is the outcome of your idea. It’s the result of your own technique, so you need to work on your skills before you actually start doing it. You also need to consider safety precautions when working as you may fall or might commit an accident. You need to ensure the work place is safe.

Always ensure that paints and other chemicals are away from kids, you also need to have enough ventilation, so you won’t be suffocated when you start working. Paints contain harmful materials that are hazardous to health of young and old people, you shouldn’t inhale it for a longer time, and enough ventilation is need on your workplace. You should always work with caution to avoid accident.

Safety measures to paint at home

Besides, you should be aware that some paints have toxic fumes, so you need to wear a mask to prevent breathing it in. You should wear gloves to prevent your skin from getting damage due to strong fumes. You should also make sure that you are wearing shoes while doing this kind of work because of strong fumes.

There are also paints that contain lead, so make sure you wear a respirator. You should also wear safety shoes and boots.

How to prepare a room to paint

Make sure that the place where you do this is free from dust. Also, ensure that you have a good light source. This will be an advantage to you in doing a smooth work. When you are done with the painting of your home, you need to clean the place using a soap and water. You need to wipe everything so you don’t have any traces or stains left on the walls.

There are some areas that you need to consider in cleaning the walls. These include doors, ceilings, windows and cabinets. You can also use different cleaning products to clean the walls. Make sure that you apply a primer to the wall before painting it. It will help to make the paint stick well. You need to consider the color of the wall because it affects the look of the whole house. You should also make sure that you paint the outside of the house first so that you don’t make any mistake when painting the inside of the house.

How to use a mask to paint a wall

Besides this, you also need to have a proper mask while working with paints.

You can use a brush or a roller to apply the paint. As you need to ensure that you do it in a proper way and you should use a thin coat so it won’t be difficult to remove. You need to make sure that it won’t get dried because when the paint gets dried, the color is harder to remove. This is why it’s recommended to use a roller. It will help you to cover a large surface of the room at once.

Spray or airbrush?

If you want to paint a room, you may choose to use a spray or airbrush. You can spray it in any area of your room or even in the entire house. It can be used indoors as well as outdoors, but it is not recommended to use a spray indoors because of the risk of getting sick. If you want to paint an outdoor area, then you need to ensure that it is clean and you should have a dust free environment.

You can use a brush or a roller to apply the paint. As you need to ensure that you do it in a proper way and you should use a thin coat so it won’t be difficult to remove. You need to make sure that it won’t get dried because when the paint gets dried, the color is harder to remove. This is why it’s recommended to use a roller.

Use your free time to paint your home

Do you have a spare time? You can have a spare time painting, and this spare time you can make use of it to decorate your home. The more you paint, the better and nicer your home will be. Painting is not an easy task, you need to be skillful in it, as you don’t want to look like a newbie in it. This can be hard to do, but you can try to learn it as fast as you can. It’s the most challenging but rewarding task you have.

Use your garage as a workplace

The idea of having a garage workshop may seem intimidating to some people. It may appear to be a very complicated thing to set up. But once you’ve got a workshop, you’re going to have a lot more fun than you ever thought possible. So, if you’re thinking about setting up a workshop, you need to take the time to read this article.

One of the best ways to protect the walls of your garage workshop is to lay down plastic sheeting. You don’t want to buy a large piece of plastic and store it, you want to use it right away. The reason why you want to use plastic is that you don’t want to damage the walls. You can use plastic to help protect the walls, but also to cover other things that you are storing in your garage.

References

  1. For over 40 years, the Home Decorators Collection has provided inspiration and ideas for decorating with everything you need to transform your home into a showplace. We have over 200 full color magazines with detailed tutorials and how-to guides for painting furniture, cabinets and walls. You will also find wall paintings in all sizes and a collection of inspiring paint colors. And if you can’t find what you’re looking for, just send us an email or give us a call and we’ll help you find what you need.
  2. Paint Your World is the world's largest source of home decorating ideas, featuring over 400,000 do-it-yourself projects. You'll find projects for every room of your house, as well as ideas for small spaces, kitchens, decks and outdoor living. And with tips and tricks from top designers, it’s easy to create a beautiful, well-designed space with any budget.
Read More
Cleaning

How to Clean a Keyboard Laptop

Why it is necessary to clean the keyboard of our laptop?

Most people don't know that a computer keyboard is one of the hardest surfaces to keep clean. It seems obvious but, many people don't wipe their keyboards after each use. And, of course, they touch their keyboards with their dirty hands almost every time they use them.

It's a very common mistake. Another mistake is using an ink pen instead of a mechanical pencil to jot down notes. Once again, a mechanical pencil is far superior for this purpose. Another thing that helps is using a microfiber cloth instead of a paper towel or a tissue.

A laptop is a tool like a hammer. You use it for a lot of different things, but mostly you use it to hammer in and tap out those little tiny letters. Over time, the keys of your keyboard will become covered with a film of dust and grime. To keep your keyboard in top shape, you should clean it at least once every month. This is easier than it sounds. Follow these five easy steps and before you know it, your keyboard will be sparkling clean.

Your laptop needs to be cleaned periodically because it is where you write most of your sales copy. Lately, I've noticed a lot of my readers are carrying around a portable keyboard in their briefcase or pocket. If this is the case for you, be sure to use a damp cloth to clean the keyboard. Don't put the cloth in the sink or dishwasher. That will dry out the fabric and cause it to lose its softness. Just dampen the cloth, wipe off the keyboard and then let it air dry.

How to use alcohol to clean a keyboard

Mix equal parts rubbing alcohol and water in a spray bottle. Spray the surface being cleaned and wipe clean with a dry, lint-free cloth. Do NOT use paper towels which have a tendency to leave a residue. Repeat until all traces of dust or debris are gone. (NOTE: This will also clean your monitor.)

NOTE: If your device has plastic components, you should treat it as though it were painted. Use a cotton ball or a clean, lint-free cloth to remove any dust or debris. Do NOT use paper towels which have a tendency to leave a residue. Repeat until all traces of dust or debris are gone.

NOTE: If your device has metal components, you should wipe it down with a damp cloth. Make sure to clean off the rubber feet on the bottom of the case. They tend to get gunked up with dust and dirt. Is your PC or Laptop ready for the new year? Are you? If not, do the above steps and your PC or laptop will be in tip top shape when the New Year begins. It's easy, inexpensive and simple stuff that most people never think about. However, without this kind of care and maintenance, the lifespan of your PC or laptop will be considerably shortened.

How to use compressed air to clean a keyboard

Remove the dust with a vacuum cleaner. Use a soft brush attachment. Connect the vacuum hose to the blower outlet of a small compressor. Screw the nozzle of the vacuum onto the end of the hose. Turn the compressor on.

Carefully move the nozzle around the surface being cleaned. Be careful not to let any dust or debris get sucked into the compressor. When you are finished, turn the compressor off. Disconnect the vacuum hose from the blower outlet of the compressor. Let the dust and debris settle for a few minutes. Then, use a broom or a dustpan to sweep up the dust and debris. Vacuum up the dust and debris again. Keep doing this until all traces of dust or debris are gone.

NOTE: If your device has plastic components, you should treat it as though it were painted. Use a cotton ball or a clean, lint-free cloth to remove any dust or debris. Do NOT use paper towels which have a tendency to leave a residue. Repeat until all traces of dust or debris are gone.

How to use x-acto knife to remove ink from a keyboard

Use an old toothbrush or a clean, lint-free cloth to remove the ink. Make sure to get in between the keys. If the ink is dry, it should come off easily. If it's not, try using a little rubbing alcohol on the ink first. If that doesn't work, go back to the x-acto knife. Just be careful! An x-acto knife is a very sharp tool. If you are not careful, you could cut yourself. Allow the area to air dry. Use an old toothbrush or a clean, lint-free cloth to remove any excess ink. Let it air dry. Repeat this step until all traces of ink are gone.

How to use dental floss to remove ink from a keyboard

Cut off about 1/2 inch of dental floss. Tie a knot in one end of the floss. Hold the knot in your mouth while holding the other end of the dental floss against the offending key. Pull gently but firmly until the ink comes off. Be careful! Dental floss is very sharp. If you are not careful, you could cut yourself. Allow the area to air dry. Use an old toothbrush or a clean, lint-free cloth to remove any excess ink. Let it air dry. Repeat this step until all traces of ink are gone. 

The hands are the dirtiest part of our body

It is often said that the dirtiest part of the human body is the hands, and this is most likely true. Our hands are usually the part of our body that comes into contact with the most number of items on a daily basis and hence hold the greatest variety of miniature foreign particles and bacteria. Given this, it only goes to follow that the dirtiest part of our laptops is the keyboard. Just as it is hygienic and necessary for us to regularly wash our hands, it is also hygienic and necessary for us to keep clean a keyboard laptop.

There are two ways by which one can clean that and these are either with the keyboard keys on or off. Some laptops have keyboard keys that are easily removed and replaced but for the sake of certainty, refer to your laptop manual to find out. If you are unsure of how to remove and, more importantly, replace your keyboard keys, opt for the first method of keeping the keyboard keys on.

Clean a keyboard without removing the keys

In order to clean a keyboard laptop without removing the keys, a bottle of compressed air will be needed. Using this, spray your keyboard laptop above and in between keys, in order to try and get the dust and other particles to be blown away. Tilting your laptop at an angle could prove to be helpful. If you do not have a bottle of compressed air, you can try shopping around for a magnetic duster.

For the next step, take a damp, soft cloth and use it to wipe all over the keyboard. When doing this, make sure that your laptop is shut off to avoid any electrical risks. Finally, go over the keyboard area one more time with a dry cloth.

For a more thorough way, use any thin, straight tool to carefully pop off the keyboard keys. Just like the previous method, make sure to shut down your laptop for safety reasons. When you have removed all the keyboard keys, place them in a relatively sizeable bowl and pour a good soap and water solution over them. Gently scrub each piece, being careful not to erase or damage the letter and number markings. While letting them soap, use either a bottle of compressed air or a magnetic duster to clean the exposed surface area of the keyboard. When you are done, dry off each keyboard piece then place them back into their proper places.

Remember that to clean a keyboard laptop is just as essential as to clean one’s hands. Keep the habit of cleaning your keyboard laptop regularly and thoroughly to keep yourself and your unit in clean, tip-top shape.

Bibliography

How To "Repair" Your Computer Bibliography (List Sources) * By: John E. Kennedy * Submitted: June 29, 1987 * Client: STARDUST MULTIMEDIA * Industry: Magazine Publishing.

Read More
Cat urine odor
Cleaning

How to Detect and Clean Cat Urine on Carpet

We have all been there. You’ve just brought home your new kitten, and it has decided to use your carpet as a litter box. You quickly find out that the smell of cat pee is not nearly as cute as the little ball of fluff you’ve just gotten.

There are many ways to get rid of cat urine odor from carpets, but here are a few methods that have proven to be most effective: If you have a pet at home and have faced this issue, don't panic. There are many ways to get rid of the odorous smell.

1. Clean up the mess

Pick up all the pieces of urine soaked furniture and bedding. Launder them as soon as possible to get rid of the urine odor. Make sure that you use a detergent with bleach if available. If not, you can replace it with hydrogen peroxide or vinegar to remove any residual bacteria that may lead to bad odors in the future.

2. Use baking soda

Just place a bowl of baking soda in the room where your cat pees on carpet and wait for 12 hours before vacuum up or sweep away it out from carpet area. This is an effective way to absorbe it.

3. High-quality enzymatic cleaner

The best way to get rid of the smell of cat pee is to use a high-quality enzymatic cleaner. These cleaners will work to remove any kind of odor from the carpet and make it smell nice again. Also, if you can't find the specific type of cleaner that you need, you can make it yourself with household items!

Cats are natural predators and hunters. They've got an amazing sense of smell which is the number one reason why they can find their way back home from anywhere. But sometimes, that amazing sense of smell can come with a downside - like when they use a litter box and leave behind an unpleasant odor.

We have to keep in mind that cats' senses of smell are much stronger than our own, so don't be surprised if you can't even detect the cat urine odor. That means it could be time for you to do something about it! In order to get rid of this cat pee smell, you need to break down the components that make up the urine and eliminate them from your home.

A cat's urine contains two substances, amines and phenols, that are associated with a foul smell. In the US, more than 50% of homes contain at least one pet.

Cats are territorial animals and use their urine to mark their territory; they often spray it on furniture or plants as well as walls and floors. When cats feel threatened or frightened, they often urinate to defend themselves. Cats that have outdoor access can leave the house smelling like ammonia due to an accumulation of bacteria in their urine over time.\

Some other techniques that can help

First off all one needs to clean the area thoroughly with soap and water in order to remove any residual cat pee smell from the area.

Pet odor eliminator or carpet deodorizer

There are a number of ways to get rid of the smell of cat pee. One way is to use a pet odor eliminator or carpet deodorizer. These products will not only provide a long-term solution for the problem, but will also cover up any lingering odors until the cat urinates in that spot again. If you want to go with a more natural option, you can try baking soda. Simply sprinkle some on top of any urine spot, wait 30 minutes and then vacuum it up. Finally, if you don't want to spend money on anything at all, then vinegar is another viable option. Simply pour some onto any urine spots and let it sit for 10-15 minutes before cleaning up with soap and water.

Having a household cat can truly be nerve-wracking especially when you always have to take care of its mess around the house. With its unpleasant odor, cat urine not only spreads the foul smell but also affects your hygiene. While many cats tend to urinate almost anywhere, most of them love to do it on the carpet because of its texture. It is best to know how to detect cat urine on carpet before its odor ruin your day. With the use of a simple tool known as ultraviolet (UV) black light, you can track where your cat has shown misbehavior.

Cover the room in darkness

The ultraviolet light detects the stains caused by cat urine by means of showing you fluorescent spots. In order to see clearly if your carpet has cat urine stains, you need to cover the room in darkness. The best time of the day is nighttime when you can make sure that darkness will be filled in the room. Do not forget to turn off all of the lights in the room and draw the curtains on your window to prevent any outside lights from coming in. In a very dark room, you will easily spot any cat urine stain whether old or new.

Look for glowing colors

Upon scanning the entire carpet, you will notice glowing colors that let you know where the cat urine stains are. Stains that have already dried up and old enough to be neglected will display a bright green mark. On the other hand, those stains that are just new will show a bright yellow mark.

Mark the spots

Whenever a glowing color appears on the carpet, be sure to mark it. One easy way to do this is to place a scrap paper on every spot where there appears to be cat urine stain. Encircle the perimeter of the spot may also be done with the use of a white chalk.

Clean the urine stains

After carefully assessing the damage on your carpet, the next step is to remove the urine stains by cleaning them. Basically, you need an enzyme-based pet stain remover. To ensure the cleanliness of your carpet, carpeting must be done as well as steam cleaning. However, if the old cat urine stains have always been saturated, there may be a need to take away that area of the carpet. Worst scenario is to remove the entire carpeting and replace it with a new one.

In order to minimize, or even let go, the chances of having your cats urinate on the carpet, be more vigilant on taking care of them especially when it comes to hygiene.

How To Remove Cat Urine From Carpet... Quickly And Easily! (a funny and real story!)

Yet another cat-related nightmare! This time it's a lady who lives in Tehachapi, California. She had just finished a real estate seminar and was on her way home when she stopped to have a cup of coffee at a local Tim's Restaurant. After her coffee, she walked back to her car which was parked in the restaurant's parking lot.

As she got to her car, she noticed a strange smell. When she got into her car, she discovered that the smell was coming from the upholstery. "Oh my God!" she exclaimed. "There's cat urine all over the car! I'll never be able to live with myself again! I've always been so careful about my car. It is one of the few possessions I have that is absolutely, 100%'mine'."

She called her husband right away and told him what had happened. Then she called her real estate friend, Nancy Jones, who lives near Tehachapi, and asked her if she knew anyone who might remove the cat urine from her car. "Oh Lordy!" Nancy exclaimed. "I know just the guy. He's a good friend of mine.".

Other alternatives to clean cat urine

Cats are lovable creatures that make faithful pets to a great number of people. Unfortunately, as many cat owners may already well know, cats tend to urinate in different areas of the house. While it is no real problem when a cat urinates on marbled, tiled or stone floors, it may become an issue when it urinates on a rug or carpet. If not treated properly, cat urine can permanently stain carpets or rugs, leaving incredibly unsightly marks and perhaps even persisting odours all over one’s house. If one wants to keep a pet cat around, it is necessary that one learns how to clean cat urine no matter how tiresome or difficult it may seem.

eliminating-cat-urine-smell-carpet-diagram

By following these easy-to-do steps, one will surely be able to overcome the problem of how to effectively do that. First, it is important to note that the longer cat urine has been on a surface, the more time it has to really soak in and create a permanent stain. Therefore, when one sees some cat urine on the floor, one must get to the task of cleaning it right away.

Before anything, one must soak up the liquid. Using some rags or paper towels, soak up the cat urine by placing them on top of the liquid and carefully pressing them down. In order to avoid the risk of letting the cat urine get on your hands or feet, use rubber gloves or slippers when doing this. The next step involves a good vinegar and water solution. Vinegar is a key ingredient here as it is an excellent natural solvent as well as bacteria killer. Three parts water to one part vinegar is usually an adequate ratio. Pour the solution on top the stained area and let it settle in for about 5 minutes.

Important note

When the vinegar and water solution has properly settled in, using a hard brush to scrub away at the area.

In order to get rid of the smell of the cat urine and the vinegar and water solution, some baking soda will come in handy. Sprinkle an ample amount on top the surface and let the odours be absorbed. After a good 20 to 30 minutes of waiting, pat the surface with a clean damp rag or paper towel then leave it to dry. If desired, an electric fan can be used to hasten the drying process.

Now one can easily and effectively clean urine off the rug or carpet. Regardless, one should know that the best way to keep a carpet or rug clean is to keep it completely urine free. If one can train one’s cat or other pets to urinate outside or in a litter box, it would save one a lot of time and effort.

Caution

1. It is highly recommended that you perform a small spot test in an inconspicuous area before proceeding with the above recipe.

2. Do not use Hydrogen Peroxide that is higher in concentrate than 3%. Bleaching may occur on some carpets with a stronger solution. Read the label on the Hydrogen Peroxide carefully. The label will state the strength. Use only 3% Hydrogen Peroxide.

3. Pet Urine may alter the chemical nature of dyes in some carpets causing discoloration, bleaching or dye run.

Home made urine removers

• White vinegar is a time tried and proven ingredient that aids in removing both urine stains and the odour. Combine one part distilled white vinegar to two parts warm water to create a spray. Remove as much urine/spray as you can using a paper towels. Mist vinegar spray over areas of cat urine and rub with a paper towel. An alternative method is to mix the solution in a bucket and dip a clean cloth into the liquid. Rub the stain with the vinegar solution. After the vinegar dries, wipe away both solution and stain with warm water.

• Another simple to make spray uses 15 ounces of hydrogen peroxide, two tablespoons of baking soda, and two squirts of liquid hand soap. Mix in a plastic container with a plastic spoon. Discard after use. Apply this solution to cat urine stains or odour areas, and then rinse away with warm water.

• Many cat owners and breeders use in Australia with great success is Bio-Zet, which is an enzymatic clothes laundry detergent. If you have washable cushions or the cat has urinated on your clothes this is a product you may want to try also.

Clean cat urine

1) Trying to remove the smell of Cat Urine from furniture and carpets can be difficult. Have you have tried most of the sprays and cleaning products you can buy in regular supermarkets and pet stores, but nothing seems to work? Let me show you a simple formula you can make at home for cleaning away cat urine odor and stains from your furniture and carpets.

2) I know what it’s like. You come home from work, open the door and the stale urine odor hits you in the face. I have had this problem in the past, but it was only a couple of days before I decided something had to be done. I wasn’t really worried about cleaning up the mess, I was more worried why my cat had started to pee on the furniture and carpet.
Severe cat urine cleaning
3) If you are looking for a simple formula you can make at home, which is safe and gets rid of cat pee odor and stains for good, then I have just the thing for you. This solution is well-known for getting rid of stains and odor on carpets, furniture and other fabrics. You only need a couple of household ingredients and an empty spray bottle.

4) You will need an equal solution of white vinegar and water, preferably warm. Mix the solution and add it to an empty and clean spray bottle for easy application. I would try using a small amount on an area of carpet or furniture which is not seen, to make sure it doesn’t affect it in any other way other than cleaning.

5) If the urine is fresh, try to soak up as much as you can using paper towels. It’s better to soak up as much as you can, otherwise you are simply spreading the cat urine over a larger area. When you have done this, spray the area in the Vinegar and Water solution and allow to soak in. Work into the affected area using a gentle brush or soft cloth.

6) When you have cleaned it thoroughly, allow to dry. Many people recommend to Vacuum dry, but I find this makes the Vacuum cleaner suck up some bad liquids and your machine may start to smell. Allow the area to air dry, and repeat a couple of times to get rid of the stain and smell once and for all.

7) When the area has dried, you can apply baking soda powder to the area, and brush using a gentle action. The baking powder is great at removing cat urine odor. You can simply vacuum away the powder, but make sure the area is completely dry before doing so. It may need a couple of treatments before the smell completely stops, but you will find this works better than anything you can buy in your local stores.

We have looked at what gets the smell of cat urine out of furniture and carpets, but it’s also important to look at why your cat is not peeing outside or in their cat litter tray. There can be many reasons for they are doing this, from health reasons to change of territory.

Bibliography

In the following paragraphs, you are going to read a very small sample (only 10 items) of the nearly 400 books, pamphlets and other publications I have collected concerning cat urine.

This is by no means an exhaustive collection. It simply represents a few of the many thousands of references I have on this subject. The information in this brief was obtained from the following sources:

1. "The Noble Savage: In Search of Animal Origins" by Gordon Rattray Taylor

2. "Cats" by Roger Catlin.

3. "The American Dog" by James A. Lincoln.

4. "The Biology of Cats" by E. L. Thorndike.

5. "The Domestic Cat: The Biology of Its Behavior" by William M. Wheeler.

6. "The Folk-Lore of Rats and Mice" by Harry M.

7. "The House Mouse" by E. L. Thorndike.

8. "The Life of the Ocean" by Ed Mayer.

9. "The Lives of Our Pets" by Ben Suarez.

10. "The Natural History of the Feline Mind" by Erich Klinghardt.

Read More
Tips

How to Combat Condensation

Moisture sources 

Humidity can have two totally different origins: that they are caused by liquid water that comes from a pipe, reservoir, rainwater filtration, or something similar and that is lost due to a pore or defect in the ducts or in the containers that the contain. In this case, it is appropriate to find out where the permeance is and solve it.

The other origin of humidity is by condensation of moisture in the form of gas contained in the air. Although it may seem easy to discriminate which of the two is the cause of humidity, it is sometimes quite complicated.

Condensation is evident on the surfaces of the crystals and mirrors in the form of small droplets of water or by clouding them and on the walls and ceilings in the form of black spots and molds.

Condensation takes place when the air, with a certain relative humidity, comes into contact with a cold surface whose temperature is below the so-called dew temperature. Without going into too many technicalities we can affirm that the risk of condensation increases the higher the relative humidity of the air and the colder the surface is in contact with that air.

Measures to avoid condensation

A first measure to reduce the risk of condensation is by controlling the relative humidity of the air, preventing it from increasing to percentages above 80%, although it is necessary to be aware that in certain geographical areas and / or in certain atmospheric conditions the external air can reach and even exceed that percentage of relative humidity.

Inside the houses, activities are carried out that punctually increase the relative environmental humidity: showering, cooking, steam ironing, burning of butane stoves, drying of clothes, watering plants, etc. and there is another activity that is carried out without interruption such as breathing in people (about 60 gr. of water in the form of gas per hour and person).

How to reduce condensation?

To reduce this relative environmental humidity it is possible to do it using thermodynamic machines (air drying) whose cycle consists of cooling the air a lot so that it expels a good part of its moisture by condensation and reheats it, This process is very expensive in energy terms, the other way, more logical and economical to reduce the relative humidity of the air is to properly ventilate the room.

Nor should it fall to the opposite extreme of having excessively low humidity because this would create discomfort in people (dry throat), it is not recommended to decrease from 30% relative humidity inside premises with human presence.

When does the condensation of water occur in the home?

Condensation occurs when warm, moist air comes into contact with a cold surface, causing water droplets to appear. Though for some, the concept of condensation may be confined to long forgotten science books and notebooks, for others, condensation poses as a daily problem. In fact, statistics say that condensation is among the most persistent problems that home owners have to deal with. On a day to day basis, people combat condensation to avoid its ill effects.

The problem with condensation does not directly concern the water droplets that form from it but rather, the effects that water droplets are directly responsible for. While water droplets are harmless on their own, if they are constantly present and not given the chance to properly dry out, mould forms. This is the reason why areas within a house or living space that are frequently exposed to condensation are also those wherein mould can typically be found. These areas usually include the kitchen, the bathroom and secluded bedroom corners.

While there are no purchasable products or sprays that can do that, some adjustments within a house or living space could get the job done. In order to do that, four elements within a house or living space must be thoughtfully manipulated. As science has explained, these specific four elements go into the occurrence of condensation and can hence be used to help eliminate it.

4 Elements to avoid condensation

  1. The first of these four elements is heating. As cold surfaces are what part of the condensation equation, eliminating or diminishing these could help combat condensation.
  2. The second element is ventilation. By allowing air to pass through all spaces and areas within a house or living space, water droplets formed by condensation will have bigger chances to dry up. If water droplets are dried out, surfaces will not develop mould.
  3. The third element is insulation. Insulation works the same way that heating does, preventing cold surfaces from being available for condensation to take place upon. A number of different materials can be used to insulate a home or living space, one simply needs to make a visit to the nearby hardware store.
  4. The fourth and last element that can help is moisture reduction. Moisture within a house or living space can be reduced by implementing some small habits such as drying clothes outdoors and taking showers at room temperature. One could also choose to invest in an air humidifier as these can remove large amounts of moisture from the air. Mostly, they are not too expensive and are also easy to find.

With a bit of manipulation of these four elements within a house or living space, one can surely combat it. Again, even if there are no available products or sprays that can help, a bit of recall from those long-lost science books can surely help.

Read More
Furniture

How to Buy Dining Room Set?

A family that prays together stays together. When we usually get to hear this, what mental images comes out in your mind? It would usually be the happy atmosphere of you and your friends sitting together or the precious moments you spend with your relatives and families, right?A dining room can surely create and stimulate a perfect atmosphere into your home and it is a valuable addition as well. That is why nowadays, there is a lot of dining room furniture that would cater the taste of everyone and would suit everyone’s financial plan.

[one_half_first]No matter how small or how large your dining area is, you always can filled with a new dining set. A dining set is usually the centrepiece or the soul of a dining room. You can compliment your dining set with the other furniture, bookcases and other furniture. There are wide arrays of dining sets available in the market and picking one is not an easy task yet it can be fun.[/one_half_first][one_half_last][/one_half_last]

Diningroom set with chairs coversThere are lots of considerations on how to buy dining room set. Comparisons and careful research are needed in purchasing the right dining set style for this can save you a lot of time and money as well as getting you into the right track purchasing the appropriate set for your purposes.

Tips on how to buy dining room set

• The Space
The very first variable to be considered is the space. How large your space will be and where will you place it? Measurement of your space is a key tool in purchasing a dining set. A dining set must provide you with proper comfort as well as it should look balance in your space and it should not make the place crowded.
You must also consider a general rule:
o For small spaces, use round table.
o For large spaces, a rectangular or an oval table.

• Persons to be seated
How many people would you like to seat at once? Answering this will help you identify in choosing the right size and shape of table along with how many chairs will you buy along with it.

• Table shape and sizes
Round and square tables usually set less people and are nice to small or intermediate families. The oval and the rectangle tables accommodate larger families and are good for accommodating guests. Having extended or expanded tables can also be considered. Depending on styles, tables can accommodate one or two leaves adding more spaces.
Classic wooden diningroom set
• Lifestyle
Another factor to be considered is the purpose of using your dining table. How are you going to use it for occasional dining with guests or your everyday dining table? Factors such as the following can guide you in choosing on the right material and finish of the table and chairs – durability, wood or glass, heavy or contemporary usage.

• Style and Décor
Dining sets designs are really assorted. Artistry lies in your very own taste.

Following these tips on how to buy dining room set will definitely give you a feeling of satisfaction and fulfilment.

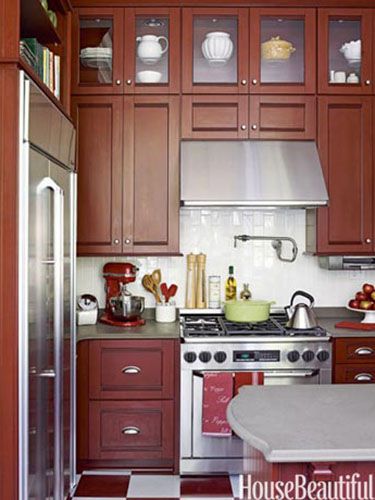
Chairs for your quick dining room makeover

You can also check on the latest designs for chairs for your quick dining room makeover. They may be simple furniture but you can actually play along colors and styles. For example, if your kitchen chairs are made of wood, you can varnish them to make them look newer. You can also add some chair covers or thin, soft pillows onto your chairs, depending on your choice of colors and theme. These are just some of your options if you cannot bring in a brand new set of chairs.

When you are thinking about doing some quick dining room makeover, you should emphasize adding style to your usually boring table. You can paint your table with bright colors if you want to be modern and hip or you can still cling to the usual brown or gold color of dining tables to preserve that cozy effect. If you want to be ultra modern, you can paint images on the top of your table. The images depend on your style. You can paint fruits or flowers if you want to link it to occasions or festivities. These are just simple ways to bring life to your dining room chairs without having to spend too much. These are perfect recommendations especially when you are expecting visitors to come over in just a few days time.

Popular Styles for Comfortable Casual Dining furniture

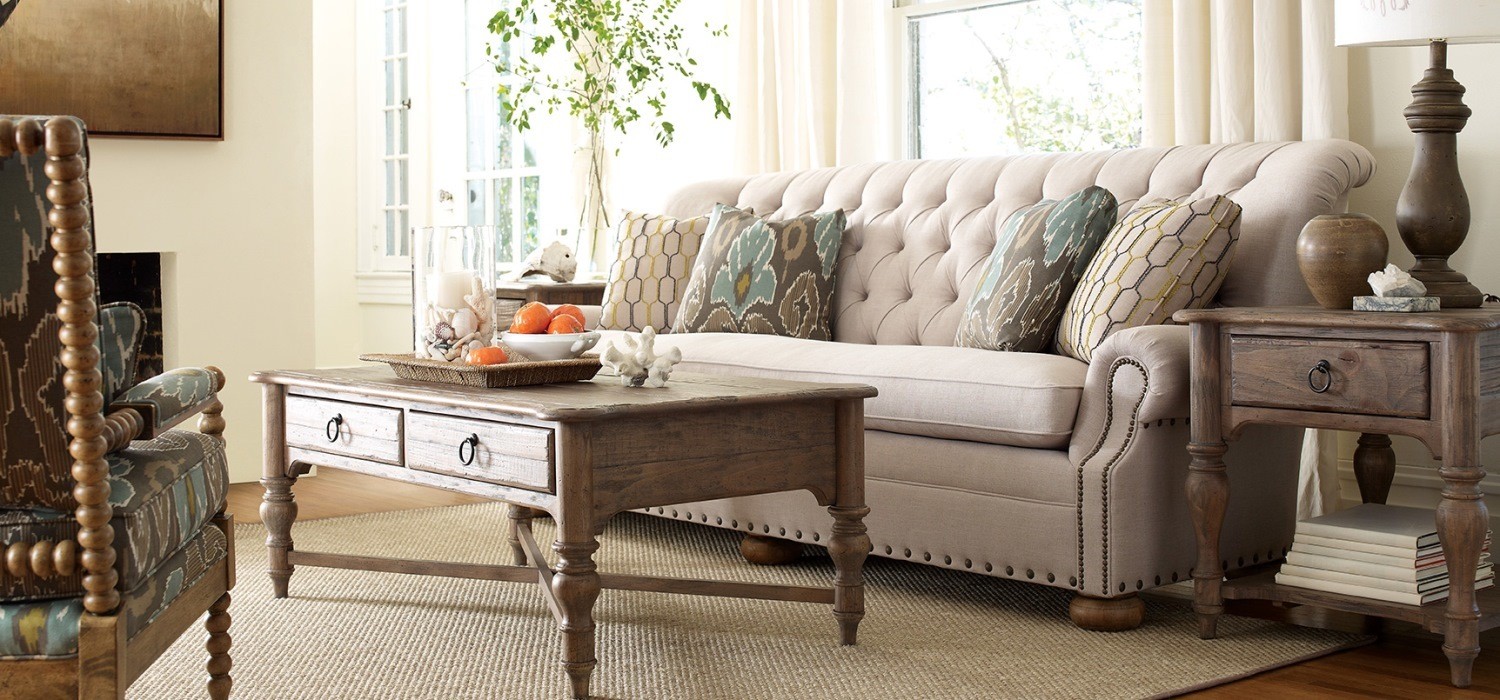
Casual furniture is estimated to be more popular as it helps people to create home that can give comfort to their visitors and families. Popular styles in casual furniture can help the homeowner to portray their personal styles in sense of designing. Typically, casual furniture is built to last and ready-to-use. With emphasis on pieces, this furniture is comfortable, durable and functional.

Popular styles in casual dining furniture are more useful wherein, the family members frequently used to digest their blessings and discuss matters as well. Choosing casual furniture maximizes comfort and utility. At the same time, it eliminates fussy accessories and complex details. Usually, softy or rectangular curved tables and upholstered chairs are common features that give a casual vibe into dining room. Rounded tables offer more seating in a smaller space. In contrast, rectangular ones require linear or narrow room.

The goal of color in popular styles of dining furniture is to emphasis mellow environment in which to enjoy time and meal together. Browns and grays are neutral colors associated with casual dining. Additionally, palette ranges from soft pastel pink shades and for deeper hues of green and blue yellow is used. Antiques, wicker, rattan and recycled pieces gives relaxing and casual atmosphere just like what lighter wood finishes can provide. Natural fibers and textured including wool and cotton make it clear that a room is meant to be lived in.

Want to Have Some Fun while Dining?

Dining rooms are the usual place for celebrations at home. It is where families and friends gather during occasions to share some delightful food. Because of that, dining rooms should have a positive ambiance. However, the colors and design of the dining room greatly contribute to the mood during festivities. This is when a quick dining room makeover is needed. A makeover in the dining room does not need to be expensive and extravagant. There are some simple ways that you can do brighten up your dining room. If you are noticing lately that your family are getting bored and quiet during meals, then it is time to spice the room up.

You can start with your walls. If the paint color of your walls is dark, it might give a boring and dim atmosphere which casts a rather negative vibes. You can brighten it up by painting your dining room walls with bright colors such as yellow, orange, or peach. If painting the entire walls would take much of your time and would cost you high, you can just go to the nearest department store and check on the beautifully patterned wallpapers.

These are easy to install on your walls, just be sure you know the measurements. In fact, even your ceiling can be designed either by paint or wallpaper. If you want to have that cozy feeling, you can have dimmer shades such as brown or gold. However, if you want to boost that bright and positive ambiance, use colorful or brighter shades. Others even add some mirrors onto the ceiling to add design to the interior. And you can also remodelate your dining room set by making some chair covers.

Specific styles in dining furniture

• Country styles. American and French country styles are often used in traditional furniture. Designs came from early American and colonial eras that gives more rustic feeling through classic styles interpretation.
• Cottage styles. Usually, family cottage was furnished with cast-offs from the family home. When creating a cottage that feel from scratch, furniture is often reused and recycled.

Sophisticated dining room• Shabby Chic styles. While revealing a rumpled sophistication, it can also balance the elegant elements with time-worn pieces. White is the signature color of this style. It was combined with mixed patterns, vintage accessories and architectural details, as it creates a comfortable aura of grandparent’s house.

• Ethnic styles. Rottenly, casual decor is created to remind the owners of where they come from and where they have been. This often means presenting pieces with an ethnic sensibility.

• Vintage/Retro styles. History repeats itself and there is no exception even with interior designs. Styles that have been popular in 1920s and ‘30s, ‘40s, ‘50s, ‘60s, and ‘70s cyclically return to fashion.

Accessories and furnishings reminiscent ‘50s diners that are a particularly popular variation on the retro look in casual dining. Choosing theme or collection is the most powerful key to unify popular styles in casual dining furniture. A seafaring theme can bring the seaside to your home by placing tableware, furniture and art and display Americana can function as conversation pieces.

Portraying Personal Styles in Casual Dining Furniture

Casual dining furnishing has been increasingly predicted to be a popular style in the present days. These styles not only bring out comfort to families and guests but also portray the personal style of the owner through the dining furniture designs. The present day popular styles in casual dining furniture are built to last and may be used readily. Moreover, apart from the comfort, functionality and durability it provides, it may also be used alongside any home décor while still providing balance to the room. Casual furnishings also maximize comfort and utility eliminating unnecessary complex details and particular accessories in furnishings.

Making use of upholstered chairs, rectangular and softly curved tables bring out a casual vibe to the room. Rounded tables are suited for small spaces since they bring out more seating while rectangular tables are fit for narrower and linear rooms.

Colors also portray a necessary role in casual dining since it provides emphasis to a serene environment in the dining area where families and guests can enjoy the meal and their time together. Neutral colors for instance like brown and gray are related to casual dining so as soft pastel pink and yellow and the deeper hues of green and blue.

To make the room an apparent place to live in, textured and natural fibers such as cotton and wool, wicker, rattan, antiques and recycled pieces may be used. These textured and natural fibers create a relaxed and casual atmosphere for the family and their guests. Mixing and matching these fibers may also be very attractive and functional.

More Popular styles in casual dining furniture

Below are some popular styles in casual dining furniture:
Country style – This type of style came from the designs of early American and colonial eras. The give a rural and country feel through a laid-back interpretation of the classic styles of American and French country.

Cottage style – This type of style represents reused and recycled material although giving a feel of informality and being imperfect make the room appear old and loved with marks of wear and tear.

Shabby Chic style – This type of style exhibits a balance of elegance with time-worn pieces. The signature of this style is the color white combined with a mix of patterns, architectural details and vintage accessories. This mixture creates a comforting aura of a grandmother’s house.

Ethnic style – This type of style is using décor that reminds the history of the owners, where they came from. Décor is composed of pieces that have an ethnic sensibility allowing the viewer to know the family’s ancestral past or memories of their fond visits and travels.

Retro/vintage style – This type of style scopes the designs of 1920s and 30s, 40s and 50s, and 60s and 70s returning to fashion. Furnishings and accessories reminisces the popular variation of the retro look in the casual dining.

Apart from the popular styles in casual dining furniture mentioned, themes and collections provide strong vigor in casual décor. Teacups and other china for instance looks better displayed or quilt collections on the wall exhibiting the personal taste of the owner. In using casual dining furniture mixing with themes and collections, surely the surroundings will wrap your meal time with a very comfortable and warm mood.

References

Furniture Shopping Tips

What You Should Know Before Buying Furniture

Furniture Shopping Tips: The Best Secrets For Furnishing

Read More
plastic hanger
Remodeling

Do you want to move your plastic hanger?

There is no doubt that plastic hanger is definitely the best ally to be able to hoist all our paintings and decorative elements of the bathroom or kitchen without opening holes in the walls. Whether plastic hanger strap or magic plastic hanger, it is thanks to this practical option that many people have been able to save large amounts of money on minor repairs after completing a lease.

But what would you do if I told you that you can still save more? Even the expense of painting can stop being a problem; you just need to know how to remove plastic hangers so they do not leave a trace. If you want to know how to do it, then, do not stop reading this article until the end.

First of all, why should not you use more nails?

[one_half_first]Small repairs are definitely a factor in every home that; when they pile up, can quickly ruin our budget. It is what is known as the snowball effect; where small things accumulate and end up becoming a big problem. That is why the need arose for an alternative to the nails and screws on the wall; especially on the more delicate walls such as the bathroom. [/one_half_first][one_half_last][/one_half_last]

plastic hanger
plastic hanger

And, although there are many more options as much or more efficient than the plastic hanger tape; the people found in it an almost perfect solution. This is because, although the repairs were not so expensive, and the job positioning them did not bother the neighbors with the sound of a drill. The traces of them were more visible than the holes; And much more horrendous.

But how could it be solved without ruining the painting and often the wall? For there are several alternatives; although we will tell you the two most efficient: First you will learn how to remove the traces, then we will explain what kind of plastic hangers you should be using today.

Everything with the final objective of you to stop opening more holes in the wall, we are in the XIX century; it’s time to modernize your techniques.

3 Options to remove plastic hanger

There are three very effective ways to remove remaining debris after removing a plastic hanger strap; but first let’s see how you can remove the tape more efficiently.

For this you will need the following materials:

  • Hair dryer
  • Knife or spatula
  • Olive oil

Many people use only a knife or spatula to quickly remove the plastic hanger. However, it is there that they comment on the first error; which often ends up meaning more repairs or a new coat of paint. The key is to patiently remove the plastic hanger strap and for this you can use two powerful allies in this task; one you get in your kitchen and the other in your bathroom or room.

Olive oil (although there are other more efficient oils) is excellent for sliding between the wall and glue; Works as a lubricant and, combined with the heat, you will get an almost perfect peel off the first try. The heat applied by the hair dryer is excellent for removing vinyl or stickers left by children; not only on the wall, also works on the wood of the doors or the glass of the mirrors.

So if you have a decorative vinyl that you no longer like, you know the most efficient technique to remove them! But let’s continue talking about plastic hanger straps. Remember to apply heat to the dryer very closely, and you will not need to use too much oil; maybe a small amount similar to 10 drops may suffice.

Remove Adhesive Rests with Alcohol

Ethyl alcohol tops the list because it is the most economical and easy to get when you want to eliminate traces of glue. In addition, it does not cause any damage to the paint and is not a chemical that requires special handling.

It is perfect for the walls in the bass and, if you have previously applied the technique of hot air and olive oil; then ethyl alcohol is the perfect alternative for those small remains.

Alcohol + Fabric Softener

The second option you will find is the same ethyl alcohol but this time in combination with another element at home: the softener. Although there is no exact portion of each at the time of mixing, a ratio of 50:50 will be more than sufficient.

This technique was discovered when we wanted to remove the wallpaper in a house; Thanks to this combination, we were able to get rid of all the paper on the wall with almost no trace left. Obviously it was necessary to apply the new coat of paint. But if you want a more effective solution because alcohol does not seem to turn out to be 100%; here is the one that may be right for you.

Turpentine

The third and last option, to remove all traces of glue on the walls definitely after getting rid of your plastic hanger. Turpentine is less aggressive than thinner; however, that does not mean that your painting will not be compromised.

This is why it is best to use it on surfaces where traces of glue remain after removing a plastic hanger; but not a surface covered with paint.

The walls of the bathroom or the glass are some of the surfaces that best serve as an example where it could be used. Especially in the internal glasses of the cars; since the traces of glue are difficult to erase.

Use plastic hangers that are easy to remove

There are several products that are designed not only for a firm grip, hold a lot of weight; and be invisible. They are also easy to remove. That is, although there is a clear trace after removing them from the surface in which they were; this debris can be easily cleaned.

There are many brands available of this type of products; one of the most recommended, are the products of the famous brand 3M. These are the favorites of many people because they leave virtually no trace; Of course they are not the cheapest alternative you can find in the market.

Final Tips

Although final objective is to save us the hard work of opening holes, disturbing the neighbors with so much noise; and avoid having to spend on repairs. You should be aware that not everything can be held by plastic hangers. It is true that some of them are so powerful; which can hold heavy mirrors.

However, before running the risk of a huge, heavy mirror crashing against the floor of the house; it is best to open two or a hole in the wall and place a firmer grip point.

After all, there are many ways to seal those annoying holes in the wall; here at Decorating Visita Casas we have several tutorials about it that you might want to see.

You do not have to spend so much money on repairs if you follow the advice we give you in our articles; so dare to read and let us know how you found this information.

References

Command Wire Hooks Value Pack, Medium, White, 7-Hooks

Command Picture Hanging Strips Value Pack, Medium, White, 12-Pairs

Command Picture & Frame Hanging Strips, Large (24 Pair)

Read More
replacement windows
Remodeling

Vinyl Replacement Windows: Cutting-Edge Window Technology

Replacement windows are specifically named and are different from newly-constructed windows because they are not actually take the old window away; you just reinforce them with another material, either for an aesthetic finish, for added strength or endurance, or both (unlike newly-constructed windows, where you literally rip-off the old window and totally replace it). There are many kinds of materials used for replacement windows; but depending on the require finish, you may have to stick to one of the kind of material for you home.

Aside from wood, vinyl has been one of the most popular materials for replacement window use of as late; because of its structural stability and general smooth texture. It is also this apparent compatibility to replacement window use that makes it perfect; especially when you want to create a nice clean finish that is incomparable to other kinds of materials, such as aluminum. And you can install it by yourself; if you want to know how, just keep reading this article until the end.

Everything about the Vinyl Replacement Windows

[one_half_first]Vinyl used as a material for replacement windows has been known as one of the most efficient in terms of noise and energy reductions; again compared to most other materials used on windows. The plastic-like structure of vinyl also keeps the room warm during winter and cool during summer, when combined with an air conditioning unit. But you have to be very alert when acquiring one; there are many scams to the order of the day and it is very easy to fall into them. Also, before you spend money on asking a “specialist” to install a new window; you should consider installing it yourself. So let’s start by identifying a quality window.[/one_half_first][one_half_last][/one_half_last]

Keys to Buying a Real Vinyl Replacement Windows

Already stop buying white windows

Most people when they hear the words Vinyl Replacement Windows think “a white window would look perfect here”; It is true that white is the color of minimalism par excellence, but white windows look really cheap and poor quality.

Vinyl can sag

A lot of vinyl windows will tend to sag and heat, so be aware of that.

Beware of bait and switch

Advertising flyers would say “Windows installed from $99”; but once you go to them, they will tell you that the window they speak of is a 1’X1 ‘which can look good in the bathroom.

Once you ask for a more normal size window, they will tell you that the price is $300. So, it is best to note that no one has bought one of these windows for $99; but do not fall into that kind of baits.

Single hung is a step down from double hung

Many companies will tell you that a single hung window is more expensive than a double hung window; it may be true in that store, but it is not the absolute truth. Study the offers in the market before making a decision.

Mechanically fastened is lowest quality

A lot of these Windows are welded in the corners while others are mechanically fastened; but these last ones are always a bad option when it comes to quality. That is why you will always see offers from them.

Low E is good, but be aware of the price

It is good that you have low E in your windows, but do not let them overload your price in an exaggerated way; the same goes for Argon.

Beware of aggressive close tactics

Once you say “okay, thanks for your time, I’ll think about it”; Most marketers will jump like a tiger and tell you something like “if you buy it today, you will get an additional 10% discount.”

Depending on the initial price, it might be worth it. But remember that the installation price starting 2000; was around $200 – $230. Today, there are unethical companies that will want to charge you up to $ 1000 for a double hung window.

In addition, you can have sellers lower their prices even 6 times; so the key is to be as aggressive and subtle as them.

Installing the Vinyl Replacement Window

The first step is to measure the window in different spots; so you have a good idea of what you are dealing with. Just remember that houses that have been built in the ’50s or even’ 60s; they may have three-quarter inch plywood on the outside instead of half-inch plywood, which is the standard measure nowadays.

The vast majority of windows come with an installation kit; but obviously you need some materials not included. The most important element of all these is polyurethane foam.

If you are replacing a solid wood window whose fence is in good condition; then you could reuse that same element for the installation of the new window. However, if it is fixed very uncomfortably or if it is very heavy; you can use a saw to cut it several times and be able to remove it more easily.

Once the picture on the wall is clear of debris and clear; you can continue with the installation of the window. And the most important step before starting is to place the handles in the window but without screwing them.

The window technology will determine what the installation process will look like hereafter; you may need to screw in the structure, or perhaps you have elements that allow you to place it under pressure. At this point, you may need the help of another person while you take care of leveling the window; everything will depend on the size of the window you are installing.

Now you only need to moisten the edges of the window so that the polyurethane foam has better adhesion; the drying time varies by manufacturer, but usually is one hour.

Do not skimp on foam; remember that it will also work as a sound insulation.

Final Tips

Although not strictly necessary; it is a good idea to use the small pieces of vinyl to seal the holes left in the frame after using the drill.

Remember that you must insulate the edges of the frame when making the last repairs to the wall; all this in order to have a good conservation of the temperature and to isolate of the external noises.

So it is good that you cover every opening, only then you can say that the final work is ready. Always perform the sealing process first on the inside, then on the outside.

If the replacement window allows you, then make it as light as possible; remove all parts you do not need at the time of installation. Just by applying this little trick you can even turn a two-person job into one-person work.

Always use masking tape when applying sealing foam to the new window or any other element; especially in the outer zone. If your outer wall is made of bricks, you will notice that several types of sealant will be needed; so you need to cover the window frame, otherwise you will spoil the frame and aesthetics of your new window.

References

Custom Window/Office Graphics – Indoor/Outdoor Vinyl Graphics?

Vinyl Windows | eBay

Shop Windows at Lowes.com

Read More
Remodeling

Hallways of most homes are usually left undecorated

Sadly, in Western culture the detail of decorating the hallways is completely ignored; many people spend their time, money and creativity on large or significant stays. However, it is obvious that however small the space of the entrance corridor may be; there is always space for beauty, and to create an atmosphere that prepares the guest both to leave and to enjoy their arrival.

How are you going to decorate your hallway? Of course, you do not really decorate a hallway near a room that does not really have any general design or motif, like for example; Hallways leading to basement rooms or closets. But decorating hallways can be just as rewarding as the decorating rooms themselves. Artworks depicting sceneries and landscapes are some of the best artwork to use to spice up you hallways; and if you want something more than wall candles and framed art, you might consider going for the most unusual type of decoration. We have tons of ideas for your hallway; would you like to know some of them?

Learn how to have a beautiful home from start to finish

[one_half_first]Small metal sculptures, which can easily be drilled onto your hallways’ walls can give that style and elegance that wall candles can provide; and sometimes even better. Motifs for metal sculptures like flower or botanical life are the most commonly used metal sculptures. Just do not forget to blend them into your rooms’ general theme. Special techniques on decorating by means of playing on an area’s focal point can also be applied to decorating hallways.[/one_half_first][one_half_last][/one_half_last]

Hallways

Techniques like the wainscoting effect; Where you put your observer’s attention to the bottom half of the hallway’s walls rather than the entire wall itself, can be applied to further give style to your bland hallways.

But which technique is the best to choose? That is the most frequent question people ask; the second most frequent question is how much will it cost me? As we at Decorating Visita Casas we are accustomed to working with a tight budget; so do not worry, here we tell you all the secrets you need to know. Just remember the following: the hallway is the cheapest part of the house to decorate.

Identifying the type of aisle we have

The influence of form on decoration is something we cannot ignore; if we are in front of a straight corridor it could produce an overwhelming feeling of length. It may also be a corridor with an “L” end; In this case we do not have to worry about the depth unless it is very long, but the angle of rotation. This will be the one that attracts attention, so we must think of an element that allows you to appreciate it well from both directions.

The width is also important, if it has more than 1.2 meters; then we can place some furniture that allows us a space of at least 90 centimeters to walk freely. If you have a wide enough aisle, then you should consider recycling decorative elements; That is to say, to apply a decorative element of a stay to your corridor, thus you will maintain the harmony.

Some of these elements are:

  • Chests
  • Shelves
  • Shoemakers
  • Low Furniture
  • Chairs
  • Tables
  • Artworks

But remember that the corridors do not need furniture, their function is to communicate rooms; therefore, although the furniture you add may be functional, your main function will always be to decorate.

Lighting instead is very important in the corridors, there are many decorative possibilities that this gives us; but we have a point later focused solely on that aspect.

Optical illusions

The main problem when decorating a hallway is its length; greatly reducing the space to move you can create a feeling of suffocation or suffocation.

To avoid this, we must take into account some decorative tricks. The first one is to avoid the use of horizontal lines. Many people turn to wallpaper or other decorations on their walls; in the corridors it is necessary to take care of the subject of the orientation of the lines.

This rule also applies to lighting. If you choose to use fluorescent tubes, it is important not to place them in the direction of the corridor, this accentuates its length. Instead, if you place them perpendicular, you will make the corridor look brighter and shorter.

Wall fittings

Do not forget that any decorative element you place on the wall will be appreciated from a very short distance; to avoid a visual shock to anyone who admires it; you can use elements smaller than a painting.

In fact, you could skip the use of pictures and instead place small photographs; Items to hang things or the aforementioned chandeliers. Thus you will divide the distance of the corridor in different points of interest.

Colors

Although colors are a key element in decoration, the intensity of the tonalities will directly affect the spatial feeling. An intense color ceiling will appear to be located lower than it actually is; that is something that seldom interests.

Long walls should always be clear, so they will appear to be more separated; however, the end walls should be darker, or at least have darker complements.

Illumination

The lighting should accentuate what we want to convey with our decoration. If we want to make a hallway look shorter, longer, taller, or have several points of interest; Lighting should reinforce that goal. If the bulbs illuminate towards the ceiling, you can create the feeling that the ceiling is actually higher; a very useful technique when you have a low ceiling.

Although applying the above concept to the inverse would make the ceiling look lower; the real way to deal with a very high ceiling is by placing a hanging lamp. Although you must take care of the width of the lamp, it is important that they always light down; so it will appear that the ceiling starts where the lamp is and not where it is fixed.

These lamps also help the corridors look wider; all you have to do is make sure they light up the walls. At this point we must talk about the candlesticks, it is true that they have the ability to “alter the ceiling height” but also the width of the hallway.

The less they protrude from the wall, the more efficiently they will fulfill their function of creating points of interest; since they will not be detracting from the corridor.

If you are lucky enough to have a natural light source that points directly to the aisle, take advantage of it! It is the perfect tool to create a good spatial division.

Place a plant, a chair and a reading table; Even if you will not use it, you will create a welcoming and welcoming atmosphere, as well as worship. All with a little natural light that can be reinforced at night by placing a lamp on the reading table or a lamp just above a candlestick.

What style is the most popular to decorate the hallways these days?

Nowadays the style is used a lot with minimal elements. Picture frames with thin black frames on a white wall. White and bright lights pointing from top to bottom and towards the walls. A long but not very wide table and, on the top of that, a plant with a message of welcome. It is the most economic and popular style, stands out for its versatility in allowing play with the tonalities of the decorative elements; and is characterized by being modular.

In any case, you should not bow to the most popular of the moment; Take advantage of the natural aura of your home and design a space with little money but with much love and hospitality.

References

25+ best ideas about House Entrance on Pinterest

70+ Foyer Decorating Ideas – Design Pictures of Foyers

Entryway Ideas – How to Decorate Your Entryway

12 Ways to Enhance Your Front Entry

Read More
Grapevine Wreaths
accesories

What are Grapevine Wreaths for?

We often appreciate grapevine wreaths when we see how it uniquely adds beauty to where you like it. Mostly, they are placed on the doors on Christmas Eve; because it is closely linked to the religions and the birth of Jesus.

However, can you decorate any moment of the year with one of them? Grapevine wreaths are actually available in stores with the varying sizes from 2 “to 18” in diameter. And there are more to grapevine wreaths for you to use artistically. Although undoubtedly; one of the most lugubrious occasions in which they are worn, is during funerals. But that only demonstrates the versatility of the same, however; today at Decorating Visita Casas, we bring you a little more of their history, how to make yours and what other creative use to give them.

Because grapevine wreaths are not just for Christmas

[one_half_first]They can be used as a window treatment. You can make use of the wreaths by placing it on the window. Have the wreaths be embellished with ribbons; and twine around them or make use of the dried flowers or even fake flowers, silk butterflies to add decors to your wreath. Then place hooks or long nails where you can hang your wreaths at the top of the window; placing one wreath at each end or if you have a wider window add another decorated wreath.[/one_half_first][one_half_last][/one_half_last]

Have a ready-made, ready-made or from discount stores. You can use this fabric to drape through the wreaths and have the fabric hem along its sides; and with the use of hemming tapes, finish the edges. Measure how long you will want the fabric to hang and how wide your window is. After you have your fabric ready, you can now hang your grapevine wreath as a window treatment.

And that’s just one of the few ways you can use it. But maybe we will go very fast; so, what do you think if we first talked about how to build your own grapevine wreaths from scratch; so you do not have to spend money unnecessarily?

Make your own grapevine wreaths

Although it is obvious what we are going to tell you, it is equally important to point out; and is that the larger the grapevine you use, the more voluminous the wreaths will be at the end. The smaller ones are great for decorating the interior doors of the house. The doors of the bedrooms or even the top of the mirror in the room.

The more grids are those that we can use for the treatment of windows. But now let’s learn how to make a circle with a medium-sized grapevine. The secret is in letting the grapevine dictate how the wreath will be; for this you will need grapevine that is still “green” otherwise it will simply break into your hands as you fold it.

Just keep in mind that even if you use a noble grapevine, though there may be branches that will break; so do not worry and just start to shape the circle. Once you have completed the first circle, you only need to take one of those branches and wrap it around. In that way, the circle will maintain its shape in a natural way.

Keep in mind that you are not looking for perfection, that is; a circle lacking in character. And that’s what we mean when you say you should let the grapevine dictate the rhythm and final appearance of the wreath.

You will notice then that the grapevine begins to be easier to manipulate and; when that happens, it’s time to start giving him that twisted look that we all like. Remember that this is a job with a simple grapevine, thin and not very long but; what if we want something more complex?

Making Great Grapevine Wreath

For this type of Grapevine Wreath you will need elements of gardening safety and some tools or materials; but the end result will definitely be worth the effort.

Materials to Make a Larger Grapevine Wreath:

  • Pruning shears
  • Wire
  • Gloves

Defining the size of the Grapevine Wreath

This is the most crucial step; you should choose the thickest grapevine but be able to bend without breaking it. Learning to choose the right one may take some practice; many people do not take a single piece but two or even three, then the joints using the wire. But the true desired result is achieved using a single large piece.

Once you have defined the size you will have, it is time to make use of wire and pruning shears; not an easy job but never try to fight against the grapevine. However, tighten it firmly so that it does not come loose while you are placing the rest of the branches.

Winding and Tucking

The key is to always use the longest vines first; you will even notice that some elements are thicker than your “base circle” but okay. Remember that size was defined with one that did not threaten to break.

It is very important that you use gloves for this process; from your own experience I tell you that, the chips can be very painful. And a very important detail is to try to use as little wire as possible at this point.

Decorating Your Grapevine Wreath

The final details are the most crucial. They will define what type of Grapevine Wreath you will have. Being so linked with the different religions of the world; some may seem a little out of place depending on your decor. So keep the following guidelines in mind.

Placing Candles in the Grapevine Wreath

The circular shape symbolizes heaven and eternity; this form is reinforced with the placement of lights in the four cardinal points of Grapevine Wreath.

This decoration is used mostly in Grapevine Wreath which is not vertically placed on a surface; but lying on the ground. Had you ever thought of placing a Grapevine Wreath on a table? Well now you know what is possible and what you will transmit with that decorative concept.

Heaven and eternity; a decoration very useful for a romantic dinner or a family reunion; which does not have to be associated with Christmas.

For this you must also implement candles of certain colors and place them on the Grapevine Wreath; although it can also be used according to the Catholic traditions of the sixteenth century.

In that sense, the candles should be lit progressively every Sunday; the candles in this way signify the light of hope brought by Jesus Christ, and for this purpose the Grapevine Wreath may even be blessed by a priest.

The meaning of the Grapevine Wreath

The symbol of the Grapevine Wreath as such is divided in both shape and color; seen in detail we can say that:

  • The circle: It represents eternity in having no beginning or end.
  • The green branches: They represent hope and life.
  • The four candles: The light of hope that Jesus Christ gives to every person in the world.
  • The Red color: It represent God’s love for humanity.

The meaning may vary from one religion to another; but the use of the technique with which they are created, is currently being applied to windows as a source form of protection and decoration.

We would like to see the results of your decorations with Grapevine Wreath; so do not hesitate to send us a photo of your work!

References

Christmas Symbols and Their Meanings

Amazon.com: Darice GPV10 Grapevine Wreath, 10-Inch

Grapevine Wreath | eBay

Read More
Surfactant
How tos

How to Remove Surfactant Leach | Decoraring Visita Casas

The leaching of the surfactant causes stains, and glossy brown spots that appear on the outside of a latex paint; surfactants are not necessary in the manufacture of paints, they evaporate and they do not belong to the ingredients of the painting. They do not cause any harm so you do not have to worry too much. Leaching often occurs during cool weather conditions or the day before the weather cools.

However, just because there is no harm to health; it does not mean that they are visually pleasing; in fact, surfactant leaching is easily interpreted as a house with “diseased” walls. It is important to know how to treat them efficiently to prevent them from appearing regularly; so here are some tips so you can eliminate them completely, both inside and outside.

But, why do they appear?

[one_half_first]The first thing we must do to solve this problem, is to understand it. Spotting occurs when moisture condenses into the new paint and extracts the surfactant quickly. This can be avoided when taking the proper precautions when painting. Most of the time this leaching condition cannot be avoided especially when you live in a cool and humid place. Sometimes, there is nothing you can do when you know you’ve tried everything you need to do to avoid it.[/one_half_first][one_half_last][/one_half_last]

So the best way to deal with them is to know that they regularly appear; in any case, it is good to keep a reserve of paint constantly, the walls always need finishing touches as they are always stained.

Surfactant

How to treat the problem on interior walls?

The walls inside the house that suffer from surfactant leaching are the ones that present the greatest difficulty; when there is no good air circulation, the problem can be and will be recurrent if a definitive solution is not taken.

To get to that point, the first thing to do is eliminate all trace of surfactant leaching; this is achieved with the following materials:

  • A cloth
  • Bleach
  • Ammoniac

Depending on the color of your wall, you may find that bleach may be more effective than ammoniac; but in any case, you must moisten the cloth or rag with enough liquid.

Another option is to fill a spray bottle with bleach or ammoniac; after having moistened the entire area affected by surfactant leaching and its adjacency, begins to rub with the rag.

This way, you will see how the stains disappear completely. Remember that you are fighting a living organism, so you need to “eliminate” it and also prevent it from reproducing.

The problem of the walls in the interior is that the conditions of the environment lend themselves so that the fungus regenerates; so it is necessary to take some forecasts when repainting.

These are some helpful tips you can do to prevent surfactant leach from appearing:

  1. Do not paint if weather conditions are below 50 degrees or during late afternoon.
  2. If blotching and stings appear you can rinse it with a garden hose.
  3. Most of the time weathering removes the stain itself for a couple of months.
  4. Avoid painting during late afternoon.
  5. Do not paint during spring season and fall.
  6. Do not paint during rainy days.

Use oil base paints if you live in a humid area.

The type of painting will be your greatest ally to prevent surfactant leaching from appearing again; you can even find paint that fights the formation of this horrible fungus.

Also, remember that:

  1. Leaching should not affect the durability of the paint.
  2. A dish detergent and sponge can also be used.

The spotting happens when humidity condenses on the new paint and draws the surfactant quickly. This can be avoided when you take proper precautions when applying paint.

Another great alternative and that could even help you create another decorative concept in your home is to use lime paint. Thanks to this old painting, the problem of surfactant leaching will not be something that you have to worry about.

It is a great alternative to give your house a more vintage look and you do not have to worry about the color; using natural pigments you can get practically any color of your preference.

Removing surfactant leaching from exterior walls

The outside can be a very complicated area, especially when surfactant leaching occurs due to natural causes at a certain time of the year. It could be said that the same climate helps to eliminate it; but if he did it in its entirety, then he would not appear again.

The first solution is to use water under pressure on the surface, this will eliminate traces of surfactant leaching almost immediately; the next thing is to apply the paint. Remember that the paint must be applied in climatic conditions that allow its correct curing; otherwise you will suffer the same problem again and again.

What do I do when I do not want to paint the outside wall?

Even in a brick wall or especially in the small stairs that precede the main door, this kind of “enemy” can be formed. Obviously, not all exterior walls can simply be painted. For this there is a protective chemical that will prevent the new formation of surfactant leaching without altering the color.

This solution is ideal to apply when you have a brick wall or something similar. During the winter especially you will notice how the moisture seems to expand through all the joints and even the bricks.

The first step is to eliminate that accumulation of saltpeter, the most efficient way is using a steel bristle brush; with the scrape the entire affected area until it releases the remains that cause the spots.

Once all the white stain has been removed, it is washed with running water and allowed to dry the wall. Only then must apply the protective anti-humidity primer; does not have color, so the aesthetics of the wall will be protected.

Other reasons why surfactant leaching is formed in the exterior

Many times the reasons are given for the manufacture of the house. Drainage as well as irrigation systems can cause serious moisture problems; the same can not only be seen in the exterior but in the interior.

We as Decorating Visita Casas had to deal with the surfactant leaching of a very unique wall. The inclination of the soil caused that the water both of the drainage of the roof of the house like of the system of irrigation; will stagnate in a corner. Little by little the humidity was climbing inside the wall to damage the image of the same on the outside; while inside the green mushroom was produced.

The process to eliminate it consisted of several stages:

  1. Remove all badly adhered wall debris
  2. Use a wire bristle brush to remove the surfactant leaching
  3. Apply waterproof anti-leaching protection
  4. Repaint. But for this we had to wait for the most suitable climatic conditions.

The customer was surprised because we did not move the drainage nor did we suggest changing the position of the irrigation system; it simply was not necessary. So when you want to do this kind of repairs, inform yourself first, thus avoiding overhead on the price for unnecessary works.

Also keep in mind that this problem will arise most of the time on the walls facing north; that is to say, those walls that almost do not receive sun during the day.

References

4 Ways to Clean Walls

How To Wash Walls

Home Improvements : Tricks to Cleaning Painted Walls – YouTube

Read More
Garden

Welcoming the Spring Season: Suggestive Green Landscaping Ideas

Remodeling can be a very fun and rewarding activity, especially if it’s your first time; and compared to the other three seasons, spring always represents rebirth, and rejuvenation after the long dark and cold winter months. As we all know, this is the season where ice starts to thaw and vegetation starts growing across the land once again; and it is the perfect season to start trimming those gardens for yet another splash of marvelous green landscaping. Only in Decorating Visita Casas, we have decided to bring you a collection of ideas to build a beautiful spring passage.

Of course, do not forget that these are only ideas, even if some of our advice is very pleasing to you or you do not like it at all; it is good that you take a whole walk for all our opinions, since they will be of great help to obtain that inspiration that you look for so much.

Bringing Spring Magic to Your Garden

[one_half_first]Determine the combination of colors that you plan to use in the entire landscape. Since it is spring there are quite a variety of different floras that can produce the exact color combinations that you want; and all you need is imagination to know which colors complement each other properly. Oh, and do not forget that green is always included in your color list.[/one_half_first][one_half_last][/one_half_last]

At least that’s the most basic advice we could give you when advising you on building a spring landscape. You have to imagine the design first on paper, laying out the designs according to the total area of your garden; or according to the area that you can cover for your landscaping project.

The designs are usually made of simple shapes that are arranged all around the area; as long as the general layout pleases the eye. If you cannot come up with an accurate model of your plan, you may have to hire a specialist to aid you. But if you want the help of a professional without having to pay an exaggerated sum of money; then just read on, because we will address several concepts with which we have worked and that give a precious end result.

Prepare your garden before spring

Landscaping should begin before spring even comes; only so you can have a scenario suitable to start correctly. The previous preparation is as important as the execution, so pay attention to the following tips.

One of the most damaged elements is grass. It is negatively affected by frost, soil compaction and fungi. Therefore, we must do work to recover it.

The first step to prepare and recover the soil under our lawn is to put out branches; this procedure should be done without hesitation and sinking the gardening tool at least 2. This will bring oxygen to the roots while the soil is compacting.

It is necessary to verify the consistency of the earth; if you notice that you should make it lighter, then you should apply a lime-based soil improve. That besides fertilizing and some good soil; then all the products must be integrated with the gardening tool.

Plants that begin to bloom

At the end of the winter there are plants that begin to bloom, if you have any of them in your garden; to create a good landscaping, and then you must apply fertilizers rich in potassium. This way you will extend the life of the flowers, improve the quality and also improve the quality of them.

A clear example is the plants of Daphne. Its flowering is very fragrant and beautiful, but it looks better when there is abundance. For the rest of the plants that bloom later, it is best to wait for the first shoots to appear before applying the fertilizer.

Plants that have lost their luster

From loss of foliage to scorched leaves and leaves and even fading; the plants that suffer most during the frost seem to be impossible to save.

However, in order to recover them, only a bio-stimulant needs to be added; natural hormones that will increase the levels of nutrient absorption and water in the plant. This type of product also increases the natural defenses of the plant. Allowing to you to recover from the frost, pest attack and even of the drought.

But remember that you must cut off all the branches that have that horrible appearance of burning. And taking advantage that you have the pruning shears in the bush; also you must cut the hedges, everything that excels of its form must be removed so that they continue developing according to your needs. That is, if you cut the hedges at foliage level, you will make them grow taller; if on the other hand you cut the height, you will increase their foliage.

What plants should I plant in the spring for my Landscaping project?

Since we speak of landscaping, surely you will want to plant species that have beautiful flowers; you will also want them to last a long time, so let’s start by talking about a beautiful plant that will last beautiful until summer.

Petunia

One of the most beautiful features of petunia is its variety of colors. From yellow with nuanced and in dark tones including red.

Lotus

It is one of the plants that serve to “upholster”, that is to say; stretch rapidly and the beauty of its flower when it opens completely because it hardly any color green.

The smallest of these types of plants is definitely their ability to change the aspect of the landscape quickly.

Hanging plants

Many people obviate the detail of beauty that can be added hanging plants depending on the angle at which they look. And it is one of the techniques used by landscapers to make the most of space; is to include several plants in the same hanging planter.

That way you not only get more frondiness, but ensure a very beautiful color variety; as one of them loses its flowers with the passage of the months, the hanging flower pot can be rotated to better appreciate the rest of the flowers.

Mixed Planters

The same concept that applies to hanging plants, can apply to much larger pots. At present and for reasons of spaces; many landscapers look for ways to combine several colors and several species in the same planter.

In this sense, the planter itself also becomes an important part of the decoration. For garden corners or even inside the house, it is best to use tall, round pots.

For the edges of the wall where you can create a long decorative line, the planters with elongated rectangular shape are perfect. But what flowers can be planted together?

landscaping

We must place plants that serve both seasons and have a long life; those that last until the summer. One of the most efficient options (since it attracts hummingbirds) is farinaceous salvia; this beautiful plant is one of those that will last until the summer.

Plants should always be placed by the largest plant; if it is a plant of long duration, then it should also be the central figure. Sage splendens is another great choice to place inside a single flower pot. Its flowers also last until the summer and it complements beautifully with the farinácea salvia.

The lower plants can be used as cover for the sides and; although most may bloom only for three months, the green touch will look great with the rest of the colors.

And remember, this is only the work of a planter; now imagine big and then you will notice that the options to create a landscape are really incalculable. If you are a garden lover, prepare your landscape from late winter and start thinking about what plants you will use.

References

Spring garden decor

Garden Decor – Yard and Garden Art

Spring Decorations, Flowers, & Fairy Gardens

Outdoor Décor : Patio, Lawn & Garden : Amazon.com

20 Spring Yard Landscaping Ideas and Beautiful Garden Decorations

Read More
Kitchen Cabinets
Kitchen

Kitchen Cabinet Storage Ideas for an Exciting Home

When you cannot find the things you are looking for, it may be the right time to start remodeling your kitchen. You might need a kitchen cabinet for the easy storage of the things you need rather than putting them anywhere; you will just misplace them later on. That is why it is necessary to start your search to give a new air to your kitchen.

The cabinets are not only ideal for storage but also help keep everything organized. If you choose them well, they can last for a long time and be perfect additions to your decoration. Here at Decorating Visita Casas we will teach you where to start.

Wood kitchen cabinets

[one_half_first]All you need to do is look around before you actually shop for a meaningful storage cabinet. Browsing on magazines and checking out the web will help you find the latest news and designs to choose from. If you choose to design a new home kitchen, all you need to do is combine your creativity with some ideas which you can find in the mall and in other magazines.[/one_half_first][one_half_last][/one_half_last]

However, the first options you should take into account are the wood cabinets. These are not old. They are also resistant and durable; Every time you decide to remodel your kitchen you can give a different approach to them.

Only with sandpaper and paint can you make your cabinets totally change.

The rustic does not go out of style

Kitchen Cabinets
Kitchen Cabinets

Following with wooden cabinets, there are different types of this material that may be perfect for you. The first option and the most used is the pine.

This super tough wood is highly rustic, and you should take into consideration that its brown color is what gives it the perfect finish. I recommend that you do not use any type of paint on top of this wood.

The best choice is a protective lacquer that will shine and protect it. However, if you do not want the distinctive brown color of this wood, then opt for an already processed black color.

MDF Wood

Kitchen Cabinets

This type of wood is excellent for those who do not want their furniture to weigh heavily. And they are ideal for kitchen cabinets.

It can withstand high temperatures as well as pressure, so you can rest easy. Nothing bad will happen with this furniture if an accident happens.

Also, this material is cheap compared to other woods; so you can save money and have a great finish.

Always looking for the economy

When it’s time to remodel any place in the house, we always do it with a budget in mind. And we do our best not to leave.

However, remodeling the kitchen always involves expensive work, in addition to the time that has to be used. It does not matter if you do it yourself. You must be prepared that it is possible that you spend more money than you think.

But there are options that are many cheaper than wood.

Yes, surely you will ask, Nora, why did not you say so before?

Well, ideally you should know the options that currently exist in the market and take the best for you.

The idea it’s when you start to remodel, do it in peace and quiet so you can have the final product that you want.

Introducing Laminates

It consists of several sheets stacked and pressed between them and then placed on a board of agglomerate; in this way a greater resistance is achieved.

It is easy to clean and resistant to contact with cleaning products; has infinity of colors. They are ideal for kitchen cabinets since the least we want to do after cooking have to clean the cabinets.

Lacquers

Lacquered cabinets can be presented with different finishes; either in satin or matte, gloss or metallized. The biggest advantage is that it can be made to the customer’s taste.

Its only defect is that it is a delicate material to hit or touch and requires greater care.

Melamine

This type of material is made by placing a sheet which is pressed onto chipboard.

It can be found in different colors which imitate the wood. This material is the most economical and allows you to create great possibilities of combination.

Kitchen Cabinet Makeover

Kitchen Cabinets

If you are one of those people, instead of completely remodeling the kitchen and getting rid of the old cabinets you prefer to refresh the ones you already have, then read on.

To make refreshment to your old furniture the first thing to determine is:

  • The quality of the same: that is, if they are in good condition, will support a new coat of paint, or wallpaper.
  • If they are adaptable: many people complain about their cabinets because they are too big or too small; Check with an expert if you can tailor them to the extent you want.
  • What materials are you going to use: This part is very important, since you should know what kind of material was used when they made the cabinets? It is important to know if the wood can be sanded, if it can be painted or can be lined.

The best advice I can give you to rebuild your cabinets is to make a design of the place. It does not have to be professional, but if at least you must have an idea of what you want.

Kitchen Cabinets

I recommend that you not only use space wide, but also throughout. Place cabinets on the wall to make the space more open.

Choose a pantry with doors to store the dishes. Have enough space and do not have to move constantly.

Play with the size of the same; Chooses cabinets of short stature to store the food and of great stature for the vessels and utensils.

Do not forget the color

This point is very important because it will define the final finish, the color of the kitchen.

I recommend that if you are going to change the whole layout of it, then you decide on a range of targets, from the stream to the Oxford White.

Instead, if you want to give something more seriousness to space, the gray colors are definitely for you. I recommend the Rockport Gray and the Metropolitan. These will help you achieve an elegant and minimalist space.

Kitchen Cabinets
Kitchen Cabinet

But if you are one of those people who prefer darker shades, then blues and blacks are your best choice. In this case, I recommend the Van Deusen Blue and Black Beauty.

There are also intermediate tones with which you can combine and create the cabinets of your dreams. The green tones are also ideal for kitchens.

But I must warn you, NO YELLOW PLACES IN IT, it has been scientifically proven that the yellow in the kitchens can generate feeling of hunger which is difficult to quench.

Kitchen Cabinets
Kitchen Cabinet

Yes, even the colors we have to fix.

With these simple tips you will know what to choose when remodeling your kitchen cabinets. You do not need to be an expert to achieve this. Only you need good taste and be clear what you want.

And I’m sure your kitchen will be part of one of your favorite places in your home.

References

40 Kitchen Ideas, Decor and Decorating Ideas for Kitchen Design

100+ Kitchen Design Ideas – Pictures of Country Kitchen Decorating

40 Small Kitchen Design Ideas – Decorating Tiny Kitchens

25+ best ideas about Decorating Kitchen on Pinterest

Read More
cracks
How to repair...

How to Repair Small Cracks in Concrete | Decorating Visita Casas

If you have cracks in your concrete, water may seep in most, especially during rainy season. The winter season may also increase the damage due to freezing temperatures and also cause the soil underneath to erode. As soon as possible, you should do something about this before it can cause further damage to your home. Repair this as early as you can and check the other parts of your home; as well as there are many more damages that needs fixing. Now, how will you repair these cracks in your concrete? How will you get your home prepared for the sudden change of weather and temperature?

Everything will depend on the type of crack or fissure we are facing; the key thing is to never consider cracks as a simply aesthetic problem. We must be prepared for the worst; so before looking for a superficial solution, first learn to determine what kind of harm we have in front of us.

A superficial or deep crack?

[one_half_first]Before you begin to give solutions to the horrible cracks that affect your home; first we will teach you how to check if they are surface cracks or if the foundations of your house are compromised. For this you will need a hammer and, although the goal is not to break the wall; yes you must strike firmly the crack in all its extension to rule that the cement behind it has not been affected.[/one_half_first][one_half_last][/one_half_last]

If the wall begins to crumble before your eyes and with simple blows the cement head; then pay attention to what is hiding behind the crack, maybe you have a rusty pipe.

In any case, your problem would not be a small or simple crack; so the solutions below are not for you. But, if the cement does not sit, then continue reading and solve that aesthetic problem together.

Why do these cracks form?

When we see cracks in the walls of our new home after only six months of having acquired it, we have doubts:

  • Have we been scammed and construction is not integrated?
  • Is the life of our family at risk in this new house?
  • Why did we have to touch the faulty house?
  • Is it normal for the entire neighborhood to have cracking problems?

The best way to answer all these doubts is to answer only the last one: Is it normal for cracks to appear? And the answer is yes.

This happens especially in new houses. It occurs during the first years in all construction. The materials settle definitively, the water remains disappear and; Exposure to environmental conditions such as changes in temperature, humidity and earthquakes also favor the appearance of these small cracks.

Thus behave all constructions, without exception.

These small cracks appear on the walls; specifically in the central part of those that exceed the three meters of length.

The area close to ceilings and beams, corners on door frames and corners under windows; all are prone to these small cracks.

No, they do not damage the structure of the building. Nor are they due to imperfections in the design; Deficiencies in the construction process or the use of low quality materials.

However, if it is an old building; then it is necessary to consider more carefully the occurrence of these cracks following the check indications given at the beginning.

But for these small cracks there are many alternatives when applying a solution; here is a list of possible materials you will need if you want to repair them yourself.

Materials for Repair

These are the possible materials that you can use to repair small cracks in concrete.

Spatula: It is the basic element to begin the repairs

Caulking Gun: it’s required to use it in the next step.

Sealant: Although there are several brands, such as Sikaflex; the good thing about this product itself is that it is flexible. Up to 50% flexible and can be painted. Thanks to it, we can cover the small cracks that tend to come out due to the mobility of the building.

Stucco powder: Its great advantage is that it allows us to prepare a more or less consistent mixture according to our needs. For this we will follow the manufacturer’s instructions; But Stucco and water will always be used.

Plastic Stucco: Offers the advantage of coming already prepared and in a white color very easy to paint. It is perfect for small cracks, but is not recommended for deep cracks.

Epoxy products: Small cracks do not always appear on walls only, also on floors. For them, it is best to use epoxy sealants; always follow the manufacturer’s instructions. There is a product A and a product B, which upon mixing, produce the sealant. It is very resistant but not flexible, it also works for walls.

Sandpaper: To eliminate imperfections once the work has been completed.

Cloth or brush: which you will use to clean the surface before applying the sealant material.

Repairing Cracks – Step by Step

As you may have seen, there are many options of materials that you can use to repair those horrible cracks; everything will depend on the circumstances. Whether you live on a very high floor in a building or if the crack is on the floor of the garage, there are several steps that you must follow verbatim in order to have a final result that you can consider a success.

The first one is to open the crack. All these materials have a capacity of adhesion and an expansive quality that is necessary to repair the crack; however, if the space to expand and settle is very small, the final work will be a failure.

For that you need the spatula. You should always expand the crack a bit to repair. How do you do it? Then you must support one of the corners of the spatula maintaining a 45 ° angle of inclination and then slide it through the crack.

This must be done twice, both to the left and right to form a “V” inside the crack. Opening the crack in this way, you will then create enough space for the material to settle.

Then remove all debris and dirt using the brush or cloth. It is necessary to perform this procedure with much patience, only this way you can prevent cracks from appearing again.

Now, depending on your case, use the sealer that suits you best. Although most people rely on the spatula to perform the spreading work inside the crack; others prefer to use a sponge. Both cases are acceptable.

Remember that usually you will need to apply two layers of sealant; but always wait until the first has completely dried before applying the second. You should also sanding excesses once a layer of sealant material has dried.

Once you have corrected any unevenness after the repair, it is time to apply the paint.

Final Tips

If the crack is in the concrete of the floor; it is best to use a hammer and a chisel to make the “V” shape instead of the spatula.

Remember that you can apply a primer to the sealant once it is dry before painting, so you will achieve a color with a more uniform finish.

Although it’s a weekend job, you have to be patient in waiting for the first coat of sealer to dry. Never overload the first layer, otherwise the cracks will reappear.

References

Masonry Work | Article about Masonry Work by The Free Dictionary

Masonry Basics – The Tools You Need and How to Use Them

17+ best ideas about Masonry Work on Pinterest

Read More
Remodeling

Hallway Makeovers: Introducing Design to Your Old, Boring Hallways

The Hallway of most homes are usually left undecorated. Not a strange fact, because their main function is to provide a way to other rooms in the house. But are they just limited to that purpose? Just being a passageway doesn’t mean that it can’t be decorated. Hallways also warrant proper decorating, just like any other part of any home.

The simplest way to decorate any hallway is to apply the same decorating theme of the adjacent rooms to the hallway itself. This could mean coloring the hallway to match the adjacent rooms’ theme or design. Common articles such as plants can also be put on your hallways, just make sure that they don’t get too much in the way. You can even paint the hallway walls with a different color than the rest of the rooms; but be sure that the color compliments the other rooms’ decorations nicely.

The entrance to your house also deserves to be beautiful

[one_half_first]Many people choose not to decorate the facade of the house or not to give much importance; either because of the weather or to maintain a low profile, the facade (including the door) is sometimes left out. However, what comes after the main door can no longer be considered facade or surface content. This is where most people misunderstand the hallway / hallway that precede the rest of the house.[/one_half_first][one_half_last][/one_half_last]

In fact, an undecorated hallway is the anteroom to a house; one well decorated is the antechamber to a home, and you already know the great difference that exists between a house and a home.

So if you want people to feel the aura of your home and feel welcome; here we will present several tips and tricks to decorate that space so far “dead” of your house.

Long, wide or small hallway?

Hallway

Dimensions matter when decorating the hallway that precedes the rest of your house. It is very important that the free transit of all who arrive or leave is guaranteed; but without leaving the space empty.

Many times, we are not even talking about a true long hallway but rather use a 5 ‘square zone species. That allows us to include more elements, not only decorative but also functional.

In any case, what you should always try to have in the hallway of anteroom to your home; Are a series of functional elements that allow the guest to feel from the beginning, like at home.

A thin but ample table where to store the belongings is very well seen; while a place destined to leave the coats, umbrellas, hats and scarves, will add a touch of incomparable hospitality.

If you have enough space to place a table, then do not hesitate to add a plant on it; the green tone and the contact with nature will make you feel more welcoming the place.

And finally, another very important aspect is the intensity of the lighting. Try to be light; a warm light will allow them to talk for a few more minutes before saying goodbye without feeling uncomfortable.

Choosing a Style

If just copying the other rooms’ theme is not enough for you or if you want a more functional way of decorating your hallways; you may want to try putting small decorations on the walls. Objects like wall candles add that stunning elegance and beauty, and with that faint flickering light; Adds an ambience that you can never feel with any other decorating style in your home.

On the other hand, if the decorative style of your house is a minimalist style, then you could make an aura of Genkan; Taking the Japanese style guides, you could create the perfect multicultural and minimalist environment.

Economic elements to decorate the hallway

The economy is something very important to consider, you can have a cozy and elegant space and at the same time save. Or at least not overspend.

When we think about economic elements but that continue to cause a great visual impact, we have to take into account mainly the illumination.

Beyond the intensity of illumination; the quality of the main hall lamp could immediately define the feelings we want to convey to our guests.

It is important that you take into account the height of the ceiling and the distance from the light output to the main door. A very ostentatious lamp will make people feel oppressed just entering the house; while a very small one will simply go unnoticed.

But if you invest the most of your budget in the decorative aspect of lighting, you will immediately notice a change in the hallway; and from there you can choose what other items to add.

As always, plants are very economical and decorative. You can also consider adding a mirror; As long as it is not directly in front of the door, it should not be left behind when the door is opened.

Does the dynamic change if it is an apartment?

The short answer to this concern that many people usually have is yes, yes it changes. Why exactly? Well, having an apartment, you must consider another very important aspect: the panoramic view.

The apartments have an additional decorative element, and it is a bird’s eye view. Whether it’s in the city, neighborhood or a natural landscape.

The detail is that, if the aisle has as a purpose a window from which you can see the view as soon as you enter; it is important that the decorative arrangement you implement is in harmony with that view.

This can be really complex, especially when the colors of the view change at night. At this point, you should not only take into account the corridor only, but that point that people observe at the end as they walk.

A good way to maintain harmony is by combining the colors and shades of the furniture or other decorative elements that you have placed; with the curtains that dress the windows that people see when they arrive.

Creating this harmony will make it easier to tolerate transition, not just from the moment the person leaves the elevator to enter your apartment; But from leaving the hall to enter the room.

Final details to beautify the hallway

The decorative elements to take into account and that will give a beautiful aspect to your corridor is:

Wall cladding: These will add character and better plot the way to decorative level; People will feel welcome and guided by the same walls.

A table with drawers: Allow your guests to leave all their belongings in a safe and invisible place. That way you will forget about them and you will really enjoy them.

A place for coats: Even if your guests do not wear coats; having a place of easy access to them and to the umbrellas will allow you to offer them one in such case that the climate requires it. They will feel well taken care of until the end and will have one more reason to return.

Pictures or photographs: Being able to appreciate art as soon as it arrives will create a sense of calm and tranquility in people’s minds. Just be sure not to overdo it with the frames, especially if the hallway is not very wide.

A plant: As with frames, try not to be too overwhelming in size, especially not to avoid walking freely. But remember that, however small the plant, it will always invite communion and help create an aura where one breathes life.

References

25+ best ideas about Narrow Hallway Decorating on Pinterest

Decorating ideas for small hallways

15 hallway decorating ideas that’ll make coming home a treat

Read More
Kincaid
Furniture

Taking a Furniture’s Splendor to the Next Level: Kincaid Furniture

If you are into fine wood furniture, then surely you have seen and heard the name Kincaid. Kincaid is now one of the pioneers of modern U.S. Furniture’s; Earning its reputation as a solid and reliable name when it comes to furniture service. The company had its humble origins with just five employees on the entire company. George and Wade Kincaid, at that time, began making furniture such as cedar chests and wardrobes in a small building located in North Carolina.

As it was in the modern industrial era, they were not the first furniture makers in the area. In fact, for the next decades to come, North Carolina will be known as one of the hubs of furniture manufacturing business; with almost 60% of all furniture distributed across the country manufactured right at this place. Consequently, this has become one of the tourist attractions in the area; and visitors often stop by furniture shops to look around and find some great furniture deals.

Good quality, traditional styling and moderate price

[one_half_first]Kincaid dictates to its customers. Despite the fact that Kincaid changes its styles from time to time, the furniture that is manufactured is never trendy. Meaning, you are assured that your furniture will not bland in just a few years. It is really difficult to speak only of a Kincaid collection, they have all proven to be wonderful. [/one_half_first][one_half_last][/one_half_last]

That is why, when you want to highlight the magic of these furniture, we must talk about something else. The vision and the truth behind their success, that’s it, the nature with their furniture is made. As they themselves says:

Kincaid furniture it’s not a purchase you make, it’s a promise we make to you.

Kincaid Furniture Manufacturing

Kincaid

Much is said about the manufacture of this type of furniture. Despite being solid wood, great care is required when moving them; Even for those who just buy a Kincaid furniture, this condition may seem strange to them. Or at least we live here in Decorating Visita Casas. When you live the university years, the least you want is a solid piece of furniture.

Then the same thing happens in your first rented apartment; most important is lightness and economy. But to have furniture of the category that only Kincaid can offer; we then notice what it really means to start building a home.

Kincaid does not use plating, all pieces of furniture are constructed of solid wood; and that is the best way to identify an imitation.

The “negative” detail of this type of wood is that it is very prone to cracks or scratches if not treated with care. But it is illogical to think that a piece of furniture is a “bad piece of furniture” just because it cannot withstand this kind of abuse.

However, always given importance to the opinion of consumers and the rhythm of life of the household; now you can get furniture from different Kincaid stress-resistant collections.

Even some Kincaid furniture have begun to use other materials than solid wood; But never, ever, will you find an original Kincaid piece made with plating.

Lifetime Warranty

Kincaid

The lifespan of Kincaid furniture is measured not in years, but in generations. Their collections can be classified as timeless since; despite the progress and modernization of the decoration, a Kincaid furniture decorative concept is still one of the best options.

So if you want to make a real investment and show your grandchildren how to make good use of the money earned; then you should buy a Kincaid collection.

Variety of Collections and Styles

Kincaid

It is too difficult not to extend when you want to cover so many collections. Over 4 generations, Kincaid has been one of the few brands that have been renovated and reinvented itself.

Their style is unmistakable, but the differences from one collection to another are so marked that they simply leave us speechless.

One of its less opulent and yet magnificent collections that here at Decorating Visita Casas we recommend you for its relation beauty / quality / price; is the Elise collection.

We came across a collection built using old techniques (which are the best ones) like the English Dovetails and multi-step hand-rubbed finishes.

All with a very discreet finish and a color so warm that is simply able to turn any stay into a home. The Elise collection is made of solid Appalachian maple; but the character Kincaid achieved with this collection is due to the wax lacquer implemented in each of the pieces.

One of the most wonderful pieces of this collection and that fits the extroverted life of every family today; is your Aura Cocktail Table.

Kincaid

Not only do we speak of a piece that stands out for its uniqueness, many would even say that it is not a Kincaid piece. And it is that in this table we will find a glass top and a mirror in the bottom supported by a metallic frame; But what surprises of this piece, is the circular form of its stop.

At first it was difficult to conceive of it as a work by Kincaid, but then, upon seeing more elements of the collection integrated into a decoration with the Elise concept; we fully understand the purpose of their designers and simply love them.

Create Your Own Collection

Of course, instead of talking about the Elise, Foundry, Montreat or Cherry Park collection; there is another element Kincaid offers us today, and is to be able to create our own collection, our own furniture.

It seems like a dream come true, and you do not need to be a company employee or write them a letter; nor is it a promotion or contest. On their website, Kincaid has the option of building your own piece of furniture.

With different insoles and a very intuitive system, you can order a sofa or furniture with the indications that you have given and they will assemble for you.

What other company of this caliber offers that kind of service?

More than a piece of furniture, a work of art

Kincaid
Kincaid

In conclusion, Kincaid furniture is more than just commercial pieces meant to occupy a space in our living room or bedroom.

The creative geniuses behind their collections are more than cabinet makers looking to fill their pockets for money.

Every Kincaid product is a work of art in itself. Combining beauty and functionality, Kincaid offers us furniture packed with positive energies perfect for the home.

Although they work with solid wood, their furniture upholstered in immaculate white is extremely famous; As well as highly quoted, as is the case of each of the pieces of the Artisan’s Shoppe collection.

It’s time to put aside cheap, disposable and uncomfortable furniture. Start building your home and your legacy for generations to come; and start with the

References

Elegant Interior Design – Solid Wood Bedroom Furniture

25+ best ideas about Solid Wood Furniture on Pinterest

Royal Elegant Solid Wood Traditional Post Bedroom Set in Cherry

Read More
Furniture
Furniture

Learn to Set Important Furniture in the Room Properly

When decorating any room in the home, it is important to take into account some elements to know how far we must place them from the accessories. Harmony must play a very important role. That is why it is necessary to create an environment with organizational concepts; which must be established before starting with the decoration using furniture as a starting point.

Each piece plays a key role. That is why you should make the most of it. Set important furniture in the room properly goes beyond just creating a comfortable space. It is about finding the basis of the decoration and continues from there. Here at Decorating Visita Casas, we will teach you the basic principles that you must follow to achieve a harmonious space in each place of your home.

How to accommodate the furniture of the house?

[one_half_first]The first thing to keep in mind is that the style forms a fundamental part of this decision, and will affect the way in which it is decided to accommodate the furniture. In addition, it is also necessary to know the activities that will be carried out inside the room as well as other key points, such as doors and windows, before planning the distribution. Many times it happens that we place furniture very close to the entrances, and end up being an obstacle and we end up getting rid of them and we break with the harmony of the place.[/one_half_first][one_half_last][/one_half_last]

Location, location, location

The location is a very important factor when it comes to knowing how to place the furniture correctly in any room. Since the circulation should be totally comfortable for anyone.

The same will depend on the size and size of a piece of furniture. For example, Ottomans are perfect for any space, as they are of any size and dimension; they are also perfect for storing.

In the case of the ottoman, in addition to adapting to any space, they are perfect in terms of utility. That’s why you should look for furniture that is dynamic, not only for space but also for storage.

Keep in mind that less is more, and this applies also for decoration.

Always go from highest to lowest

It is important that you know before decorating, what you need, and do not get carried away for what you want. Accommodating the furniture of the house, should always be made from major to less importance.

For example, in the case of the room, first decide where and in which direction you are going to place the sofa, then the coffee table, and finally the accessories. Keep in mind that these last items of decoration should be easily accessible.

In the case of the kitchen, opt for a fridge-stove-sink organization. This way you can have everything within reach and save space.

The correct location of the furniture of the house, helps you to avoid not only bad distribution, but you will make cleaning easier and thus aesthetics will look better, and the corner will not be forced.

The Feng Shui Effect

In the universe of Feng Shui is important both matter and energy, which although we cannot see it many times, can change our life.

The same thing happens when applying to furniture or decorating a room. According to this philosophy, it is necessary that the space has a light and freely circulating environment; in this way energy is transformed into the home.

That is why; there is furniture or accessories that we must pay attention to the time to accommodate them in our home.

  • Mirrors: if you want placing the mirrors inside the rooms or in wide walls, let me tell you first that it’s not recommended. First because they divert and redirect the energies, if they are in a room you will not be able to have a full rest.
  • Lamps: many times we see a corner and we automatically think of a plant, however, the best option is to choose a lamp. Every space in the home must be fully illuminated for the energies to flow.

You do not need major renovations

Forget getting rid of your old furniture, and spend money on expensive, custom-made furniture. It does not sound bad, but if your budget is tight, do not worry, the truth is that you do not need major renovations.

I recommend that the first thing you do take a piece of paper and divide the spaces of your house. If you have the plan the room it’s much better. Just draw some pictures of the furniture so you know how to distribute them.

Main entrance

When it is time to decorate the main entrance you must take into account that this site should always be clean and clear. That is why you should not choose a lot of furniture for her.

A couple of plants and maybe a few light bulbs is enough. Leave the wooden furniture for the garden and opt for an entrance without them.

The main room

The most important furniture in the room is the bed, then the bedside tables, and finally the closet. However, too many people want to have a vanity; that is why you should choose one that is just the right size so that the room does not look overloaded.

Remember, the room should be a place of rest, the fewer things you have better.

The kitchen

In order for the kitchen to be seen with a better organization, we recommend separating the elements, in the oven and stove on one side and the refrigerator and sink in another corner.

You should always leave room for a working inn and especially take advantage of the height of the walls for storage.

Try that each accessory has its space, and the dishes are in place; so you avoid the mess and you can keep the kitchen clean for much longer.

Bathroom

Although the most important elements of the bathroom cannot be modified (toilet, shower, washbasin) unless you do a total remodeling; it is important accessories that complement them.

For example, the glass doors of the shower. As well as the metal bins to avoid the accumulation of odors.

A mirror that is also a store is a good idea to keep all those necessary things in the bathroom.

This place is also ideal, to play with the height of the wall, opts for shelves for storage.

Dining room

An essential part in the house; Here you only need a dining table large enough for your family and a few guests.

I recommend that you decide for a rectangular table so you can add more chairs in the meetings; However, if your space is summarized, then opt for a round table, but always buy at least two extra chairs.

If space allows, buy a counter to place food trays that do not fit on the table. Thus, you can also use it as storage space.

These small but useful tips will help you optimize the space in your home, making it more comfortable and dynamic.

You really do not need to make a big expense to implement this, if you need to get rid of furniture, you can organize a garage sale or post them on any page of buying and selling products to earn extra money and also gain space.

References

How Office Furniture is Accommodating the New Workplace

How to Plan and Arrange Furniture in a New Home

When to buy new furniture for new house

Read More