Pictures
Photos

Wall Anchors for Larger Pictures | Decorating Visita Casas

Do you want to hang your pictures on the wall, but then you remember that it is made of beams and plaster; and you are afraid of cracking or holes in it? So, today is your lucky day; as we will give you some tips on how to hang your favorite pictures, photos or images without splintering or shredding it. We will not resort to the old way, that of taking a hammer and hitting a nail, but we will apply some much better but simple methods to do it.

Here are some things you can do to hang your favorite pictures or paintings on the plaster wall of your kitchen. Just remember that you must always take special care. All things have to be done with the right techniques so do not rush and always remember: patience is a virtue, and good luck!

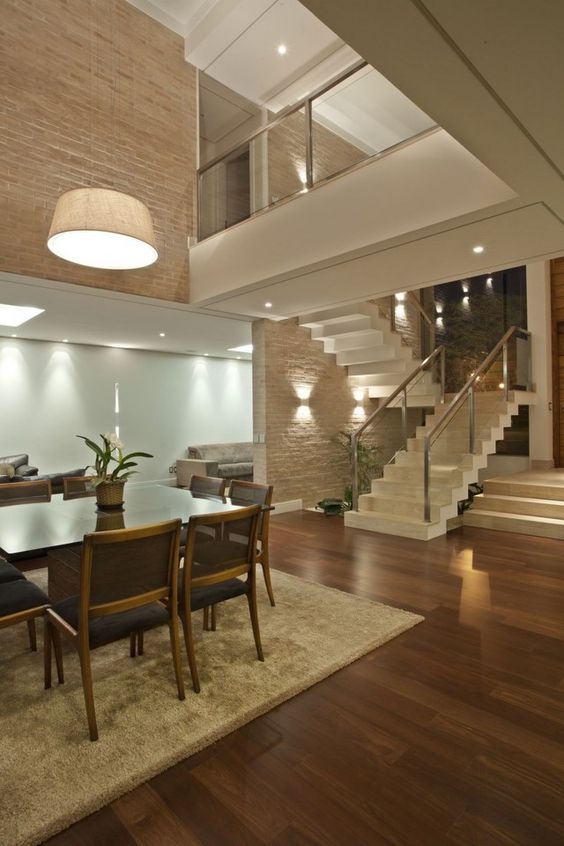
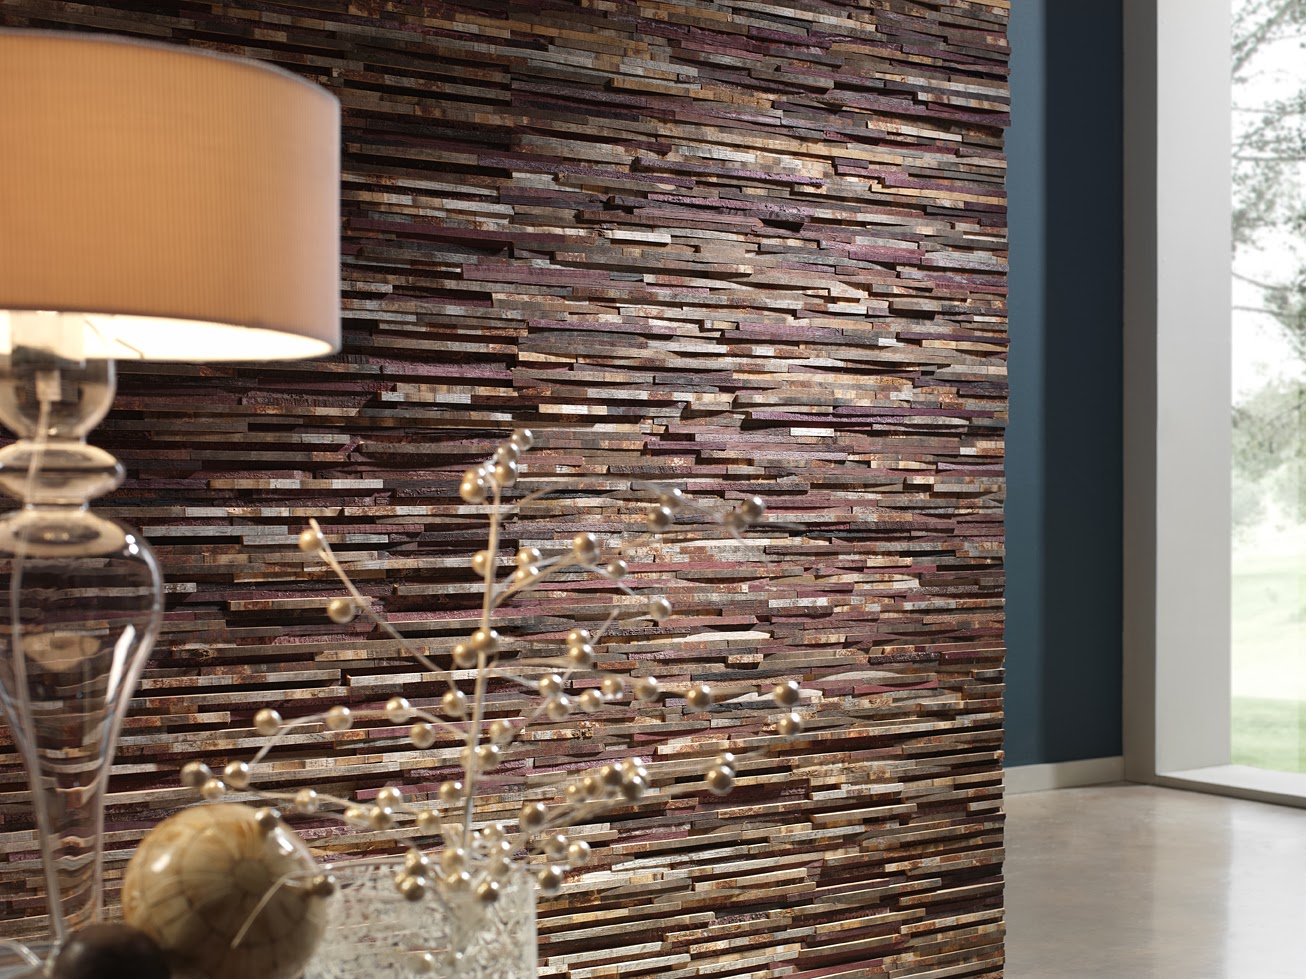
Pictures on the Walls of the Rooms

[one_half_first]For large tables, the use of anchors or supports is most advisable; because they help extend the surface of the wall at the time of insertion of the screw. Using electric drills to drill the holes prevents the chipping of the wall. Also need to know that hanging the pictures on plaster walls is not an easy task; however, there are some tips that you can apply when doing so. [/one_half_first][one_half_last][/one_half_last]

Start by taking into account the following recommendations:

  • You should always drill a hole to guide you. These guide holes help you get to the hole you will make in the plaster wall. It does not matter if it is not very deep; you only have to cross the first layer of plaster in this one.
  • Never use screws only on drywall.
  • Never pull off the bar. It’s the worst thing you can do, because you could bring with you some of the plaster layer on the wall. Focus on the wall columns instead of the surface wood; which is basically the one that holds the plaster in place.
  • To find the column inside the plaster wall, it strikes with the knuckles. You can easily hear where the hollow of the wall is. But you can use a column finder for this task.

Also, you can follow the next advices. They are all very useful too.

Pictures

Heat the nail

One method known for several years to hang things on the wall is to heat the nail you are going to use. After heating it, you nail it to the wall. This will help to make it easier to penetrate the wall surface without cracking more than it should.

Use tape

One small trick you can use is to use tape. Placing a small piece in the wall helps to make the surface layer of plaster do not crack so easily; it basically helps to hold it in place. Before placing the tape, go first where you will insert the nail, and after that; place the tape at the chosen point.

Pictures

Find a good support

The next thing you need to do is find what kind of frame support you should use. Read the following carefully:

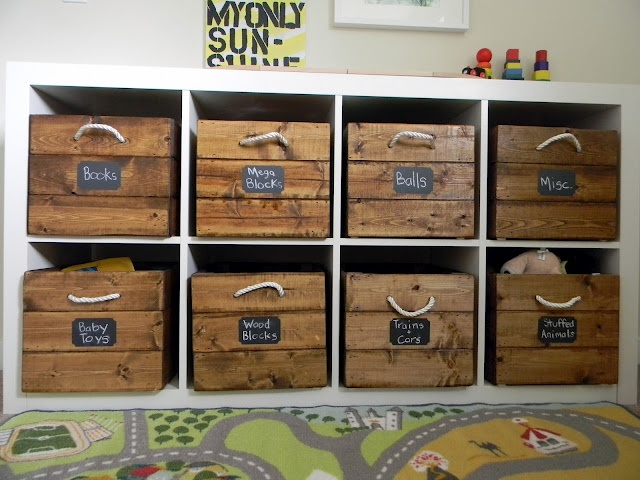
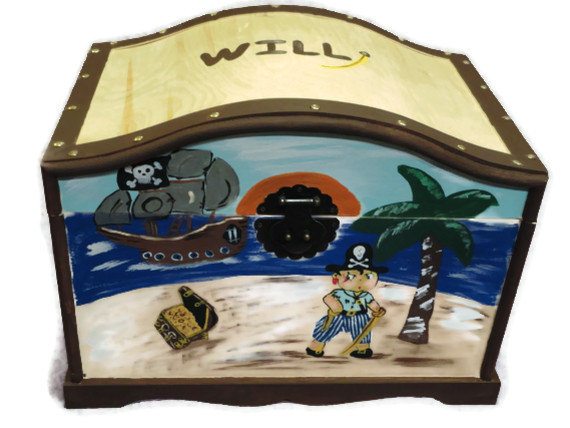
If you are going to hang a small box, use one of those little hooks (the ones that are adhesive on the back); in addition to the nails you chose to do the job.

The only problem with this type of hook is that it has a high probability of damaging the wall; but of course you should be extremely careful when nailing it. We also recommend doing it at a 45 degree angle for you to get a better result.

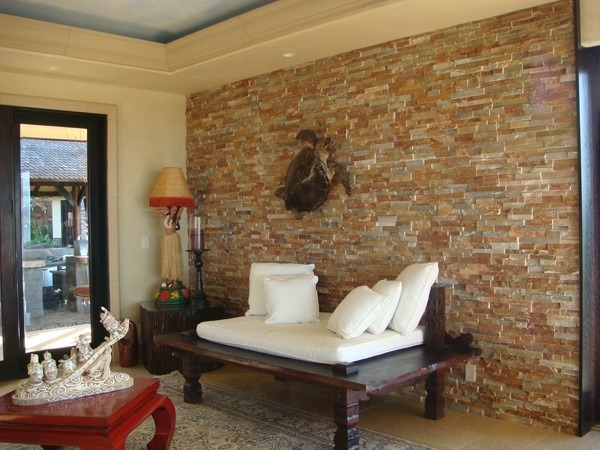
How to hang pictures on your concrete or brick walls

It is unpleasant to note that when you hang a picture on a hard wall such as concrete or brick, this will eventually loosen; and we run the risk of our decoration falling. So other support methods for this type of wall are needed.

Concrete walls require powerful tools to drill enough and hold the hook that supports the frame. This will depend on the hardness of the wall to be drilled; and a hammer drill and concrete drill must be used.

This type of drill has the property of vibrating providing a slight but constant blow of the rotor against the cement; as would a hammer which is fragmenting the cement to allow the drill to enter.

What do you need to drill a concrete wall?

They are much harder than a plaster-coated wall. Be sure to use a special high-performance drill. There are long or short depending on the thickness of the wall and allow a better evacuation of the drilled material.

Also, you will need use ram plugs or dowels. Small tubes of plastics or wood where you will introduce the screw that will support the weight of the frame or support must have the same diameter of the hole to be drilled.


In addition, the bricks are hollow, so it is possible that the ram plug enters more and is lost between the empty spaces that is. Use a special mixture of plastic cement to fill the hole at the time of introducing the billet, to give it more resistance.

Also, if the frames are small and light weight, it will suffice with the screw, if it is a bigger and heavier frame; it is advisable to resort to additional supports.

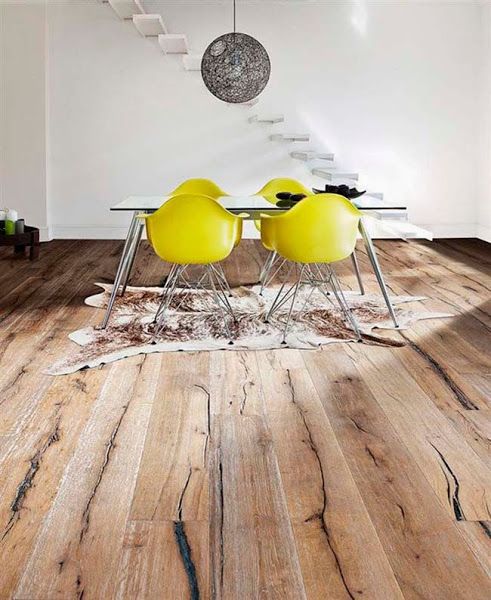
Do it yourself: Hanging up your pictures

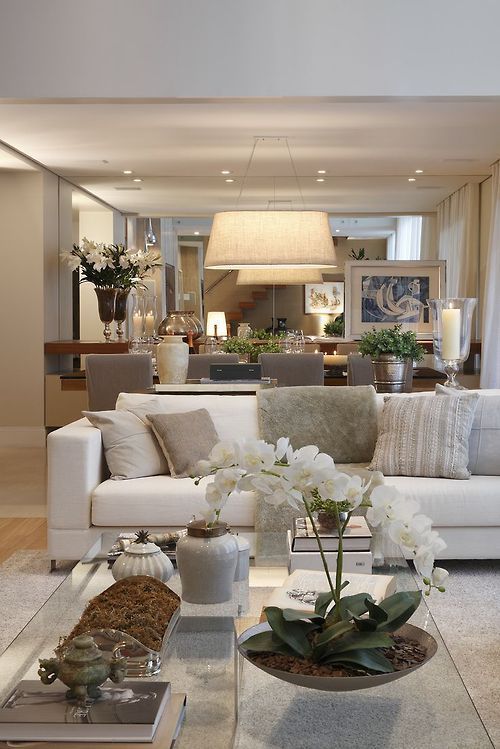
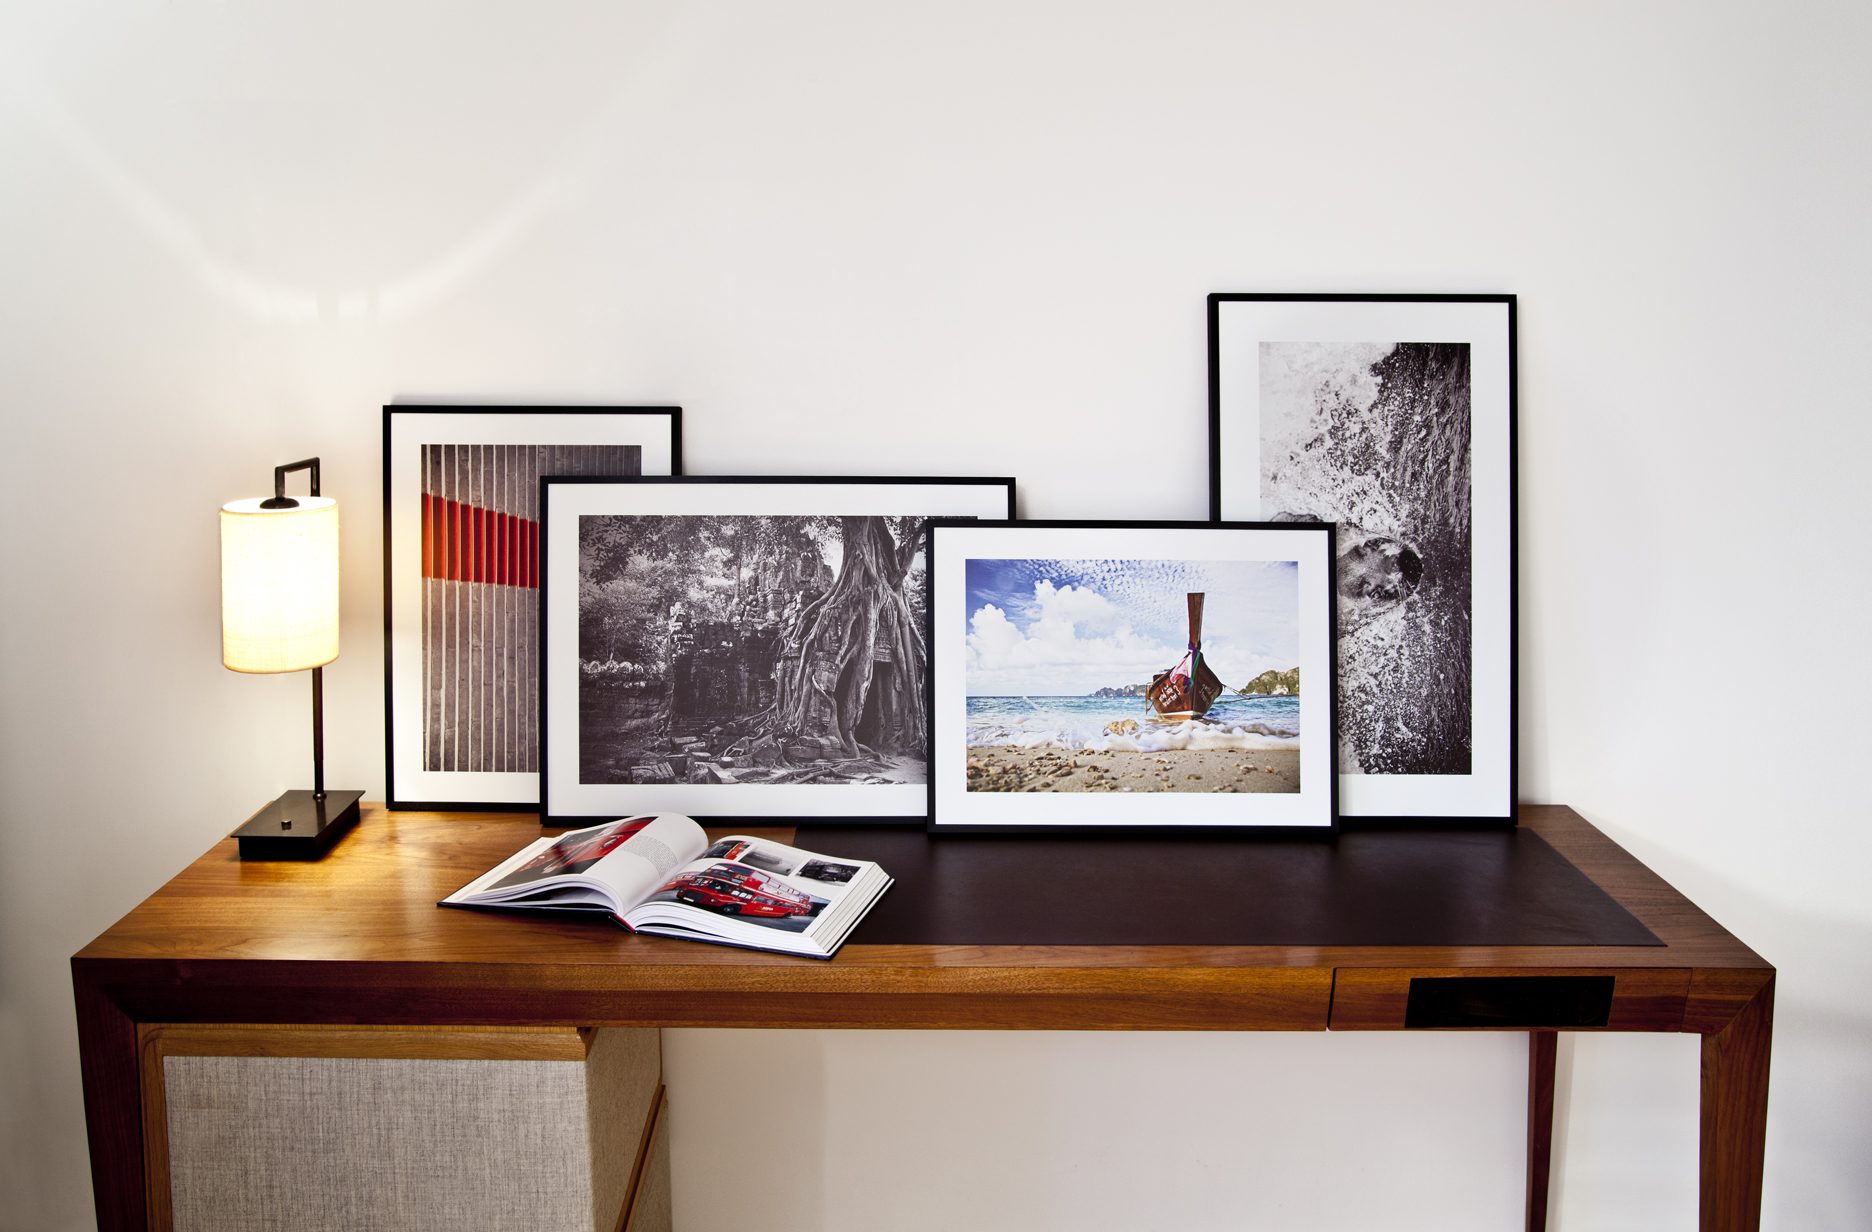
The best way to make your home, apartment or even a small space look good is by decorating it. Certainly the furniture gives it a pleasant atmosphere, but the pictures or photos you hang on the walls will also do their part.

If you want to hang your pictures or basically anything (such as bookshelves and ornaments) on the walls, do not even think that just taking the hammer and a nail will suffice. It would be a big mistake on your part.

If you insist on using those materials you will probably create cracks or holes with larger diameters than the nail itself. Coated walls usually have a coating of plastic lime and pairs plaster in their lining. This type blending can coat durable walls, but it cracks and cracks easily.
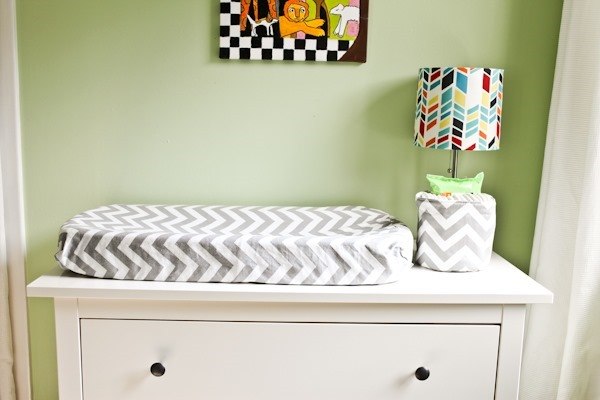
Now it’s easier

Before, the houses were built with moldings of wood known as beams for paintings. Placing hooks in different parts of the beams was something very normal. The pictures or the small decorative pieces were hung from the hooks, so it was not necessary to make more holes in the plaster walls.

These days, it will be easy to find out what other types of hooks are available to you in the market, and it is much better than simply taking a hammer and a nail. One of several types that exist is made of very hard plastic materials; in addition to they come in different sizes.

Finally, a high strength adhesive

A high strength adhesive is placed in the contact zone, which becomes sticky once it is wetted. Let the adhesive settle for a couple of minutes and then place the plastic hook on the wall.

Firmly press the adhesive against the wall and let stand for a while. After this the hook will have enough strength to resist the weight of whatever you want to hang onto it.

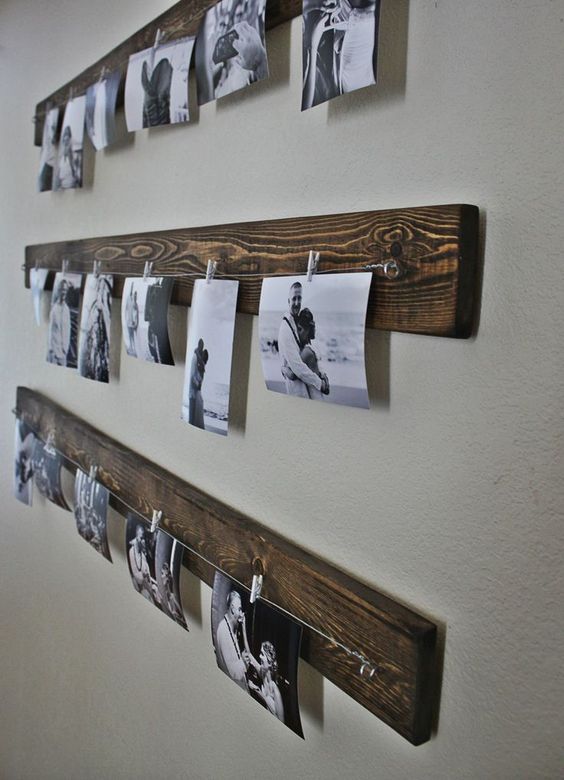
Among other models of supports are those based on rails. They are of different lengths and are placed on the highest part of the wall, where they hang the threads and hooks that hold your pictures.

These strands can be made of different materials, and their choice will depend on the frame weight or frame you wish to hang. There are steel for heavier or nylon pieces for the smaller ones.

You can vary the length of the thread depending on the height. These rail brackets can cover the entire length of the wall, ideal if you are one of the people who like to change the position of your paintings regularly, simply slide the top hooks side to side.

References

7 Wall Anchor Types: Uses and Applications

Choosing and Using All Types of Wall Anchors

Anchor Wall Concrete Retaining Wall & Landscape Blocks

Hollow & Drywall Anchors – Anchors – Fasteners – Hardware

Read More
Garden

How Do I Keep Cats Out of my Mulch?

Cats are lovely, but who wants to maintain a garden that is persistently messed up by cats? Many people become upset because of cats that camp out in their gardens. Cats drink from pond or water basins, eat your plants, bump into furniture, urinate anywhere and specially in carpets, ruins your plants especially your flowers, scratch furniture, and, even worse, leave poops around your place. For sure, you do not want to take care of a garden that has a revolting odor. Worry no more because there are tested ways on how to keep cats out of your mulch. Consider the following tips to keep them out of your yards.
Small garden
• Make the mulch uncomfortable for the cats. Usually, cats love to lay in a fresh and soft soil. Whenever they feel like peeing, the nearest patch of soil is where they answer the call of nature. It is good to spray prickly stuffs on your mulch. Pine cones or pine needles can be sprinkled for the cats to avoid.

• If that doesn’t work, you can raise a level of danger for the cats. Go get some supplies that have sharp ends. You can use wire nets that will surely make cats despise your mulch. Try putting down some chicken wire as well. If you do not like wire netting, use stone mulch instead. The texture of this kind of mulch is hard for the cats to dig in. It surely is uncomfortable for them to lie on.

• Unpleasant smell is a no-no for cats. Pet stores have animal manures that you can use for the soil and, at the same time, to get rid of the cats. Ammonia can also be used since its smell is repelling.

• Utilize fences. Put up fences around your garden. Ordinary wooden fences are not enough since cats can still find their way on skipping into your yard. It would be better to use an electric fence. Surely, cats will no longer risk entry and lurking on your mulch after being shocked.

• There are motion detectors available at your local hardware stores that you can have to scheme the riddance of cats. You can install one in your yard so that when a cat enters, it will automatically spray water into it. With that, the cat will stay away from your beloved garden.
Gardening
• Using a cat trap can be your option. Pet stores have different kinds of cat traps that you can use. Whatever type of trap it could be, the important thing is that whenever a cat enters into it, the traps closes for the cat to be locked in. It is up to you if you are nice enough to look for the owner of the stray cat along your neighborhood.

• Calling animal control has to be the last among your choices. Hire professionals to help you out on your surging problem.

Always take note that in order for your mulch to be efficient for your plants and for your garden in general, you have to take really good care on your gardening. If the cats are your problem, you have to be responsible enough to have them out of your yards.

Read More
Rosa Wood
Furniture, Wood

Enjoy the class and style of palisander rosa wood furniture

The Palisander Rosewood furniture (or Rosa Wood in some places) is a very rare and very classy style of furniture. Made from wood found only in the Indian Peninsula, the Palisander is considered to be rare and hard to come by wood. It has been considered a high class wood reserved for the elite, but has recently become much more available to the middle class.

Now days, there are many different types of furniture that are made from Palisander. The most common is the Palisander chair which is made by Dutch interior designers. These chairs are usually decorated with beads and other ornaments to accentuate class and convey a sense of wealth. Often these chairs have no arms, which creates more spacey feel and is surprisingly comfortable. Do you want to know more about this magnificent element? Well, keep reading, because there’s a lot more to tell!

A wood of purple color

Rosa Wood

[one_half_first]The Palisander Rosewood is generally a dark color with an exotic pattern. However, it is well known that according to the intensity of the light being subjected; The Palisander Rosewood can look like really dark purple, which is amazing! It’s a very hard wood so it takes a lot of effort to carve out and use to create furniture. [/one_half_first][one_half_last][/one_half_last]

However, once the furniture piece is complete; that means that the furniture is very durable and very unlikely to break. The wood is also much more water resistant than most other woods.

There are too many fakes and / or imitations woods used to make Palisander furniture. Nonetheless, real Palisander wood is easily distinguishable by its amazing, classy look and feel.

Rosa Wood

Its authenticity can also be distinguished according to the grain of the wood which is pronounced and of dark veining; which is why the floors with this wood have so much character.

Another unique feature of the original wood is its odor; a slight but exquisite odor of flowers that is slightly sweet; hence the origin of his name really comes.

In short, it is a very beautiful element that adds to all decoration an impressive value; As long as it comes from India, however, other countries like Brazil, Indonesia and Madagascar.

Features of the Rosewood from other Countries

Rosa Wood

If you’re looking for a piece of furniture that will really stand out, project class and elegance; then a carefully selected piece of furniture from different country to India could be a wise choice and just the job.

Having a piece of Rosewood furniture in your home will really add to the overall style, feel and décor. And with so many people all over the world are enjoying this furniture, why should not you enjoy it as well?

Directly from Brazil; you could enjoy a hand-carved piece with brown tones mixed with reds or a much warmer purple than that of India.

Madagascar on the other hand offers us a variety as exotic as the Palisandre; So much so that in 2016 many cases of contraband of this wood along with exotic animals, were frustrated by the authorities.

The tone of the Rosewood from Madagascar is red. At Decorating Visita Casas we recommend you do not try to buy this Rosewood species; unless it is to a friend or acquaintance or in an antique shop. This is because in 2010 a moratorium was issued stating that trading or exploiting Rose Bois is illegal.

Rosa Wood

Finally we have the Sonokeling which is very similar to the Rosewood Palisander since it comes mostly from Pakistan; but it is not cared for with the same discipline as that coming from the Indian Peninsula.

Many times people will try to sell you Dalbergia Retusa or even Dalgerbia Oliveri saying that it is Sonokeling; so it is important that you learn to differentiate them, the price difference in the market is very important in these cases.

Do not be fooled!

Small details such as softness, porosity, and intensity of brown color are crucial to be able to differentiate Palisander Rosewood from Nicaraguan or Guatemalan Rosewood.

Other Features of the Rosewood

Rosa Wood
Rosa Wood

Since the Rosewood molecules extremely close together, the furniture made with it is not only solid and durable; it is impressive how heavy the furniture made with this wood can become.

Reaching the figure of 2.4 lbs. / cm2.

The most expensive and elegant ships are made with Rosewood and also balms to treat infections with worms.

In fact, this same natural ability to fight against parasites; is what makes furniture made of Rosewood resistant to the attack of fungi. Another factor for which it is so durable.

Large Parts Made with Rosewood

Rosa Wood

Although it is true that furniture made with this wood is amazing; one of the great tests of its quality are the musical instruments.

And although the standard price of a guitar made with Rosewood oscillates the 2000 $. Unique pieces like the guitars of Miguel Rodriguez Jr. 1981; can be auctioned for $ 50,000 or more.

And this price will only increase over the years as the Convention on International Trade in Endangered Species of Wild Fauna and Flora (CITES) only increases its strict policy to protect the few remaining specimens of these trees.

Alternatives to Power to Enjoy the Rosewood at Home

Beyond being able to have a stroke of luck in an antique shop that allows us to buy a piece of furniture made with Rosewood; or to win an auction in which we receive a famous guitar (which we do not know how to play).

Rosa Wood

There is the possibility of being able to enjoy furniture made with Rosewood legally and at reasonable prices. Eye! Reasonable, but neglects the concept of cheap.

A Rosewood furniture is an investment for generations to come, it is not cheap; but you can buy it with a little effort and hard work.

With $ 400 or $ 600 you could completely renovate the bedroom; A price much more affordable than a $ 2000 guitar. However, you will notice that many of the economic options are in Asia.

The problem is sometimes in making the shipments, for that reason, we recommend that you try to adapt to your geographical location.

But remember that there are many scammers on the market and when you go to an online store; you may suffer some inconvenience and do not receive the product for which you paid.

The way to avoid such scenario is to be guided by the reputation of both the seller and the page itself and its security policies.

For person experience of us Decorating Visita Casas, we recommend not guiding you by the names of the shops. Just because a store is called Rosewood Furniture, does not mean that all your furniture is made in that wood.

Rosa Wood

And their prices can be exorbitant when it comes to authentic Rosewood furniture. Of course, they often come from Malaysia and not from India.

And you are lucky to own a piece of Palisander Rosewood? If so, please share a photo, we really love it!

References

Rosewood Furniture Clearance Sale! | Chinese Rosewood

Welcome to Rosewood Furniture Inc. | Exquisite Fine Works Of Art

Asian Rosewood Furniture | Oriental Furnishings

Rosewood Furniture – Home | Facebook

Read More
Soap Dispenser
accesories

Install a Wall Mounted Soap Dispenser as Wish it

Many people happen to lose their patience with the use of bar soaps. Especially when there are several people who share the same bathroom; which implies that they share the same soap. Remember the phrase “the next time you use the soap think about this, what is the last thing I wash, and what is the first thing you wash?” Since I heard that phrase, I decided to install a soap dispenser.

The point is that they are much more hygienic, elegant and help us to keep the spaces tidier. Of course, we cannot ignore how practical they are. And although they are not perfect, in Decorating Visit Houses we think they are the best option; Accompany us to discover a little more of them, maybe so you decide to install yours.

From the Bar to the Dispenser

Soap Dispenser
Soap Dispenser

[one_half_first]The first step to leaving behind the bar of soap is to make the transition from the liquid soap. Many well-known brands maintain their anti-bacterial properties despite their liquid presentations. In fact, if we judge them at the chemical level, we can conclude that liquid soaps are much better than bar soaps.[/one_half_first][one_half_last][/one_half_last]

Why? Well, let me explain. Bar soaps are made by combining water, surfactants, preservatives, fragrances, dyes or pigments and special ingredients such as moisturizers; All combined with an alkaline base and a fatty substance. This is how the final product of detergent characteristics is born.

Soap DispenserHowever, it is due to the nature of this same chemical reaction; that bar soaps have a PH which always rounds a value equal to 10.

A PH of 10 is not the most act for the washing and care of sensitive skin, and I am not just talking about babies; Children, young teenagers and especially girls have very sensitive facial skin.

The liquid soaps due to their consistency, allow a handling of the elements in their elaboration much more versatile; just for that detail, liquid soaps can have a pH value of 4, more than suitable for the care of sensitive and delicate skin.

In addition, you cannot deny that the bar soap, as it is finished; It becomes so small that it simply slides out of the hands. When the bar soap is already too small to hold it comfortably, one of two things happens:

  • We get a new one and that small piece is there on the bathroom shelf and sticks to the sanitary slab.
  • We let you free to navigate the shower and go down the drain; which then causes obstruction problems in the pipes.

Liquid soap does not present either of these disadvantages, however; brings us a new challenge that we must overcome, but once we do, then we can say that it is perfect.

The Great Disadvantage of Liquid Soap

Soap Dispenser
Soap Dispenser

Obviously, the major disadvantage of using liquid soap is the accumulation of dispensing containers. Even if we are people who live by applying the rules of recycling at home; the real solution is to minimize the consumption of such containers.

Also, if we buy the larger dispensers, then we face another problem; and is that their bases are very wide and may not fit comfortably in the sink. This is a problem that mainly affects people with little space in the bathroom.

This is where the definitive solution comes in and what makes liquid soaps the best alternative; the fixed soap dispensers.

They not only minimize the accumulation of plastic containers because some use dedicated soap bags that come in a standardized measure according to several models.

They are also great decorative pieces that add a level of elegance far superior to our bathroom; And not only to the bathroom, we can fix them in the kitchen and also in the garden area.

At present there are simple, minimalist and yet very beautiful models in which the liquid soap is poured directly from the container.

However, there are also electronic or automatic; which have a proximity sensor which activates the mechanisms of the dispenser to release the soap.

Both are perfectly functional options; which one to choose will depend on your availability of money and the nature of your decor.

I only advise you not to buy the electronic if you are an impatient person; this model takes between 2 and 3 seconds to apply enough soap when you close your hands.

Installing the Soap Dispenser

The installation is very simple, although it is good to consider the amount of use that will give you daily to choose the best method of installation.

Screws or glue? It is the question, because it is always better to choose screws. Although opening more holes in the wall is not something you like to do to anyone; when you have children that will be using the dispenser, it is best to use the screws.

Even if it is a dispenser with proximity sensor which do not have to touch to be able to use; it is best to use screws since you will want to protect your investment, remember it was not free.

Of course, there are also dispensers that can be placed directly on the sink as if they were an additional faucet.

But if you are going to install a wall that children will use, always use screws; especially if it is one of the models that also allows dispensing toothpaste and has a space to place the toothbrushes.

Where should I install my dispenser?

Soap Dispenser

I guarantee that when you install your first liquid soap dispenser you will want to have one everywhere!

They are very practical, and if you used the luxury dispenser which is also a decorative piece; then you’ll want to bring that elegant look to the rest of the house.

Although I must say that there are places in which it is not convenient to have them because they will not really look good; not to mention changing the dynamics of the room.

It is not about turning your house into a hospital-like place, but about adding comfort and hygiene to the most critical areas.

Therefore, the places where you should install one are:

Soap Dispenser
Soap Dispenser
  • The bathroom next to the sink, a soap with a low pH and that is dedicated for the face.
  • In the shower, a more consistent, anti-microbial soap; you can also buy the double or triple dispenser, so you will have soap, shampoo and rinse in a single dispenser.
  • In the garage or workshop, it is good that you have a dispenser for these areas where you do work; Make sure it is a strong soap so you can easily remove the grease. Do not worry too much about the presentation of this dispenser.
  • In the garden. If the children are playing or if you are working on the plants and you must attend visits; a dispenser in this area will allow you to be more efficient. When you tell the children to come and eat, wash your hands first! You can see that they actually wash them.
  • In the kitchen. A soap that takes care of your hands and is anti-bacteria; so you can avoid cross-contamination in your kitchen.

All these dispensers are best to always fix them to the wall; we really recommend this feature because they will look smarter than on a table.

And what if I want to make my own dispenser?

Soap Dispenser
Soap Dispenser

That is also a valid alternative!

Although we leave it to the last point because we prefer to use the finishing dispensers in silver or chrome; you can make your soap dispensers at home using glass jars and the dispenser of an empty liquid soap bottle.

It is a simple mechanism that works by suctioning the air, so you do not have to worry about using a specific container. A little hot glue, some decorative elements and ready!

I recommend that you also use hot glue to attach the dispenser to the sink; that way you should only open the lid every time you want to pour soap and, if you used glass, it is best to take care of your work.

Soap Dispenser
Soap Dispenser

Although one of the disadvantages of making your own dispenser; Is that you are limited to building it oriented with the base down and fixed to a horizontal surface.

References

Bathroom Accessories You’ll Love

80+ Best Bathroom Decorating Ideas – Decor & Design Inspirations

Bathroom Décor + Shower Accessories

Small Bathroom Decorating Ideas

Read More
Living Room
Decoration

Simple Ideas to Reinforce your Living Room Decoration

Living rooms are considered the center of all homes. It provides access to almost every corner of the house. A place where the whole family can have fun together; and especially where you can entertain and welcome guests. The Living Room provides a window to almost all of the key functions of one’s home, and it is very important that we know how to decorate them properly and neatly.

Before you start decorating your living room, you must first know the entire room’s “specifications”. Is the room spacious? What is the general shape and layout of the room? What kinds of furniture will nicely fit in the room? Does the room provide enough natural lighting? In other words, you must know what your living room is actually doing before you even consider creating a specific theme for the room. That’s why, here at Decorating Visita Casas; we bring you this series of tips so you can add more power to the decoration of your living room, even if there is already an established decoration.

Decorating the Living Room like a Designer

Living Room

[one_half_first]After knowing your living room’s “specifications” it’s now time to decorate the room. If you have already picked a certain theme for your living room; then you may already start decorating the room according to what is prescribed in the theme that you have just chosen. However, it would not hurt to have some nice living room decorating ideas while you’re at it. [/one_half_first][one_half_last][/one_half_last]

That’s why they first step is to check how sunlight affects the brightness of the entire room. If the room is too well lit because of the rising sun; you might want to add a few translucent curtains when decorating your living room’s windows.

This way, you are able to filter that bright sunlight from entering the room freely, and at the same time, adding quite a nice touch of the morning sunlight that slowly scatters across your living room.

Remember that we are decorating the living room as a designer would; for that reason always takes into account first these two elements: space and illumination.

Then, to be able to design a technically correct space at a professional level and at the same time beautiful; you should try to avoid committing some of the most common mistakes that beginners make.

Although decorating is a wonderful experience as we see how an idea in our mind comes alive before our eyes; this process can become very bitter when frustration or nonconformity strikes. If you want to avoid feeling like this, pay attention to the following.

The Color

Color is the third most important element, even if you have chosen a minimalist style for the living room; you should not omit the color. White, beige and gray are neutral or cool tones that give a feeling of spaciousness to every room; but the lack of warm colors will lead to boredom and even depression.

Living Room
Living Room

Add touches of warm colors by taking advantage of the smaller decorative elements that you will use in your living room. Lamps, cracks or a carpet; Can create the contrast you will need so that the passive color of your furniture and walls will not devour you.

Thus you will have a minimalist space but with details that give joy and personality.

Do not Use a Same Element for Everything

To think that everything must combine from the floor to the ceiling is a very common mistake when designing. Combine shapes, prints and materials without fear.

You will notice that this way you will create a more interesting atmosphere and you will turn your living room into the favorite zone of the guests; you cannot ignore the fact that the living room is the space destined to meet with friends and guests. Unlike the kitchen that is the place of common meeting of the people living in the house.

Design the Points of Light with Time

Living Room

Beyond the consideration of natural light, there is the artificial light that will accompany them during the dark evenings. You cannot just stay with the ceiling lamp you loved so much.

Light is the decorative element par excellence; and it is necessary to compensate for the absence of light during the night in a creative way. We at Decorating Visita Casas have seen and designed living rooms that by day have a look and by night another; All thanks to the use of lighting.

Consider adding table lamps, wall candlesticks or floor lamps; so you avoid creating a window-like appearance, which is what happens when you have a single luminaire in the sky of the house.

If you do it in time, you will avoid wiring in sight or inappropriate connections; it is never good to decorate under pressure a space that must be seen every day by those who live in it.

Distribute the art correctly

Placing the frames too high or too low can mean a decoration failure; and is more common than you think. You should place them at eye level so that they can be appreciated by all.

Although you can create a corner of art where they do not depend on straight lines but varies both in frames and in patterns; These dynamic spaces must be worked in the same way as light: with time.

Use the correct size of carpet

Living Room
Living Room

Carpets are expensive pieces capable of renovating a space in a wonderful way. The problem is that, when the correct size is not chosen; at the moment of integrating it in the decoration will be so forced that it will appear to “float” in the decoration; And not in a harmonious way.

Whenever you can buy a custom carpet buy it, if you cannot, then there is the option to cut it according to your needs.

The carpets do not have to be square obligatorily, but what we do recommend the following; Try to keep all the furniture in it, at least the majority.

This will notice the diversity in the decoration but without affecting the balance of the nature of it. Do not forget: it does not have to be square; a round carpet where furniture rests and a coffee table is a great choice.

Do not buy impulsively

Although a decorative element is a reflection of our character; large items such as furniture should not be acquired impulsively.

Planning is necessary before beginning to add any piece of furniture; Even if you get one that was “just what you needed” before you buy it you should study your decoration one more time.

Living Room

Plan the placement of the furniture and how the color of the new element will affect it, will you need to upholster it? Should you completely eliminate another element of decoration? Where exactly will you place it and how will that affect the aesthetics and functionality of the decoration?

These questions must be able to answer them without hesitation; and the only way to get to the answers is to first analyze the decoration and then the anatomy of the furniture: form, functionality and color.

Properly distributes furniture

Many people believe that by setting their furniture in “L” or all folded to a wall; will have more space. But the truth is that a feeling of emptiness will be created; and at the same time you will have an area that you will not be able to use.

It is best to create attention points and think that when your family is there and even some guests; Feel comfortable and attracted to different areas in your living room.

And Finally!

Living Room
Living Room

The best way to avoid that all those efforts and reinforcements that you have invested in the decoration do not come down is: do not put anything in front of the entrances of natural light.

From the beginning we considered the windows and windows of light, therefore, even if you think that big furniture would be right on that wall; do not put anything in front of windows that obstructs good air circulation or lighting.

Obviously the curtains are exempt from this condition. Follow these tips to the letter and you will notice that not only can the decoration be reinforced by adding elements; Can also be achieved if you know how to add them or even without knowing when to remove them.

References

51 Best Living Room Ideas – Stylish Living Room Decorating Designs

145+ Best Living Room Decorating Ideas & Designs

20 Best Living Room Ideas – Beautiful Living Room Decor

Living Room Decorating and Design Ideas with Pictures

Read More
Storage Benches
Furniture

10 Instant Solution for Storage Benches for Kids Room

Fighting disorder in your children’s room is something that will never end until they move out of the house. It is a way that life has to take our toll for all the times our mother had to pick up our mess. But there is a very practical and definitive solution: Storage benches.

It is not an accessory, nor a piece of furniture, much less a gadget; is a combination of the three and many more. At Decorating Visita Casas we love furniture that can cover many functions; and one of the marvels of a storage bench is that it can be a great decorative piece. What do you think if we analyze the possibilities?

Disappearing Disorder in Seconds

Storage Benches
Storage Benches

[one_half_first]A room decor that can help clean up the clutter of toys that are scattered on the floor in seconds. Of course, it is not something automatic that will collect the toys by itself (I wish it were so); But it can be used to instill discipline, good manners and the courage to be ordained. [/one_half_first][one_half_last][/one_half_last]

Toys thrown on the floor inevitably end up being trampled and mistreated, thus losing their beauty and lifespan much faster. A basic trunk, although does not keep in order or classified the toys inside it; beautifully preserves its colors and textures.

This furniture works well even if you have a room theme; In fact, it works best when you have a theme in the room because it is a large add-on. Of course, they can also be very discreet; everything will depend on how it is designed from the outside. And this is where Decorating Visita Casas stands out more; customizing a storage bench is something we love.

Storage Benches
Storage Benches

Have the opportunity to explore the creativity of children and; together decide what concept would be best for that magic trunk that keeps all the toys is phenomenal!

Therefore, although it is true that there are many designs already prefabricated; it is best to buy a base furniture and customize it as you like your child. Not to mention of course, you can even build one with your own hands. Let’s first evaluate how to customize them and then move on to our own carpentry work, do you think?

Customizing the storage bench

At the time of personalization, your imagination in combination with that of your child; are the ones that set limits.

Beyond a beautiful coat of paint, there are techniques such as:

  • Stickers
  • Decoupage
  • Toile de Jouy
  • Carving the wood

They all require creativity, dedication and time; and all are just as comforting when we can see the finished work finished.

We personally recommend that you use letters in a big way; Paint them very creatively and then glue them to the trunk. Use words like “Toys Here” or even the name of your child.

That way you will not only have an educational and interactive piece; But something that will make you develop your sense of belonging and reading ability.

What if I want to buy something elegant?

Go forward! Just remember that smart is not necessarily synonymous with expensive.

It is true that complete sets are sold for the baby’s room; these sets grow with your child and one of the furniture included in a trunk.

However, unlike the crib; In fact no other furniture can be resized to adapt to the needs of your baby as he grows.

Yes it is true that all belong to the same set, offers a homogeneity that you could not match so easily. But he thinks it’s not about your room.

Storage Benches
Storage Benches

In order to stimulate a good development of the child’s creativity, the combination of colors and interactive options should be part of his life.

That is why if you want to buy an elegant piece, perhaps the antique or second hand stores are the best option. We’re not talking about an economy anymore, no. It is not about saving a few dollars; it is about giving our child an environment different from the outside world.

So much order, so much homogeneity, in short, a serious decoration; it might not always be the best option. A great vintage trunk that you can restore together is a better choice.

Storage Benches

Sometimes it does not matter if the new moves will keep the decor; what is really important is to add diversity. And in our differences lies our magic as human beings; if we are all different, why use the same trunk and the same decoration in general?

Even if you are the kind of person who prefers to spend their money on solutions because it is the most practical or because it is what you choose. Even so you can be creative in choosing the new furniture for your child’s room.

Making the Storage Bench

Storage Benches
Storage Benches

When you build the storage bench yourself you will have a great choice; and is to be able to make the furniture a more functional step than it normally would be.

It is true that we could buy cubes organizers that would perfectly fit inside the trunk; However, when we construct it ourselves, all these elements can be added in a way more in accordance with our vision.

At Decorating Visita Casas we were once faced with this situation; we wanted to do something really meaningful but with a very tight budget. It was then when we remembered the old cradle that was in the garage; Very ugly to give or donate and it did not make sense to restore it since there was no baby in the house.

It was a second-hand crib that had time in the garage; and a friend who had serious problems to make her son more orderly. Seeing the bed in which the child slept, something was familiar to us, his bed had a finish very similar to that of the crib! So, what used to be a crib, became a storage bench.

You should not complicate much the situation, using the lateral parts of an old cradle, chair or even the back of a bed; you can build a decorative base from a convenient storage bench.

The boards that make up the frame that will be trunk are secondary; these will be decorated, painted or stamped; but that recycled centerpiece will be the column of your new piece of furniture.

Make sure you do things yourself at home! You’d be surprised to know how much money you can save if you start living by applying the DIY philosophy.

What to do when your child does not want to use the Storage Benches?

Again comes into play one of the best tools: creativity.

Even through an innocent lie, preferably those used in games using the imagination; we can teach our child the importance of keeping their toys.

Movies like Toy Story and Barbie movies; Teach many values ??to children regarding the care of their toys. We are not telling you to let T.V do the work; but you could watch the movies with them and tell them about the importance of keeping their toys to protect them.

Storage Benches
Storage Benches

Remember that, as it is an interactive furniture, the idea is to have a fun form; that prompts the child to touch it and even play with it or on it (or below, depends on how you have built it).

Just take a little patience and take time to teach your child how to play healthy. Remember that discipline is developed with dedication and repetition of the same activity. If it becomes very complicated, then you can go to tutorial Montessori educational method; there you will find great tips that will help you apply effective methods that encourage discipline and healthy fun.

References

Storage Furniture for Kids – IKEA

Kids’ Storage & Toy Boxes – Shop The Best Deals

Kids’ Storage Furniture & Cubes, Kids’ Modular Storage

Amazon.com: Kids’ Furniture, Décor & Storage: Toys & Games

Read More
Photographs
How tos, ideas, walls

Displaying Photographs | Decorating Visita Casas

At present, the culture of photography is something that has been much distorted. Although the photographs can be seen anywhere in the house; the portability of the devices with which you can take a photo, has made us stop appreciating them so much. Black and white photos nowadays are actually more expressive than those with superbly gorgeous colors. Displaying photographs for decorating is better than without a photograph without a frame.

It is true that the photo album is something beautiful that used to be in every house; however, today you may have some pictures in the cloud. If you love the pictures, you love to decorate and you want to explore a new horizon of possibilities with a minimalist, modern or vintage style you have arrived at the article indicated! Get comfortable and talk about the wonderful decorative photographs.

Displaying Photographs like a Designer

[one_half_first]Do you remember when the visitors came to the house and your grandmother or your mother were looking for your photo album to show the family story? How did we get from that to the cell phone? Photographs on the cell phone screen do not generate that level of privacy that physically achieves a photograph in front of us.[/one_half_first][one_half_last][/one_half_last]

However, it is not about returning to the age of the grandmothers and begin to fill an album every year again; is more about the artistic aspect and treasure the most shocking moments.

So, although the ideas that we are going to give you below are the techniques that we at Decorating Visita Casas use; do not let your creativity be limited by our vision. Use this article as inspiration, not as a set of rules to follow.

And we’ll start with grayscale photographs in a minimalist setting. For combining those elements; we have as a result the classic style, a way of displaying the photographs that transports us to an ancient time: that is why black and white photographs are used.

But there’s a lot more behind all of this, so we’d better look into it thoroughly, would you say?

The magic of black and white photographs

The artistic aspect of the black and white photographs is given because indirectly we associate them with an old event; beyond the inclusion of color in the screens.

However, when combined with the image quality offered by today’s lenses; we get amazing results that escape the imagination.

Another great detail of black and white photographs is that they are perfect for hiding imperfections. Many professional photographers use grayscale for those photographs in which design programs would ruin the concept of natural photography.

Instead of editing the imperfections, they cover them by removing the pigments; the defects of the skin do not disappear from view, but decrease considerably and a more “real” appearance is obtained.

Photographs

A group of black and white photographs will always be a topic of conversation; Best of all is that you do not have to limit yourself to a single theme.

You can use photographs of many events with intimate approaches and not all have to be taken by you. But that is not the best part, the best begins when we combine everything with the minimalist style do you know how to do it?

Combining the minimalist style with photographs to create the classic style

Photographs

The frame makes the photograph more attractive and attention calling; especially when the frame is elegantly stylish in appearance. It is way better when the photograph and the frame blend to give an explicit appearance for the people who look at them.

Photographs can be seen anywhere in the house. But mostly they are in the living room to be displayed and be seen by people. Some photographs are even placed in the bathroom for more life in that room. It is better to have a colored wall when decorating black and white photos with frame.

But the wall can still be in white and the frames come in black or vice versa. Although sometimes a white wall makes it seem dull. With this kind of technique; the photos you show will be more focused and given more attention by the people that sees them.

In decorating photographs it has the capability to be noticeable depends no more on its ability to speak to the person rather than on its own interesting appearance image.

Without a doubt, striking black and white photography does not draw out with its play of colors. At this point, secure attention to masterpiece, lighting, point of view and the context are important.

This is the kind of shot that you have when it comes to black and white frames and photographs.

And do not forget that the frames must be thin and instead of glass as a protector you can use acrylic; these elements are an essential part of the minimalist.

You can also complement the photo gallery display with LED lights dedicated to making them the center of attention.

The new place to place photos

Photographs

Our clients often ask us what other place besides the living room and the wall of the stairs is good for putting pictures.

For now a tendency is emerging that seeks to somehow rescue or maintain the values: placing photographs in the children’s room.

The photos on Facebook or on the cell phone are not used to treasure the memories is something that you must understand; Do not let yourself be devoured by the technological age and do not let your children devour.

A photograph of when they went to the zoo or their birthdays are very special memories to have them in IG; Incorporating them into the decoration of their room makes them more than just souvenirs or trophies.

They are a window to the happiest moments of your life and something very intimate that only those people who have the privilege of entering your room will see.

You will put the first pieces of the collection, you will see how your child is responsible for making it grow.

Wallpapers photos?

Yes and No. It is circumstantial. Many times it is not only the photograph but the background in which they are placed.

When a long hallway in your house which, despite having decorative wall lamps and several photographs; Feels empty. Then the best solution may be wallpaper.

And when the wallpaper of a room seems to devour you or very overwhelming every time you walk next to it; then you may need photos.

It is necessary to compensate for the lack of simplicity or the excess of opulence. What scenario do you face in this situation?

I recommend that you use small pictures or simple resolution so you can rotate them easily without having to replace the frame.

And something that can help you a lot! Is to use portraits with long forms; Even if you put a small picture inside. The way the photographs are displayed can change completely when the frame also assumes part of the protagonist.

Chaos Organized

Photographs

The way of distributing the frames does not always have to be the traditional one; Art evolves with us and all those inflexible norms now no longer exist.

The best way to organize your photo presentation is by cutting patterns with the shapes of the frames you will use.

Once you have all the pieces, which you can create using any type of paper and a scissors; then you can measure the wall or simply “arm the decor” superficially.

Imagine that you are going to build a wall with many bricks of different sizes and shapes so something much more fun awaits you when you decide to put together your own exhibition of photographs!

References

Take a Picture: Decorating with Photographs

How to Decorate with Photographs

5 Mistakes Your Making Decorating With Photography

Picture Perfect: Decorate With Black And White Photographs

Read More
Scaffolds
accesories

When and How Will You Use a Scaffolds

“… Yes, those things that are like stairs and that are used to get up …” This is how most people usually refer to a scaffold; and are not completely wrong. Scaffolds are nothing more than a structure made of tubes; which fit together to provide you with a much more stable platform than a simple ladder. They give you much more comfort and facilities when doing some work in the higher parts of your home.

Because they allow you to have many tools at hand for the shape of their structure. The  Scaffolding is a must when you are remodeling ceilings and walls in very high places, both indoors and outdoors. Its structure even allows you to use more than one scaffolding; as the models are usually of the standard type and can be stacked on top of each other to climb in the work you will perform. Here in Decorating Visita Casas we are going to teach you when and how to used it.

How many types of scaffolding are there?

Scaffolds
Scaffolds

[one_half_first]One of the amenities provided by the scaffolding when it comes to remodeling your home is to have what you need. They are roomy enough to have paint cans for ceiling and wall covering work; as well as materials for heavier jobs such as bricks and cement for building walls. In fact there are several types of scaffolding depending on the work to be done. The most common are:[/one_half_first][one_half_last][/one_half_last]

  • Frames
  • Gondolas
  • Predominate multidirectional
  • Mobile towers
  • Towers of Cimbra

The frames

Also called European style. Are structures that are usually used when restoring a facade and simply lean on the floor or some other structure.

These can be connected to each other by bridges, and are useful for wide works of facades and whole walls.

Gondolas

The so-called “gondolas” are a type of suspended scaffold mostly used in buildings that require maintenance, restoration or cleaning of their windows.

They are fastened through cables long enough to reach from the top of the building to the ground floor.

We need to talk about the frequency

Scaffolds
Scaffolds

Depending on whether they are required with relative frequency, they can be part of the same building structure, to facilitate cleaning and maintenance work.

Many skyscrapers are built with supports for this type of structure; so that they can be assembled and removed relatively quickly.

There are some that have wheels to facilitate their transfer from one side to another as are the scaffolding of mobile towers, they are also known as access stairs.

Other types of scaffolding are those that form part of the others and are mostly used to support weight, rather than providing work space.

There are light and heavy, mobile, zipper… well, there are so many models and so different uses for each one; but it’s better to focus on what you need in your home.

The house needs a change, but what do I do?

You will need a scaffold that will allow you not only to reach up to where the roof begins; but also to give you enough space to have all those things you need. Because it would be very exhausting to be going up and down every so often and take with you those brushes and cans of paint that you bought.

A light scaffolding would be your best option for the exterior; those what are used for cleaning facade and restoration.

The idea is to raise the tools and be there long enough to replace that piece of wood or lining that deteriorated.

And, What if we need an indoor work?

Scaffolds
Scaffolds

Well, here it is a bit different. Indoors, the first thing you think about is the roof. One with the particularity of being mobile will work great.

One that you can move in any direction with just a little push and roll you to that part that needs a paint job; and if you have someone to help you when repainting or changing that already worn color of your ceiling that’s is even better!

And sure you thought a ladder would be your first answer, but think of everything you need: the paintbrush, the paint can, a roller, also at some point you will need to rest. It would be very dangerous to leave the ladder there in the middle of all.

They are somewhat unstable and things can fall into the slightest stumbling block; and you cannot be going up and down everything at every turn.

The comfort of the scaffold comes in the quantity of tubes from where you can place a small table as a shelf to leave things to one side without even moving the feet.

Safety tips with scaffolding

Scaffolds
Scaffolds

You should always think about safety first and foremost. Scaffolding is better in this respect. A well-rigged scaffolding system has a characteristic cube shape and that makes them very stable and wide enough for your work.

  • Make sure that the mobile scaffold does not move on its own: Place brakes on the wheels.
  • Tighten the nuts: Although the upper parts of a scaffold insert into the lower ones; they usually have holes where small metal rods or a screw with their nut are inserted to prevent them from being detached and released.
  • The scaffold you use is not for play: Children love to climb things; but the tubes are too far apart to use as a ladder even for an adult. In that case some come with a ladder that will help you get higher.
  • Beware: The old scaffolding was made of wood; but now, they are made of metal. A cable with a little hair up to copper could be disastrous.
  • If the scaffold is very low, it will be difficult for you to reach the roof: if it is very high you will get a good blow when standing up. That’s why there’s so much pipe. Adjust the height of the shelf where you stand.
  • Check that pipes are not rusted: bent, or fractured prior to arming. Even after assembling your scaffolding check that everything is well fixed where it should be. Follow the instructions.
  • Always wear protection: gloves, helmets, and non-slip shoes. You will not want to fall from above.
  • Check your moves: If for each movement you have the reflection of holding the structure when you are in the highest part, then something is wrong. Make sure the ground is level first, or at least do not move too much before climbing.

Do research before you buy your Scaffolding

Scaffolds
Scaffolds

Like everything, they have their limit. Do not use scaffolding for remodeling and painting for building or masonry. The scaffolding system does not withstand unlimited loads.

Each country certainly has regulations for the use of scaffolding, so investigate a little first, before using one on your own. Remember that in every remodeling process of your home you need the right implements.

These are, of course, just some of the tips you should take into account. Use common sense.

All work at home, however simple, carries some risk and more if they are high work; use the appropriate protection and clean your workspace at the end.

References

Scaffolding For Sale Every Day – Browse Our Products Now

Scaffolding Manufacturer – Famous Brands,AJ Scaffolding?

Super Scaffolding – Ladders

Mobile Scaffolds – KRAUSE Ladders and scaffold systems

Read More
carpets
accesories

Dash and Albert Rugs & Carpets for Your Home | Decorating Visita Casas

Carpets, especially the modern ones for decoration; are nothing more than flat pieces of any material, shape and size that are used to cover the floor. Some are fabrics, some are made of plastic, some are intricate patterns, printed or simple monochromatic, but all are designed for the same purpose, covering the floor where you step.

They originated thousands of years ago, when ancient tribes of nomads needed protection that was more effective than simple animal skins when making blankets, and were also easy to handle and move. But nowadays they are so linked to utility as to decoration, and can be purchased as large as the floor of the room where you wish to place it; And for them will have to resort to people who know the matter and go to another establishment to find the one of your preference depending on the use you want to give.

Textures and materials of carpets

carpets

[one_half_first]If you get tired of that cold floor, or with each step you hear the creaking of the wood, or the heel in the cement; maybe a carpet is the best for you. It will give a soft surface to the touch and bring some elegance to the room; something that for many people is important when it comes to receiving visitors. The carpeting of a room will have to decide depending on your taste as there are many designs; but size is much more important because if you install it will be a great feat, replacing it will be more.[/one_half_first][one_half_last][/one_half_last]

Carpets can be found with an almost infinite variety in designs and textures; and will be made of many materials that will suit you very well if you decide to have it, so cheer up.

And for that it takes into account some of these data:

  • Textures and Materials
  • Designs and Colors
  • Dimensions

You will find them as soft as wool, and as rough as the wicker, and that will depend on the utility you will give it.

Usually, the rooms are used with a very soft texture; so that when you get out of bed the first thing you feel is not the cold floor on the floor of your feet.

Cotton carpets are perfect when installing inside the room, this is because they do not accumulate static, are very hygienic and easy to clean; But they are not very resistant to the transit of people and for that reason they are the most common to place in these spaces.

Wool carpets are more resistant to the passage of people, you can place them in places like the living room, study or office, the corridor, or in the dining room.

They are antiallergic, although paradoxically not very recommendable for asthmatics as they accumulate dust mites.

But there are treatments for the care, and so solve that small detail

Short pile carpets are excellent for warm temperatures, as they do not contribute much more than the already existing ones.

But in cold winter climates it is advisable to have longer hair to give better insulation at low temperature.

There are carpets of very rough textures, like jute that need daily maintenance; but they have the advantage of being pleasing to the eye, and give you a sense of tranquility.

These can also be installed in your room or in the living room … everything will depend on your tastes.

The variety of designs and colors is amazing

carpets
carpets

Since the first carpets were created, they were stained with natural compounds, seeds, and insects to give them different colors.

Some of these techniques have lasted over time; especially in places in Asia and the Middle East where most of the most beautiful carpets in history are found.

When installing one in your home, be sure to turn to an expert for this type of detail.

This will help you according to the rest of the set, the combinations, your preferences; and the environment you want to give to that space.

Play with dimensions

The carpets can cover the whole room where they are installed or only a small space of this; the largest in the world is located in the Sheikh Zayed Mosque.

If you decide to install one that occupies an entire room; this may involve a greater expense than a simple and small.

There are good prices in the market and all you have to consider is the durability of the materials with which the carpet is made; as the transit of people will never be the same in the room as the dining room.

Maintenance of carpets in your home

However, the maintenance of a carpet assumes a concern for the person in charge; because depending on the matter with which it is made and the people who live in the house it’s how this process is performed.

Chemicals may end up being harmful to allergy or asthmatics, so special care must be taken when doing so.

Some rugs are much easier to clean than others. There are some techniques that you can use on your own and then you will have a few tricks.

  • Vinegar: Ideal for long-haired carpets when they need cleaning, as it disinfects them; In addition, it does not leave residual odor because when drying this it is dispersed in the air.

If it is manageable, hang it outdoors, tap it to shake the dust and then mix water and vinegar, use a spray and spray the mixture without soaking completely.

3 hours later it will be ready to be placed again

  • Salt: Excellent for old carpets that have some bad smell and some moisture. Just spread the carpet and spread the salt over the entire surface.

Then roll it tightly and leave it at least one day. At the end you just have to unroll and vacuum, taking the salt, dirt and bad smell.

  • Oxygenated water: Very good for wine stains. Only mix hydrogen peroxide with a trickle of liquid dishwasher, sprinkle with a spray and let it act for a while. Then wash it as you normally would.
  • Bicarbonate: Bicarbonate is used for accidental oil stains that may be present on your carpet.

Immediately to drop the oil, sprinkle the baking soda all over the stained surface and let it act a good while. Then just aspire it with you and ready, like new.

Last recommendations

carpets

It is always recommended in case of having pets; leave them out to avoid that small accident that involves having a dog, cat or any other pet.

In such cases you have to be quick and proceed immediately to clean to avoid getting both stain and odor.

There are many methods and formulas for it; just choose the one that best suits your type of material.

There are many agencies specialized in everything that carpets are concerned, there will be some of these agencies in your city.

Just go to them and they will be able to advise you on everything you need regarding them.

Having a carpet should not mean something laborious; you just have to know a little about the installation and its prices.

In the agencies and shops that are dedicated to the world of carpets to decorate your home; they will show you many models, sizes and shapes, as well as textures, materials and endless designs that will surprise you.

References

Indoor/Outdoor Area Rugs & Patio Rugs | Dash & Albert

Indoor/Outdoor Woven Polypropylene Area Rugs | Dash & Albert

Rope Ivory Indoor/Outdoor Rug | Dash & Albert

Diamond Black/Ivory Indoor/Outdoor Rug | Dash & Albert

Dash and Albert Indoor & Outdoor Rugs You’ll Love

Read More
Purifier
How tos

The Secrets of Best Home Water Purifiers

Water, source of life, health and well-being. But how much is it costing us to keep this natural resource in good condition? With so many technological advances; and still we do not give with what allows us to supply potable water to the world. At least there are what famous water purifiers. And thanks to them enough water can be made available in our homes.

The history of water purifiers is ancient, as are the Egyptians. There for 4000 and 2000 years before Christ. Since then it has boiled, allowed to evaporate in the sun; introduced metals such as silver or copper or just let it pass through the sand. These processes are very simple and in some parts of the world they are still used. Do you want to know more?

Let’s talk about purification

[one_half_first]There are several techniques that have been used for thousands of years; from then until now the methods change but the bases are still maintained. The most common to be used in our homes are boiling and filter. They are almost free; or at least everyone can apply them. But we have to know the basics before going further; so let’s start with the most basic of those both.[/one_half_first][one_half_last][/one_half_last]

The Boiling

It consistsin leaving to the fire the source of water with the purpose of killing the bacteria and parasites that are in there. This process has been the most common in all households; and over time has been perfected, until pasteurization.

Purifiers

It receives its name from the scientist and chemist Luis Pasteur; who was looking for a way of partial sterilization of liquids for consumption.

It is not sought to completely change the chemo composition of the liquids that are submitted to it, on the contrary; it only seeks to eliminate what could well do damage to our body. But leaving others, since there are microorganisms that are necessary for the proper functioning of our body; and are found naturally in the water we consume.

Filtration

The filtration consists in passing the liquids through different materials sufficiently porous to allow it; but not so much as to let drain some microorganism that could be harmful.

These materials, usually consisting of pieces of clay, and although they allow the passage of water in small quantities; is effective enough to provide the vital liquid for human consumption.

Some types of filters use active compounds such as carbon. Which are adhered to unwanted compounds such as dust and certain chemicals present after the source of water has been treated; and also removes the hodor that could be generated in water.

In the last century began to use different chemical agents for the purification of water intended for households; one of these compounds is chlorine.

It is very common to hear things like letting the water stand for a few minutes before consuming it, and that is true, sometimes. As the chlorine with which water is treated evaporates little by little until it is imperceptible to taste.

Advantages of water purifiers.

How many times have you seen people take it directly from the tap? And how many times have you done it without knowing if you can really do it?

Well, I will tell you that it is not very advisable; because usually people who drink water directly from the tap do it because it has a filtration system connected directly to that faucet or to the entire piping system in your home.

Water purifiers are always a must have in your home. You should be aware that not all the water that passes through a pipe; and is supposed to be for human consumption is perfectly treated.

Stomach diseases are very common in countries where water treatment is poor; and does not provide a true sense of quality. In third world countries, or developing countries, unfortunately; contaminate their own sources of drinking water.

Coming from inland lakes to which nearby industries throw their wastes; thus causing intoxication on more than one occasion who consumes it. Even using filtering and cleaning methods, water loses its purity.

Purifier

However, when the society handles that little detail and begins to rationally use the water it consumes; you, yourself can account for the advantages you will have in the long term, and it is not only the horror of money. There is something much more important, less medical treatments for stomach upsets.

How should you maintain the water purifiers in your home?

Depending on the type of purifier you use in your home; there will be different methods, ranging from cleaning to replacing it. The stones that come in some filters can be washed to remove any dirt that is trapped in its surface; while others require to be replaced by new ones.

And is that the active carbon that some of these possess lose that ability to absorb impurities and chemicals. That’s why you should be very careful to check them regularly to check their status. Each filter has its instructions; so be sure to follow it correctly.

Home methods of water purification.

Now we will mention some home methods to give that extra touch of water purification in your home.

Lemon

Purifier

Something as simple as lemon juice can help. A few drops for a certain amount of water but do not completely disinfect the water, help kill bacteria as the cause of cholera.

You can let it set for a few minutes and leave it directly in the sun after adding lemon drops.

Chlorine

Purifiers
Purifiers

While chlorine may be helpful, you should know how to apply it. If you do not add enough it will not kill the bacteria that are in the water, and if you apply too much its flavor will be horrible.

An excessive amount of chlorine is dangerous for the body, so with just 2 drops per liter of water and then let stand for at least 30 minutes is enough to evaporate excess chlorine and you can consume the water.

Fabrics

You can remove certain impurities from the water using only a piece of cloth; if it is thick enough, the earth or mud will be trapped in it.

Put it on a container, hold it with a piece of string or tape and pour the water. If you use a white cloth will be better, because you will realize that the water you thought was clean really has a lot, a lot of dirt.

Settlement

Settlement is to leave the water at rest for some time so that the solid waste it may contain falls to the bottom.

This system is basically implemented in water tanks, both aerial and underground, where it remains quite enough for this process to happen.

Take a container, fill it with water and leave it for a long time at rest. You will see how the earth is deposited to the bottom of the container.

You must be aware that all these methods of purification, homemade or not provide great help to your health and that of your family, so always remember them.

References

Water Services How Can We Take Care of Water?

Why Care About Water? – National Geographic Video

Clean Drinking Water

The Importance of Caring for and Respecting our Water Supply

Read More
Collections
Decoration

Decorating With Your Very Own Collections

Many times we think that we do not have what it takes to make a decoration that pleases us, but nothing is further from reality. Surely you must remember your days of childhood, when any stuff that you found; if you liked it you kept it. Well, this time the information on this decoration advice is precisely in those junk; your old collections.

Both for the people who collect dolls, and for those who accumulate different models of toy cars. This is the option of using them to decorate your home; and thus not only have your memories in sight, but will serve to honor those who have affectionately given one or two of those objects. So take out all those boxes of memories and get to work.

The Trunk of Memories.

Collections
Collections

[one_half_first]From sea shells to buttons; from cassettes of the 80’s to today’s compact discs; there are countless objects that are the main protagonists of the most varied collections in the world. And all of them can be part of the decoration, of the decoration in your house. [/one_half_first][one_half_last][/one_half_last]

Because there is nothing better than to decorate your home using that which brings back good memories; and surely with the passage of time you have accumulated many objects that are important to you. Objects kept in the corner of the closet, or in the bottom of a drawer.

The most common collections and sure you have one

There are more than 300 types of collections. Most do not have a specific name; but among the most known and common kind of objects that people collects, we can name:

  • Postage stamps.
  • Books.
  • Sugar sachets.
  • Coins of all kinds
  • Owls
  • Ticket collection.
  • Dolls.

But there are other types of objects that you will surely have by quantity although you do not realize; you just have to rummage through your belongings and you will be surprised.

An example of this to begin with, are the postcards of your friends and family.

Start your own collection of postcards; as they are excellent memories that you can frame and place on the wall, or next to the photos of whoever sent them to you.

Surely when they return to visit; you will be glad to know that you have preserved something that for them was a simple decision.

Dolls and Cars

It is also very common, above all for our grandmothers; to go collecting figures of porcelain or old dolls. But there are young people whose hobby is to accumulate a large number of them; of varying sizes and designs.

Dolls have as much variety as people in the world; and if you are proud of your collection then show it. In a series of shelves is the key to display that collection of dolls; and that everyone in the room is marveling with them.

Toy cars are also a very common collection, which eventually evolves into miniature versions of full-scale models. If you are passionate about this type of collection; a good place to show it is in an office or study.

The most beautiful collections for a home come from those objects that are part of nature. An example of this are the collections of butterflies; a part of the scientific investigation of insects.

Many of these collections are framed in beautiful wooden boxes with glass top that are ideal for hanging as pictures.

There are also people more nature lovers and their collection of butterflies is limited to just the image of these; accumulating them in photos, prints and designs on crockery that is never used.

How to use your collections in the decoration, without seeming a mess.

There are many ways to show what you collect, here are some simple tips when showing that little side of you that perhaps nobody knew.

  • Choose the right place: The pieces should be in a place that makes them the focal point of the room.
  • Keep all the pieces together: If they are watered by the house; it is likely that your collection will not be noticed by the visit.
  • Look for the right lighting: That miniature houses you may own remind you of a small town or city.
  • Sort them by size: Depending on the collection, by placing it in the correct position, you keep the view of the viewer moving.
  • DON’T Collect dust: The pieces you collect accumulate a lot of dust by being static for long periods of time. Frames or place them inside glass boxes.

There are plenty of ways to use your collectibles at home.

For example, a lot of photos of your travels will serve to cover a whole wall; and make sure you have something to tell in your meetings with friends.

Geometric patterns like circles, triangles or rectangles; and the contrast between pieces are some things you can take into account to make your collection feel when it comes to decorating.

A collection of glass spheres, for example, is much more striking when placing the largest in the center; and using the spiral form, organize in order of size the remaining.

One advantage of glass is the refraction of light. Light it up and you will see a spectacular result.

The idea of every serious collector, is not only to accumulate things, but also to exhibit it, so start to build your courage.

Don’t forget the shelves!

Make up your mind to buy shelves; a set of shelves which you can get in any furniture or decor store. What you should take into account is the space in your home, a place where it does not obstruct is step and at the same time is visible.

As a curious fact, in the world of collections and collectors, is the collection of Barbie dolls. A man in Singapore has a collection of more than 3000 dolls of this character, from the first editions to the most modern ones. Some valued at almost $ 4000.

To be a great collector you do not need to make long trips or spend large sums of money; any object can be a collection item; only finds what you are passionate about and brings you pleasant memories of your childhood, important moments in your life and the lives of your loved ones.

Most collections end up showing objects of great value, not only sentimental but also monetary. There are objects that although you do not know, are so rare that anyone would pay large sums of money to observe and obtain.

Coins, signed photographs of celebrities or stamps are one of them. Objects so valuable for the small amount that they exist today. The past of those objects that you have in your home may surprise you; you just have to investigate.

It will take your time to accumulate something that is worth showing the world, but when you decide to use your collection as a decoration do it with pride; because constancy is what matters most when it comes to accumulating the objects of your choice

Perhaps someday, you will be among the most famous Guinness records by the largest collection of unique objects of its kind.

References

This Is The World’s Most Expensive Collection Of Whisky For Sale

THE WORLDS MOST EXPENSIVE SNEAKER COLLECTION – YouTube

Six of the Most Expensive Celebrity Car Collections in the World

List of most expensive coins

Read More
Home
Bedroom

Fall season outside garden and home customizing | Autumn Decor

It is really easy to change the decor of your home to suit the season of the year that is approaching; and give you that unique style that will fill you with energy when you get home after a busy day of work. One of the most important things to remember; is that it is not necessary to do a complete remodeling of the interior or exterior spaces to set your home.

With just a few changes here and there you can easily give your space that style you want; and that added to saving time and money will always be a point in your favor. In this case we will refer to a decoration inspired by the autumnal period; where the leaves fall from the trees filling the streets with beautiful orange and red colors. Let’s look at some tips that can help you establish that environment and; that will make your home much more welcoming.

The Colors of the Season for You Home

Home
Home

[one_half_first]The typical colors of the fall season, as mentioned above; are those with shades ranging from red, orange and yellow to brown and some shades of green. The same colors of pumpkins on Halloween, the leaves of the trees that begin to feel the approaching winter cold; and the dry branches that fall to the ground.[/one_half_first][one_half_last][/one_half_last]

These colors can be integrated into the space by changing just a few pieces; or details in the room or even in the garden decoration.

Those details that even if simple; will be very useful to you when giving that nice touch of the season to the decoration of your home.

It is known by those who study the effect of colors on people; that the orange tones, associated with the sunsets, tend to attract vitality to their observer.

Home
Home

That is why for some, the autumn season is loaded with lots of energy; and prepares them slowly for the winter time that is always closer than you can imagine.

The color brown and its derivatives, because it is a dark tone; will help you to make all the brightly colored objects that you place nearby stand out more.

Do not deprive them of the natural brightness that they can demonstrate when they are reached by the light that enters through the window.

Some things that you can change in the decoration of your home, to start giving that autumnal air; may seem basic to you when making your decoration, but are the details in which you can put all your creativity.

  • Prints.
  • Ornaments.
  • Illumination.

Let’s talk about prints

The prints that best fit the decorations of the fall season are those that are shaped like leaves, especially those that are in orange tones; the same that are drawn in the environment of this time.

These prints can be added when changing the curtains of the room or the pillow cases; as well as changing the fabric that covers your sofa or the sheets of your bed.

Home
Home

The tablecloths on the table, both the dining room and the coffee table; are useful so you do not see the need to completely change the furniture. Especially if this is a laminate furniture that does not show a wood finish.

In the case of garden furniture; I recommend that you leave them naked so that the color of the wood can be appreciated.

And is that something that is part of autumn and that you should not miss, is the wood; which with their brown tones give a natural finish that will always be suitable for decorating at this time of year.

So if you have any wooden furniture, take advantage of it!

Accessories are required

The ornaments that can be included in the decoration; go from crowns made with dry branches on the doors to real pumpkins in the garden or house entrances.

Small ornaments on the coffee table or a large ceramic pumpkin like centerpiece in the dining room will also help give that autumnal style that you want.

There are places where they sell ceramic pieces that are perfect to help you in the fall decoration.

Cooked earthen squashes are a great advantage; because you can put a candle inside it without worrying about it deteriorating.

They are pieces that you can reuse with each year; and you only have to buy them once!

Lighting helps with the environment

Lighting is important when it comes to setting your home, as this helps to accentuate the decor. There are many ways to provide the right lighting when it comes to decorating.

The decorative lights in orange and red colors can serve you well; place a few in ceiling lamps or bedside tables to resemble the natural light of an autumn sunset.

You can also use color filters to diffuse light!

Home
Home

The lights that are normally placed during Christmas season; can be very useful if you decide to remove them from your box in advance.

They will serve to illuminate all the edges of the windows and doors; and so enhance any decorations that you have arranged in those spaces.

Always taking precaution, you can use orange or yellow candles, flavored with essences that help you bring an air of romanticism at dinner; or simply to fill that empty space on that little table you have in the room.

With these simple tips you can set any place in the house in the fall season.

Recycling

Home
Home

There are many other things that can be reused, and always have at hand.

Bottles of empty supplies filled with beads or colored stones decorated with gift ribbons; to plastic or real flowers if you want a more natural aroma to impregnate every corner of the house.

You can also collect some fallen branches of the tree in your garden and adhere them dry leaves. The one with the most vivid colors you find; with which you could make several crowns that hung on each door you want.

Both that of your entrance to Welcome you to the visits, as of the rooms.

Home

A vase, for example, that you kept long ago and that you thought you would not find a place in your house.

Just fill it with many orange candies. It will definitely be the great attraction for the children of the house; and will serve to sweeten those tea evenings that many often share.

Remember that autumn is a time of Halloween or a night of witches; and much of the decoration should be focused on this holiday that is celebrated in most countries in the northern hemisphere.

Pumpkins decorated with the carving of faces on these are also part of the era; being this the most popular. Inspire yourself, create and share that moment in family.

The most important thing is always to enjoy the moment when making your decoration!

Home

Keep in mind that this type of decoration will be several weeks in your home; so any piece you decide to place should be visually pleasing, as well as easy to move and dust-shake.

That way, you can have all the vigor that both colors and the same decoration can bring you.

References

51 Front Yard and Backyard Landscaping Ideas – Landscaping Designs

Garden Design & Outside Spaces – Inspiration & Photos

Garden ideas – Find garden ideas with 1000’s of garden photos

Best Landscape Design Ideas & Remodel Pictures

Read More
Glass Doors
Doors

Glass Doors for your Interior | Decorating Visita Casas

Doors are, just like decorative glass, the moveable part of a wall that is used to conceal an entrance. Also, they are useful to avoid spread of fire and conceal noise. But when we talk about glass doors; that is a complete different animal.

Glass doors are also decorative elements; and many times they can even be the protagonists, everything depends on the place in which they are located. For that reason, it is important to know how to take advantage of this curious design so popular in places like France.

Learning to Decorate with Glass Doors

Glass Doors

[one_half_first]Naturally, your glass door is the first part of the house that a visitor will see. Since it is the first then, we want it to be fascinating and inviting to the eyes. Front doors need to be equally strong and durable like the other constructive parts of the house. Tough to last the kind of weather outside and strong to be reliable that secures the house.[/one_half_first][one_half_last][/one_half_last]

Though we want the front doors to be solid, the interior doors also need to be strong but need not be as expensive as the front door. This allows you to focus on the design of your interior doors to fit the overall design of your house. You can choose from among the wide range of variety of door designs that the market now offers.

Although in this article we will focus mainly on the internal glass doors; before going further in the subject I want to explain two very important details concerning the glass doors at the entrance of the house.

Choosing the right door for the main entrance

First of all let’s talk a bit about the mystical aspect. In Feng Shui, the front door of the house is also known as the mouth; since it is where the guests enter and where the chi energies enter.

It is where the opportunities and the main input of energy nutrients for our house arrive. So when installing the door, you must ensure that it can be extended 90 degrees to facilitate the passage of chi energy and thus the good news.

It is important that the front door is visible and easy to access; so the best way is making it obvious, otherwise the chi will not be able to find the main entrance to your house and you will only have confusion and doubt in your life.

Some add ornaments that even emit sound, but bright or reflective things are more than enough; However, the glass is a double-edged weapon because, although it is capable of giving us a door that stands out, it does not really serve to contain these positive energy inside.

Imagine this glass configuration at the entrance as a glass of water filled with holes. The entrance door must be of solid wood and; proportional to the size of the house.

So I do not recommend using glass on it and; if you already have it, then place dark curtains or obscure the glasses.

Choosing the glass door for the interior of the house

Unlike the main door that seeks to safeguard our security and privacy; the glass doors inside the house are designed to foster respect for privacy.

A double hinged door in the office of the house where the children can see father or mother working; it is great to keep in touch with the family at all times.

The important thing is to educate them so that they understand that just because they see Dad or Mom working, does not mean that they can enter.

The glass doors inside the rooms of a house are built with the intention of giving continuity to the spaces. Do not create divisions but threads of light.

That is why you will notice clearly how a glass door can better isolate the sound even than a solid one; but at the same time allows us to be in eye contact than the people on the other side of it.

In addition, its main concept at the time of its creation was to allow a greater amount of natural light to enter the different environments of the house. That is why French doors are the most famous glass doors in the world.

The French door is born of the necessity of sunlight during the day; But without sacrificing privacy by having to deal with all the noises from outside.

I guarantee you that there is more probability that you will hear a conversation through a thin wall than a French door.

The modern concept, sliding glass doors

If a double door cannot be opened wide; and if on the contrary one of the doors is always the one that opens or closes while the other is “shut”

Then in that house energy flows half, half opportunities, half happiness, half positive energies. Positive energies stagnate and rot in the closed door and become dead energies.

Glass Doors

The concept of folding glazed door seeks to compensate for this lack of energy circulation by offering visual and light continuity. However, that does not change the reality that one of the doors remains closed because “it cannot open well”

Thinking of that concept where furniture does not allow us to take advantage of a swinging door; But without giving up the privacy of noise insulation and preserving the decorative elements and safety, the sliding glass doors are born.

The concept is simple: a door that opens horizontally along a rail; this thanks to the two different mechanisms that allow you to open.

Whether they are sliding doors hung from above or sliding doors with bottom of gears. Both, if they are made of glass; They offer a much greater circulation of light and; The use of complete curtains to cover those that look towards the back garden, bring elegance to the interior of the home.

The lower gear sliding door is hardly used anymore, however, because of that same detail, they are currently the most economical in terms of installation.

And of course, we cannot ignore that full glass doors can become much safer than a wooden one in spite of being lighter and more fragile.

The best recommendation we can give you

Glass Doors

Investment in safety when using reinforced glass doors; it is an investment of those that are worth, but that our credit card will feel strongly.

However, do not forget: you can never be too careful. My recommendation is that you use full glass doors for that wall that faces the backyard.

Internally you can use French doors, especially in areas like the office or the entrance to the games room. If space allows you to place a double door, do it!

But it is also a good idea to place a half-timber door, half glass in the purest French style; these are especially useful for the rear doors of the house.

Glass Doors

And finally, never put doors with glass for the cabinets.

You can use them in the cupboard, in a great exhibition hall and of course in the bathroom; in the shower area. But never put them in the rooms; much less in the closets of children.

Remember that the minimalist style uses a lot of glass to improve the lighting of the rooms of the house and LED lights; especially in the garden area and kitchen.

So if you want more modern lighting, before you start buying light bulbs like crazy; Raises the possibility of adding glass doors to the furniture in your kitchen.

References

Decorative Doors Ideas, Pictures, Remodel and Decor

What are Decorative Doors? | Definition of Decorative Doors

Cabinet Doors & Drawer Boxes | RTA Cabinet Components

Exterior Decorative Doors

Read More
How tos

How to install a decorative wall paneling

In the interior design, colors, lighting and textures make up the triangle that will give life to the decoration. And many times the answer is not a new color for the wall or a window. Sometimes, the need to improve space is only achieved through texture; and it is for this reason that today we will talk about decorative wall paneling.

Because if it is to add texture and a three-dimensional effect taking advantage even more the color that we have chosen for our furniture and walls; I assure you that one of these panels is the answer to your needs, join us to install it!

The Need for a Decorative Wall Panel

wall paneling

[one_half_first]Too many times people have come to Decorating Visita Casas expressing their discontent regarding a wall in their home; in less than a year they have already tried to decorate it with three different colors without success. If you are suffering a similar situation in which the pictures, large mirrors and sets of colors; they simply are not helping you to achieve an appearance on that wall as much as you want.[/one_half_first][one_half_last][/one_half_last]

Do not keep insisting on those methods; the same Einstein said it:

You cannot expect to achieve different results if you always do the same

When the situation reaches such extremes, the key is to reinvent the wall itself. No, you do not need to demolish it, here we are going to give you two alternatives to “make” a new wall with current elements of interior decoration.

Decorative wall panels. They are a vertical shaped concept of decoration with laminate flooring. That is, instead of installing a floor on the floor we already have; this time we will install a new wall on the current one.

The good thing is that the alternatives that this method offers us are full of wonderful surprises; which is just what you need if you are going through a creative depression because of your wall.

Here we will talk about the decorative lining with PVC slabs and the decorative lining with slate stone. So take note and forget about that crazy idea of buying so much paint; let’s reverse your budget on something you really love and it will be worth it.

Slate stone for interior walls?

wall paneling

That’s right, using the slate stone only for the front of the house or for the garden is already a thing of the past. But you need not be scared, the slate stone for interiors is different; the steps to install it are also different.

That is why we will give you several tips so you can install it yourself; because the best thing of all this project of renovation of your wall, is that it is a DIY project of a single day.

Many times paint takes two or even three days, so rejoice; you just need hard work and a day of your weekend to enjoy a completely renovated wall. So, do we start by assembling this type of slab?

Materials to install a decorative slate stone wall paneling

  • Measuring tape
  • Slate Stone Wall Panels
  • Mason’s water level
  • Mix to stick Slate
  • Mason jigsaw trowel
  • Adherence promoter
  • Rubber mallet

Of course you should not overlook the security features. You may need a screwdriver, paper, pencil, a calculator; much desire to enjoy your new wall as soon as possible!

Wall Paneling
Wall Paneling

The first thing to do, will be to calculate the square meters of the wall measuring both the width and the height.

Then go to your favorite store where you can get the Slate Stone and once you have chosen the design that you will use to decorate the wall; Check carefully how many square meters of slabs the box contains.

That way you will know the number of boxes you should buy so you do not over material and for that much less lack.

Unlike laminate flooring, stone slabs do not need to be a long period of time in the room before being installed; that is why this project will take a day or less.

Installing the slate stone wall paneling

After clearing the work area, you should make sure you have removed the plugs and switches to work really efficiently.

The correct thing is that, if you must remove some element of your electrical installation; first remove the current from the house by lowering the fuses.

The next thing is to make a mark on the wall about 8 “from the ground; There will be located our line of slab guides, why 8 ” exactly?

Because it is a multiple of 5 and helps to better distribute the slabs as most of the thickness of them is a multiple of 5.

Once you have marked on the wall then just subtract the mixture and begin to fix the tiles. Some blends come with very specific instructions, the same with slabs; it is good to check if you are working with any particular case.

wall paneling
wall paneling

No, you do not need to hit the wall until it opens small holes in it. Although you are going to perform a very similar work, not to damage the wall on which you will place the coating; it is best to use an adhesion promoting component when preparing the blend.

You could place this element as an option, but the other alternative is to take a hammer and a chisel to open many holes in the wall. For that reason, just buy the adhesion promoter to prepare the mixture with it.

The thickness of layer of mixture that you must apply in the slabs will depend very much of the thickness of the same ones; in such cases it is best to refer to the manufacturer’s instructions. But what is important and nobody tells you; is that you should place the lines following the same technique as if you were building a brick wall.

Finally, and that is optional; you can apply a product dedicated to this type of slabs to give it shine and provide protection. Although it will not be under direct sunlight and other climatic factors; do not forget the children.

Installing a “wood” decorative panel

The HDF is a beautiful material that gives our floors a beautiful and warm appearance. However, it is impressive how the technology of laminate floors has moved to the walls; so efficiently.

But this time not in the form of slabs of wood, although the appearance may be practically the same; the currently recommended wall cladding is PVC.

A decorative PVC wall covering can easily give our room a green shade, a more life-like appearance or magically disappearing imperfections we both hate.

Wall Paneling

In addition, the decorative PVC coating is perfect for both kitchen and bathroom. It is a thermal and acoustic insulation material and is not susceptible to mold.

Its installation is very simple, just follow the indications given by the manufacturer since each of them has its own nomenclature. However, here are some tips that will be very useful to you; you know, what nobody tells you, we here at Decorating Visit Houses we tell you.

  • In order to guarantee a stable coating, the distance to which the screws of the fixing profiles must be located should not exceed 24 ”
  • Premium PVC sheeting already comes with glue on them and can be fixed directly to the wall without the need for screwed profiles
  • Even in bathrooms, it is necessary that the walls are completely dry before placing the coating; although the material does not allow the water to stagnate or prone to bacterial growth once it is installed. It is necessary during the installation that the condition of the wall is optimal.
  • Although indicated for walls, you can also use these panels on the ceiling for a uniform finish. They are great for small dedicated closets or bathrooms.

Lining with decorative wood panels

Wall Paneling
Wall Paneling

That’s right, you can also use HDF panels for laminate flooring; however, in this case do not do the coating in a place where they are exposed to a lot of water.

Its installation remains very similar to the one made on the floor. But you will need fixing panels and even many times a mesh; everything will depend on your type of wall.

This last method is the most tedious, but remember this; for every square meter you need about 30 minutes while you adjust. Then you can do the job in five minutes.

Practice makes the master, do not forget!

References

PVC Wall Tiles – Decorative Wall Tiles – Wall Decor

3D Wall Panels | Interior Wall Paneling | Textured Wall Treatments

Accent Walls | Decorative Wall Panels to Update Any Room

Best Decorative Wall Panel Design Ideas & Remodel Pictures

Read More
Floors

The aesthetic beauty of past can be retained through WidePlank Flooring

Wide Plank Flooring is so awesome because; with the perfect quality of wood used, the stability as well as the durability is really dependable in whatever season will come. It does not only trade in its natural beauty and offers a healthy environment and a lot of advantages; but they also play a very important role portraying how to preserve national resources.

When it comes to installation, you’ll never go wrong as they have the do-it-yourself instruction; or you can have someone professionally provided by knowledge of the job. On this occasion, and promoting our DIY philosophy; we bring you several indications that you will surely find fascinating when choosing and installing your Wide Plank Floor.

From the Forest to Our Lives

[one_half_first]We open this article by saying that the Wide Plank Floor plays an important role in preserving our national natural resources. It is true that the way to obtain the wood is through the deforestation, then how can this logging benefit the environment? Well I want to talk to you, before giving you the tips for your Wide Plank Flooring; of one of the many cases that Wide Plank benefits our reserves.[/one_half_first][one_half_last][/one_half_last]

The white pine of New England (the one that grows really straight); is one of the main materials of category that are used to elaborate the Wide Plank.

It has a relatively short span of 150 to 180 years; it is for this reason that cutting it when it has reached maturity, is good for the forest.

In addition, lots are cut during the winter months, when the soil is frozen; Thus avoiding to cause greater impact on the forest floor.

And a fascinating detail of this beautiful material; is that the floor of a house built with it can have a life span of 350 years. And this is how the ecosystem is cared for in one of the many forests that are cleared so that we can enjoy the warmth and security of our homes.

About the Installation

There is great controversy regarding the process of acclimatization of planks; but what everyone agrees on is that you should never start the installation until you receive the planks.

According to the season in which you are, you should really take into account how much the acclimatization process will be; remember that you are not dealing with MDF or a simple HDF.

If due to the weather you use both the air conditioner and the dehumidifier; then the acclimatization time might necessarily be longer.

The best way to become real aware of when to install your Wide Plank Floor; Is using moisture meters to make sure that moisture between the sub floor and the planks does not exceed 2%.

Ask specific information to the manufacturer of the planks and practice the patience; the waiting time can go from 24 – 48 hours to 1 – 2 weeks. And the best way to keep the planks in the room during the acclimatization process; Is about small acclimation sticks, depending on the length of the planks we recommend 3 – 4 for the air to flow correctly.

Fighting moisture at a second level

It is necessary to use the plastic barrier to combat steam. This usually black color protection (depending on your country); Prevents any remaining moisture in the concrete from permeating our new floor.

It usually also helps acoustics, but that happens more on the thin wood floors.

Preparing the sub floor before installation

Wide Plank

Before and during installation, the sub floor should be carefully examined to make sure there are no nails, screws, paint, grease, dust; Nor any other element that may maltreat or damage the new floor in the long term.

Remember that you must always install from a corner of a wall to the door; so you avoid getting locked up while you work. It is also important that, during installation; Vacuum the ground as many times as you consider necessary.

Another critical area that must be prepared with diligence is the space that must exist between the new wide planks and the wall; the measurements are not standard, so check the manufacturer’s instructions.

Just know that for all soils a minimum distance is required for wood expansion.

The common method of installation

Wide Plank

The most common method of installation is by applying special glue to the planks by the face with channels; And after having fixed it to the sub floor, a pneumatic nail gun can be used to fire nails into the planks along the wall while the glue sits.

After this first group of nails, proceed to introduce another set every 4-6 inches through the tongue of the plank and diagonally.

Remember that it is extremely important, if the wide planks go on a sub floor of cement; do not pierce with the nails the vapor barrier.

The first row will always be the most important, however; Care must be taken to the rest of the rows. Always have a rubber mallet, never use your feet to secure a row of wide planks to the other.

Other Methods

When the sub floor is thick enough and if you do not have the right tools to do a job accurately; the wide planks can be screwed directly vertically.

For this it is necessary to use a drill and to realize holes of the size of the head of the screws where this will be placed; generally every 4 “.

By doing this, we can screw in such a way that the screws will not be below ground level. To disappear the holes that will remain along the length and width of the floor; we will use small repair plugs similar to cork.

These plugs have a surface very similar to the grain of the wood and can be bought according to the type of planks that are being used. To cut it you must use japan pull saw.

Very well you should know that we do not all have the right tools at home to do a complete job; But you should not go to a professional.

If you are really short of budget, then you can apply this method; is just as effective and the work can be done even faster than using the nails through the tongues.

Conclusions about the Wide Plank Flooring

Maintenance will never be a problem because the wide plank floor can retain its beauty for the long years; even without need of preserving it because they are not requiring daily maintenance to preserve the unique characteristic that reflects to life.

So, do not doubt it; the aesthetic beauty of past can be retained and preserved through Wide Plank Flooring. It is a very distinctive and unique flooring investment close to the heart of nature.

Bring the historical appearance together with application of antique is the simplest way of showing the beauty and versatility of our resources.

And once installed, comes the same equally important step: The decoration. And guess what! We have many articles on Decorating Visit Homes that talk about it.

References

The Hardest Wood Flooring You Can Buy

12 Types of Hardwood Floors | Cost of hardwood floors

17 Best ideas about Wide Plank Flooring on Pinterest

Oak & Broad Your Source for Wide Plank Hardwood Floors

Read More
baby stuffs
How tos

How to organize all those baby stuffs and toys

One of the most overwhelming moments when my daughter turned 2; was to realize a reality: she had more things than me. The amount of baby things like clothes, shoes, toys, diapers, drawings, baby stuffs all in general; the house was 64% she, and the rest of us.

I realized that I had to do something quick or the things of the baby were going to end up burying us; was in the phase of controlled disorder the next step after that point was nothing more than uncontrolled chaos. If you are having trouble handling all of your baby’s things and you feel that the mess will soon get out of hand; then you came to the right article to solve your problem.

Stopping the avalanche of baby stuffs

baby stuffs

[one_half_first]I’m going to give you one of the most valuable tips I’ve ever had in my life and that has to do with babies: never underestimate the speed at which babies grow. And that’s one of the main reasons why we accumulate so much of the baby stuffs. With much enthusiasm people give us gifts and we buy and buy more accessories; clothes, shoes and toys of all kinds. The problem happens when we realize that, after putting on those clothes that we both loved; the next time we try to put it on, it does not fit![/one_half_first][one_half_last][/one_half_last]

Then we are faced with a dilemma, should we buy just the necessary because obviously soon nothing of that clothing will remain; or should we give vent to our imagination and credit card?

It is always good to have choices, baby clothing can be inherited from one generation to another or donated. But not to suffer a chaotic collapse of so many baby things; it is good that we maintain an organization from the first moment.

So let’s analyze the following elements, in every house where there is a baby there must be this; but in addition to naming them, we will tell you how to make the most of them to have everything well organized.

A cabinet with many drawers

baby stuffs

One of the most important pieces in the decoration of the baby’s room, not only because it adds aesthetic and that soft touch to the room; But because its functionality is as crucial as that of the crib.

In addition, over the years a cabinet with many drawers can become an excellent ally for the child and later for a teenager.

But how could you make the most of furniture with drawers? For the secret is knowing how to choose very well; always thinking about the future.

That is why in my opinion the best piece of furniture with drawers that you can add to the baby’s room is the one that can serve as a changing table.

baby stuffs

A spacious space at the top of the cabinet with drawers means that you will not only save money; but you can turn that same piece of furniture into an excellent place to put the toys.

And the best of all is;  that the same piece of furniture can be used by your baby as a hairstylist, even if it is a boy, teach him to take advantage of that space at the top.

If you have a girl then you will have no problem convincing him to add a mirror to the top of the furniture and buy a matching chair with the moldings of the furniture.

No matter if it is metal or wood, the important thing is that it has an average height similar to the island of your kitchen; so you can change the baby comfortably and you will have all the diapers at hand.

Diapers!

One of the biggest reserves you will ever get in your life; it is better always to have them in the drawers ready to be used and; always remember to place the furniture with drawers relatively close to the crib.

Many times you will have to change the sleeping baby. So I do not recommend keeping the diaper reserve in the lower drawers, but in the first or second.

Following this simple technique, you will be able to organize absolutely all the clothes of the baby, your child and later your son and adolescent. Everything from a simple piece of furniture bought intelligently.

Organizing the toys

I have discovered a concept that may not attract much attention. It is true that applying it in all parts of the house is not the most ideal, but a perfect place to implement it is in the baby’s room.

I mean the modular decor.

Just as the babies’ current toys “transform” as they grow to adapt to them; the same goes for decoration.

Many mothers and fathers have come together and thanks to all of them we now have many modular decor ideas. An interactive decoration whose elements remain invisible and only when they are needed come to light.

baby stuffs

It is similar to minimalist decor; only that in truth the function of the modular decoration is not to have just what is necessary, but to have everything but stored in such a way that it seems that there was nothing.

It is very important to teach our children from childhood to keep all their toys after using them; but you must also respect his/her decision to always have a toy or a group of specific toys on hand.

So the first thing that you must have to be able to organize the toys is a trunk.

Classic toy trunk taken to another level!

baby stuffs

The trunk is not very pleasant for the children because in it the toys mix, look disorderly and even seem to suffer. But the concept of treasure chest (in this case toys) is very attractive.

How could you work on this element so that your child respects and uses it? Well, making it bigger! Distributing it in a better way! And that’s where the concept of modular decoration comes in.

baby stuffs

A decoration that your child can modify according to their tastes or mood and still you can maintain order.

Instead of having a large trunk for all toys, take advantage of one wall of the room and create a large set of drawers decorated with your child’s favorite figures. And that each drawer is intended for a type of toys.

I ran with the luck that my baby loves LEGOS, so all this modular shelf takes the LEGO concept. She has fun arming and disarming her “toy trunk” but she already knows that the yellow drawer is for the dolls.

Take advantage of as much space as possible

v

Surely there will be toys or elements that will be only decorative, for those cases; the best thing you can do is take advantage of the height of the walls in the room.

But heads up!

I recommend that you do not place on high floating shelves or anywhere your child does not reach with his hands; fragile toys or elements that could be damaged if they hit the ground from that height.

That is why it is good to reserve those elements of height for stuffed animals.

Last but not least, teach he/she to donate!

The act of giving someone is one of the most wonderful ways to cultivate the emotional intelligence of our children. Teach him to let go of material things and give them to those who have less possibilities or resources than he.

To never be materialistic. But do not force him to do it, just plan the possibility that to buy a new toy, you need to let others go.

And if you have doubts about how you could organize the rest of things, then let me know to bring you more advice; This time on how to store the items that go inside the diaper.

References

Baby Nursery Furniture – Babies”R”Us

17 Best ideas about Nursery Furniture on Pinterest

Baby Gear, Baby Furniture Sets & Baby Room Decor

Read More
redecorating
Decoration

What You Need to Consider Before Redecorating Your Home

When you are redecorating your home, you do not just decorate it however you want it to look. There are things that you need to consider that are called the elements of beauty. You need to consider the look that you would like to have from the furniture, the color, and the new accessories and; other things that we want our room to have and make it look good together.

You may also want to decide what you would like the room to have. Consider the texture, the line, the form and the color; which are the elements that are essential and which possess the psychological and physical characteristics that are equally important. Do you want to know how to do it properly? Then, keep reading.

What to consider when redecorating?

redecorating

[one_half_first]Lines are the first among the essential elements that you need to consider; Different lines have different effects. This is what you need to consider when decorating your home. Horizontal will give a relaxing and breadth effect while vertical lines express masculinity and formality. [/one_half_first][one_half_last][/one_half_last]

Diagonal lines have a restless and dynamic effect and gives that feeling of instability while the curved lines gives the feeling of cheerfulness; however, this may appear ornate when overdone.

And remember, you’re not decorating from scratch but you’re redecorating. Therefore, the first question that you must formulate to yourself and; on which you must base all your decisions is:

What elements of the decor are bothering me so much to have decided to change the decoration?

Once you have answered that question honestly, then the next point to consider is:

Those elements that you now dislike, before you liked? Why are not they to your liking now?

Although it may be that the changes you want to carry out are due to the decoration already came with the house; It is important to consider what elements and why now?

I have been in that situation where a whole decoration simply makes me want to run away; but it is important to know what exactly you do not like. Only then can we save a lot of money, especially if we have a tight budget.

The keys to redecorate

Once you have been able to determine what exactly that bothers you; Then you can work based on what remains, why? Because those elements that you have decided to conserve, even if they are few, are what really define you.

When we talk about elements that define you I mean those who have your character, energy or are simply as an extension of you.

When someone who does not know us makes us a gift that is a decorative piece; we feel really uncomfortable, the label rules tell us to accept the gift and integrate it into the decoration.

But if it is not something that really makes us feel identified; we may end up hating it. But the opposite happens when the gift comes from someone who does know us.

That gift makes us feel more connected with that person but also with a part of us that we cannot see; but that person who gave us that gift can.

So, if you have decided to redecorate but along the way you have made the decision to keep some elements such as furniture, the color of a wall or a lamp.

Hold on to it! For that component is a survivor of your new need to renew yourself, that is; It is your essence and everything else was left over, do not throw away your essence.

Where to start when redecorating?

It is the most relative question of all, and they do much to us; the problem is that if you want to redecorate, you must start with what you decided to keep.

Many people have the need to change the color of the walls, others instead choose to keep that color but to renovate the furniture.

There are those who change the lamps on even the floor they have it covered with a new laminate floor or with a carpet. The best answer to that question would be: Start at the beginning.

If you have decided to change all the decorative style, you do not necessarily have to give up your favorite table; as in the example of the photo, may not look like it, but it is the same table, only surrounded by different decorative elements.

It is good that you have in mind what will be the centerpiece of your decoration; if you have decided to keep something, then part of it. Whether the shape, the color or the textures as we have mentioned before; But this time having a clear guide.

If on the other hand, you have decided that all the decoration will change, then start with the most obvious: painting.

After that you can focus on the new furniture and then on the new lighting; But pay close attention to the following rules when redecorating.

At the time of choosing the new painting, be flexible

When we finally get rid of the “ugly” color of a wall, we tend to be more emotional than rational when choosing color. It is as if we want to unload a kind of repressed feeling by painting the wall.

Our advice is to take things slowly, if you do not get the color you are looking for; then you may not be looking for something specific, you just feel a need to change.

In those cases, the best thing you can do is to accept suggestions and bring samples to a place you’ve decided to redecorate. You will notice that you will have many energies, so if you want to do things 100%; Take care of the painting, do not hire a third party.

Do not go with a preconceived idea of the furniture you will have

This is the factor that causes the most stress at the time of redecorating. We are tired of those furniture and we want some that define us and make us feel at ease; the problem is that our ideal is often in our imagination only, not in the stores.

Choosing new furniture at the time of redecorating is a demanding experience, requires a lot of mental strength, patience and acceptance. Of course, there are styles that are more fashionable and this makes it easier to get the furniture as we want them.

But even if you have seen the furniture online, do not let yourself be dominated by the need to change now; it may be that the shipment of the same is very expensive and that the stores near your town do not have it.

For that reason, it is best not to go with a specific preconceived idea in our mind. The ideal is to go out and see your alternatives, to reinvent ourselves has never been an easy or forced process, why does it have to be so when reinventing the decoration of a place?

Take care of the decorative experience and have catharsis, finish removing the remains you want decoration you did not like and start your new decoration with creativity.

And do not get carried away by the urge to buy all those new things. That is also due to your eagerness to renew yourself; be very careful about the budget and keep the discipline.

The least thing for you is to become one of those people who get the thrill of redecorating not the final result after the change; But in the process of transition from the old to the new.

If you feel that it happens, the best thing is that you dedicate yourself to the interior decoration or you will ruin yourself redecorating every 2 weeks.

References

25 Best Interior Decorating Secrets – Decorating Tips and Tricks

20 Easy Home Decorating Ideas – Interior Decorating and Decor Tips

60 Best Home Decorating Ideas – How To Design A Room

12 Key Decorating Tips to Make Any Room Better

Read More