Tips

7 Tips on Making a Window Treatment

A proper window treatment can give accent in our whole room, but then the cost of customized curtains and even its valances can be immense. There is a fact that is saying that “anyone who is really willing to invest a little of their time and patience can make their own curtains effortlessly without even having bothered to sew it”. Now let us see how we can make our own do it yourself window treatment without having to spend too much.

[one_half_first]The first step that we can make in making your own DIY window treatment is to decide what kind of curtain do we want, considering its full length, its windowsill, or even its valances. Once that we already have decided, we can now pick out our own fabric.

We can simply buy a fabric by yard at any craft stores or even at any of the retail outlets. While we are out picking up a “no sew”, which is already an iron on product that fuses the fabric together without having sew it.[/one_half_first][one_half_last][/one_half_last]

When we’re already home we should measure the length we want our curtains to be hanged, giving some several inches of it for its hem, and then we could now start our fabric cutting. For an instance, if our window is 5 feet long and we wanted our curtain to just hang at our window sill, we should cut out our fabric 60” plus 5”.

Window decorative curtainsAnd once we already have our fabric with its right size, we now need to put a hem on it, at its bottom and even in any of its raw side edges. We just simply needs to take a piece of the “no sew” that we bought and then cut it to the length of our fabric that we wanted to hem. We should lay it flat along with the wrong side of our fabric, and run a very hot iron on it. After which, we now have to peel the back of it and carefully fold our fabric into itself to be able to create a very smooth and straight hem, and then iron it again for a few seconds and allow it to set.

Balloon window valancesWe should then repeat the same process at its top, and never forget to create a pocket for our curtain rod. We should also do the same process of folding our fabric, except that we have to leave at least about an inch and a half of it, or even larger if we are planning to use a wooden poles, and let’s not forget to iron our curtain good, just to create a strong bond. Simply because, this is the area that will usually be abused; the same reason why we should make sure that it has a good bond.

Those are some of the great tips that we can take just to make our own window treatment.

Using Rice Paper Shades

If your décor has a touch of Orient then the best window treatment for you is a rice paper. In addition, if you’ve got a window with an unusual shape or in an awkward location and you want to dress it up, a rice paper window shade is the answer.

Rice paper can provide an austere, enchanting, and economical alternative to drapery. The traditional Japanese shades, called “shoji”, are being assembled by stretching rice paper over a wooden frame. These shades can then be affixed to the window frame or hung from the top of the window frame. Though the word “shoji” means “something that blocks the way”, rice paper shades allow light to filter to. When the lights filter through, it is when you really get to see the beauty of the paper fibers. The rice paper shades create a feeling of light and space much better than cloth curtains.

There are types of rice paper window shade that you can choose to fit your window. A true rice paper is a very thin, translucent paper made from rice grass (Oryza sativa). However, there is ‘rice paper’ that is much sold that made from the vast fiber of the mulberry tree and is more properly called unryu paper. The distinction of this paper to the pure rice paper is it has a coarser texture and more visible fibers. I can assure you that both types of will work well in a window shade. Just keep in mind that rice paper is available raw and sized, with the sized type being thicker and better suited for use in a shoji shade. When choosing the color of the rice paper to your window, white or off-white tones of rice paper shade should be place in your window where the sunlight passes through. White or off white tones can stay looking good longer than strong patterns or deep colors. Another is you can use the acid-free paper for it last longer than papers with acid content.

Do I need to add decorations with the rice paper shade to coerce it to be more elegant and beautiful? Traditionally, rice paper window shade is left undecorated however nowadays you can add few unique touches before the paper is attached to the frame. One of the most prominent decorations to add to rice paper shade is Chinese calligraphy. If you are into the authentic look, you can try painting the rice paper shades with a combination of Sumi-e ink and watercolor paint. Rubber or sponge stamps dipped in ink is suggested if you are not into complex symbols. This is more convenient because it provide a faster and simpler way to add style to the shades.

Remember that rice paper window shades can provide an elegant solution for hard-to-cover windows, can be made inexpensively in less than a day and with proper care, you can maintain the attractive appearance up to 8-years or more.

How to Choose Window Treatments

When it comes to your home, decorating it needs to be perfect. This is because you certainly would want your home to look well coordinated and suitable for your preferences. The decoration of your home not only includes the fixtures of your home but even your window treatments. A window can even act like your home’s eyes since you can look out while others can also look inside. But since the amount of light that enters your home can affect it, it is important that you control the light that comes in. For this you can make use of window treatments.

The reason why it is important to choose window treatments well is because they act as direct source of light to your home. Your options include shutters, window coverings, vertical blinds, mini blinds, plantation shutters, draperies, curtains, cellular shades, pleated shades, roller shades and a number of other different types. Because there are just too many different options for you, choosing the right one can be a bit overwhelming.

For this, here is a guide to help you choose window treatments:
• Price
As with anything else, this is usually the first step when it comes to looking for the right window treatment. You need to determine how much your budget is so that you can have a price range on the probable window treatments that you want to buy. By having a budget, you can easily shortlist the ones that have caught your eye.

• Size
This is the next thing you need to know as the size will play a huge part in getting the right window treatment for your home. There are some instances when you can get to a store and find one that you like. If you are unable to write down what the measurements of your window are, you might end up buying one that is either too big or too small for your home. If this happens, you will only waste money on something you cannot use.

• Style and Color
The style of the window treatment needs to match your home. This is where your creativity will take action. You will have to choose the color that matches the predominant hue of the room where you will put the window treatment. The reason why this is important is because it will affect your home’s color scheme later on.

• Type of Window Treatment
Lastly, you have to decide what specific type of window treatment you want for your home. This is where you choose between curtains, shutters or blinds. The decision for this can be affected by the whole look of the room you want to put the window treatment in. If you are interested in having a modern look, shutters can be opted. If this is for an office, blinds are more appropriate. On the other hand, if they are for a bedroom, drapes are usually more appropriate.

However, when it comes to how you should choose window treatments, your own preference cannot be disregarded. The above mentioned are merely some tips on how you can shorten your selection as well as the important factors that you should consider. The end decision still rests on your own choice.

Read More
Remodeling

Window Decoration: A Look at some Window Treatments

Your windows can tell a lot about your house. Imagine a beautiful home but with crappy window. Now does that seem like a nice home to you? No, it doesn’t. You need a nice looking window to go with your nice house. Having a nice window can really liven up the joint. A window is somewhere you can get a nice view from. So if it looks nice, it a makes whatever you’re looking at even better. Your beautiful home deserves a beautiful window. You can think of it as a jewelry for your home. So, here is a look at some window treatments.

Something Organic

[one_half_first]One of the most popular window treatments is the natural woven shades in bamboo and matchstick. This type of window let in diffused light so that you can behold what’s going on outside. But it’s not just and open window, so you don’t have to worry about your privacy.

It works really well on different environments. It looks very nice and natural. So it can give you that outdoors feeling you have always wanted. A very nice option indeed.[/one_half_first][one_half_last][/one_half_last]

Simplicity and Elegance

To match the scale of the formal dining room, heavy brocade curtains are hung right below the tray ceiling. A simple ring heading balances the luxurious fabric very nicely while silk ties hold the draperies back to allow natural light into the space. It’s beautiful. Imagine this in your home while you’re taking a nice cup of coffee. Life couldn’t get any better.

So many Colors

A beautiful piece of work. Just think how nice it’ll look in your house, the white is paired with navy. This sort of design is on the rage in the window treatment agency. So you can give this look a try, it will probably impress. It’s especially nice if you do this decoration in your living room window. So wow the guests, with this unique design.

What a nice breeze!

Window treatments aren’t only for indoor rooms. You can try them outside as well. It can really give you a relaxing indoors feel. Try this at your backyard. Of course you should pick outdoor proof and easy to wash fabrics since you it’ll get dirty more often than not. But just look at the relaxing views, it makes you fall asleep. Having a nice conversation with your family members in a place like this wouldn’t be so bad now would it?

Luxury Fabrics

You can use luxury fabrics such as silks, velvets, damasks, fur, leather and suede. Although the overall design here lean towards simplicity but this trend will remain popular with people who desire embellishment and luxury. There is sparkling crystal, beaded tassels and lavish embellishments on every element of the window from the hardware to the trimmings and fabric.

Velvet and Grosgrain

Even today soft textiles are still driving the market and styles. Because of being simultaneous of fashion and interiors trends, you are seeing couture fabrications and dressmaker details such as ruffles, cording, beading, lace, etc.

Grosgrain is a strong and closely woven ribbed fabric usually made of silk or rayon, is used as a ribbon detailing on blinds and drapes. Velvet banding can also be used for detailing, or as a ladder tape to cover up route holes for string in blinds. A nice design for your home.

Go for Sleek Lines

Windows treatment: Today Simple, sleek lines are dominating window fashions in everything from flowing drapes to chrome decorative hardware. Creating sleek silhouettes against a window instantly gives you a clean, modern look to any window and room. Popular panel-track systems are a quick way to get truly streamlined treatments. Unlike their ugly vertical blind precursors, panel-track systems are made of fabric or woven-wood panels and they can be used as room dividers or on window walls and doors. These panel-track treatments can look contemporary or European depending on the fabric and on what you prefer.

Go Bold and Colorful

If you’re a fan of art then you’ll probably love this. This sort of design can really make your house look like an artistic masterpiece. Although Roman shades aren’t as dramatic as floor-to-ceiling window treatments, but they can add just as much color and punch.

Something for the lady of the house

Unique window treatments such as this can really complete a room. It is very romantic and feminine, perfect for the lady of the house. This sort of design is perfect for a bedroom and on valentine’s day, it can really set the mood just right. If you have a girl then this is also a very nice design for her room as well.

Try Silk Panels

Silk is a pricier option for window treatments. So if you don’t mind the extra price then this can be a very nice option for you. The shine and luxury of the fabric can instantly wake up a dull room. There are many different option you can go for such as embroidered silks, plaid silks and jacquard paisley designs. Since you’ll be spending a pretty penny, it’s a good idea to find out how it will look in your home first. So be careful in this department but other than that it’s really a nice window treatment.

The High-Tech Option

Technology can play an important role in our lives and but we still look for simplicity. You can now control window blinds via remote. The same goes for a light switch or even the Internet. But just because your windows have gone high-tech, it doesn’t mean they have to be stark and uninviting. One trend sure to cozy up a window is the Layering fabrics with high-thread-count cottons. So don’t be afraid of technology. We are in the 21st century after all.

Anyway these are a few window treatments you can try out. Remember, a beautiful window can really liven up your house and make your neighbors burn with envy.

Home windows are now part of your home decoration articles. Not only are they decorated by using curtains and valances, but are now filled with more design by new decorative articles such as shutters and blinds. These window treatments are in fact already secondary windows by themselves, but are windows injected with style and design that is created for the homes of the modern era, which is why they are perfect in almost any type of home today. Here are some suggestions on what kind of window treatment would be good for certain kinds of homes.

Decorative window shelveBlinds or a window blind is a type of window covering where slats of either fabric, wood, plastic or metal are adjusted by rotation and are closed by overlapping the slats together, either vertically or horizontally. It is now a common article in window design, but you may still have the option to choose blinds to decorate your windows. Blinds offer that modern look in a home more than curtains can do, and is often used for home offices and other business establishment. This window treatment is best for the sleek and straight designs of modern interior design.

Shades are another type of window treatment that is commonly used today

It is like the window blind’s ancestor, and its basic features is a wide sheet of elastic covering material, most of the times made of plastic or fabric, that is rolled into a cylinder that is situated above the window. You can adjust how the shade covers the window by either pulling the sheet up or down, and is sometimes automated by an electronic device. Shades comes in a wide variety of colors, designs and patterns, if you prefer to use shades, then you need to pick carefully the right pattern or design that fits your home.

Shutter or window shutters, on the other hand, is a window treatment used in homes since the medieval times. It is characterized as an extra “door”, usually comes in pairs and acts as a secondary window. Shutters are mostly used to prevent light and wind from entering the room. It is very simple and almost requires no technical effort to make one. Decorations of this window treatment mostly come from the design of the shutter, which may be of intricate or technical design, depending on the structure where it is applied on, and also comes in a variety of colors and color patterns. The advantage of the shutter is that it can be applied outside the room, giving you yet another space to decorate your window. This kind of window treatment works best when used on contemporary modern homes, houses that are designed after homes of the early 17th to the 19th century.

Window roller shadeThese are some of the major types of window treatments that are widely used in most homes for decoration today. Choosing the appropriate window treatment would highly depend on the general design of your home or of the room that you are planning to decorate. You might get “lost in time” when you apply the wrong type of window treatment for your home.

Read More
Inflatable Furniture
Furniture

How to Use Inflatable Furniture for Your Kids | Decorating Visita Casas

Previously, inflatable furniture for children was used only for swimming pools and during summer days or vacations.
However, today that tradition, although it is still respected, has been taken to a new level where it combines fun and functionality.

It is true that not everything in our children’s room may be inflatable; however, the alternatives that we will show you below can be easily implemented adding an important value to the decoration.

Best of all, your child will thank you! After all you’ll be giving him a fun, comfortable gift that he can carry everywhere inside and outside the house.

Read More
Tips

7 Flower Arrangement Tips: Taming the Exotic Flowers

Did you paint the walls but still can’t seem to find what’s just right to make your home look great? Do you want to spice up your living space with some fancy, pretty-smelling, colorful décor? Does this sound great, but you don’t know where to start? Not sure the difference between dandelions and daisies? Can’t remember the last time you even smelled a flower? Does the idea of flowers for decorations sound like too much maintenance? Well, don’t get too overwhelmed before we even begin. Let’s begin a virtual trip to the garden nursery, look at the different chrysanthemums, amaryllis, Peruvian lilies, and even take the time to stop to smell the roses along the way.

Be creative and careful

[one_half_first]If none of those names seem familiar, and some sound like ancient species of dinosaurs that have recently been discovered, you’re not quite on the right track- but stay with us. This is okay.

Luckily, unless you are unable to see, you’ll still have a fantastic ability to pick the right flowers by their visual appeal alone. When making flower arrangements, you’re going to need a little bit of planning, creativity, and courage. Careful planning always goes an extremely long way with regards to anything and flower arrangements are no exception.[/one_half_first][one_half_last][/one_half_last]

Choose what kind of flower you want

Before you can begin choosing flowers, you need to decide what kind of flower arrangement you are building. “Well, that’s great,” you think “but I didn’t know there were different types.” Flower arrangements are categorized by their style, looks, patterns, and geometry. There are three major categories. Those are:

  • Traditional
  • Oriental
  • And finally, Modern

In the Western world, the most popular type of flower arrangements are the Traditional Arrangement. “The emphasis is on the use of many flowers as a mass in the floral arrangement” When imagining the traditional arrangement, try to imagine your standard bouquet of flowers. Sometimes it can be a mix of flowers, or sometimes it can be as simple as one type and color throughout. These make great and easy gifts, especially if you know someone’s favorite. These make great gifts for graduations, birthdays, lovers, and other celebratory events. Truth be told, traditional arrangements are quite plain, overdone, and often boring – not requiring much thought or effort from the designer.

While easy to assemble, they are simple and not overly spectacular nor stunning. They aren’t showstoppers and if you’re looking for something exciting and breath-taking to bring your interior space to life then you’ll be crossing traditional flower arrangements off the list.

Oriental flower arrangements

“The emphasis is on the Lines in floral arrangement.” Geometry comes into play here, but don’t start breaking out your protractor and ruler just yet. The wonderful thing about flower arrangements is their only requirement is to look good. They are an art, not a science. “The most popular kinds of flowers used in oriental arrangements are flowers such as

  • Lilies
  • Orchids
  • Snapdragons
  • Peonies
  • and Irises

Using a “diverse set of flower types” you can create intricate patterns, both with delicate or sharp curves and bends. Feel free to be creative here; you can “[create] a balance of white or cream coloured flowers and bright pinks, purples and / or yellows”. Additionally, “sheet moss [and river rocks] creates a lovely balance”, adding overall to the piece. When it comes to flower arrangements, the entirety of the arrangement including the device used to hold the flowers inside is part of the design and this remains especially true for oriental flower arrangements. If you want to create a sophisticated, eye-catching arrangement, consider designing an oriental flower arrangement and placing it anywhere, from on the nightstand, to a larger arrangement on the kitchen table.  The wonderful thing about flower arrangements is their only requirement is to look good. They are an art, not a science.

Modern style

In modern style geometry and style come to play. The crazier you want to get with the design, the better. For this flower arrangement, the device you decide to hold the flowers in is your blank canvas and everything you put inside is your paint. You’re allowed to have a little fun. In fact, you’re encouraged to have as much fun as you can. This is gloves off, no rules, nobody-is-pulling-no-punches flower arrangement. But, with no rules, one might ask themselves “Where do I begin?”

Floral Wreaths

First, you need a device in which you are going to style the flower arrangement. Floral Wreaths are “an arrangement in the form of a circular garland, usually woven of flowers and foliage.” While traditional floral wreaths are pleasant, unless it’s Thanksgiving or Christmas season, this probably isn’t what you’re looking for. Wreaths are very welcoming and homey, but they lack risk, flare, and pizzazz. When designing an exotic flower arrangement, wreaths simply just aren’t on the list. Wreaths are very welcoming and homey, but they lack risk, flare, and pizzazz. When designing an exotic flower arrangement, wreaths simply just aren’t on the list.

“Floral baskets are flower arrangements done in baskets of varied depths.”  These, also are traditionally used as presents and gifts. They are great for birthdays, celebrations, lovers and friends. However, take into consideration that flower baskets are greatly limited by the depth of the basket. These too, are probably best given as gifts and not going to be our choice when designing an exotic flower arrangement to spruce up our home and bring it to life.

Centerpieces are “designed to be placed on tables” and as the name denotes, usually in the center. These are usually made of glass, ceramic, or metallic material, and their shape takes a key role in the overall look and style of the design. It may sound awfully counterintuitive but a centerpiece can look in great in other places. There’s no need for them to go in the center.  We’re playing with no rules, remember? They don’t have to go there. You can put it on the left-hand side, or the right. No one is going to call the flower police on you. It’s safe and everything is going to be okay. For exotic flower arrangements, we’re going to go with this choice. Using creativity, patterns, spacing & geometry, shades and hues, shapes and sizes, and the list goes on and on, you can create your own living masterpiece.

What style tips should be kept in mind as you begin to craft your floral magnum opus?

  • For large flowers, you can “celebrate big billowing flowers with an exuberant large-scale arrangement”. When designing with large flowers in the mix go big or go home when it comes to your vase.
  • Don’t be scared to attract attention. That’s the entire point of designing the flower arrangement in the first place. To be the center of attention. We’re designing a centerpiece, remember? Large metal jars, or glass vases with intricate patterns, or other styles of containers can be used, and then after filled with soil and the flowers of your choice can be decorated nicely with different matter such as river rocks or decorative sheet moss.
  • Allow the stems to take the shape of the container. “Flower stems naturally follow the shape of vase: They reach up and out, and the result is delicate and light.” You can’t spell flowers without flow and just like water, flowers loosely and beautifully flow to fit the shape of the container they are in.
  • Use a combination of flowers with soft, long, bouncy stems and others with strong hard and sturdy stems to diversify your arrangement and further add uniqueness and style to your design.
  • Use color to show depth and complexity by using contrasting or complimentary colors. “Create a study in color with different flowers in shades of the same hue” to create a subtle yet profound impact on the complexity and level of stylishness demonstrated by your floral piece. Again, there are no rules here. Allow your eyes to guide you to make the correct decisions when it comes to colors and hues.
  • Use color to show depth and complexity by using contrasting or complimentary colors… to create a subtle yet profound impact on the complexity and level of stylishness demonstrated by your floral piece

Exotic flower arrangements

Exotic flower arrangements are a fantastic way to change up the interior of your living space. The entire design experience is fun. You can create multiple arrangements, each one unique for every room you please. Floral arrangements are a dynamic piece of living home décor that can brighten up any living space and with the vast selection of different flowers to choose from in every shade, hue, color and saturation that the human eye can see; you’ll never run out of choices. They are not only easy on the eyes, but flowers are incredibly aromatic and will naturally release scents that will make your home smell terrific all the time.

Conclusions:

With a little preparation, maintenance, and care, you can add a wonderful exotic floral arrangement to any part of your home and ditch the traditional “glass vase of roses on roasted turkey day” for something more fun, lively, and interesting. Live life a little on the edge. Take risks. Have fun, and make your home look fantastic while you do it. Besides, it’s where you live. Your home is an extension of you. You owe it to yourself to make it look great, wouldn’t you agree? There’s no need to get your gardening gloves and garden shears on, but you can start looking online, or in store at your closest nursery to find ideas for your design for your abstract exotic flower arrangement today.

There are many exotic flower enthusiasts as there are Harry Potter fans. Why? Some things are easier seen than said; exotic flowers possess a distinct beauty and appeal that is not present in the usual flowers. Exotic flowers have brighter and bolder colors and peculiar shapes than the common wildflowers; these traits make them perfect for eye-catching flower arrangements.

Roses arrengement

Check what is Available

Since they are rare and a lot more difficult to produce under controlled conditions than traditional flowers, exotic flowers usually cost more. To make things worse, the availability of exotic flowers is very unpredictable. Given this situation, it is best to survey the availability of the exotic flowers in your local flower store a day before doing the flower arrangement.

Plan on the arrangement

Take note of what is available, with this data think of the arrangement. Consider the flowers as pieces of the puzzle and when you capture a mental picture of the floral arrangement in your mind sketch it on paper. This will serve as your initial design for the floral exotic arrangement.

Center piece

Polish the mental design

Now that you have an initial design, you should now consider other factors such as the event or occasion, the final color scheme and other specifications for finalization. Think on how the arrangement will fit the occasion. With your initial design as reference, create the final design by eliminating what doesn’t fit with the requirements and adding things that will promote emphasis and harmony. Once you have conceptualized the final design, create the final list of things to buy. The list should contain the flowers, the containers, and other accessories for the arrangement.

Putting the pieces together in flower arrangement

Buy everything on the list you have made, it is advisable to pick up the non-perishable items first like the accessories and the containers. Exotic and Wild Flowers wilt easily especially when exposed to heat and air so it is best to soak their stems in water once you get home, this will help prolong their freshness. Some flowers however require refrigeration, the conditions for each flower is different so it is best to ask the florist for tips.
Flower arrangement
Before putting the design together make sure that your workplace is clean and you are properly equipped with shears, towels and spray bottle. Be certain that you have everything you need in the table for quick access because you need to operate quickly to prevent the flowers from wilting. Carefully set the flower arrangement, you can stick the flowers to hydro foams for additional longevity. Carry out the design that you have made earlier and improvise if you want, make it as special as you can. After you finished doing the arrangement, be sure to keep it from direct sunlight and store it in a cool and safe location.

References:

1. The flower expert.
2. Oriental flower arrangement.

Read More
Girls

Baby girl room décor pictures and wall hanging decoration

What is the one thing that all of us care about? That’s right family and who do we love most? Our kids of course. They are our little bundles of joy. They are the reason many of us work day and night with a smile on our face and with no complaint. Every parents want the best for their kids. Now, let’s say you have a baby girl, one of the best things you can do for her is give her a good environment to grow up in and her room is the first and the best place to begin since that’s where she’ll spend most of the first few years of her life. So, for those who are expecting and those who already have a toddler, you should start right now. So, here are some baby girl room décor pictures and wall hanging decoration that’s sure to your girl’s frown upside down.

1. A Cozy Nursery

[one_half_first]If you want a cozy nursery for your baby girl, this sort of design is just for you.

With a beautiful looking crib, Just imagine your daughter chilling in the canopy with snuggly pillows and her favorite dolls.

Wouldn’t that be precious? Then there is the beautiful crib.[/one_half_first][one_half_last][/one_half_last]

2. Feel Like A Princess

Make your girl feel like a princess with this beautiful design. The beautiful crib, chandelier, lights, curtains all together makes it combination you don’t want to skip out on. Of course the colour combination of the walls goes perfectly with the décor.  So use this as an guideline to give your princess the best she deserves.

3. Something Nice To Decorate The Walls

You can use paintings like this to decorate the walls of your children room. You can put it on a table, wardrobe or hang it on the walls as well. The colorful clouds, stars in the painting makes for a simple yet fun looking design. Sweet dreams little one the writing says and its exactly what you’re little girl will have with this in her bedroom.

4. Purity Comes In White

This is another inspiring design you can use. Just look at the décor. Isn’t amazing? A bright room with white color inspired design like this will brighten up anyone’s mood certainly a kids. They say if you stay in bright places like this, you develop a very clean and positive psychology. Something every parents want for their little baby girl. The light colors than complements the all-white design will really make your princess feel like she’s in heaven.

5. Inspire With Design

Wall arts are one of the things you can do to match up with the rooms décor. Just look at this beautifully painted room with the wonder bed, the curtains that complement it. Then you have a nice wardrobe for all her clothes. The bed also has those ribbons tied in a beautiful fashion to complete those small touches. This picture may feature flowers as wall painting but you can also paint bunnies, cute dolls, teddies and others to go with the décor. Then you have the beautiful

pink colored painting hung just at the right place with a perfects positioned light fixture beside the wardrobe. Now if this doesn’t inspire you, I don’t know what will.

6. Wouldn’t It Be Wonderful If They Didn’t Grow Up?

We all want to see our baby girls grow up, right? But as they grow they have to leave soon and that’s the saddest part. Sometimes you just wish they didn’t grow up. Would it be wonderful if you could stare at her pretty face forever? Well you can’t do that but you can put this up as a decoration. Who knows maybe it’ll warn her not to grow up and you’re going to have your princess forever. After all as it says don’t grow up it’s a trap. We can all relate, can’t we? So put this in her room. It won’t stop her from growing up but maybe seeing this all the time will keep that kid part of her alive longer. After all every parents wish that their little girl always has that little kid inside of her.

7. Pink Is Awesome

What’s a little girl’s most favorite color? That’s right pink. You can go for this pink and golden vive. With the golden wall matching perfectly with the pink décor. The crib has that cute bow tied ribbons. This sort of room design in a large windowed room like in the picture really goes well together. The curtains, carpet, chandelier and wall decorations really brings all this together. This sort of design is perfect for room which is well lit with sunlight. Now be honest, isn’t this one of the most beautiful rooms you have ever seen? IF that’s right then what are you waiting for? Get decorating.

8. Sweet Dreams

This is a mermaid embroidered dream catcher. Goes really nice with grey or black walls. The starfish designs really brings the whole thing together. It’s a very nice thing to have hanging in your baby girl’s room. Sweets dreams are just a nap away with this dream catcher in place.

9. It’s Story Time

This is another set of accessories you can add to your baby girls room. The small spacing covered all around with beautifully colored curtains, a beautiful light hanging on top shining on your girls pretty face, the snuggly pillows, the colorful and comfortable sitting arrangements creates a very nice place for you to read her a story or for her to do some reading on her own when she’s a little older. This is a very nice thing you can do to her room if you spacing like this available. With this sort of design, it’ll always be story time.

10. Something Nice To Put Her Clothes In

Your baby girls is going to need her wardrobe. You can use something like this. Just look the elegant design accompanied by two beautiful light fixtures on both sides and then a nice clock hanging right on top. Then you can put some nice flowers and pictures to make it look even more beautiful. Nothing says elegance like this one right here. With this design in place every time she takes something out from here she really will feel like a princess. This is one piece of décor that you really don’t want to miss out on.

If you are worrying about the budget, worry not because room interior designing does not cost that much. You do not have to spend big bucks to have your desired room arrangement. You just have to use your creativity and style to have a perfect room design for your kid. There are many available designs and ornaments at every store across the state. Some of them offer big discounts that will surely fit your budget and also, your desired design. Designing and arranging your baby’s room is a real challenge to every parent that’s why you have to ensure that you will do it properly.

Little princess' roomDo not waste more time! Start your own room interior design for your little princess. Turn her ordinary and plain room to a castle she’s been dreaming of! Just don’t forget to put baby girl room décor pictures and wall hanging decoration for her room to have a bang! This is a tough challenge but definitely a fulfilling one when you see your kid appreciate the room and happy about it.

Perfect room for your Little Princess!

Do you want the best room design for your little princess? Do you want a creative room arrangement customized to fit your baby girl’s style? Then better extract your own creative juices and pick your own style as you put your personal touch with love in the room of your little girl. If you want a unique and stunning room arrangement for your daughter, then try baby girl room décor pictures and wall hanging exclusively conceptualized by you for your own daughter!

Mothers nowadays meticulously arrange and design the room of their baby. They put many designs such as colorful wallpapers, stuff toys, stickers and the like. This is for the baby to enjoy the room and at the same time, to have a good visual effect. If you want to make your baby girl’s room look fantastic, the first thing to do is to think of what do you want to put inside her room. Make sure to paint the walls with light colors to not hurt the eye of the baby. Also, make sure that the room is properly lighted. Do not use dim lights because it will cause eye problems to your daughter.

Romantic baby girl's roomBig space also matters because once your daughter learns how to walk, you can’t stop her from playing around the room. Do not put too many things inside the room to avoid overcrowded room due to unnecessary things. Lastly, decorate the room. You can put your personal preference like your favorite Disney princess character, different flowers and animals etc. But what is important is to put your pictures on the wall for the baby to always see your family’s face and to recognize you. You can also put baby girl room décor pictures and wall hanging decoration for more blasting effects.

Read More
Girls

Tips on Creating a Grown Up Room for a Little Girl

It is time to treat your little girl, your little princess; like a grown up woman. The very first thing that you should do is to prepare her room, because this will be her place of adjustment; the place where she is going to learn how to act as a grown up. Your baby is now a lady so you should make her feel like one.

Therefore, you must make her get involved in the process of choosing the setting. It will be her room and in which she will spend most of her time. You must take into consideration her tastes and needs and above all; make her new room feel comfortable.

The hardest thing for parents is to watch their children grow up fast; hence that is why you should enjoy the decorating process with her.

Read More
Decoration

A Japanese Dining Room at Home | Decorating Visita Casas

The Japanese dining room, one of the most desired today. Not only meets the wonders of minimalism, but also permeates tradition, culture, beauty and elegance.

Do you imagine being able to share with your family in a wonderful Japanese dining room or be able to meditate on the doorstep of the Genkan next to your Zen garden?

It is very difficult to encompass all the wonders of Japanese decoration with luxury of details in a single article. However; today we share the smallest details that make up a Japanese dining room so you can create the perfect atmosphere at home Are you ready to start?

Read More
Furniture

15 Tips to Give You Kids Some Extra Storage in Their Room

In the modern world today our population is getting larger and larger and homes are getting smaller. Buying a large home just isn’t the option for everyone. People with kids have it even harder. Kids are messy, they’ll easily fill up their rooms and before you know it you’re in a mess where you can’t tell the difference between a dump and you your kid’s rooms. On top of that your kids are growing and as they grow they are taking up more and more space. So giving them a little more space will not only help them stay cleaner but also accommodate their growing need for more space. But often we are at a loss on how to provide more storage space. So. Here are 15 tips to give your kids some storage space in their room.

1. Coordinate with color

Using children’s book as décor, you can place them in forward facing bookshelves. Not only will it save space but also make your kids room look nice and colorful. It’ll save you some money on room décor as well. A great technique if I do say so myself.

2. Repurposing the bookshelves

[one_half_first]You can create small storage space and seating in your kid’s room by simply repurposing bookshelves. Just turn the shelves on their side, put some foam cushion and add some colorful fabric and you my friend have a new sitting arrangement but that’s not all the empty space can be used as bookshelves just like before or you can store something else. It’s not only useful but with the right design it can look stunning as well.[/one_half_first][one_half_last][/one_half_last]

3. Labelling

In your boy´s games room, labelling is an excellent way to keep things organized and not run out of space. Just label your drawers and baskets so that everything has its own spot. That way things won’t be lying here and there and you and your kids will always know just where to look. So, you won’t be late just because you couldn’t find your daughter socks.

4. Under the bed

It’s always a great idea to look under the bed not just for hide and seek but to get some extra storage space as well. A good idea is to make an under bed storage cart with wheels and you have yourself some extra storage space. You’ll also have an easier time finding your kids as well since they don’t have their favorite hiding space anymore.

5. Clothes on display

Dress up clothes can actually work as a charm decoration as well. So, rather than wasting storage space and valuable time, simply put the dress up clothes on display. It’ll save you some time, space and make the room look nice as well. You also get to show off your children’s beautiful clothes. So, what are you waiting for?

6. Pegboards

Pegboards aren’t just for hardware craft or storage. Just hang up one in your kid’s room and see the magic. You can use the caddies to store diapers, toiletries or socks and other accessories as well. Now think how impressed you neighbor will be.

7. Rethinking your closet

Kids love hiding in closets. Use this to you advantage. Turn the closet into something else like a reading nook and part storage space. That way your kids have somewhere they can read in, somewhere they can hide in and you also have some storage space as well. Learning, fun and practicality all in the same space. One of the most effective ideas, wouldn’t you agree?

8. Creating your own play table

Have an old coffee table? Well don’t throw it way, use it. Transform it into a play table for you kids. They can use it for their train sets, Lego toys or even use it as a toy. Just simply color and design it to their liking. You’ll save some money on toys and you don’t have to throw your table away.

9. Double duty seating

Multifunctional pieces are important to any functional, hyper-organized space. So, when you are choosing furniture like seating, look for ones that have some storage below. You can keep you kids’ books, toys or other things under there. So, when your kid sits to study or draw, they can easily takeout the book or drawing kits from underneath.

10. Crates on the wall

One thing you can do is recycle old wooden crates and boxes and hang them in your kid’s bedroom walls. It’ll create some extra storage for toys, books and other accessories as well. You can make them look nicer by painting or wallpapering them. You can also design the crates in different ways when you’re recycling them so they look extra nice. The colorful toys your kids put in them will make them look even better and in extension make the room look better.

11. Hooks and rods

One good idea is to create some holes in the wall and attach some hooks or mount rods on the wall. You can simply hang your kid’s clothes. It’ll save you some extra room not only that but mounting rods to your walls and putting clothes there can actually make your kids room look nice if done properly and your kids will love it too. If this isn’t a good idea, I don’t know what is.

12. Add shelving

Don’t be shy about adding shelving on the walls. Just make sure the shelves go all the way to the ceiling to maximize space. This is great for storing books, toys and other accessories. And as with every storage idea just a little care and creativity can actually add beauty to your kid’s room.

13. Trunks

Trunks are great for putting away large amount of toys and they can be transformed in to a seating arrangement as well and with a little decoration you can make them look very nice. Bet you didn’t expect that, did you?

14. Bunk beds

If you have two kids but not enough room or want to give them more room, bunk beds are just your thing. It’s a very solid idea. They will save you a lot of space. Just think how much space a bed takes. You can easily avoid that with a bunk bed.

15. Lockers

Although we see lockers only in schools, they can be used in homes as well. Just color them according to your kid’s room and design them to go well with the décor and you have a very nice storage space in you kids room. Your kids can toy, books, clothes and anything else you can think of in their storage lockers and who knows maybe it’ll motivate them to study more since it’ll give their rooms a school vive.

These are some of the ways you can give your kids some extra space. So, start preparing today.

Your kids room is a place where they can play and hide themselves from outside world. Their room is where they can feel safe and express who they are and what they feel. Your kids room should be filled with toys and in the long run, they would have a room filled with toys. However, if they don’t have enough storage in their room, its tendency is to get messy and a messy room would not let your children relax. So make sure that your child would have enough storage where he can place his toys.

Storage bencheOne furniture that can help you with your child’s toy storage is the storage benches. This can help in beautifying the room and at the same time would be your child’s storage of his toys. This is where they can store their dolls and their stuffed toys, dress up items of their dolls, their books and other toys. Having this furniture in your child’s room would greatly help in keeping your child’s toys in their places at the time that they will not be using them.

Read More
office

15 Tips to Design a Home Office that Encourages you to Work Harder

In this modern era a lot of us do more than just work in our regular office. You really need to work hard to make it in the modern age. That’s why a lot of us have dedicated home offices. Some of do things like blogging, freelancing, business while other have to complete some of their office work at home as well and then there are people who are just workaholics. Whichever kind you may be you deserve more than just a piece of metal desk and extra chair stuffed into a corner. You deserve a home office that not only encourages you to work harder but also makes you feel comfortable while you burn the midnight oil. Plus an office that motivates you can do wonders for you and your work. Anyway here are 15 tips to design a home office that encourages you to work harder.

1. Location

[one_half_first]You’ll probably spend many hours in your home office, so don’t deprived yourself of space. Consider your abilities as well. Do you like working in crowded places or do you prefer silence and tranquility. Be a bit practical, if a client will be stopping by then a private sitting and ample space is a must. Having a proper location in your house to set up your office can really motivate you and allow you to work harder. Say for example you feel motivated seeing your kids so you might want to set up office in a place where you have clear view of your kids, so you get a reminder every now and then about what you’re working for. So proper location is important.[/one_half_first][one_half_last][/one_half_last]

2. Form over function

Your desk, shelves and storage are there to serve you not the other way around. Don’t sacrifice form for function. Take into account your workflow and items you may need at your fingertips before you decide to invest in any furniture and then look for pieces that provides beauty and function. If your home features traditional décor, warm wood and soft, comfy chairs or a loveseat are ideal if you have the space. Home offices should complement your house not make it look like a soulless cubicle.

3. Inspired by nature

Try to design your office a room that has freshness, has plenty of light. Has designs that inspire nature, so that when you work you get that natural feel, you don’t feel like someone that has been cooped up in an office for days but rather someone that’s taking a stroll in the park. So try to have natural design.

4. A great sitting arrangement

Invest in a great chair. Let’s face it, you’ll spend hours in your office chair, so it a must that you spend well on the best chair available. When buying a chair keep comfort, beauty, health and functionality in mind. Buy a chair that makes you feel like boss, that makes you feel like you’re a king ready to sit on your throne and rule your kingdom that is your office. So, investment in a great chair is never a waste of your money.

5. Paint with your favorite color

Forget the office norm. You need a color that makes you think I am ready to work and gets your blood pumped up. So when you painting the walls of your home office, choose a color that makes you feel motivated, happy and makes the place lively rather than a grey uninspiring dump. You should choose a color that enhances the beauty of you work area and home in general.

6. Add some graphic elements

Try putting some inspiring graphic letters in your home office. You can put the graphic letters in varied sizes for a different, inspiring and attractive look. These graphic letters should be something that gives you instant motivation when you look at them. So whenever you feel tired staring at the computer or your files you can just look around you and instantly feel motivated. So, give this idea a go.

7. Give yourself warmth

Don’t put your office in a cold dark corner or somewhere where you need to be air conditioned all the time. Put your office where you get some natural warm from the outside like beside a window or somewhere in your house that has constant natural warmth. Staying in an air conditioned room all is not only hazardous to your heath but also will make you feel bored and artificial. Give yourself some natural warmth. You never felt tired when you were a kid playing outside because you were in contact with nature, so just imagine the same feeling but from your office. Worth a shot, isn’t it?

8. An awesome view

Give yourself a good view. Place your home office where you can stare at something more interesting than a blank wall. If your home is beside a small forest, mountain or somewhere with a wonderful natural view than it’s a good idea to position your office near a window so you can look out when you need to. If you don’t have that then maybe somewhere from where you can see your wife. She would be a pretty thing to look at. Either of these will get you motivated although one more than the other. In any case make sure you have a good view.

9. Choose home friendly accessories

You never really feel tired in the comfort of your own home. So why not make your home office look more like a home than an office. You can do just that simply by choosing homey accessories like a beautiful mug for a pencil holder, trendy notepads, sticky notes and a decorative waste basket. Have a gorgeous fabric wrapped around your bulletin board. Hang inspirational prints on the walls like your kids drawing or a classic painting. These things are sure to get you motivated and working hard.

10.Focusing on art

Having art in your home office can really provide some inspiration. Modern sculptures rest on the desk and credenza. An abstract painting on the wall. Certain piece of art can really make your office look inspirational and help you keep your grove on.

11. Vertical and horizontal organization

Home offices normally don’t have a lot of space so it’s crucial to make use of every square inch. So, try to use space efficiently. Hang shelves on the walls to get papers and office equipment off the desk and you can use vertical file folders on the desk to keep important papers close by. You have a habit of piling your papers then get a nice basket to manage your mail, notes and papers. Wooden or metal cube storage is a good substitute for bookshelves, since each space can be used for books, knickknacks, or baskets of odds and ends.

12. Tech management

You can’t do much to make your computers, printers and phones look pretty by you can hide the unsightly cords. You can start by making sure that your equipment is close to outlets and have easy access if you need to unplug. You can encase cords on the desk with a pretty fabric. Use a plastic or metal cap that can help guide the cords through a hole in your desk so that you can hide them underneath. Using the cord winders, tame the cord jungle on the floor. You can also use tubing or a wire organizer that’s attached to the desk and lifts the cords off the floor.

13. Let some light in

Place your office near a window or in a room with lots of natural light. Trust me some light will lift your mood and give you more energy to work harder.

14. Inspiration den

Surround you home office with things that inspire you. For example if you like hunting why not decorate your office with hunting trophies and traditional furnishing. If you’re a tech guy, surround yourself with the latest technology.

15. Keep order

Keeping everything orderly can do wonders for you. When was the last time you saw something orderly and it made you feel bad. Keeping everything in order will give you a positive energy, a beautiful view and a drive to work harder.

As the new era goes on, more and more people are starting to build their businesses within their homes. Most of the people these days are working from home regardless of their status in life; they want to maximize their time with their family that is why they chose to stay at home with them and still earn the same amount they earn in a typical office.

Designing your home office can be very exciting especially if you are doing it with your family. Although there are lots of things to consider in making a home office for your small business needs, you do not have to be anxious because you are working for the benefit of your family and not for your own personal reasons.

Office furniture
Suffering from Monday blues can be minimized, nowadays; because you can now work from home. You can easily manage your time and your sleeping habits. You do not need to hurry for breakfast and bump into the traffic dilemma just to reach the office on time. By working from home, you can work in your pajamas, while having breakfast or while watching over your kids.

Decorating home offices with two themes

Dual themed rooms are quite exciting to do, but are also quite risky. Since a home office’s main function is to provide you with a working environment, decorating home offices with two themes might prove to be quite a difficult task. Use dual themes ONLY if you really know what you are doing otherwise, stick to the basics. This is mainly recommended for people who would like to get out of the norms of normal room decorating
Remember that although your home office deserves a good style and decoration, you must never decrease its overall functionality. After all, it is still and office and several of your everyday work routines are done at that room. Never sacrifice functionality for aesthetics in this part.

Office computer desk
Better yet, inject both functionality and elegance in your rooms by providing decorative alternatives to otherwise functional articles in the room. Good lighting and proper brightness of the room is one aspect of a productive home office. Well organized work items and furniture should be neatly organized and are always maintained to keep their proper arrangements in place. Other work related items like files and documents are to be kept properly and should be stored in their proper shelves or cabinets. Certain articles like lights, tables, cabinets and other related articles for these kinds of functions may be chosen to suit the theme of the room, and therefore combining the best of both aesthetics and functionality.

Home Office Makeovers: from Functionality to Style and Glamour

Home offices warrant more decorative ideas than one might actually think. Though they may be rooms of functionality, it is not really a bad idea to sprinkle it with a little color and sparkle that every rooms deserve to have. Here are some good pointers for you to start decorating home offices.

Office furnitureFirst, decide on a theme that well suits the type of work that you are doing in your home office. This could be either by the actual profession that you do, or by what type of clients you are dealing with. Some modern home office designing has now made it possible for certain room themes to suit almost any kind of field or profession the room’s owner would be. If you are unsure of what style you are going to do to decorate your home office, then it is recommended that you take these “flexible” themes first.
Next, make sure that every color of each article in the room is in their proper place. Of course, this goes on without saying, because generally planning on a theme already provides the necessary color combinations for your home office, but then again it might not, especially if the design or themed that you have chosen presents several varieties of the style. Having different ways to decorate offices using only one style or theme might confuse you, but carefully noting the color combinations of the articles can help you know if certain combinations are not complimentary with each other.

Feng shui at home office

Feng shui is an olden Chinese way of life, which thinks that the arranging and physical characteristics of a home influence the destiny of the owner. With this feng shui home office decorating strategy, you can accomplish more prosperity, better wellbeing, and contentment by affecting how energy runs all the way through your home or garden. In recent times, people around the planet have begun to glimpse the benefits of using feng shui methods in their very own homes. To plan for most advantageous results, you need to gain knowledge of the essential feng shui areas, and what each one is a symbol of, and decorating home office feng shui, room or garden. Grant your life a little yang if you wish for more energy. Open the curtains or blinds and allow the sun shine in as frequently as possible.

Feng Shui officeGreen plant life in your home will stimulate yang, bringing you joyfulness and contentment. Yang can as well be achieved from music, water, air, mirrors, wind chimes, bright colors and flowers. This is an additional to decorating home office feng shui. Position your desk so as you do not have your backside to the door. This is the least feng shui condition for the office furniture. Be as well aware of not facing a wall at the same time as working at your desk. If you really have to face the wall, make use of feng shui to make the wall disappear by means of lively images, stunning art, etc; no matter what brings a smile to your face and makes you breathe deeper and calmer.

By means of the principles of Feng Shui on your own desk, be it in a place of work or a home office is a powerful technique to catch the attention of prosperity. By means of a little concern in how you put in order the items on your desk, you possibly will be able to draw attention in more business, and as a result more money. The west part of the desk is related with finances, and so is a perfect place for money, checks and everything else related to money. To further give emphasis to financial prosperity, put the desk in the prosperity spot of the room. You can also put a crystal bowl, plant, miniature water fountain or pricey piece of art on the prosperity area of the desk, because these things symbolize, and as a result attract, prosperity.

And for the reason that the color red is related with prosperity, bright red items as well emphasize financial achievement, and placing them in the upper left-hand area in decorating home office feng shui may increase financial fortune. Feng Shui is designed to get better in all of portions of life, from wellbeing to relationships to finances. While the main belief of Feng Shui does not have the assurance of on the spot financial achievement, they can help out create an ambiance favorable to achieving wealth. Patience and hard work will still be necessary, other than the course of action possibly will be quicker and easier, and the rewards may perhaps be better than ever expected.

Read More
Bathroom, Lighting

10 Secrets on Bathroom Lighting Up

The place before we face the world: the bathroom. The bathroom is one of the many places we don’t miss to enter in a day, may it be in the house, office, restaurant or any building we go. We always drop by the bathroom to check ourselves. And since we always want something exquisite and foxy in our sight (remodeling the bathroom), we wanted our bathrooms to have drama, intense, creativity and beauty. One way to adorn and enhance your rooms is through bathroom lighting.

[one_half_first]Bathroom Lighting is one of the many approaches that you could experiment to add more glamour and beauty when improving your bathrooms. There are a lot of things to consider in lighting your bathrooms such as the amount of light for your bathrooms. The amount of light you need for your bathrooms actually depends on how big the room is.[/one_half_first][one_half_last][/one_half_last]

This is simple, just get the room size and multiply it by 20 and you’ll get the exact amount of watts you need for the room. For example you have an area of 9square meters, you multiply 9sqm by 20 and you’ll get 180watts. 180 watts is the amount of light you need to light up your bathrooms. Now in installing the lights of your bathroom will depend on zonal concepts and IP (Ingress Protection). IP is followed by two numbers: the first number indicates the degree of protection against particles or solid subjects while the second number signifies the fittings resistance to water. Bear in mind that you have to apply a fitting with a correct rating according to where the fitting will be sited in the bathroom. Here are some of the different area zones:
Best bathroom lighting
Zone 1: A height of 2.25m above the floor, this area is above the bath or shower tray. Zone 1 requires a minimum of IP44 rating.

Zone 2: Zone 2 requires at least IP44. Zone 2 stretches from 0.6m outside the perimeter of the bath or shower tray and to a height of 2.25m from the floor. It’s also good to consider the area around the wash basin as zone 2.

Zone 3: This area is any area outside zone 1 and 2 and it has an IP rating of IP20. Take note if there are water jets used for cleaning purposes or a possibility of splashing waters in zone 1 and 2 you must use the rating of IP65.

Use frosted or white bulbs rather than clear bulbs to eliminate glare and incandescent lamps are good for bathrooms because of its warm daylight glow. Too much light can be binding and uncomfortable and too little light can make activities difficult. Have this guide lead you to elegant and enticing bathroom lighting.

Various types or classifications of bathroom light

Hardware flourishes like doorknobs, cabinet knobs, and faucets along with bathroom light fixtures can establish an entire mood or style in just a decorating accessory. The various types or classifications of modern bathroom light fixtures are especially designed to give you more focused task lighting at a mirror especially during at night so that it would give you a more subtle and calm appearance of yourself, diffuse lighting above a shower or bathtub, or overhead lighting for the entire room. They come in several distinct designs, with an almost infinite number of variations on finish, color, texture, glass, and size. One of the various types of bathroom light fixtures is the bar light installed by plumbers. Bar lights are a series of small trochees arched on a metal bar that attaches to the wall above your counter top and sink.
Nickel bathroom faucets
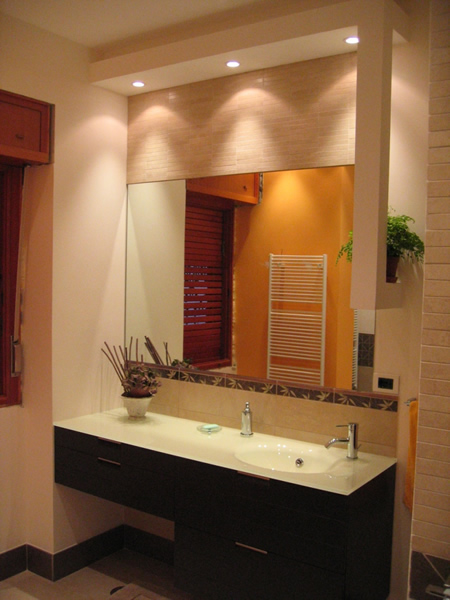
These versatile lights are either held upward or downward facing glass shades, so the lamp might overflow a mirrored cabinet or bounce light off the ceiling. Since the bar can arch up to two to six shades, they can extend or stretch over double-sinks as well, eliminating the need to have two separate fixtures. You can find the shades available in white, frosted, or translucent glass. The metal parts are available in shiny chrome, polished brass, nickel, or antique finishes.

Vanity globes is one variation of the bar lights. These round, white, glass bulbs entirely encase the light bulbs. You usually find them topping mirrors in celebrity dressing rooms. Again, this alternative gives a firm, extensive, diffuse light that is perfect for close-up primping. Globes would look best over a constrict sink, vanity table, or in a guest bathroom where their fun, Hollywood style would perfectly fit with the decor.

Types of bathroom light fixtures

Sconces are another one of the various types of bathroom light fixtures. The sconce category includes entities that hold only a single shade and a single light bulb. These are similar to wall lamps found in other areas or rooms of the house, such as the library or corridor, although corner bathroom lights tend to be less exuberant. A sconce can be situated in an area far from the sinks, such as in front of a closet or in a separate room for the chiffonier.
Types of bathroom lighting fixtures
Finally, sunken lighting is a popular option for ceiling luminance. Since the bathroom receives so much moisture inside, it is uncommon to find crystal chandeliers hanging from the ceiling! A perfect alternative choice from among the many various types of bathroom light fixtures is to go with sunken lighting. These are simple, round lamps that lay outpouring with the ceiling, so they don’t have any dangling parts to collect condensation and dust made by the bathroom temperature. They may be more difficult to install however, since the wires are located inside the ceiling.

How to Update Your Home’s Lighting

If your home lighting system is obsolete and you are looking for an update that would be both functional and aesthetically pleasing then you have look too far. There are different lighting systems that are currently available in the market to suit your needs. Updating your light system to new one can change the whole decor of your house and give the house a new and fresh feel. However, before choosing any light system it is important to keep in mind the system that would the interior of your house. Lighting engineers these days have come out different lighting specifications for different parts of the house. Here is a quick preview of some of the lighting systems available for different parts of the house.

Recessed lighting can be fitted in the kitchen, bathroom and any part of the house that you want to highlight. If installed in the dining room it will add glamour and dept. For decorative motifs, show pieces and paintings that you want to highlight Track lighting is ideal. It will give the best display.

Cove lighting is best suited for dinning room, family room and theater. This system will give a soothing glow that will enhance the room. You can also update you kitchen central lighting system with a modern light diffuser and a wood trim. This can be custom design and is ideal for the Island type kitchen. You can also add lighting system for the kitchen cabinets and for the counter top. For the staircase and hallway there are lighting apparels known as wall sconces

There are lighting systems available for the front porch of your house. The most commonly installed ones are the flood lights. Flood lights will accentuate the garden and the landscape if they are placed strategically. If your have a long walk ways to your house, then lanterns poll lights of electric or gas can be installed and these can give an illuminating glow to the house.

In addition to all these mechanical electrical fittings, you can enhance the depth and décor of you room by installing windows, ventilation and skylights at some of the strategic parts of the house.

Different Types of Bathroom Light Fixtures Available Now

Ah! The bathroom, our best friend. Every one of us need to go every now and then whether to take a bath or to do our business. It’s what separates us from the animals. Of course the modern men and women expects a little more finesse and design out of their bathrooms. Our bathroom lights are an important feature. You would not want to go into a dark bathroom all by yourself now, would you? And when you have the latest and the greatest light fixtures available in the market in your bathroom, it really classes the joint up, doesn’t it? Nothing says class like having style even in your own bathroom. Now here are some new different types of bathroom light fixtures available right now.

1. Organic Amber Art Glass 29 1/2″ Wide Bronze Bath Light

Elegant and sophisticated. This golden bronze bath light fixture is a sight to behold with its elegant free-form amber art glass which also gives it an organic touch of beauty. Classic scrolling forms creates drama and centerpiece is free-form amber art glass in this traditional bath light. A golden bronze finish with silver finish accent highlights adds richness and nuance to this old world inspired design. Now, wouldn’t this be a beauty in your bathroom.

Features

  • 23 3/4″ wide x 4 3/4″ high x extends 5 1/4″ from the wall.
  • Takes three 60 watt candelabra bulbs (not included).
  • From the Franklin Iron Works brand of bath lights.
  • Glasses that are inspired by rustic and industrial style designs: Bronze-gold, hand-blown, vintage-style glass.
  • Bronze-gold finish frame and accents.

                Price:  $149.95

2. Monocle Wall Sconce

This one eyed beauty provides a strong yet warm beam of LED powered light. Milled aluminum is used to shape this rotating surface mounted fixture resulting in a smooth clean product perfect for any space where warm directional light is needed. You can use it as a wall scone or a celling fixture and optional wall adapter kit is also available. Now this looks like something a king would use.

Features

  • Without Adapter: 5.25″D X 4″extension
  • With Wall Adapter: 5.25″D X 6″extension
  • Materials include aluminum and plastic
  • From Rich Brilliant Willing
  • An LED lamp
  • Blubs: 1 X 8.7W 120V LED module, 2700K, 80 CRI, 700 lumens (included)

Price: $415.00 – $600.00

3. Boxie Ceiling Light

The boxie ceiling light is a clean square pressed glass shade with a polished surface which provides ambient, diffused light. It is available in small or large sizes and in incandescent or fluorescent versions. It is suitable for wet locations and ceiling mount only. However, caulking is required for shower installation. Nice, isn’t it?

Features

  • Small: 5.3″Square X 2.2″H
  • Large: 9″Square X 2.2″H
  • Small / Incandescent : 1 X 40W 120V G9 halogen (included)
  • Large / Incandescent: 1 X 40W 120V G9 halogen (included)
  • Large / Fluorescent: 2 X 13W 120V or 277V 2GX7 twin tube lamps and electronic ballast (included)
  • Made from glass and metal
  • LED, Halogen lamp
  • From TECH Lighting

Price: $105.00 – $261.80

4. Amber Scroll 35 1/2″ Wide Chandelier

Now she’s a looker. This the product you get when you put beauty and drama together. If you are looking for a bathroom chandelier this is it. This beautiful piece of work features a scrolling frame finished in golden bronze silver finish accent highlights. It is completed wonderfully with amber art glass. Define style with this nine light chandelier.

Features

  • 35 1/2″ wide x 35″ high x canopy is 5″ wide, 1″ high x weighs 30.2 lbs.
  • Includes 6 feet of chain, 12 feet of lead wire.
  • Takes nine maximum 60 watt or equivalent bulbs (not included).
  • Large chandelier with two levels of lights from the Franklin Iron Works™ collection.
  • 9 lights with amber art glass; golden bronze finish, silver finish accent highlights.
  • From the Franklin Iron Works brand of bath lights.

Price: $399.95

5. Capital Lighting 8494 Steele 32 Inch Wide Bath Vanity Light

Now this is a nice looking vanity light that you want in your bathroom. The Capital Lighting Steele 8494 is a transitional bath vanity light available in Brushed Nickel, Burnished Bronze and Chrome finish. The transitional style is sure to complement any bathroom and make you a hit.

Features

  • Lamping:Incandescent: 4 – Medium Base 75 Watt
  • Voltage:Line Voltage (120 volts)
  • UL Listing:Damp Locations
  • Attention:Not suitable for installation in outdoor spaces that are not enclosed.
  • Dimensions
  • Height:   8.00 inches
  • Width:   32.00 inches
  • Depth:   8.00 inches
  • Back plate Dimensions:   5.13 inches
  • From Capital lighting

Price: $214.00

6. Tube Vanity Wall Sconce

The tube vanity wall sconce is sure to look nice in your bathroom. It features a hand blown etched opal glass diffuser. The shade is held by an I-shape glass holder that extends from a rectangular wall plate. Finish available in chrome, brushed nickel, dark restoration bronze and honey gold.

Features

  • FINISH: Dark Restoration Bronze
  • SHADE COLOR: Etched Opal
  • SIZE: 25″H x 4.75″W x 4″D
  • DIMMER: Incandescent
  • LAMP SOURCE: Halogen
  • BULB:2 x T4/D.C. Bayonet (BA15D)/60W/120V Halogen
    BULB INCLUDED
  • From George Kovacs

Price: $123.90

7. Starburst LED Chandelier

Whoa! Now if you look up unique in the dictionary, you’ll probably find a picture of this.

This kind of design don’t come cheap either. Anyway, the laser cut frosted light guides take decorative LED lighting in a beautiful new direction. With its sparkle and sharp angles, the Starburst LED Chandelier fits into a variety of applications once dominated by incandescent fixtures. This high tech beauty breaks new ground with innovative optical light guides and replaceable LED modules. It was made from created steel construction with stainless steel arms in polished chrome ending. It also includes a 42-inch maximum length adjustable stem kit, and supplementary stems can be purchased to expand that length by up to 8 feet (4 stem sections). Instant on/off; dimmable with TRIAC dimmer (not included).

Features

  • 5″D X 19.9″H; Overall height 21.5-57.5″
  • Steel, acrylic, polymer are used as materials
  • LED lamp
  • Bulbs: 24 X 120V G4 bi-pin LED arrays, 28.9 Watts total, 1990 Lumens, 3000K, 80 CRI, 50/60HZ (included)
  • From Blackjack Lighting

Price: $2,655.00 – $3,150.00

8. Elf2 Bath Light

The Elf2 Bath Light is a sleek and modern light that combines geometric angles with the round aesthetic of the cylinder shape. It features a luminous opal glass tube by a metallic trim. It can illuminate any bathroom with a diffused, ambient light which makes it ideal for any bathroom by balancing form with functionality. So, give this a go the next time you are looking for a bathroom fixture.

Features

  • Wall mount only. Vertical or Horizontal installation.
  • Mounts to a 4″ octagonal junction box.
  • Available in Satin or Polished Nickel with Opal glass diffuser.
  • cUL and UL Listed for Dry and Damp Locations.
  • 5″L X 4.8″H X 5.8″extension
  • Metal, Glass
  • XENON, LED, FLUORESCENT
  • 3 X 60W Xenon BA15D Bayonet Base KX60FR/DC (included)
  • 2 X 13W 120V or 277V 2G7 Compact Fluorescent Lamps (included)
  • 1 X 21W strip LED, 3000K (warm white); 80 CRI; 1800 lumens output (included)
  • From Illuminating Experiences Lighting

  Price: $290.25 – $468.75

9. Integrity™ Lighted Mirror with Vive™ Technology

The Integrity Lighted Mirror is a stunning addition to any modern bathroom. Just imagine how jealous you neighbor would be if you had this in your bathroom. The mirror features a band of frosted light around the boarder of the backlit mirror that emits a natural light. It features long lasting lamps, natural light temperature, anti-corrosion mirror treatment and energy efficiency. Plus it’s an awesome thing to have in your bathroom.

Features

  • LED lighting
  • E-Life™ 8 Years Extended Lamp Replacement Cycle
  • Natural Light Color
  • Hard Coat™ Anti-Corrosion Mirror Treatment
  • Environmentally Sustainable
  • Energy Efficient
  • Proudly Made in The USA
  • Patented (US 7,853,414)
  • INT4236: 42″ W x 36″ H x 3″ D
  • INT4236: 42″ W x 36″ H x 3″ D
  • INT4242: 42″ W x 42″ H x 3″ D
  • INT5436: 54″ W x 36″ H x 3″ D
  • INT7242: 72″ W x 42″ H x 3″ D
  • Material: Glass
  • Lamp: LED
  • Bulbs
  • INT3642: 50W 120V LED strips (included), 5500 lumens 3000K, 85 CRI
  • INT4236: 50W 120V LED strips (included), 5500 lumens 3000K, 85 CRI
  • INT4242: 50W 120V LED strips (included), 5500 lumens 3000K, 85 CRI
  • INT5436: 50W 120V LED strips (included), 5500 lumens 3000K, 85 CRI
  • INT7242: 50W 120V LED strips (included), 5500 lumens 3000K, 85 CRI
  • From Electric Mirror

Price: $3,465.00

10. Swirl LED Pendant Light

Here’s another jaw dropping design. Just imagine taking a bath under this thing. What could be better, right? The Swirl LED Pendant Light features LEDs placed inside softly curved sculptural arms which turned a classic fixture into a more beautiful version of itself. This pendants luminous forms are created with highly efficient LED strips mounted inside metal stampings that dissipate LED heat. Did I mention it’s an award winning fixture?  It won the 2014 lighting for Tomorrow “Honorable Mention” Award Winner

Features

  • S7P-SN: 16″D X 13.3″H; Overall height 17.8-53.8″
  • M9P-SN: 23″D X 19″H; Overall height 20.6-56.6″
  • aluminum, acrylic, polymer, steel
  • LED
  • S7P-SN: 7 X 120V Flexible LED Strips, 23.6 Watts total, 2130 Lumens, 3000K, 80 CRI, 50/60Hz (included)
  • M9P-SN: 9 X 120V Flexible LED Strips, 38 Watts total, 3250 Lumens, 3000K, 80 CRI, 50/60Hz (included)
  • From Blackjack Lighting

Price: $1,799.10 – $2,499.30

Read More
Paint

Advantages of latex acrylic paint vs. oil-based paint

Painting is one of those things some people enjoy and some people find a chore to do. Painting is a hobby for some. A lot of people love to paint or is learning. So, if you are a beginner, there is a lot of things about painting you don’t know. One of the most puzzling problems are choosing the right paint. Sometimes if you don’t choose the right paint, it can really ruin all your hard work. There are many different types of paint in the market like oil based paint and latex acrylic paint. Many become confused over which one to choose. “Should I use oil based or acrylic?” is a common question. So this article will help you choose the right paint.

1. Do you work fast or slow?

Acrylic paint Pros: You can paint on anything.

This is one of the crucial things that make acrylics an important choice for beginners. Being able to set up everything quickly and start painting on anything is brilliant. Paper, card, canvas board, whatever you have at hand you can paint with this.

Acrylic Cons: They dry quickly

[one_half_first]

Now acrylic paint dry very quickly. Say you’re about to start painting and you squeeze some paint out and then suddenly there’s ring on your phone. When you comeback you’ll see that the paint has already dried out. You take some more and before you begin there’s a knock at your door, you go to check and by the time you return the paint has already dried. So that’s a problem with this type of paint that they dry really quick.

The solution?

  • Try to squeeze out more paint
  • Try adding a retarder to keep the acrylics wet for longer (no more than 15%)
  • Use a stay wet palette to keep the paints moist.

[/one_half_first][one_half_last][/one_half_last]

Oil Pros: Longer working time

Since oil paints stay wet for a lot longer than acrylics it gives you the flexibility to start a painting and then come back to it later and continue from where you left off. The paint on the palette will still be wet and pliable, the colors on your canvas can still be blended together. So you get a huge advantage.

Oil Cons: Preparation is key

Since oil is corrosive in nature (in oil paints) you have to work on a prepared canvas or board. If you are going to prepare the surface of the canvas yourself the preparation time can take a lot longer. You could always buy a pre-prepared canvas and get started right away.

2. Blend or gard lines?

Acrylic Pros: A Crisp edge

The crisp edges that you can achieve with acrylics can be a huge benefit for you if you paint with a more graphic composition. You can mask out areas and work over them quickly and easily cover a hard shape with thicker paint. Mixing clean, bright colors very easily.

Acrylics Cons: Achieve a smooth blend

Blending with acrylics can be really frustrating since the speed of the drying time is quite high. If you are working on a large-scale it can be practically impossible to work the canvas as a whole to bring it all to the same finish together.

This is for a size of say 6ft x 4ft. If you are working smaller that this you can create some lovely blends.

You can however achieve smooth blends with acrylics if you just work quicker. Add a medium to the paint to help keep the working time open for longer. Use soft gel gloss, retarder (slows down drying time) or glazing liquid gloss.

Oil Pros: smooth blending

Oil paints are number one when blending colors together. Because of the slow drying nature of oil paints they can be really fantastic for creating subtle blends.

Working wet-into-wet is a sure-fire way to get a smooth transition in your painting. This is particularly true for portrait painting when the slight shading of the face is needing constant revisiting. Adding slower drying oils to your paints create surfaces that can stay wet for weeks.

Oil Cons: Trying to create a crisp edge without it affecting the underlying colors with oils means you have to wait until the next day, or touch dry otherwise your brushstroke will pull and mix with the paint underneath it. It is very easy to mix ‘muddy colors’ when starting with oils due to everything staying wet and the colors mixing together on the canvas.

Solution: Experience teaches you to work cleanly.

3. Shifting colors

Acrylic Pros: They are superfast

Acrylics won’t fade in time, the colors will look the same now as they will in 200 years. The binder in oil paint, oil goes yellow over time which causes the slight glow on old master paintings with acrylics they are colorfast. On the other hand, the binder – acrylic polymer doesn’t yellow over time.

Acrylic Cons: They change color when they dry

The binder used in acrylics is usually white but dries clear. Acrylics is clear, but still has a slight color shift. This means it seems lighter on the canvas when you first put in on, and then dries darker as the white binder turns clear.

This becomes really clear when painting portraits. When you think you’ve cracked the precise color, you turn around and the color has already changed. With practice, you can learn to judge to shift but it can be disconcerting when you’re first beginning.

If you add more acrylic polymers to the paint, in the form of mediums the color shift will be even greater.

If you use student quality paints that have extra fillers added, which are often white, the color shift will be more pronounced.

Oil Pros: color doesn’t shift immediately

Initially, oils stay the same color when painted on a canvas. However, once the color dries it can appear to change if the oil from the paint ‘sinks in’ to the canvas.

This can lead some areas being glossy (still have the oil in) and others staying matt (oil has soaked into the under layer) to produce a deader color. To overcome this, try to “oil out’ the area of the painting you are working on. A paint surface can appear dull and is usually caused by too little oil in the paint film due to the absorption into the ground layer (or overuse of thinners such as turpentine).

Oil Cons: Yellowing

Oil paints will have a slight yellow tinge to them due to the color of the oil (like olive oil) as oil dries over time through the process of oxidation additional yellowing takes place. This varies in degree depending on the binder used in the paint.

4. Do you like working with thick paint or thin layers?

Acrylic Pros: Very flexible

If you like the idea of using a palette knife and creating thick, impasto paintings, and acrylics could be the choice for you. You can paint thickly, build it up and the paint will dry. If you try to achieve the same with oils the outer surface will dry to the touch but the inner paint will still be wet.

You can also work very thinly with transparent glazes or very thickly with a mountain of paint but the actual surface quality of the acrylic remains flexible, this means your painting won’t crack over time. You can use thin coats of acrylic paint to give a watercolor look to a picture.

Oil Pros: Longer drying times

If you have plenty of time set aside for your painting, oils can be fantastic. You can work with thick paint, wait a couple of days for that paint to dry then add thin glazes to create luminosity in your work.

Oil Cons

If you are working with thick paint, you need to take into account the drying time of oils. Each particular pigment needs a different amount of oil mixed with it resulting in a different drying time,.

The solution: Add a siccative to the paint. A siccative is a medium that helps to speed up the drying process in oil paints.

5. Are you working in a small space?

Acrylic Pros

Acrylics can be a great alternative to oils if you’re working in a confined space are working with kids or in an unventilated area. You just need access to water. Acrylics have no smell and are non-toxic.

Oil cons: turpentine smell

If your start painting with oils in a confined space the fumes from the thinners can really overwhelm you, turpentine and white spirit can be really strong. White spirit can also be irritating to the skin and turpentine rags can spontaneously combust. So, by now you should be able to decide which is better suited for you.

Some tips to use acrylic paint

  • Latex acrylic paint have water soluble base thus may be easily applied and can be dried up within 1-2 hours. This kind of paint also produces less odor than the solvent paints. Oil-based paint on the other hand requires longer drying period around 24 hours. Moreover, oil-based paint produces strong odor.
  • Latex acrylic is also less expensive than the oil-based paint.
  • Latex acrylic paint is resistant to fading, chalking, blistering and peeling while oil-based paint may become brittle thus may lead to peeling and chalking. Blistering in oil-based paint may also appear over time.
  • Latex paint is preferred to be used in exterior painting as this kind of paint is less prone to fading. Oil-based paint is susceptible to mildew thus may not be preferred for exterior painting.
  • Latex acrylic paint is non-flammable while oil-based paint is highly flammable.
  • Latex acrylic paint may be easily disposed while oil-based paint cannot be easily disposed due to its hazardous material components. Turpentine is also required in cleaning up oil-based paint.

As they say, painting indeed is a remarkable way to bring life to a once dull space. While the right color is one of the major considerations for choosing, color is not entirely the basis for selecting paint. In choosing oil-based paint vs. latex acrylic paint, it would be wise to choose paint depending on the texture of your existing wall surface, how easily you like it to be cleaned up later on and the appearance that you like your walls to have. Ultimately, you need to wisely select how well the paint will last and wear in your walls.

Selecting the Right Paint: Oil-based or Latex Acrylic Paint

Selecting the type of paint for your painting project may be a tough decision. The question to ask before choosing oil-based paint vs. latex acrylic paint really depends on your existing wall surface, how you prefer to clean it later on and the visual appearance that you like your walls to have.

Before selecting between oil-based paint vs. latex acrylic paint, one must understand first the advantages of each kind of paint versus one another.

Advantages of oil-based paint vs. latex acrylic paint

  • Oil-based paints are better stain sealers compared to latex paint where stains can easily penetrate.
  • Oil based paints are better for holding unto steel, metal and dirty surfaces while latex should rather be applied to clean surfaces since the paint does not stick unto dirty and chalking surface.
  • Oil based paint usually are more resistant to low temperature thus are less susceptible to shrinkage compared to latex that is more sensitive to temperature thus is vulnerable to shrinkage.
  • Oil based paint may be used in high foot traffic areas due to its durability and the capability to be cleaned. Latex on the other hand must rather be used in non-high traffic areas such as the bedroom.

The Difference between Latex and Acrylic Latex

In works of art, amateur painters care less on what kind of paint they will use while the professional ones are keen on choosing their equipments and materials for painting. Paint is a mixture of liquid. It is used in art application and designs. Two popular types of paint are acrylic and latex. Though both looks and works the same, there are certain differences that shouldn’t be overlooked. Originally, latex paints are made by rubber. They are produced from a certain Brazilian rubber tree named Hevea Brasiliensis. Now, they are produced with only water or chemical-based paints and are mixed with different pigments as well as additives that act as the binders. Acrylic latex, on the other hand, contains acrylic or vinyl binders instead of water. There is a big debate on whether which kind of paint should be used. Both have their own advantages and disadvantages.

Painting with sponge techiqueHere are the following differences that you can use in deciding on which one is better:1. The main difference of the two is that latex paint is water-based while acrylic is chemical-based. Latex paint is non-toxic while acrylic is composed of different chemicals which give a less odor for the first one mentioned.
2. Elasticity is one property of acrylic paint that latex doesn’t have due to natural- based components. The elasticity of acrylic allows the paint to contract and expand more so it is better to use it on exterior surfaces. Also, it resists chalking, flaking and peeling for a long period of time.
3. Latex paints are non-flammable compared to chemical-based paints. The solvents used in acrylic paint are considered toxic waste and are usually high-flammable which is kind of dangerous nowadays.
4. Acrylic paint is great on applying to interior surfaces. However, latex paint is better in having gloss and is easier to apply. The bad thing is, the more gloss, the more the imperfections can be seen and it can be quite difficult to have a touch up after applied.
5. Latex paints have a faster drying time compared to acrylic paints.
6. For cost, acrylic paint is more expensive compared to latex paints. But let’s also bear in mind that the more expensive the product is the better quality it can give.
7. In the area of clean-up, latex wins over acrylic. Latex can be easily washed by simple soap and water while acrylic needs a lot of things like thinner, etc.

Painting roomsWith the differences mentioned, it is obvious to see that in terms of cost and nature-friendliness, latex paint is the one we should depend on but in terms of painting expertise, acrylic is the better one. Acrylic is always considered as the highest quality latex paint and it is composed of properties like durability, flexibility, opacity as well as color-retention. Nevertheless, it’s still the user’s choice on which one he or she thinks is better.

Read More
Decoration

5 Step Turtle Kids Room for Kids Decorating Solution

If your child wants a turtle-themed room, trust us, it won’t be that hard. For themes that are of the marine area, one thing that you can first do is paint the walls blue. The color blue represents water and it shows the aquatic theme of the room more. You can also use green, which also is part of the aquatic theme. It can also represent grass which is an additional design to the bedroom of the child.

For the bed, choose a bedding sheet that is of turtle-theme. You can purchase it on your favorite bedding store or you can let someone make it for you too. This way, it will be very personalized and it is more artistic. Also, you can use colors blue or green. It will feel like your bed is the turtle pond or home of the turtles. In the bed itself, you can buy a built-in design or you can even make a head board. It can be of a turtle-shape or anything that is related to turtles like shells, pond, etc.

For other designs, you can design your furniture that is under your theme. You can use shelves which is of turtle-themed. Make sure it is sturdy enough to last for a long time. You can also display collections of turtles or any aquatic designs. For furniture, tables can be designed as turtle ponds. Paint it with the color blue or green. Just use your artistry and it will end up good.

Accesories for a Turtle Kids Room

For accessories, you can hang pictures of turtles. You can also use wall decors like wall clock, turtle designed-accessories (e.g., wind chimes) for the flooring; it will be simple enough if you can paint it with but with simple patterns of blue or green. You can also use personalized rugs or carpets that show that you are more on the aquatic part of the room.

Another theme that is partnered with turtles is bugs. Basically, this is what the turtles eat so you can use bug accessories in various parts of the room. You can buy these bugs in children’s store for just a cheap price or you can make your own one and bond with your child with it.

Other things that you can use are a basket in which you can put all turtles or your child’s toys in order it won’t be that messy enough, you can also use nature like twigs and glue it on the walls so you really can feel the naturalness of the boy´s room.

Now, don’t just overdo things. Remember, simplicity is still the best design. Let your child help so that he or she can feel the ambiance of his or her room. Harmony is also one thing that you should bear in mind. Pick all your designs and make sure that it compliments one another. Have fun designing!

Read More
Boys

How to Decorate your Little Boy’s Room to a Grown up Room

So you little guys a grown man now. They grow up so fast, don’t they? One day you are teaching them how to use a fork next you’re showing them how to ride a bike and before you know it they are teaching you how to use the latest app in your mobile phone. Raising kids can be pretty challenging. Constantly keeping up with their needs, making sure they grow up right, these things are something only a parent would understand and when your little boy turns in to a grown up there is so much to do. Isn’t there? One of the most important things are to arrange new accommodation or in other words changing his old room into a new one. With your kids grown up they have new needs you must take into account. Decorating their rooms to their preference can be a challenge but don’t worry you’ll get there. Just follow these guidelines and you’ll be fine. So here’s how to decorate your little boys room into a grown up room.

Some things to consider

[one_half_first]The first thing you should remember that you little one is no longer a little. He is all grown up and with that comes new interests, new desires. So you should design his room according to the rainbow colored personality boys of his age have. They dream of a fancy room with a lot of space, plenty of room to study in. A place where they can invite friends over and not feel embarrassed as their sense of dignity and being cool to their friends or the girl they like is at the height of their priorities. They need a place to practice their guitar or play video game without feeling disturbed. They want a place that feels private. At their age things are never easy, they get a sense of responsibility and independence. They need a place where they can be themselves. But of course you know all this, you were at their age once, so this is just a reminder. Take all of this into account when you’re decorating their new room.[/one_half_first][one_half_last][/one_half_last]
Boys bedroom

Take out the childish things

Get rid of all the childish things. The crayons, lego toys, toy trucks, skate board shelves, story books, play tables, clothes and all the other things. You won’t have to do much, they’ll already have gotten rid of most of the things by themselves but still, your boy is now a man so get rid of it all. Of course getting rid of it doesn’t necessarily mean you have to throw it all away, you can give his old toys, clothes, books to charity or keep some of them in storage so that he can reminisce about his childhood if he needs to. But those things must go from his room. Once you have gotten rid of all of it, you’re ready to redecorate.

Get a new bed

First things first, It’s a bed room, right? So get him a new bed. Throw out the old child themed bed be it a sports car bed or something else. Get him a new bed with some nice bed sheets, throw pillows. Find a well-designed bed. Perhaps with some extra storage space. Get him a stylish, functional bed. Maybe something with a built in night stand or some extra space underneath. Just make sure it has a sleek, modern design and is functional and take his needs into consideration. Ask him if he has any special need for the bed and accommodate his need accordingly.

A new desk or workstation

Get him a new desk or workstation. Make sure the desk has ample drawer storage for books and supplies. He might also need a separate computer desk for all his tech work and entertainment. But you could save space by putting two together and getting him a large workstation instead. By which I mean a larger desk. Maybe get him a really large computer desk with enough space to study and work in and also make sure it has drawers for supplies as well. Pay attention to the coloring as well. Don’t get him a pink colored desk or something with flowers just because you think it’s cute. Remember boys hate that.

Repaint

It’s probably been years since you last repainted his room. So take a brush and start painting. Paint according to his interest or liking. If he is a fan of sports paint something with a sports theme. Maybe paint the picture of his favorite baseball or soccer player on the walls. Another thing to remember is that you don’t have to paint the entire room in the same color. Be creative. While you’re doing this patch up any holes or cracks in the celling or the walls and change switches, sockets and other electric outlets. Get something that’ll match with the color of the room. Re do the entire room.

Change the furniture

Get new furniture. We already discussed about a new bed and desk but there are other furniture and those need to change as well. Get him a new dresser or if it’s up to date then do some repainting. When it comes to painting, again, be creative. You can also make a world map with recycled pallet wood or other creative items to get his room some extra finesse. Put up wall shelves if he needs some extra storage. One thing you can do is be a little creative with the furniture just like the sports themed wall, custom make his furniture with the theme he likes.

Better lighting

Lighting is a very important. If you have ever been in any party then you know how the lighting can change the mood. Better lighting can also help your boy with his studies. So get rid of those hot old lights and get him some sleek modern lights. Put some crazy LED lighting in his room that’ll make him cool to his friends. Trust me, being popular may not be very important but it will give him peace of mind that can help him go a long way. You can also place lights above the beds for better reading and a table light as well.

Keep their interests in mind

As stated many times above, keep their interest in mind. If you can keep the theme of their choice in the place they’ll spend a lot of time in, you’ll indirectly inspire them. Just thing that you son wants to be a baseball player and he is good at it too. Giving him a baseball themed room would always keep him motivated to follow his dreams. So be a source of support and keep his interests in mind.

Go for a masculine design

He is a man, not a kid and not a girl. So don’t mess up his room. Keep a sense of masculinity in his room. Don’t design something with a pony or something that’ll make your boy feel like less of a man. If anything do something that inspire him to be more responsible and brave.

Floors

You should also redo the floors. Change the carpets into something nicer or you could go for an entire make over and change the entire floor. Go for a hardwood floor or black carpets. Just make sure it matches with the rest of the room.

Consider the need for privacy

Every grown up needs space. I am telling you leave him but give him his space. Don’t design his room in a way that’s makes him feel like he is being spied on. If his room is in such a position, consider giving him a new room. If you have more than one boy and unable to give them separate rooms than at least give them separate beds, make sure that each of them feels like they have a room or personal space of their own. So make sure that their room has privacy.

Your little boy is not getting any younger anymore. He has grown up so it is time to decorate your little boy’s room to a grown up room. Changing some things in his room or adding something to make him feel that he is a grown up is the best way to help him feel that he is indeed a grown up boy. Here are some suggestions on how to decorate your little boy’s room to a grown up room.

Grown up boys roomRemember that it is not totally saying goodbye to his baby days, decorating his room is about training him to be a grown up though there will be times that he will miss his baby life. You don’t really have to remove all of his toys and other baby stuffs. Instead have a cabinet where you could organize everything so that once in a while your little boy can grab anything when he needs them. Try to add some books that are based on his age, like educational books. It would also be best to add some magazines about sports while we add books in his room.

Suggestions on how to decorate your little boy’s room

Your little boy gets older and wants his own room; he will want everything to look cool and superb in any other way. Therefore, you should choose bright primary colors or muted tones in shades of blue, green and brown, as most men designed their rooms in muted earth tones with man’s theme colors.

Far west styled boys bedroomThe wallpapers that must be used in your little boys room must be intricate without being busy, be inspired of Ralph Lauren’s patterns and other designers. Try to have a solid colored background that would give a man’s appeal. In order to give your little boy’s grown up room a masculine effect try to put some masculine accessories and big man’s toys like, airplanes, cowboy stuffs, car collections and motorbikes, as starters. Do not give him a crib to sleep on, purchase a full sized bed. Cribs are for babies, and your young boy is not a baby. Give him the bed that is simple, comfortable and suitable for a young adult.

Unisex baby bedroom decor
In addition to the aforementioned things, another great suggestion is to give him a small sized pool to play inside his room. A simple room yet with masculine effect, your little boy is truly a grown up in his own room. All these suggestions are proven to be much effective. What are you waiting for? Decorate now. Decorate your little boy’s room to a grown up room.

Design choices for a Room for a Little Boy

For the design choices, you will have a wide variety to choose from. Plaid and stripes however, are very good basic designs that you can use as the main backdrop. Plaid is a very reliable pattern that you can always count on not to suddenly get old. Stripes on the other hand are very classical. It can be used as a good backdrop for practically any type of décor you can come up with. You can use different combinations of stripes. There are the bold and wide stripes with strong colors and there are also the thinner, lighter ones. Larger stripes usually fit easily into a boy’s room; it would take a little more work to “muscle up” the smaller stripes into blending well with the room.

In front of these plaid and stripe background, you can place the furniture and accessories you want your little boy to have. Try to keep your distance from the plastic tables, chairs, and drawers that have “for children only” written all over them. Look to bring in more masculine type furniture made of large wood or sleek metallic surfaces. The shiny accessories would do well in highlighting different parts of the room.

Decorating ideas and plans for boys bedroom

You will come across a lot of decorating ideas for boys bedroom (completely different than a girl’s bedroom), as well as projects, display ideas, paint, themes, and artistic ideas for particular spaces. Who said a boy’s bedroom has to be boring? A special theme will make available both the center of attention and the motivation for an out of the ordinary one-of-a-kind bedroom and can be personalized as your child grows up. Though you might assume that a little boy just wants an area to play around, from the moment in time a little boy gets his very own bedroom, he will wish for the whole thing to give the impression of being “cool” or “hip”. Whether he is wild and humorous or caring and thoughtful, the bedroom ought to focus on his interests and activities.

Boys decorating bedroomWhile decorating ideas for boys bedroom aim to think further than the toddler days and seek to pay money for most important furniture pieces that will adjust as he grows up. The most important thing to think of for furniture for a boy’s bedroom is with the intention of its sturdiness. After all, through the years, he will be hoping around and climbing on and off for years. Think outside the box and be resourceful with the furniture for a child’s bedroom. Locate pieces at garage sales or flea markets and adjust them to the recent need. When you have the expense for more furniture, and then pay for pieces with the aim to last all the way through college days.

It is an excellent thought to have some furniture on casters. You will be able to move about the bed around the bedroom, make a new arrangement of space, and familiarize yourself with the needs of your child’s age with no investing in new pieces. If your boy’s bedroom is tiny, get as much off the ground as you can to maximize floor space for playing. Mount shelving from the walls rather than letting it stand on the floor. Make available space off the floor for displaying awards, books, pastime projects, collected works, and sports equipment. For sure, needs will change with growing age, nevertheless there will always be a need for storage space.

Decorating ideas for boys bedroom ought to have a comfortable and cool bed, the most excellent one you can pay for. Even if he might not weigh a lot and only just make a dent in the mattress, he needs firm support for a contented and healthy rest. The best pick for a boy’s bed is a platform bed or loft bed. For a tiny room, you will double the space and get lots of storage space at the same time. Bunk beds are always cool and gives cozy space for sleepovers and slumber parties as your child grows up. Make use of blankets to create a sleeping tent for added fun. The next fine essential is a bedside table, an area to place the nighttime drink

How to Create a Grown Up Room for a Little Boy

Your little boy’s room is his own private space. It is his own world where he can let his imagination roam free and he can immerse himself in his fantasies. This room is by far the most important possession he has at this point in his life, so you are going to have to treat it that way when you begin to think about setting it up and decorating it.

Giving a grown up look for your little boy’s room will surely excite him. He will feel much more confident when he feels that you think he is “grown up”. He will also appreciate the “grown up” items that he will get to have for his room.

For starters, give the room an overall feel of maturity by sticking to more subdued color shades over the bright and overly light ones. The bright primary colors that are very common in children’s rooms would not make a good base for the “grown up” atmosphere that you want the room to have. Furthermore, real grown up men like their colors to be a little more muted than that of the women; thus, it would be a safe bet that your little boy would prefer it too. Be careful though not to make the room too dark because this would take out the fun character of the room. After all, this is still a little boy’s room. To prevent this, choose the main shade from the lighter “manly” colors like tan or brown. You can also place light color themed posters or wall tattoos around the room to make it feel a bit livelier.

Read More
Sports Themed
Furniture

Sport Themed Furniture and Accessories | Decorating Visita Casas

The passion for sport is a reality, not just a phrase. And the sports themed in furniture, accessories and decoration in general; is of course a very interesting valid concept which final result is worth admiring once we have finished it to the last detail.

The problem is, and one where many people often fail, in the focus that most people give to the decor; not to every decorative element. The real problem lies in the final decoration based on the sport theme.

So in order for this not happening to you; today we bring you the best advice to build your sports decoration which final result will be the envy of all who admire it.

Read More
Christmas Decoration
Decoration

The Perfect Christmas Decoration! | Decorating Visita Casas

OH Christmas! One of the most beautiful times of the year, not only for the perceived aura you get whenever you breathe in, the gifts and snow (my apologies if it does not snow where you live), it is also perfect for people like us because very few things are as beautiful as the Christmas decoration.

Before, people just hung a few lights and nothing else. However; now we have all understood that Christmas decor is as important as everything else.

For there is no better way to create the perfect environment than through the correct scenery, that’s why, here we will give you the best tips to get the perfect Christmas decoration.

Read More
Colleges and Schools, Interior design

Proof That Interior Design Training Is Exactly What You Are Looking For

Interior Design is a career involved with anything; space, windows, finishes, doors, furnishings, furniture, walls and lights. Interior designers use these essentials to polish an efficient, practical, secure and pleasurable area for the user of the building.

The specialty areas and opportunities for an Interior Designer are limitless, especially for an outstanding one. To acquire the skills and knowledge needed for this line of work, one needs to go through training.

If you are a person who is beginning in this world and you would like to know what step you should take next; this article is for you.

[one_half_first]

Postsecondary education, particularly a bachelor’s degree, is ideal for positions in interior design. Through the modern technology of the Internet, taking up these courses at your own homes is not impossible anymore.

Several outlying schools extend online interior design training which allows students to merit their credentials at their ease. They offer different programs beneficial for the career of Interior designing such as drawing, perspective, spatial planning, furniture design, architecture and many more.

[/one_half_first][one_half_last][/one_half_last]

Read More
Bar
Tips

10 Unique Drinks to Prepare In Your Home Bar

If you have a bar in your house (like me) for sure it is because you enjoy being the host of meetings between your friends. But a home bar should be something more than decoration, for that; if you are going through that problem where you do not know what to prepare for the next meeting, here are some tips.

It is important that you keep the bar stocked, but before making a major expenditure only on liquor; read the article calmly, here also we will give you very important tips to keep the bar always stocked.

[one_half_first]

The first thing you need to prepare and in what you really should invest a good part of your budget are the utensils. It is true that you will have a bar and the main thing will be the drinks, however; the magic of preparing the drink with class and in a “professional way” is what makes the drinks taste better.

Keep in mind that people study this as a profession and constantly are appearing new drinks, new delicious combinations.

[/one_half_first][one_half_last][/one_half_last]

Read More