accesories

How to Hang Pictures on Plastic Walls

Photos are shot for a remembrance for all of us. We take photos so that in due time we tend to cherish the memories that took place. We laugh and cry at the pictures that we reminisce at. Remembering and missing the friends we used to hang out with and the fun that happens spontaneously in our lives. Photos are meant to be displayed and be seen by people.

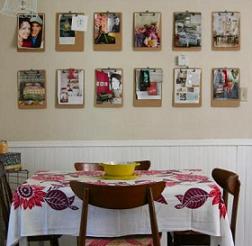
Decorating with photos on frames is like displaying your artwork on the wall. Camera work is a famous branch of art. An art which in you capture the most beautiful and breath taking scenes. As we can see, people love taking pictures of themselves and other people too. A person loves to take pictures of anything and absolutely anything. May it be hilarious or in formal ways just to have fun doing the poses for the camera.

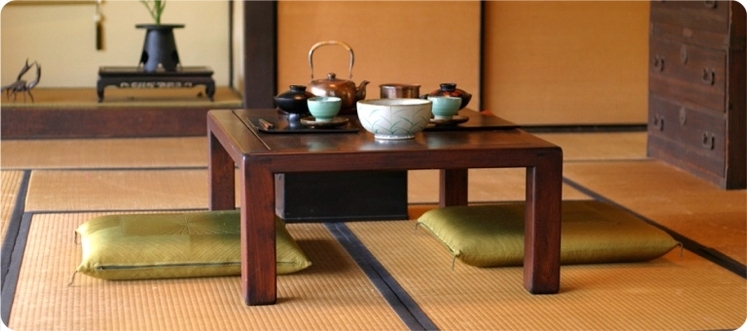
In the past, the only existing photos are black and white. But these days, colored pictures are now well-known. We see a lot of pictures on walls even on the internet. May it be colored or in black and white. Black and white pictures are coming back to way of life. Some people love to take it in the old fashion way. Portraits have continuously been in frames on walls. Some people even decorate their own frames for their photos. Frames are used to display the photographs that you have captured.

How to hang a picture on walls made of plastic

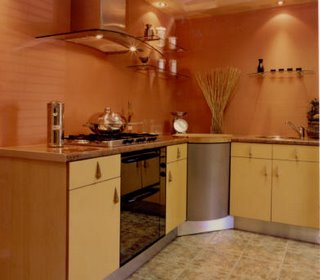
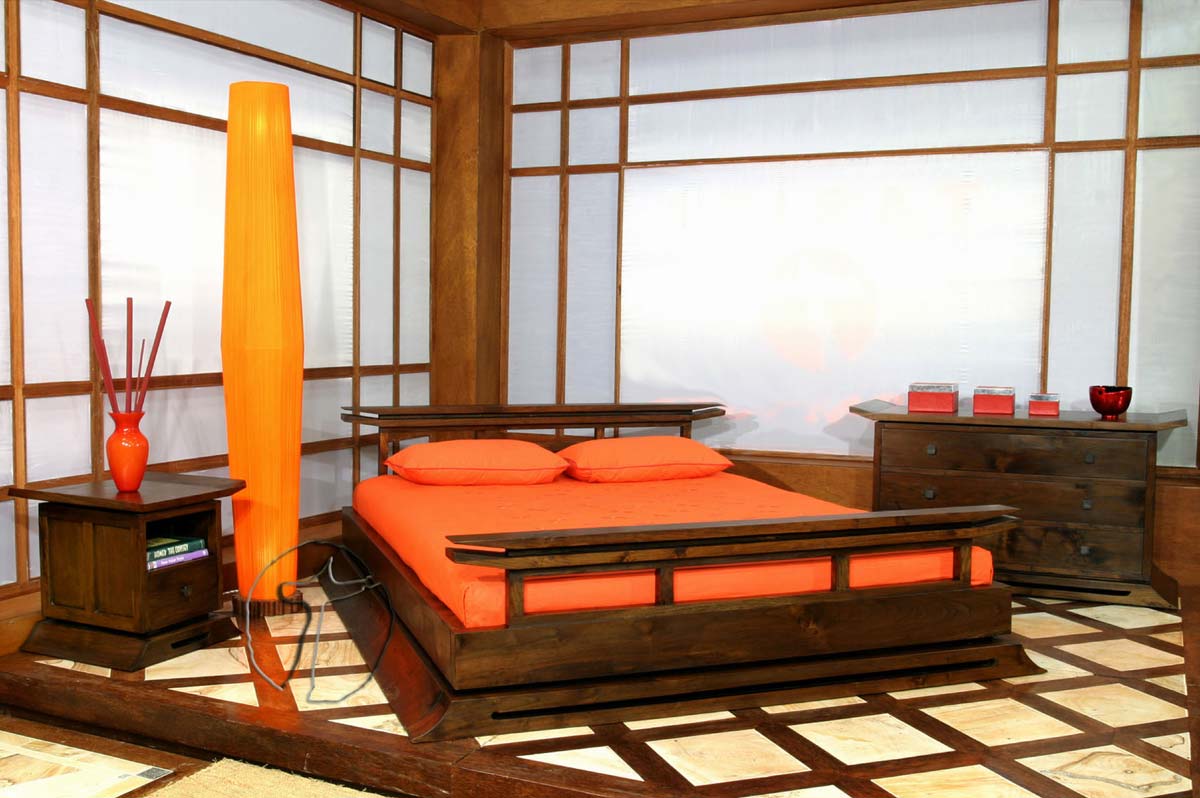
As you can see, using photos to decorate your home is widely used today, and it will also give your home a more welcoming look.

Dying to hang your favorite picture or portrait of you on your wall but remembered that your wall is of plaster and you’re scared to have cracks or holes on it? Well then, today is your lucky day because we will give you tips on how to hang your pictures on plaster walls without chipping or crumbling it. We will not do the old style that we’ll just hammer the nail on the wall but instead, we’ll be doing simple and easy ways to hang up your pictures.

Here are the following tips and instructions that you can do:

• An old school style in hanging things on plaster is that heat first the nail that you will use. After heating, hammer it to the wall. It will easily and smoothly be pushed inside the wall without chipping it.
• A very tricky thing that you can do is to use masking tape. Applying masking tape helps the plaster in order not to chip easily. Basically, it supports the plaster. In applying the tape, determine first where you will put the nail. After that, put masking tape on the position you chose.
• Next thing that you need to find out is what kind of picture hangers that you should use. Read this carefully:

If you’re going to hang up a small picture, use small picture hooks (adhesive-backed ones) with nails. The problem with small hooks is that it does have a high rate that it can still damage your walls but of course, you should be really careful in hammering it to the wall. We also recommend that you hammer it in an angle of 45 degrees for the best outcome.

D.I.Y: Hang Pictures on Plaster walls

The best way to make your house, condo, apartment or even one small place look great is to decorate it. Furniture gives a pleasant ambience as well as wall-hang pictures. If you want to add or hang picture or any small furniture into your wall, don’t ever think that hammer and nails are enough. You are definitely wrong. If you insist to use these materials, you can probably produce cracks or hole that is bigger than the diameter of the nail. Plastered walls usually have coating of lime putty mixed with Plaster of Paris. This kind of plaster mix can cover walls durably but it crumbles, ships and breaks off easily.

Older days, houses were built with wood molding, also known as ‘picture rail’. Placing hooks at different locations into the picture rail is normal. Then, using wires, strings, etc. pictures or small piece of furniture were hung to the hooks. Through this way, no holes are made in the plaster walls.

Presently, investigating the other hanger types that are available in the market is better than reaching hammer and nails. One of the various types of hanger is made of hard plastic materials which are available in different sizes. A heavy duty adhesive was built in its back which becomes sticky once it gets wet. Allow the adhesive to set in a couple of minutes then position the plastic hanger on the wall. Firmly press the adhesive against the wall and let it be undisturbed for a period of time. After giving enough time, hanger is ready to hold the thing you want to hang on it.

Read More
accesories

Using grapevine wreath as a towel holder

The towel holder is a wonderful invention that makes life easy. The towel holder is an ideal way to hold your towel. It allows you to hang your towel in a safe and dry place. It's a stylish and practical accessory that will keep your bathroom looking neat and tidy. Also, uou can install it on your own or have your local handyman do it for you.

A towel holder, or bathroom shelf, is designed to keep towels and other bathroom items in an easy to reach location. It's great for small bathrooms, as it reduces the amount of counter space required. You can also choose from a variety of designs. It also helps reduce clutter and makes it easier to find your towel. If you are looking for one that is easy to install, this may be the perfect solution for you. 

What is a grapevine wreath?

Are you looking to learn what a grapevine wreath is, and how you can use it in your bathroom? Well here is the place to go!
 
A grapevine wreath is a wreath that is made out of grapevine. The grapevine wreath has been around for ages. It was first used by the Native Americans in their ceremonies. They would tie the grapevine together and use it as a ceremonial object. It was also used for decoration, as they would hang them on the doors and walls. The wreath is made with pine cones, a few strands of grapevine, twigs and a few ornaments. And comes in different sizes and colors.

The grapevine wreath is a wonderful way to decorate your door or wall. It is simple and easy to make and you do not need any special tools. But is not only to decorate your door or wall, here we want to tell you how usefull it can be in your bathroom.

Why Use A Grapevine Wreath In Your Bathroom?

Grapevines are an ideal option for bathroom decorating since they provide a warm, rustic, and elegant touch to any bathroom setting. They can be used in the shower or bath, as a beautiful accent in your sink. This article will provide a basic overview of the benefits of using a grapevine wreath in your bathroom.

The grapevine wreath is a great place to hang your towels. And you can use it as a towel rack. There is no need to put a towel on the floor. You can hang the towel on the grapevine wreath and it will not be in the way. And when you take the towel off, it will not be in the way either.

This is the perfect idea if you want to make your place more interesting and elegant and it is quite easy to make this.

This is a great functional décor that you can place in the guest bathrooms. You can choose from wreaths with 6-8” in diameter whichever suits you. Use smaller wreaths for smaller towels. Decorate the wreath to make it look more presentable. Instead of the traditional towel rings, you can make use of this to make it more presentable and unique.

Use these tips as inspirations for your own creative projects. Make sure that you have a clear idea of what you want to do. In the end, your towel rings will be a great addition to your bathroom decor.

Other uses for the grapevine Wreath in the bathroom:

Here we are going to give you some ideas of how you can use a grapevine wreath in your bathroom. The first thing that you want to do is to make sure that the grapevine wreath will fit on your bathroom door or wall. You want to make sure that the wreath will look nice and it will not fall down. If it is not big enough, then you can simply add more grapevine. Or if it is too big, you can trim it down. And you can also add ornaments and other decorations on it.

Other uses that can be given to this accessory:

Grapevine wreath can be used as a lamp base. If you want to accentuate the base of your lamp base to make it look more interesting, you can make use of the grapevine wreath. Buy wreaths that would be used to cover up or conceal that rustic look of your lamp base. You can make use of a glue gun or twine the wreaths together to secure it to each other. Then decorate the wreath with flowers or anything that may be fit the theme of the room your lamp is in.

Grapevine wreath is also perfect for your table’s centerpiece. With a little touch of your artistic talent, you can have the perfect centerpiece less the hassles. All you have to add is some fake or dried flowers and you can have your perfect centerpiece. These are just some ideas that you can have making use of grapevine wreaths. This would surely add a color of life to your room.

Read More
Bedroom

Personalized name wall décor for kids bedroom

Looking for a personalized wall décor for your kids bedroom? Check out this post on the importance of create a wall decal for your kids bedroom. Children love creativity. So why not let them decorate their room with a personalized name wall décor?

If you have a child who loves to draw and create, a personalized wall décor for your kids bedroom is the perfect gift for him or her.

Why Create A Name Wall Décor For Your Kids Bedroom?

You can create a personalized name wall décor for your kids bedroom to help them feel special and unique in their room. Create a name wall décor for your kids bedroom is also a great way to promote positive thinking in children.

Here are some reasons why you should create a name wall décor for your kids bedroom: 

  1. If your child is a creative person, they’ll appreciate the fact that they get to express themselves with their own name on their walls.
  2. It Helps Promote Positive Thinking. Children are naturally creative and expressive. They’re going to enjoy decorating their room with their name, whether it’s a personalized wall décor or a nameplate. Creating a name wall décor for your kids bedroom will help them develop the habit of being creative and positive.
  3. It Builds Self-Confidence. Children who are able to express themselves through art, music, sports, etc, are often more confident than their peers. Kids who have a name wall décor in their bedroom can feel proud of themselves because of their creativity.  
  4. It Helps Children Feel Special. Children love to feel special. When they’re surrounded by objects that they like, they’ll feel better about themselves. Create a name wall décor for your kids bedroom will make them feel special and unique.

How to decorate a children's bedroom:

If you want to create a personalized name wall décor for kids room, you can find many different materials to use. There are many different designs available to get you started. You can also try different colors and styles to make it more interesting. The most important thing is that you can customize your wall décor according to your kid’s taste.

When you think about creating a named wall decor for your children's bedroom, the first thing you might think about is the color of the wall decor. But before you take out the brush, take a moment to think about the design you want. Create a named wall decoration for your children's bedroom that should include items that your child can interact with. Here are some tips to help you create a name wall decoration for your children's bedroom: Choose a design that is simple but fun. In this way, children will be able to interact with your name. You don't want a layout that's too complicated or too difficult. Also, make sure to use a font that is easy for children to read. That is, choose a font that is readable and fun.

But, if you dont want to do it yourself and you are worrying about the budget, have no worries at all. Most of the creators of personalized name wall décor for kids room offer cheap rates especially if you have many orders. You can ask them to make personalized name decors for your kids and your room! In this case, you will not only give your kids’ room a blast, but also your room and most important of all, you can save bigger amount of money! The good thing with having personalized name wall décor is that you know that your kids can easily connect to their rooms’ environment.

They can feel total security and they are not afraid to stay their alone. It is important to instill onto their minds that their rooms are for their own. No one can take it away from them and personalized name wall décor for kids’ room strengthen their feeling and attachment.

To sum up

 If your child is a creative person, they’ll appreciate the fact that they get to express themselves with their own name on their walls. It helps them develop the habit of being creative and positive. It Builds Self-Confidence. Children who are able to express themselves through art, music, sports, etc. are often more confident than their peers, also tt helps them feel special and unique... ­­­­­­­­­­­­­­­­­­­­­­­­­­­­­­­­­­­­­­­­­­­­­­­­­­­­­­­­­­­­­­­­­­­­­­­­­­­­­­­­­­

So, if you want your kids to go crazy about their new room, have your own personalized name wall décor for kids’ bedroom now! Make your kids’ room an enticing place to go for them to appreciate and to feel that they are being loved by their parents. Designing your kids’ room maybe a great challenge but a very fulfilling one once you see the smile in their place while being amazed by your efforts on arranging their room in a new style with a blast!

Read More
Feng Shui

The Stream of Life’s Essence: Balancing Chi Energy in your Home

The world is filled with negativity. In our homes, we often absorb that negativity. Our homes become negative places where we sit, relax and do not live life to the fullest. Home is where we spend the most time. But we often forget about the importance of having a positive energy home. That’s why we bring to you tips and techniques on how to keep your home free from negative energies.

This blog is about the importance of positive energy in our homes. We share tips on creating a safe, happy environment and discuss different methods of creating a positive energy in our homes. We believe that there is no better way to improve the quality of your life than to surround yourself with positive energy.

About the Chi Energy

Chi energy, pronounced as khi energy, is one of the fundamental active principles that form a part of every living thing. It is what the feng shui discusses as “energy” or “energy flow”. Chi energy may of positive or negative attribute, and the maximum utilization of positive chi is the most fundamental principle of feng shui. Turning this positive energy or chi energy for homes may not be such a difficult task, provided that you can follow these certain procedures.

The Chi Energy is the life force that flows throughout our bodies. The Chi Energy is responsible for all physiological functions, including metabolism, circulation, respiration, immunity, and mental functions. A properly balanced Chi Energy is the key to good health and vitality.

Feng shui practitioners often use it as a method to control and direct this energy for personal, family and business purposes. In feng shui, we understand that every living being has a source of Chi energy. However, when we are born, we are surrounded by negative energies which may be due to pollution or some other factors. This causes a blockage in the flow of the chi energy and leads to negative effects on us. It is for this reason that it is important to learn how to balance our chi energy to make it positive and beneficial. Chi means breath or life force in ancient Chinese culture. Chi energy is also known as life force, spiritual force, universal energy, life energy, prana, bio-energy, vital force, and bio-energy. It is the energy that flows through all living things. It is the most fundamental energy that forms a part of every living being. 

Turning this positive energy or chi energy into your home

The following are some tips on how to transform your home into a place of positive chi energy: Exist a traditional belief that chi energy scatters when carried by air and is collected when carried by water. Basically, you can start to get chi energy to circulate properly through your home by drawing them in through openings like windows and doors. We recommend that you open doors and windows, in order to let the chi energy flow naturally in the house and in the different rooms of your home.

Control how the air flows around your house. For example, if you are using a fan at home, make sure that it is not set on a setting that is too high, as it can disrupt positive energy because of the random flow of air it produces. Position the fan so that it is now directly aimed at yourself, and provide a central air circulation system for your home. You should never let the air stay stagnant for a long time, as it can accumulate into negative energy through time.

Other tips for creating a positive environment

It’s about creating a happier home environment. To help you get started, we have listed out some tips on how to create a positive energy in your home. These are just some tips, there are many more. The first step to creating a positive energy in your home is by eliminating negative thoughts. To eliminate negative thoughts, one must have an open mind. You can do this by meditating, reading books and taking time to think about what’s going on around you. Another way to create a happy and positive home is by surrounding yourself with happy people. One way to do this is by spending time with positive people, especially those who make you happy.

The next step is to be aware of what’s going on around you. By being aware of what’s going on around you, you can avoid getting into a negative state of mind. The most important thing to do when you are in a negative mood is to be grateful for the things that are going right. You can also be grateful for the things that you have and how fortunate you are. Another way to create a positive energy in your home is by spending time outside. Being outside has many health benefits and it helps us get fresh air. Spending time outside will help you clear your mind and you will feel more relaxed and happier. When you are outside, try and look at all the beautiful nature that surrounds you. It’s important to keep a positive mindset while you are outside so that you can bring the positive energy inside your home.

Read More
Styles

Decorating Kids’ Rooms: Egyptian Style

A child's room is like a child's playroom or a toy room. The best rooms for children have themes like the zoo, park, forest, beach, etc. This room is meant to be a special place for your child to learn, play, read, draw, write, paint, and do whatever he likes.

The importance of a nice room for our children has been stressed by many people. They suggest that you should set aside a room where your children can feel comfortable, relax and play without any pressure. We understand that it can be a daunting task to create such a space for your kids. We hope that the following suggestions and tips will help you in creating that special room for your child.

This blog is full of tips and advice for those who want to build a better room for their kids. So, if you want to help your kids with their rooms, then read this article.

About Egyptian Style and Design

In case you don’t know what is the ancient Egyptian style and design, then it’s time to read about it. Egyptian style and design is primarily characterized as ancient, but advanced at the same time, it is due to the feeling that ancient Egyptian technology during their time gave the sensation that it not suited for their era, rather like it was actually a glimpse of their future. This unusual mix of ancient and advanced motif of Egyptian interior design and architecture makes it one of the prominent designs that go out beyond the norms. Egyptian style can be applied to almost any kind of room, the kitchen, living room, dining room, and even in your kid’s rooms.

Egyptian interior designs usually represent several iconic articles that are depicted in ancient Egypt. The room’s walls can be given a general design and look of an ancient mural or writings, but these can be quite expensive and takes so much effort to do. Instead of going for ancient murals or wall writings, you can go for something simpler like, reed papyrus themed walls. Walls can easily be painted to look like reed papyrus by going for light yellow and deep brown colors for added detail. It is recommended that you use a stencil with a reed papyrus design etched in it in painting your walls. This way, it becomes much easier and saves a lot of your time to concentrate on other parts of the room to decorate.

How to decorate your child's room with this style?

If you have kids and are looking for some great ideas on how to decorate their rooms, this is the right place. This blog is dedicated to all the parents who love Egyptian style and want to decorate their kids room in this style. If you want to bring the ancient Egyptian style to your kid’s room, then you are at the right place. On this article, we have listed different themes, designs, and decorations to help you decorate your kids’ room according to Egyptian fashion. So, without wasting any time let’s get started. 

Floors are much easier, since the design is that of an ancient civilization’s room design. Floors can be painted with a very light orange tint to resemble a clay brick’s color that is commonly used during that time. Add the ambience of a ancient Egyptian room further by adding an Egyptian themed carpet which you can order locally, but you’ll have to consult a specialist which kind of Egyptian themed carpets are good to use.

Another common iconic article that you can use in designing an Egyptian themed room is none other than Egyptian artifacts. Of course, you don’t have to go to Egypt to buy souvenirs just to get those decorations, nor one would have to go to an auction to buy those very expensive genuine artifacts from Egypt. Simple alternatives like small cat and fox sculptures of Egyptian design would suffice, as it can greatly add the ancient feel of the room’s entirety.

Beds can simply be of modern design, with the skeletal framework being the one with the Egyptian motif. Color combinations such as yellow, blue and orange are the best ones to use, just remember to apply these color combinations in tandem with the color of the pillows and blankets that you are planning to use. Children would love to see the lively colors of their Egyptian beds. But remember, don’t apply anything too fancy.

Finally, adding some enhancements to the rooms like papyrus curtains and a few Egyptian themed furniture like chairs and you now have your very own Egyptian themed room for your kids. A word of advice though, children might want to play with some of the artifacts at their room, so you’ll have to put away every item that can be hazardous away from them.

To summarize

A child's room is like a child's playroom or a toy room. The best rooms for children have themes like the Egyptian stile, zoo, park, forest, beach, etc. The importance of a nice room for our children has been stressed by many people. We hope that this blog was helpful and gave you interesting tips and advice for those who want to build a better room for their kids. 

Read More
accesories

Scaffolding for Do-It-Yourself Jobs

Naturally, scaffolding meets the wide variety of requirements in maintenance and construction, as it is expandable and flexible. The building blocks called jacks which supports metal and are built of heavy tubing. It has telescopic adjustable feet that lock into position with steel pins. All scaffolds set-up requires at least two scaffold jacks.

Due to scaffold’s expensiveness, it is available for rent for homeowners who cannot afford to buy. It is used for most large home-improvements, which made scaffolds more feasible now as it make any jobs easier and safer as well.

What is a Scaffolding?

A scaffold is a temporary platform used by construction workers for the purpose of working on the roof, wall or floor of a building. It is usually made of wood, metal or plastic and can easily be assembled and disassembled.

If you’re going to use a scaffold, you need to be sure that it is sturdy enough to hold all your weight. You also need to make sure that it is stable enough to support the weight of the workers. There are several factors that you should consider before using a scaffold. For instance, if the scaffolding has no proper locking mechanisms, it is not safe. 

In addition to this, there are many other things that you should look out for. The height of the scaffolding should be adjusted according to the work that you will be doing. If you’re working on a high roof, then it is advisable to use a scaffold with an extra height. The most important thing is to make sure that the scaffolding is safe and easy to use.

A scaffold is an essential part of any construction project. It can be used for several different purposes. For instance, scaffolds can be used to build a roof or to fix walls. You can also use them to work on the floor of a building.

Scaffolding as a tool to consider when renovating your home

If you have your own house or you are planning to have one, in the long run, you will encounter house problems like replacing rotten boards, repainting or installing new features, which are simple problems that you can do alone. Ultimately, you will work on higher parts of your house. Nowadays, it is very convenient to have ladders that can help solve this kind of renovation. They are available in a variety of configurations and they are designed to lean on the wall. This type of ladders maybe all some homeowner’s asking for, but for special situations, it is not as suitable as scaffolding is.

Although scaffolding is a type of rolling ladder, ladders are different from scaffolding. Scaffolding is ideal for construction as it is safe because of its ability to operate and stand alone, adjustable height, lockable wheels and the capacity to hold multiple persons and materials as well. It is used temporarily and it is elevated framework that supports workers and materials in construction work. Particularly, it is used for building or other large type of structures.

Here’s an example of benefit of using scaffolding in do-it-yourself job:

Assume that you have a two-story or three-story house, and the ceiling in the main atrium and great room soars up to the upper level. You want to install crown molding but you don’t want to damage the walls by leaning tall extension ladders against them which are sheetrock. This kind of job calls for help from scaffolding. You can measure the length by simply assembling scaffold jacks accordingly. You can also use it or painting in high-ceiling rooms and for installing ceiling fans or other fixtures in such a room. Even though ladders are the most essential tools homeowners have, the availability of rental scaffolding opens a new range of do-it-yourself jobs that are higher above the ground. Always exert an extra carefulness.

About the risks

On the other hand, despite the fact that scaffolding is effective and safe, there are still some risks in using it for construction work. Accordingly, knowing how to use scaffolding properly and careful maintenance is required to ensure its good condition, prevent scaffolding related injuries or accidents and promote overall construction safety.

The following guidelines are suggested for using scaffolding safely: Avoid using scaffolding in places where it is not appropriate. If you’re building a home, you must first check with local codes and regulations before you start. Always follow the manufacturer’s instructions when using scaffolding. Be sure to read the manual thoroughly before you start. If you are using a scaffolding platform, make sure that the platform is stable enough to support your weight and avoid standing on it if it is unstable.

Also, make sure that the platform is level. In addition, if the scaffold is in a place that may be affected by winds, always wear a hard hat. Don’t climb on a ladder while the scaffolding is in use. Always take precautions to protect yourself and others from falling. Make sure that all work is completed before you remove the scaffolding. If you have to use scaffolding on a busy street, always keep it in a safe place. Never use scaffolding if there is any chance that the work will be affected by rain or snow. If you’re using scaffolding for construction work, then it’s important to keep safety in mind.

Read More
office furniture

The best and more useful office furniture

Building an office is almost the same as decorating your own home. You have to think about your overall layout, the furniture that you have to use and how to arrange them, colors of your walls, and so on and so forth. When you are decorating your own house, you normally think about comfort; on the other hand, when you are decorating your office, you do not just think about comfort, but you think about productivity as well.

Every week, a typical employee or business owner would spend about forty hours or more in the office; it’s like their second home. So making your office a little more comfortable than the typical bare office could really make a remarkable difference in how things flow in your office. If you want your time in your office to be productive, then build the kind that will make you happy.

Why is a good workspace important?

According to the recent market analysis, working space and computer desk design is one of the contributing factors in employees’ efficiency and productivity. They must be able to perform their work faster with a close access to the equipments and documents that they need to complete their tasks. Aside from proximity of their working materials, privacy is also necessary to let them concentrate and carry out their job free from noise and distractions hampering the quality of work. Meanwhile, expanding companies call for a bigger space which they require a proper workplace layout and design. Modular office furniture is the key to these demanding requirements of workstations nowadays.

Most of the manufacturers offer wide selection of office furniture which transforms the office from traditional set-up into a systematic environment with a privacy panel depending on the designs, sizes and colors. This system maximizes space and organizes equipments and files with the use of office tables, ergonomic chairs, storage cabinets and office accessories. Modular office furniture at National can be designed to accommodate a defined number of employees considering comfort, mobility and flexibility. It also promotes the ergonomics concept for the benefit of the workers to lessen fatigue by means of proper design of chairs and reduce movements by providing complete access to materials and equipments. It also comes with a cubicle and facade that helps lessen noise.

Office furniture that's more useful:

To jumpstart your quest in building that comfortable and productive office, you need the best office furniture—the ergonomic office furniture. Ergonomic office furniture is the kind that allows you to move around in your office more efficiently and in effect increase your productivity. There are three pieces of furniture that you need to have in an office. These three should be carefully thought of when you are purchasing them. You need an ergonomic office chair, desk, and filing cabinet.

The Ergonomic Chair

Who would have thought that the most important piece of furniture in an office is the chair? Most of your hours in the office are spent sitting on a chair so it makes sense that it is the most essential piece. When choosing a chair, choose the one that will provide a comfortable sitting experience for you by making sure that the chair suits your body size and body type, checking the back support, and by checking the height of the chair. If your work requires a lot of movement in the office, then it is best to get a chair that is sturdy and has wheels.

This chairs are designed to prevent fatigue. It must come with an adjustable feature.

The Ergonomic Office Desk

The office desk only comes second to your chair. First thing that you have to check is the height of the desk. You have to make sure that the height goes well with your chair. Ideally, your desk should allow your elbows to bend at a ninety degree angle when your hands are at rest on the keyboard. Most desks are not adjustable, so before you purchase them, check your options; see if the manufacturer can adjust them for you or if there is an easy fix for it like placing blocks of wood under the desk. Other things to consider when choosing the desk is that it should give you enough work space and enough room to place your computer, mouse, and keyboards. Having the right desk will minimize tensions in your wrists and arms, which you normally experience when you do repetitive motions and when you work for long hours.

The Ergonomic Filing Cabinet

Once your chair and desk are all set, the third step is to choose the filing cabinet. The filing cabinet should be of appropriate height as well so that you do not have to strain your back when you reach for your files.

Filing systems is needed to hold the documents and reports organized and easy to retrieve. Wheeled pedestals, filing drawers or wall cabinets minimize space and prevent cluttering of files.

Cubicles 

This is one of the most admired features of modern system furniture. The design and style promotes privacy to employees and decrease the noise throughout the entire workstation. A careful analysis and study must be done to determine the proper layout and organization before installing the cubicles. Good quality modular must be adjustable in terms of height and length and movable whenever re-layout is needed. Cubicle panels must also have the capability to grip the data network connections and electric power cords through a row of cubes. For computer-aided jobs, there should have an option to raise or lower the work area.

As A Bonus

Don’t forget to set the atmosphere in your office. It’s a plus! You can create a happy atmosphere by painting the walls with sunny and warmer colors. Instead of using grey and dark colors, you can use warm yellow paint to set the mood.

In summary

Different products of office furniture have somewhat different panels and structures which are not interchangeable. Therefore, it is better to decide where to purchase the items based on the above mentioned criteria.

Read More
Decoration

3 options to decorate your child’s room

Parents would certainly want to give the best childhood experience for their kids. They would want them to enjoy their childhood and allow them to make the most of their youth. True enough, kids must have their best time during their younger years. It is those years when they can play around, go around while everybody is loving them.

It is the only time in their lives when all they want to do is have fun and enjoy everything around them. So, you, as parents, must try to keep up with what they enjoy the most. You must be able to relate to them, to understand what thrills them so they would never forget their childhood days. A person can only be a kid once, right? So, teach them how to enjoy their young life. Start with their private world: their bedroom.

Decorating your child's room

There is no better bonding than to teach your children with the do-it-yourself decorating of their rooms.

People nowadays are fussing about how they will decorate their kids’ rooms. It is a very challenging task because you have to take into consideration what their kids will feel on their new room. Also, they have to take note what their kids want like their favorite color, cartoon character and stuff like that.

A room designed with the tropical sea

Of course, room designs always come with specific themes, most likely the interest of the one who uses the room. However, one of the best do-it-yourself bedroom themes is the tropical sea. Most kids love the sea, and designing their rooms with sea fish furniture, figurines, wallpapers, and other decorations will certainly brighten their private world. With the term do-it-yourself, you may ask them to express their own creativity by letting them make their own designs. However, if you want to have more intimate yet fun bonding moments with your kids, you can help them do the designs.

Now that you have that do-it-yourself kids’ theme for their bedrooms, which is the tropical sea, you can now start with your kids the first steps of decorating. Where would you start? What about designing the entire room with a wallpaper designed with the tropical sea and other images of sea creatures? For men boys, you can choose a Nemo-printed wallpaper while for girls, you can have a wallpaper with the images of Little Mermaid. If you want to do away with fictional characters, you can just settle with sea creatures.

After that, you can choose the same design for the bed sheet, the blanket, and the pillows for the bed. You can also add some stuff toys of fishes, sea horses, octopus to further maintain the tropical sea concept within the bed. The same design can also be applied to the curtains. Choosing tropical sea design for the curtains will only look a little disorganized. You can choose from a wide variety of fish furniture to display on the tables, hang on the walls, and put inside the cabinets to establish the theme. These decors will add beauty to the room and the kids will certainly be amazed by how realistic their tropical sea room is.

Personalized name wall décor for kids’ room

If you want another option you can try a wall decoration with a personalized name for the children's room! This is easy to set up and easy to find for your convenience and is sure to match your desired style!

Is the new trend in interior design. It adds personal touch to your house because it gives you the sense of total ownership of the place. It is very important to feel that way especially for the kids because this is their safe place, their own place wherein they can do what they want and where they are the only and real masters. Also, personalized name empowers the kids ’thought about their room, make them feel at ease with it. Surely, this will add a mesmerizing effect especially if you will combine the personalized name wall decorations to other ornaments and designs in the children bedroom. You just have to make sure that the color combinations fit and connect to each other.

Designing a Bug-Themed Bedroom for Kids

If you are looking for a colorful, fun, and cute theme for your kid’s bedroom, a bug-themed bedroom might just be the thing for you. To start your room getting the “buggy” atmosphere, paint the ceiling and maybe even the higher parts of the wall a light blue to make it seem like the sky. You can incorporate clouds, birds, and even the occasional commercial airliner if so you wish. The lower part of the wall may be painted lush green to provide a grassy effect. 

You can purchase wall stickers of different bugs and critters that you can scatter all over the wall against the green backdrop. You can also overlap flowers and leaves to make it a little more lively and colorful. If you have bug posters, you can also place them in large spaces of the walls that will be hard to cover with little bug pictures. It would also be a good idea to hang some pictures of your outdoor activities as a family or maybe your kid’s pictures at camp on a special section of the room. For window treatments, you can use mosquito netting or butterfly netting. These come in a variety of colors so you can color coordinate them with the entire room. For corner pieces, you can get a toy or big stuffed tree that can stand on its own. You can a put long, soft, curly snake on this. You can also put other fun characters like happy lizards, a trail of ants, and even cute little baby birds on a nest.

A cute idea for accessories is to hang some from the ceiling. Toy replicas of butterflies, dragonflies, and other flying insects would be very interesting accents of the room if you hang them on different corners. To contrast this, you can put stuffed toys in the shapes of frogs, snakes, and worms on the floor. For a whimsical bug lighting effect, you can use table lamps with bug themed bases and shades. There are some that have special features like glow in the dark insects and insect sound alarms.

To coordinate all of the fabric of the room, get bedding that has the most number of different insects that you can find. With this main ingredient having all of the different insects, you can then choose the smaller items with specific insect themes. You can have bug pillows, a butterfly headboard, worm and snakes carpeting, frog trunks, and lizard shelves. You can also bet hold of bug-themed toys and electronic devices that you can use in the room. You can find items like bug-themed jigsaw puzzles, lifelike insects that make different noises, and 3-D ant farm tunnels.

Read More
Doors

How to Spice Up your Sliding Doors

Sliding doors are a great way to maximize the space in your home. They are great for any room in your house and are especially useful in bedrooms. Sliding doors allow you to have the perfect amount of space and privacy at the same time.

This post will give you a quick explanation of what a sliding door is and how you can increase their appearance.

What are sliding doors for?

Sliding doors are the best option for those who want to add elegance to their homes without compromising functionality. This are one of the most used doors in homes, offices and other areas where they serve as a means of opening and closing. There are many different types of doors that slide; some have handles, some have knobs, some are push buttons, and some use magnets. Also, sliding doors can be made of wood, steel, glass or aluminium, and provide many benefits in home and commercial settings.

There are many benefits of using sliding doors. They provide a sense of privacy, they are easy to operate, they can be easily moved from room to room and can be used in both residential and commercial settings. They also allow you to control the amount of privacy you want in your home.

Sliding doors are available in many different styles, including traditional styles and contemporary styles. Most sliding doors have an attractive design, are durable and can be made to match any décor. Sliding doors are usually easier to install than other types of doors. They can be installed with or without tracks. They can be opened by hand, and they can be closed either manually or by using a remote control. 

How to improve the appearance of your sliding doors:

The slides is a very good addition for any home. It’s a nice decorative feature to add some style to the house.

To spice up your sliding doors and giving them a new look you can install custom made door handle, door knobs, and a decorative glass insert. This will not only add to the aesthetic value of your sliding doors but also add a lot of style and elegance to your home. 

Cleanliness is very important

Also, to spice up your slidind doors yo can clean them very well. You have to be careful not to scratch or damage them. To help you with this, you can buy a window cleaning kit that includes all the tools and accessories that you need to clean your windows. 

This article will help you to learn how to clean your sliding doors and how to make them look great. Sliding door cleaning is easy. You just need to follow these steps:

1. Remove the glass from the door frame and place it on a table.

2. Put a wet cloth over the glass and spray it with water.

3. Use a soft brush to scrub off any dirt and dust.

4. Clean the handles and hinges with a rag and some rubbing alcohol.

5. If there is any debris stuck in the track, use a small toothbrush to remove it.

6. Dry off the glass and the door frame. Now, you have a clean and sparkling sliding door.

Tips for sliding doors that are near the garden

Many people find sliding glass doors really interesting. It is because sliding glass doors have a special effect especially to the living room adjacent to the garden. These provide a beautiful view from the outside, and what a better way to enhance them than to think of window treatment ideas for glass sliding doors. Contrary to what other people think, there are many things that can be done with the windows to complement it with the glass sliding doors. For those who would want to see what’s outside the room through the windows, it is best advised to use Roman shade. A Roman shade provides a cozy feel to the entire room without sacrificing the visual quality across.

The other idea that can be done is to use curtains. Curtains can really make a difference if you want to have a modern and sophisticated look. There are many types of curtains that are available in the market. Window curtains are available in a variety of designs and styles. 

If privacy is desired in a limited room but still would want to get a glimpse of the outside, the glass be have a frosted shade. This gives a slight dark shade yet the natural light from the outside still gets in the room. If one wants to further feel the outside ambiance, he or she can place some shutters on each side of the glass but be sure they are of the same height. It is also advised to hang some elements just above the sliding doors to give a cozy touch. Be sure that the color of the elements complements the color of the shutters.

Read More
How tos

How to dry and display wildflowers

Displaying dried wildflowers is a creative way to decorate and you can get it right from your backyard. There are easy (not to mention budget-friendly) ways on how you can dry and displaying wildflowers.

Benefits of having wild flowers to decorate your home

Wildflower home décor will provide you with the chance to use nature in your own home. You will find information on how to grow wildflowers indoors and how to use these as house plants. In this article you'll find some tips and tricks on how to have beautiful wildflowers to decorate at home.

Wild flowers are great additions to any room. They bring a unique touch to any room and the beauty that they create is unparalleled! They are beautiful, and adding them to your home or office creates a natural touch and an interesting and soothing visual experience. Whether they are in vases or growing in the ground, the benefits of having wild flowers in your home are endless. Our blog covers some great benefits of having wild flowers to decorate your home, whether it be in your bedroom or living room.

One of the benefits of having wild flowers to decorate at home is one of the best ways of keeping the room fresh and relaxing. Not only is it very attractive, but it also gives off a welcoming and refreshing feel to the room. Also a bouquet of wildflowers can be placed anywhere in the house. They can be placed in a vase or basket. You can also take them outside and place them in the garden.

With a wide variety of flowers to choose from, you will never get bored with your home décor. When buying flowers for home décor, it is best to go for a large variety. This way you will not be limited by the amount of flowers that you can buy and you can always find something new to decorate your home with. You can choose the type of wildflower you want, or you can pick a combination of flowers to create a unique look.

Preserving Wildflowers for Your Home

Step one would have to be, of course, gathering your flowers and leaves. Bring scissors when you check out your backyard for grass, flowers and fallen tree leaves. Don’t forget to bring a container with water so the flowers won’t wilt. If you live in a nearby river, you can also find interesting plants growing around the bank. As much as possible, when scouring for plants, try to look for the “fresh-looking” flowers. These are the flowers with petals that haven’t been partly eaten by the caterpillars and other leaf-eating insects.

Don’t pick the flowers down to the roots. When cutting the stems, cut at an angle close to the bud. When you get them home, the drying process can begin. Perhaps the most famous method to dry flowers and leaves is to place them inside thick books. To protect the pages, place newspapers between the pages so the pigmentation from the flowers and leaves won’t stain. Another technique is the use of silica gel. These are the ones in packets that you can find in newly purchased bags and shoes but you can get silica gel at flower shops.

There are a number of ways to dry and display wildflowers:

Using an airtight (preferably plastic) container spread a layer of silica gel at the bottom. The size of the container will depend on the number of flowers you’re going to dry. Just use multiple containers if you’re going to dry a lot of flowers. Shape the gel into mounds. The gel will hold the stems. Place some silica gel on the petals as well. You might need to practice on this part especially if you have shaky hands. You don’t want to destroy the petals. Typical waiting will last about 3-5 days. In the same way that you’re careful with the placing of the silica gel, be twice as cautious when removing it. You can dry flowers using floral sprays or satin acrylic spray to ward of the negative effects of moisture on your flowers.

Another method is to air-dry the flowers. Keep a longer portion of the stems when cutting from the plant so you would be able to hang them. Choose a dark area because direct sunlight will wither the flowers. For smaller buds and leaves, you may use food dehydrators.

Once your flowers have dried, you can choose from a wide range of containers to put them on display. Choose from vases, frames, paste them on boxes and present them as gifts. Flowers, even when dried, can be arranged. Your arrangement could be depending on the petal shapes or the color of the flower. Just like all the methods of decorating, you can experiment to your heart’s content. To get best results, just follow these easy steps on how to preserve wildflowers.

Read More
Tips

Tips if you have a Home Mortgage

Because of the economic downfall, people are having a hard time keeping up with paying their mortgages. As a result, banks are starting to take measures to protect themselves from bad debts and loan defaults.

In this article we want to comment on some tips that we believe will be useful if you have a mortgage loan. If you have any doubts or questions about mortgages, please feel free to contact us at any time.

How to Eliminate a Second Mortgage

For this reason, it is not unusual to find some people to have a second mortgage. However, a second mortgage is not really a way out of the debt. There are even several people who end up losing their property or filing for bankruptcy just so they can eliminate a second mortgage. One good way to get away from this situation is a thing called Chapter 13.

According to the law, a Chapter 13 case is capable of removing an entirely unsecured mortgage. This can also help you save your home from a probable foreclosure. At the same time, it will also help get rid of your second mortgage obligations as well as repay your past due mortgage debt. The court has the capability to remove an individual’s second mortgage once the initial mortgage has been determined to be greater or equal than the home’s value. In addition, if home owners can prove that there is a negative equity on their home, their second mortgage can be considered as a low priority unsecured debt which is separate from the first one.

The necessary steps that need to be done: 

In order to eliminate a second mortgage, here are some of the necessary steps that need to be done:

• A negative equity on the home must be determined. This can be done by having the true market value of the home appraised by a professional. This appraised value should then be compared with the individual’s current balance due on his first mortgage.

• A Chapter 13 Bankruptcy Petition must be prepared. Along with this petition, the individual’s monthly expenses and statement of income must also be submitted. In addition, the other forms that need to be submitted are the statement of financial affairs, list of assets and liabilities, a copy of the repayment plan and also a proof of completion of credit counseling.

• The petition must be filed with a local bankruptcy court. If the individual has no time to do this, he can have his attorney do this in his behalf. Once the petition has been filed, a motion for removing the second lien should also be filed. The court will then schedule a hearing during which the court will deliberate on separating the motion from the rest of the filed bankruptcy. When this has been granted, the second lien holder will be directed by the court to remove the lien.

So that the process to eliminate a second mortgage will be approved, the individual needs to attend his confirmation hearing as well as present his repayment plan to the court. Once the plan has been granted, payments must be made to the trustee or straight to the creditors. In order for the second lien to be completely removed, the terms of the repayment plan should be satisfied within the 3-5 year time period permitted by the court. On the other hand, if the individual does not qualify for the Chapter 13 case, they can consider Chapter 7 as an alternative.

A new deal on your home mortgage

A new deal on your home mortgage, or what is called a refinancing, will help you considerably. Your monthly payments will be lower so you will have more money to spend after you pay your monthly bills. Do not let the extra paperwork scare you too much and do not accept the first offer without checking out all other possibilities. Keep in mind that the result will be that your daily life becomes a lot easier.

Your wife would no longer complain that you are just a stranger who pops in every now and then. You will actually be able to create more time that you can spend with your family. You will have more breathing room for your spiritual development. Hobbies become a possibility again.

If you pay a considerable portion of your monthly income to your home mortgage loan, and your activities in life are considerably restricted because of your high payment, then it is definitely time to look into the possibility of refinancing your home mortgage loan. 

Refinancing your home mortgage loan will enable you to lower your payment amount and lower the total amount of money that you need to pay each month. This will make it much easier for you to save money, which can be used to make other investments in your life.

Read More
Cosmirror Make up mirror
Fashion

7 Pros of Cosmirror illuminated makeup mirror

This post is all about beauty and makeup. Here you'll find information, videos, and photos about the latest in the industry, in this case, the COSMIRROR illuminated makeup mirror

The beauty industry is a huge one and it seems like every day there's a new product or a new idea that takes over the market.

The illuminated makeup mirror will add style and elegance to your bathroom. It is made of a aluminum frame, acrylic glass, and a LED light source.

Overall, I would recommend this product to anyone who wants to enhance their appearance with beauty products. 5.0 out of 5 stars. This is the best beauty mirror I have ever owned.

What is it?

The COSMIRROR Illuminated Makeup Mirror is a new beauty tool which promises to be revolutionary in the world of makeup. The light-up mirror has a built-in light source, which illuminates your face as if it were daytime. It also comes with a stand and a battery-powered light which shines around the edges of the mirror. In addition, the illumination lasts for more than 10 hours, and the battery is rechargeable.

What makes the COSMIRROR so special? First of all, it's made out of a hard plastic, unlike all the other lighted mirrors which use an LCD screen or a plasma display, and its illumination is bright and clear. The mirror is easy to use and very safe. The stand can also be used as a makeup tray.

The COSMIRROR is a high-tech makeup mirror. It has a soft-light LED lighting source that eliminates shadows and brightens your face by 40%! It also has the ability to light up your eyes and lips so that you can see yourself like never before! 

Additionally, the illumination lasts for more than 10 hours. This product is the future in makeup technology! This mirror is easy to use and very safe.  

What you should know about this mirror

It is beautifully made and so comfortable to hold. It illuminates my face perfectly and gives me a magnified view of my eyes, face, neck and décolleté. I love that I can easily change the lighting levels from low to high or bright.

My favorite feature is that it comes with different sized mirrors so I can use the one that fits me best.

I got this as a gift and I was amazed at how quickly I could find a way to improve the quality of my make-up with this mirror.

Its characteristics:

1. The cosmirror LED mirror is integrated with 21 pieces of adjustable brilliant light LEDs, you can dress yourself in various lighting situations such as the day, night, home and office, bright but not blinding, protects your eyes.

2. IntelliSense: the intelligent touch sensor, controls the LED light up. A long touch can adjust the brightness.

3. The 10x magnification mirror allows you to see every detail clearly, apply delicate makeup like mascara, eyeliner and lip gloss. 2 powerful fans that can be mounted on the mirror or on the large mirror.

4. Tactile touch controls: the LED makeup mirror is controlled by the tactile switch of the touch sensor. Long pressing can increase the brightness.

5. Free rotation of 180 degrees: this mirror is illuminated in your countertop and can be adjusted freely. It fits perfectly to a viewing angle that is comfortable and convenient.

6. There are 2 ways to use the LED face mirror: it works on 4 AA batteries or with the included USB cable. The mirror itself cannot store power.

It’s a perfect gift for mother, sister, wife, fiancé, makeup artist, etc. on Valentine’s Day, Mother’s Day, Christmas, anniversaries or other occasions.

Our recommendations

1. Do not use the bathroom mirror to check your makeup. If you are using makeup on your face, you can use a makeup mirror to apply it correctly. But if you are using the regular mirrors, make sure that you have the correct lighting in your room.

2. Make sure that the mirror is clean and dry before you use it. The best way to do this is to take a tissue or cloth and wipe down the entire mirror. This will help you avoid having any residue left on the mirror.

3. When using a makeup mirror, you should always keep it on a flat surface.

Benefits of using this product

1. When you are using this makeup mirror, you can see yourself from all angles, so you can find the best angle for you.

2. This makeup mirror is an important tool for women to keep their makeup looking perfect at all times. Makeup mirrors are very useful for women who want to apply their makeup on a daily basis.

3. You can easily control the light with this mirror, which means that you can use it in both indoor and outdoor lighting.

4. It is made of a quality material that can last for years.

FAQs 

What is an illuminated makeup mirror?

An illuminated makeup mirror is a mirror with LED lights on it that can be used for many different things. We use it in our showrooms to illuminate our products, to light up our faces, and to make our makeup look better.

What's the biggest misconception about illuminated makeup mirrors?

A lot of people think that they are going to be really expensive, but they aren't that expensive. They are fairly easy to make and you can make them yourself.

What's the best thing about illuminated makeup mirrors?

There is nothing better than having a mirror that is constantly lit up. 

What's the difference between a makeup mirror and an illuminated makeup mirror?

A makeup mirror is basically a regular makeup mirror. An illuminated makeup mirror has a light source on the backside that shines through to illuminate the makeup.

What are some tips to illuminate makeup mirrors?

Before lighting the makeup mirror, use a makeup sponge to spread Vaseline or baby oil on the top of the mirror. The mirror will look like a mirror, but when you turn on the light it will be glowing!

What's the best thing about illuminated makeup mirrors?

They're a great way to do your makeup.

What is the great myth of using illuminated makeup mirror?

A myth about the illuminated makeup mirror is that is only for models. In fact, the illuminated makeup mirror is great for any woman who wants to look good!

In synthesis

You can do all the makeup you want, but the COSMIRROR illuminated makeup mirror is the most important thing you'll ever buy. And this is the perfect item for anyone looking to polish their appearance.

If you are a beauty or fashion enthusiast, you've probably noticed the ever-increasing popularity of illuminated makeup mirrors. They can be found at beauty and makeup stores. 

If you have a makeup mirror, but are not sure where to put it, then you should have an illuminated one. This is because you will use this mirror often when you have to apply your make up in a hurry. It will help you by showing you exactly what you are doing to your face and how to put it on right.

Think about how to maximize the beauty of your makeup mirror. Make sure to include the following: An arm to hold the mirror, a way to hang your brush, a lighting, a place to store brushes, a place to store makeup and any other items.

Read More
Fashion

HSI Professional Hair Straightener: The Best For Curls, Waves And Other Styles!

Hair straighteners are an indispensable tool for any woman, a few minutes of hot air straightening can make a difference in your life. The hair straightening device is an electrical appliance used for the purpose of straightening hair. It is used to provide a smoother finish and remove frizz from the hair. It is available in different types and sizes. It is also used to improve the condition of the hair.

I'm not a big fan of flat irons, and when it comes to my hair, I have to admit that I'm a little picky. But I also don't like spending more than I have to on something that I'm not going to use that much.

But then I found out about the HSI Professional Glider flat iron. It's a flat iron that comes in two sizes (small/large), and each one is designed to perform in different ways. The smaller one is designed for everyday usage, while the large is more for styling.

The small iron heats up quickly and evenly so you spend less time applying heat to your hair. But the big iron heats up even faster and can be used to create those sleek, shiny styles.

About the HSI Professional Hair Straightener

The tourmaline infusion reduces frizz by generating negative ions, and the ceramic plates are built for durability and lasting results. Plus, the floating plates give the flexibility to flip, curl or straighten your hair, all with a single iron.

It's a versatile tool that works for both long and short hairstyles. The real reason why people can't get enough of this iron is because not only is it feature-filled and battle-tested, but it comes at a great price, with a satisfaction guarantee and a 1 year warranty to match.

Why is the HSI Professional Hair Straightener a Good Choice?

If you want a quick and easy way to straighten, flip and curl your hair with minimal effort, then this flat iron from HSI is the best bet.

The HSI Professional Glider creates dramatic results on even the frizziest coarsest hair; to quickly straighten, flip, and curl with minimal effort. Simple & fast.

High quality ceramic plates use 8 HeatBalance micro-sensors to regulate the temperature & evenly distribute heat so fewer passes are needed on your precious hair.

Ceramic and tourmaline crystal ion plates create a shinier, silkier finish in less time.

The adjustable temperature settings from 140-450°F gives greater control to achieve a perfectly sleek and smooth look for all hair types.

The 1 inch plate width is wide enough for any hair length, yet narrow enough for bangs.

Take it when you travel

Take it when you travel: The Glider's worldwide dual voltage compatible 110v-220v works so you can take it with you on your next vacation. Move freely with the 360 degree swivel cord.

The Glider Ceramic Flat Iron includes an HSI style guide, a 1 year warranty, and a bonus travel-size argan oil leave-in hair treatment to help smooth and protect tresses.

The HSI Professional Glider is a great flat iron for those with short to medium hair lengths. It does a good job at straightening, curling and flipping your hair, and doesn't take too long to finish a typical session.

12 Tips

  1. The best time to do a hair straightener is at night: I am often asked for advice about the best time to use a hair straightener. There are pros and cons to using a hair straightener at different times. In general, the best time to use a hair straightener is at night. This is because your hair is naturally softer at night, and you can use less heat than you would during the day. Your hair is also more likely to be dry at night than it is in the morning.
  2. Do not brush your hair straight after a shower: This will make your hair greasy. After a long, hot shower, most people want to have their hair as soft as silk. And if you don't wash your hair thoroughly, it will be extremely greasy. To avoid this, don't brush your hair straight after a shower. This will make your hair greasy. Instead, wait until your hair has dried completely before combing or brushing. Also, don't use conditioner or shampoo right after a shower. The oils in these products will make your hair greasy. 
  3. After washing your hair, let it air dry: After drying, apply coconut oil to your hair. It will help moisturize your hair and add shine.
  4. To dry your hair, apply coconut oil to your hair: The coconut oil is an excellent natural moisturizer for the hair. It helps in making your hair healthy, shiny and strong.
  5. Do not wash your hair in a very hot water: The hair can easily be damaged by washing it in a very hot water. The most effective way to shampoo your hair is to use cold water.
  6. Apply a conditioner on your hair: When you wash your hair, use a conditioner. It helps you get softer and healthier hair.
  7. Avoid applying a lot of oils on your hair: The best time to apply oils to your hair is right before you wash it. Otherwise, it will weigh down your hair and cause it to look frizzy.
  8. The key to a beautiful and long hair is a flat iron: When you use a flat iron to straighten hair, it leaves a permanent mark on your hair. It also makes your hair much softer and silkier. You can make your hair shiny and smooth using this method.
  9. The flat iron should be the first thing that you use every day: The flat iron is a tool for achieving the perfect hair. It's not just a tool. It's a necessity. I always carry a flat iron with me. If you have long hair, you need a flat iron.
  10. Avoid using a hot comb to brush your hair, this method will damage the hair: Using a hot comb to brush your hair is a great way to damage your hair. When you use a hot comb to brush your hair, it causes the cuticles of the hair to become loose. This means that the natural oils in your hair can be released, and the hair becomes dry and brittle.
  11. A heated flat iron should be the only tool that you use to straighten your hair: It’s hard to believe, but you can do so much damage with the wrong tools. Heated tools are very dangerous for your hair. They have a lot of moving parts, and you have to clean them every single day. But flat irons are also really useful. They are perfect for curling, and they’re great for setting curls. A flat iron is the only tool that you should use to straighten your hair.
  12. Flat irons should be cleaned regularly: If you use a heated flat iron, you need to be sure to clean it after each use. The flat iron will not damage your hair if you keep it clean and dry. 

Wrong beliefs about the use of professional hair straightener

  • Hair straighteners are the cause of hair loss.
  • Hair straighteners damage hair follicles.
  • Professional hair straighteners are dangerous.
  • They contain chemicals that can damage your hair and make you go bald.
  • Professional hair straighteners are expensive.
  • Hair straighteners damage your hair.
  • Professional hair straighteners only work on women.
  •  Using a straightener will make your hair dry.

In summary

In conclusion, the HSI Professional Glider Ceramic Flat Iron is a great flat iron for those with short to medium hair lengths. High quality ceramic plates use 8 HeatBalance micro-sensors to regulate the temperature & evenly distribute heat so fewer passes are needed on your precious hair. Take it when you travel: The Glider's worldwide dual voltage compatible 110v-220v works so you can take it with you on your next vacation. Move freely with the 360 degree swivel cord. The HSI Professional Glider is a great flat iron for those with short to medium hair lengths. It does a good job at straightening, curling and flipping your hair, and doesn't take too long to finish a typical session.

FAQs

Do you know how to use a flat iron?

If you have a lot of hair, a flat iron is the best tool to tame and style it. You can use it to straighten, curl, crimp, or wave your hair. To achieve a perfect flat iron result, you need to learn how to properly use a flat iron. The key to a beautiful and long hair is a flat iron.

How can you get the best straight from your hair?

The best way to get the best straight from your hair is to use a professional hair straightener. 

What is the best thing about having your hair straightened?

Having my hair straightened is like having a new lease on life. When I used to be a model, I used to wake up every day dreading what was going to happen. Now I look forward to it.

Is hair straightening expensive?

It depends. The price varies from salon to salon. 

How to do to have long shiny hair?

To get long, shiny hair, you should use a good quality shampoo and conditioner and follow these steps: Wash your hair with a shampoo and conditioner made for your hair type. Rinse thoroughly. Use a wide-toothed comb to gently pull through the hair. If you don't have a wide-toothed comb, you can use a comb and a plastic cap to pull through the hair. Apply conditioner to the ends of your hair and work it into your hair from roots to tips. Leave it in for two to three minutes. You may need to rinse again to get rid of the conditioner residue.

References

  1. HSI Professional
  2. HSI Professional Hair Straightener
Read More
ilife v3s pro
Vacuum Cleaners

Pros and Cons of ILIFE V3s Pro Robot Vacuum Cleaner

Robotic Vacuum Cleaner is a great and easy way to make your house clean, free of dust and dirt. This robotic vacuum cleaner makes your job easier and cleaner. This robotic vacuum cleaner can be used to clean all floor types such as hardwood, tile, stone, carpet, laminate, vinyl, and wood floors. It has a great suction power that removes dust and dirt efficiently.

The Vacuum cleaner that makes cleaning easy

I’ve been looking for a vacuum cleaner for my house for quite a while now, but none of them have been able to deliver the power and quality of ILIFE V3s Pro.

ILIFE is a company that’s been around since 1989, so they know what they’re doing when it comes to home appliances. They know that it’s not just about making them affordable and easy to use; they have to be high-quality too, which is why they’ve been able to stay in business for over 25 years.

Benefits:

1. The most powerful model

The V3s Pro robot vacuum cleaner is one of their most powerful yet most energy-efficient models. It has an impressive suction power of up to 2.5-meters and can reach a depth of 4-meters on carpet, and it even cleans your stairs too!

2. It's silent

It’s very quiet as well, so you can use it without fear of waking up your sleeping kids or neighbors.

It also has two cleaning modes that are suitable for any floor type – carpet and hardwood/laminate, and a self-charging feature that allows you to run the robot from battery power.

3. It's easy to use

The dust bin is easy to empty out, and it can clean up to 1,000 square feet per charge.

It's what I was looking for

I’ve never owned a robot vacuum cleaner before, but I’ve seen them at other stores and they were pretty good. The ones I tried had quite a high price tag, and I’ve seen some cheaper models that weren’t as effective, so I was really impressed with ILIFE V3s Pro.

It’s so powerful, efficient, and well-designed that I’m certain it’ll help me keep my house cleaner, which is exactly what I was looking for.

Other benefits of the ILIFE V3s Pro:

  1. With a tangle-free pet hair care technology, focuses on picking up hairs, dirt, debris on hard floors.
  2. Low profile design to clean under beds, furniture where dirt hides. Ideal for hardwood, tile, laminate or stone.
  3. Self-charging, programmable schedule, smart sensors for anti-bump and anti-fall. Runtime 90-100 mins.
  4. Easy operation with remote control, or one touch auto clean button on robot.
  5. Tip: Easy maintenance, empty dustbin and clean the filter after each use. Replace filter every month.
  6. A 12-month and U. S. customer service team provides you with peace of mind and great service.
  7. Anti-dropping sensors prevent dangerous drop-offs.

This is a great robotic vacuum cleaner that I bought from Amazon and I'm very happy with it.

The ILIFE V3s Pro has an impressive suction capacity and is ideal for pet hair and other small particles.

It’s easy to charge this robot vacuum cleaner with automatic and manual modes, and has a smart LED display to show you when it’s time to recharge or empty the dust bucket.

This Robotic Vacuum Cleaner will automatically detect obstacles such as stairs and tables and avoids them, while the self-cleaning brush is perfect for hard surfaces such as tile. It also comes with a microfiber cleaning cloth for deeper cleaning, and can clean up to 150 square meters of your floor in one go.

The robotic vacuum cleaner is also equipped with three cliff sensors on the bottom to avoid falling, and comes with a 300ml dust bucket with a capacity of 5 liters.

ILIFE V3S Pro is easy to use, and has a 2 year warranty and 1 year free replacement warranty. I love that the dust bucket can be replaced with one of its own size.

This robot vacuum cleaner is great for cleaning hard surfaces, so if you’re looking for an effective pet hair vacuum cleaner, then this is your best bet.

Some disadvantages...

On the other hand It also has an impressive suction power and it’s easy to empty out, so you don’t have to worry about losing any dust. The V3s Pro is easy to set up and use, but it does have a couple of drawbacks. Sometimes, it tends to be noisy, so if you live in a small apartment or you have young children, then you might want to think twice before buying this robot vacuum cleaner. I’ve used this robot vacuum cleaner for several months now, and it works great, but it’s a bit expensive, especially if you buy it from Amazon.

In summary

I recommend the ILIFE V3S Pro for people who have large houses with hard floors and a lot of traffic in their home. This robotic vacuum cleaner can clean your entire house, including stairs and hard surfaces, with ease. The ILIFE V3s Pro comes with three sensors on the bottom to avoid falling, and it has three cleaning modes that are perfect for any floor type – carpet, hardwood/laminate, and tile.

Questions and doubts tiptical on robot vacuum cleaners:

Can it clean up pet hair?

A: No, but it will pick up all kinds of pet hair, so if your pets are shedding a lot, you can just vacuum them!

How long does it take to charge?

A: It takes between 5 and 6 hours to fully charge. When the battery is at 100%, it will run for about 10 minutes before the motor runs out of power and stops.

What's the biggest misconception about being a robotic vacuum cleaner?

A: I think the biggest misconception is that it's hard to use. It's not.

What's the best thing about being a robotic vacuum cleaner?

A: The best thing about being a robotic vacuum cleaner is that it can do everything. It cleans, dusts, vacuums, and polishes. 

What is the biggest misconception about a robot vacuum?

A: The biggest misconception is that a robot vacuum can clean your whole house in one cleaning session.

What do you think is the best feature about a robot vacuum?

A: The best feature about a robot vacuum is that it is completely silent, so you can enjoy your morning cup of coffee without disturbing your children or pets.

What's the difference between a robotic vacuum cleaner and a traditional one?

A: Traditional vacuums are mechanical, whereas robotic ones are driven by an internal battery. Robotic vacuums don't require any maintenance or charging, and they can vacuum for hours without ever running out of batteries.

What's the biggest misconception about robotic vacuum cleaners?

A: The biggest misconception is that they are not as good as a human vacuum cleaner. I think people get scared of them because they look like robots. They can be extremely useful, though.

What's the best thing about robotic vacuum cleaners?

A: The best thing about robotic vacuum cleaners is that you don't have to be around them.

Read More
Garden

How to take care of bonsai trees

Bonsai trees are a very special kind of plants. They are often very small trees or shrubs that are trained to be shaped into some sort of tree. These trees have very unique characteristics that are different from other kinds of trees. One of the most unique characteristics of a bonsai tree is that they have a very short life. As a matter of fact, these trees are taken care of for only about five to ten years. Once the bonsai tree has grown for five to ten years, then it will be time to plant it in its permanent location.

Video: How to create a bonsai tree

Insert Video

The tradition of bonsai trees is an ancient practice that came from the Japanese. During those times the art of taking care for these seemingly miniature versions of trees are reserved for the elite class, and most especially for the feudal samurai class. It is often considered as a form of art, and commonly symbolizes the graceful and elegant aesthetic skill of these mighty warriors. Today, it is a practice that well known around the world, and we are now here to show how you can take care of bonsai trees.

How to start?

To start off, bonsai’s like any other plant, also needs all the other essential things normal plants need, water, nutrients, sunlight. Watering bonsai highly depends on the current season. You may have to water these plants everyday during summer, and you sometimes need to leave the bonsai not watered during winter. Sunlight is of course very welcome, but you may have to move it in the shade if it gets too hot.

A healthy does of good nutrients take regularly can also keep your bonsai well throughout the year. For people who don’t like high frequency maintenance, they may opt for fertilizers in pellet-form, which can last for several weeks due to its slow nutrient release process.

The pruning sessions

But the main highlight in taking care of bonsai is the pruning sessions. When we say the word “pruning” in bonsai trees, we usually refer to the clipping action the gardener does to beautify and customize the bonsai according to his or her own preference. Aside from this purely aesthetic statement however, pruning is also well used to enhance or inhibit growth on a specific area.

You can prune a bonsai to undergo a specific growth pattern, and you can inhibit growth of areas which would just ultimately stunt the growth of the tree as a whole. The best time to prune a bonsai tree is during its growing season, but apart from this you also need to know the type of bonsai plant that you are growing to ensure that you are not just inhibiting its overall growth.

Bonsai also needs to be wired

Lastly, aside from pruning, some bonsai also needs to be wired. While some view this as a purely optional activity, others view as a necessity for their bonsai trees to grow. It is true however, that there are only some specific types of bonsai that actually need any wiring. There is a common misconception that bonsai trees need to be wired in order for the tree not to grow larger than what the owner intends to.

This is not the true, because the actual purpose for wiring bonsai trees is simply to keep their shapes intact, or to let the bonsai grow into a shape of their liking. If you intend to take care of bonsai trees by wiring (check first if they need wiring), then keep it in a way that it still matches the natural curves of the tree. You risk breaking the tree if you force it in a direction in which it cannot go smoothly.

How to grow a bonsai into a big tree

If you want to grow your bonsai into a big tree, you need to wire it. Some people think that it is useless to do so, but the truth is that the wiring keeps the tree's shape intact. In addition, wiring also lets the bonsai grow into a certain shape that they want. Therefore, keep it in a way that it fits into the natural curves of the tree.

8 tips on how to grow a bonsai into a big tree

  1. To get started, all you need is patience and the right tools.
  2. First thing you need to know is that it's easy to start growing, but it's very hard to keep it going.
  3. When you want to start growing, you need to choose the right tools and the right method.
  4. A good bonsai requires a lot of work and time, and you need to spend several years learning about it.
  5. Once you have mastered the art of bonsai, you need to have patience and take your time when pruning or trimming the trees.
  6. You can find some tips and tricks that will help you on this page.
  7. Some of these tips will teach you how to get the most out of your bonsai trees, while others will help you keep your trees healthy.
  8. It's easy to start growing, but very hard to keep it going.
Read More
japanese
Styles

10 Tips on Japanese interior design

If you are one of those who like Japanese manga and anime and the rising sun culture in general; you will surely agree with me that the Japanese style interior design is great.

But today it is not just us who think about it.

Japanese interior design has become a trend in all households, from famous people to the girl ofthe next door, everyone has it or want it.

If you want to learn a little more of everything about what this decorative style implies; then you came to the right article!

So be prepare to be amazed!

The Keys to Japanese Interior Design

The Japanese decoration looks for three very important aspects for the development of the human being: habitability, sustainability and humility.

The most ironic of all this is; that the houses that maintain this decorative concept increase their value in the market.

It is not just reduced the quantity of furniture and eat sitting on the floor; creating the right culture atmosphere can be a challenge that many fail to overcome.

We ourselves at Decorating Visita Casas have gone through complex situations in redesigning tone area of a house, however; these adversities have made us grow as decorators in this Japanese matter.

Therefore, I want to start with something very basic before I speak seriously about the most complex Japanese decorative arts; and those that more visual impact cause in the atmosphere of the place.

The Colors

Black and White are very often used in Asia, and they are very importants to them.

Although in Western culture these colors are not add to their interior desing because, according to the chromatic circle; they are values and not colors.

It is said in art that black is the mixture of all colors and therefore denotes perfect integration; while white is the absence of all color, and represents the uncorrupted spirit.

Black is used in a distinctive way by defining geometric, structural alignment and shapes.

White, on the other hand; is widely used as a malleable base when we talk about a large area;

or as a symbol of purity if we take it to something very small. The natural lighting in the Japanese decoration has more value than the artificial, therefore; to highlight the works of art people, usually use white.

In fact, the main reason that the Geishas paint their face in white is to highlight their facial expressions even in the dim light.

So, you can go giving up the pastels or grays in the vases or pieces of decorative ceramics.

It is imperative to resist the need to accentuate the decoration in multiple colors; in reality these statements are made using the color black. Color overload a piece, so be it with the primary colors; is actually a Western trend that should be avoided.

While we use 3 colors for decoration, you will notice that the Japanese use only two; but with bright colors or another color other than white or black, stand out a particular piece of art.

It respects the singularity of each element that, integrated with a minimalist design; ends up functioning in perfect harmony without losing and without stealing the protagonism.

Designing an Organic Decoration

If you thought that Japanese decor and interior design came pre-made everything (with Made in China label)

Fortunately, you are wrong!

There is a Japanese decorative art with flowers and it is called Ikebana.

Ikebana means “living and settled flower” and the rest of civilizations; the Japanese have also used flowers to dignify all important events in their lives throughout the generations.

Nevertheless, its rules for making the flower arrangements show a different aesthetic to the Western that, correctly integrated to a design of Japanese decoration; will give your home that authentic atmosphere that you desire.

When you realize an ikebana, you will notice how it is more than a simple flower arrangement, it is a way of living and being not only in contact

but in communication with nature.

The decorative motifs not only incorporate flowers, also branches, fruits, leaves and seeds.

That is why it is not only a decorative focal point, it is also a center of meditation and personal growth as well; it’s variety of components are tied to the seasons and cycles of life.

Ikebana has its origins in the Japanese religion; It is only a little over 100 years ago that it has been exported to decorative art for everyone to know.

All of its components should be organic or hand-drawn and consists of three elements: Heaven, earth and man.

So if you want to print to your Japanese decor something more than generic and disciplined pieces; you can then not only have a ZEN garden but also an Ikebana.

The Japanese and the Danshari in the decoration

The reason for the Japanese decoration is the Danshari. It refers to leaving out of the home any economic disorder, any emotional imbalance and any spiritual disturbance.

The humble decorations of the Japanese but at the same time so personal, is because they do not build in “mass”. They have always tried to diminish the environmental impact that the violent growth of its population would supposed to them if they used the western method.

In fact, Japan is ecologically sustainable because they use elements of nature easy to grow such as bamboo. In this sense, even if a house is very small, it will always have enough ventilation, natural lighting and organic elements.

With that in mind you should then, rethink your decoration and really analyze what components of the “Japanese shop” are really elements of sustainable decoration.

Remember that there is always people only want to make money; however, the Japanese have managed to recover their country after the nuclear attacks thanks to discipline, not to greed.

Do not forget the GENKAN

Japanese

When redesigning your house to emulate the Japanese style; getting rid of the big furniture can become very complicated

You could donate them, but it is always better to sell them to be able to acquire with that money the new pieces of decoration.

However, something that you can do and that is what determines if a house follows the Japanese culture or is not it’s the Genkan.

Remember:

The shoes are left at the entrance of the house in a closet, shelf or simply on the floor; but never go inside the house with them.

A table for the entrance of the house with enough compartments for the shoes, decorated on the top with Japanese accessories and you have already created the necessary aura.

And of course do not forget have enough slippers for you and the guests that you can get.

The Tatami is very important

If there is something that does not require much remodeling and that you can easily include it, it is a Tatami.

If you are going to educate your body to be able to make a noble transition from western to Japanese decoration; remember that you must practice the different positions to be on the floor comfortably.

The japaneses have not iron knees. Although they are accustomed to eating, meet to talk and sleep on the floor; they use tatamis to create a soft and protective layer, thus avoiding injuring themselves.

In addition, traditional tatamis are made of straw; but today it is made with stretched polyethylene, so you should not import it from Japan to be able to have a traditional floor.

Gradually see the furniture and remember this:

If you find it difficult to get rid of your big furniture, enjoy it!

In Japan, to dispose of large furniture you have to pay.  That is another reason why they keep everything simplified; but always in a way that is comfortable as well as humble.

Ideas that you can use for your Japanese decoration

You can also add fabric patterns especially on the pillows that you may use or place on the walls as decorations. You can have Japanese embroidery, brocade, Kasuri or metallic weave are just some of the decorative that you can use.

This artwork may give you the flowers, patchwork designs that you may use and other patterns that are brightly colored. Then give attention to your windows. You can have window treatments to give it a Japanese look. You can mimic a look of the shoji screens in your window by making use of the rice paper window shades which you can place under cornice boards that may be covered by black and gold fabric.

Then choose the furniture that you would be using. In most Japanese homes they make use of the tatami mats instead of sitting on the floor or chairs. But for those who wanted to have added comfort you can sit on pillows. You may not need the Japanese kokatsu table instead you can use low tables by shortening its legs or purchase a hibachi table if you are planning to use it for long term.

Then to complete your Japanese dining area, have the tableware match your theme. These are some ideas that you can use for your Japanese inspired dining room. You may use the real things that the Japanese people use for their dining, but with this preparation, you can have the feel of eating in a Japanese environment.

A Japanese Touch in the Home

  1. Redecorating your house is one of the most enjoyable things that you can do. If you want to have a feel of Japan in your home, then you can add a touch of it in your interior decorating style. Here are some things that you need to consider to give your home that Japanese feel and you can even do it yourself; you do not even have to hire an interior decorator to do it for you.

    The first thing that you can do is decide how much you will spend for the Japanese interior decoration and stick with the budget that you have.
  2. Plan out the colors that you will be using. Remember that Japanese interiors usually use neutral colors for a simple background. These are the colors of the Eastern art because it represents the simplicity; these colors would minimize the clutter feeling that is very essential in the designs of the Japanese and in the Eastern designs.
    Japanese interior decorating style

    The next thing that you need to consider is the texture and the type of material that Japanese use. These materials may be cedar, rice paper, bamboo and stone to mention a few. The Japanese culture also balances everything in all the aspects of their lives and the interior decoration is included. Here are some examples: if you use a highly polished bamboo floor, you may need to match it with mats that are heavily textured or you can place white pebbles on top of the black granite ledge that is around the tub; or you can display a box that is lacquered on top of a rough table.
  3. Clutter is not a part of the Japanese decorations and so you need to take away all the decorations that fill in your space. Always consider the pillars of the Japanese decoration; which is peacefulness and balance. So never over-decorate when you want to have a Japanese-styled interior decoration.
  4. Always bear in mind that the Eastern interiors that include a Japanese style have a central object as its focus and it may be a garden, an altar or an irori (hearth). Thus, you can place an orchid or a small fountain as one of your decorations. With nature in your decorations, this would give you the serenity; an element that is vital to the Japanese inspired design.

    Natural light is also an important part of the Japanese design; thus, the use of rice paper as screens and walls that would offer both privacy and light. If you do not want to use rice paper you can make use of light colored curtains like white or you can also choose cream color.
  5. These are just some of the ideas that you need to remember when you will be decorating a room with a Japanese style interior decoration. These are just the basic things that you need to follow to achieve the Japanese feel that you would want in your home.

Peace and balance in Japanese decorating style

Balance

Everything should be balance; everything should go and blend well in order for nature to be aligned. Selecting the materials of very strong opposing or contrasting texture and finish is not a hindrance in keeping you from your goal of achieving tranquility, order and balance. Like the Buddhist thinking of opposition, the yin and yang is an example. Always remember that you should strive for simplicity and nothing complicated. For in complex you might find other difficulty or problem unlike when you’ve done it simply.

Peace

When clutter is present, expect that you won’t find peace. The design feature of a Japanese room or multiple rooms is usually dictated by the fixation of the Japanese towards simplicity and the approach to Japanese interior design. The placement of furniture and display follows rules prescribed or advised of fluidity. A Japanese room to be decorated usually has tendencies to arrange on the perimeter, creating traffic patterns across the center.

Contrast to that, the Japanese interior design establishes a focal point on the center with little flow and physical movement on the perimeter. Remember that quality is the key to your selecting of the elements that will go about in your interior. Overloading also is one of the less priorities in Japanese interiors. If your room happens to large, it’s better to keep some open spaces.

Read More
Floors

DIY: How To Repair Hardwood Floors In A Week Or Less!

How to Repair Scratches in Hardwood Floors

Most homeowners especially those who have specifically built the house of their dreams aspire to have the best materials that are aimed to last a lifetime. One of the many considerations in building or acquiring a house would be the flooring and the type of material used. Hardwood floors for instance, are quite expensive but are built to last with the proper care and maintenance.

Usually flooring materials are pre-treated

Homes particularly built during these modern times ensure that hardwood flooring materials are pre-treated to ensure a longer lifespan and to survive regular wear and tear. For older homes, most of the maintenance problems would be how to repair scratches in hardwood floors.

Since dated and older homes were built during times where advanced pre-treatment methods weren’t available yet, they usually require repairs and more maintenance especially if the homeowner wishes to revive the original material used.

Video on the Easiest Hardwood scratch repair you can do

Seek professional assistance or DIY?

Some homeowners seek professional assistance while others simply change their flooring to other alternatives. There are several ways on how you can go about it without having to hire professional help and specifically save on cost. Initially, inspect how extensive the scratches are to know what methods and materials you will need.

It would be best to determine the type of existing floor finish since hardwood vary in terms of materials like Birch, Maple, Mountain Elm and many other types and require different stains and protective coatings. This information will come.

The nobility and resistance of wood for floors

Hardwood is an excellent material that comes from angiosperm trees. In fact, they live up well to their name, and are used in almost all aspects of a typical home, and is most especially used in floorings. But as hard as it is, it is still wood, and is still prone to many kinds of things that can damage it. Fortunately though, we have ways to repair hardwood floors and restore their natural beauty without the need to actually replace them.

Find a drum sander

Find a good drum sander from your local tool rental shop or hardware store. This will be the primary tool that we’ll need to polish up faded hardwood. We’ll be using sandpaper at each grit gradient (20, 40 and 100) to scrub the entire floor thoroughly.

Move each and every movable article out of the room. These items include books, lamps, household appliances, and other similarly sized things. Curtains should also be removed, and larger but still movable house articles, like shelves should also be move out of the room.

Preparation of the sanding process of the wood

Seal off each and every passageway of air, such as cooling and heating outlets and air ducts in the room except for the windows (yes, and I repeat, do NOT close the windows). This is to prevent wood dust from entering these things and harming other users of the room later on.

Before starting the engines, make sure that you are wearing proper protective gear such as safety mask and safety glasses. This will critically protect you from the harmful wood dust that will be formed during our hardwood restoration process.

For a general scrubbing of the older messes, we’ll start by using the 20-grit sandpaper. Go back and forth across the room, but don’t forget that we are using 20-grit sandpaper. If you need to move to the next step, you’ll have to lift the entire sand duster to prevent it from creating holes in your wood. Because the drum sander is still a bulky too at best, it would be wise to use some extension tools to help it reach smaller areas that the entire body of the drum sander cannot reach.

Repeat all of these steps until finish

Repeat all of these steps, now using the 40-grit sandpaper. Then repeat again using the 100-grit sandpaper. Notice how the floor gradually transforms and restores bit by bit during each session. After using the drum sander, inspect the entire floor one last time. If you are already satisfied with the results, then you may now return the equipment back to its owners.

Free the entire room of wood dust, and apply a thin layer of wood coating to the floor. If done properly, the hardwood floor would now as if it had never even been damaged before.

How to protect hardwood floors from furniture

Hardwood floors are very good floor material. Aside from the sturdiness that hardwood provides as a floor material, it is also very attractive to look at, capable of setting the ambience for many kinds of themes and room designs. However, maintaining hardwood takes a little more effort than your regular marble or laminate flooring. It is still wood after all, and to protect hardwood floors from furniture provides us a way to keep those elegant floors for a long time.

How to move furniture by sending damage to the wooden floor?

Never move the furniture by simply pushing or pulling them. This creates scratches on the floor, and eventually destroys the wax coating on the floor. Try to lift the entire furniture before carrying it to wherever you plan to as much as possible, so that you furniture would never even have to scratch the surface of the hardwood floor. Be careful not to drop the furniture unintentionally, not only do you risk damaging the furniture itself, but you also risk creating a permanent dent in the hardwood.

If you can’t lift the entire furniture even with assistance, or if the furniture is just too big or too wide to be carried properly, you can put a piece of cloth on each peg of the furniture, and then push it gently and slowly. This way, your furniture literally has now way of come in contact with the hardwood floor to scratch it. This method is recommended for furniture that are too wide or too heavy to be carried by without assistance.

Plastic wheels can damage your floor

Wheels installed on furniture are of no exception in this one. Some office seats are installed with wheels that are made of hard plastic. This kind of plastic is harmless to harder substances such as granite and marble, but has the capability to gradually harm hardwood over time. Now, just can’t always lift these kinds of furniture, can we?

Doing so is just impractical and plain ridiculous. How to protect hardwood floors from furniture in this situation then? Use customized rubber “tires” for these furniture. Try finding these items at your local hardware store. If you don’t have access to these rubber tires, then you can make your own by cutting strips of rubber that you can find from old machine shops and use it around the wheels as the “tire” (prepare the proper materials for this though).

As an ultimate alternative, choose furniture that uses softer materials and materials with less friction. We have mentioned earlier that you should lift the furniture when moving it as much as possible. Well, if you have safer materials used on the underside of your furniture, then you don’t have to put cloth underneath at all! Just slide the furniture across the room without worries. Never push the furniture too vigorously though.

How to protect hardwood floors from dog nails

Pets are very lovable companions around the house. Just who can resist their very cute antics and earnest demeanor toward their masters? Unfortunately not all of your pet’s tricks and activities are harmless, as dogs sometimes unintentionally mess around the house. If your home uses hardwood, watch out, because your floor is very prone to damage every single day. A proper way to protect hardwood floors from dog nails specifically would be necessary.

Dogs, like any of their other domestic housemates, grow nails from their paws. It is a general characteristic of a standard land mammal. Dog nails usually grow larger and sharper each time, and it can sometimes be painful when they try to cling on your legs or back. If it’s painful for your skin, then how much painful is it for a hardwood floor?

Sure, hardwood floors are far sturdier than your average skin, but these powerful nails can simply just dig into the wooden floor as time passes.

How do you stop an excited dog from scratching your floor all over?

The answer is simple, cut off the source. Give your dog a proper nail trimming session once in a while with your vet. Cut them to a level where it won’t be painful for them, but would make it technically impossible for them to scratch the wood in any way.

So the next time your dog dashes through the house, you won’t have to worry about getting your hardwood floor scratched. Do not forget to do it again once in a while though, or you’ll find your dog again with those deadly arsenals.

Cutting your dog's nails

If cutting your dog’s nails isn’t enough, you might as well teach your dog not to be hyperactive inside the house. Try breaking its habit of always running around the house like an excited little toddler. Train your dog to behave properly inside the house. You can decisively reduce the chances of getting your hardwood floor damaged this way, and as a bonus, you get to keep a smart dog around the house as well.

If modifying the source still did not provide an adequate solution for you, then you can now move over to floor defensive maneuvers. Protect hardwood floors from dog nails by providing good cover for the hardwood floor itself. Applying a wax coating is your simplest arsenal on the list. Scrub all the way around your house, and your hardwood should now have a protective layer of wax coating. This wax coating would help absorb the dog nail scratches instead of being directly inflicted onto the hardwood.

Using cover carpets to protect the floor

Another easier alternative is to use cover carpets and other similar items to cover the hardwood floor and protect it from dog nail scratches. This method is still debatable though, as many people can’t see the point of keeping hardwood if you are going to cover it anyway with another material.

Read More